The concept and development segment has evolved for every industry. Appreciation goes to immersive experiences, 3d animation, AR/VR technology, and 360-degree views. The biggest contributor behind these is the 3d modeling.
As the 3d modeling programs are in demand, many enthusiasts are looking to build careers in this sector. On that note, today’s tutorial covers how to make a 3d model from a photo.
What you’ll learn in this article
What is 3D Modeling?
3D modeling is the digital art of creating a three-dimensional object in a virtual space using software. By using vertices, edges, and faces in accurate mathematical measurement, a 360-degree representation of a real object is created in a 3d space.
Nowadays, all types of industries such as construction, architecture, manufacturing, engineering, research and development, health and medicine, education and technology, scientific research, modern business, etc use 3d models to systematize designs, visualize ideas, and make informed decisions.
The benefits of using a 3d model are –
- Accuracy: It offers precision on objects similar to real life.
- Improved visualization: Viewers can understand the object (product, architecture, character, etc) and learn about its functionalities, pros and cons.
- Flexibility: 3D models are easy to change for any flaws. By making necessary adjustments, you can improve design efficiency.
- Reduce expenses: As a digital prototype, it cuts down costs and hassle for the manufacturing process.
- Strengthen collaboration: By bringing ideas to life, 3d modeling helps team members understand the project, share ideas and knowledge, and improve communication and collaboration for business growth.
Which Software Should Be Used for 3D Modeling?
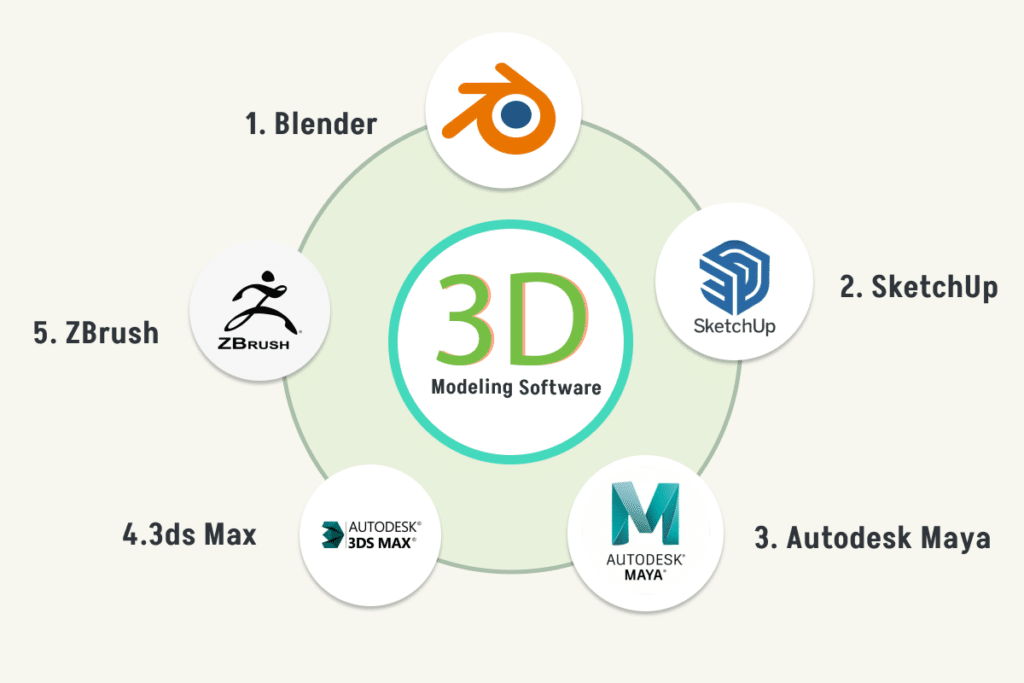
Blender, Autodesk Maya, 3ds Max, and ZBrush are among the software used for 3d modeling. Each 3d modeling software available has its toolset to offer optimal user experience, intuitive interface and navigation, and learning curves. The best software depends on the user directly.
1. Blender
Blender is a 3d modeling software, with an entire solution for 3d computer graphics creation. This open-for-all software is equipped with plenty of tools for creating any models for 3d printing to animated films and games.
Features:
- N-Gon support
- Grid and Bridge fill
- Edge slide, collapse, and dissolve
- Keyboard shortcuts for a fast workflow
- Python scripting for custom tools and add-ons
Best for: Both novices and advanced professionals.
Price: Blender is an open-source software.
2. SketchUp
SketchUp is popular for its easy learning curves and interface, intuitive tools, and plenty of pre-built tools. It integrates with other tools including AutoCAD, & Revit, and offers a fast solution for creating and collaborating on projects.
Features:
- Pre-built models
- Import and exporting
- Allows collaborative works
- Modeling tools and AI tools
- Adding attributes like components
Best for: Novices
Price: Pricing starts at 119$. Free trial available.
3. Autodesk Maya
The industry standard tool Autodesk Maya offers powerful tools for creating detail-oriented 3d models. From simple to complex, organic shape to hard surface, with Maya, any model creation is customizable and high-quality.
Features:
- UVs
- Polygonal Modeling
- NURBS Modeling
- Sculpting in Maya
Best for: Advanced users
Price: Price starts at $235. Free trial available.
4. 3ds Max
3ds Max is well-reputed for its comprehensive and versatile tools to create complicated highly detailed 3d models. The speedy and accurate solutions are why the software is one of the preferred tools for architecture, visualizing, entertainment, scientific research, and medical development industries.
Features:
- Creating Geometry
- Surface Modeling
- Autodesk Civil View
Best for: Advanced users
Price: Price starts at $235. Free trial available.
5. ZBrush
ZBrush is also an industry-level 3d model software, used for creating organic shapes with intricating details. Its powerful tools give the artist complete control over the model design with fine details; easing up the real-life 3d objects and creating a digital space.
Features:
- UV Master
- Digital Sculpting
- Real-time topology
- Subdivision Levels
- Hard Surface Modeling
Best for: Advanced users
Price: Price starts at € 36.79/mo
How to Make a 3D Model from a Photo: Step-by-Step
Here is the step-by-step guide to making a 3d model from a photo. We are using the 3d modeling software, Blender for this written tutorial.
Step 1: Collect reference images.
We will make a 3d model for a bottle. For that, we have collected reference images such as the top view, the side view, and the bottom view of the product with proper dimensions.
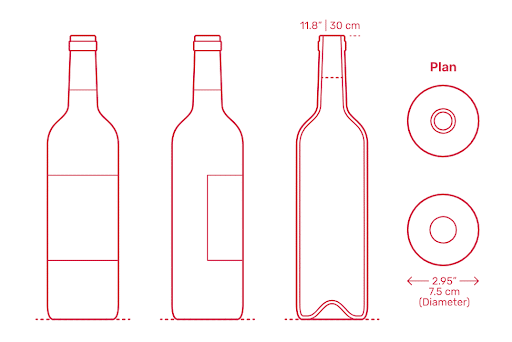
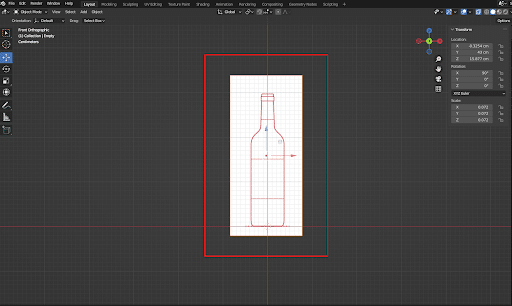
Step 2: Set up the images on 3d modeling software.
Now, we will set up the reference image on our preferred 3d software, Blender.
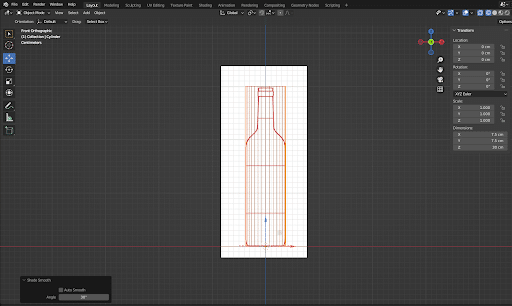
Step 3: Transform the shape.
Here, we will add a cylinder and transform it according to the required size.
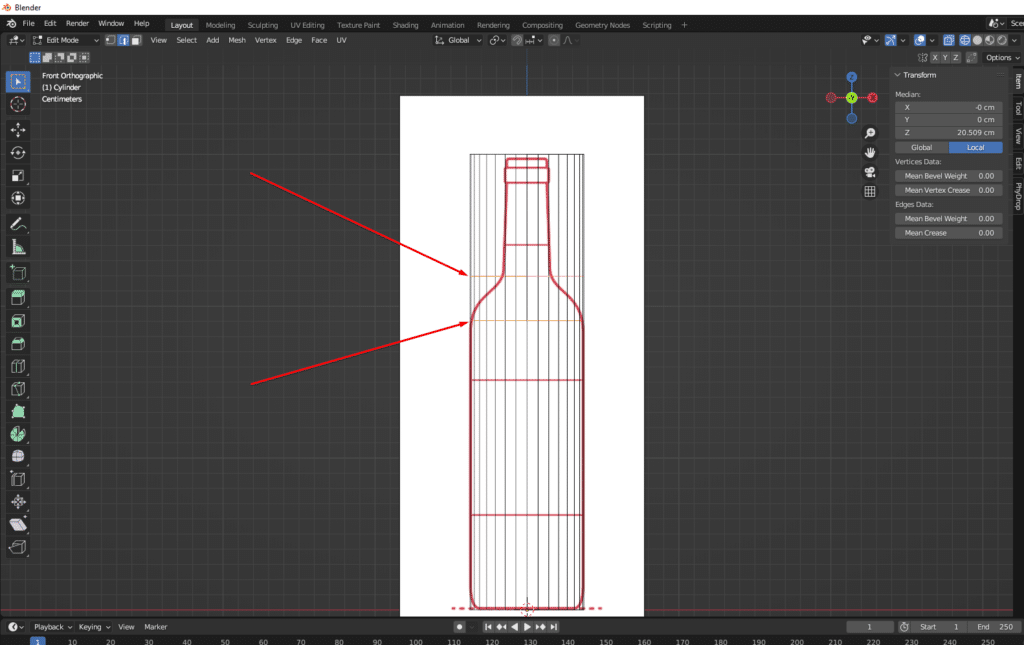
Step 4: Add loop cuts.
After that, we will be adding loop cuts to the required section.
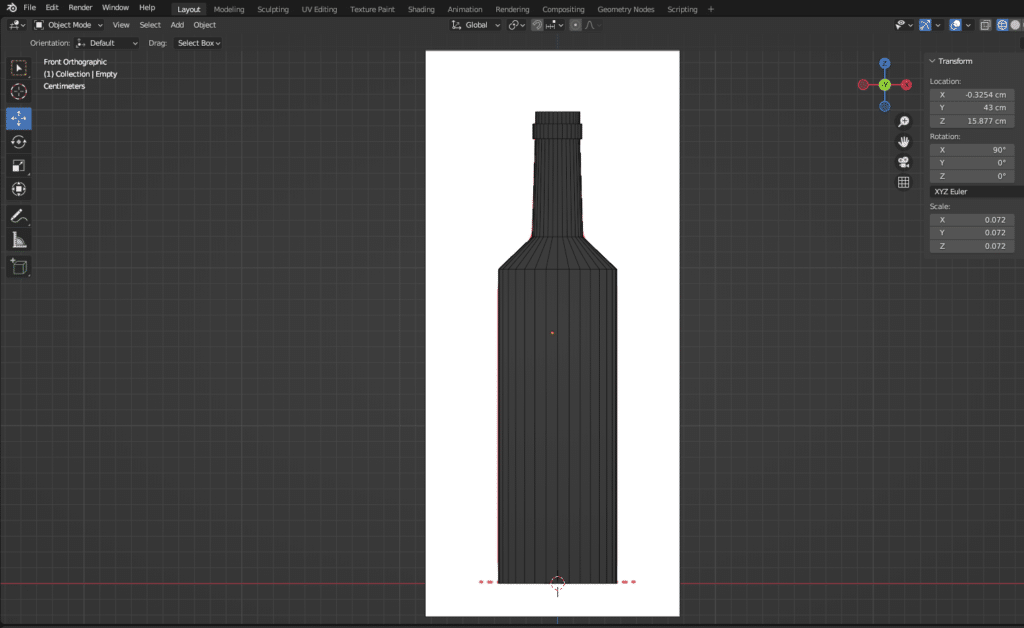
Step 5: Geometrical matching.
In this step, match the geometry roughly with the reference.
Step 6: Bevels adding.
Now we will add bevels into the required sections.
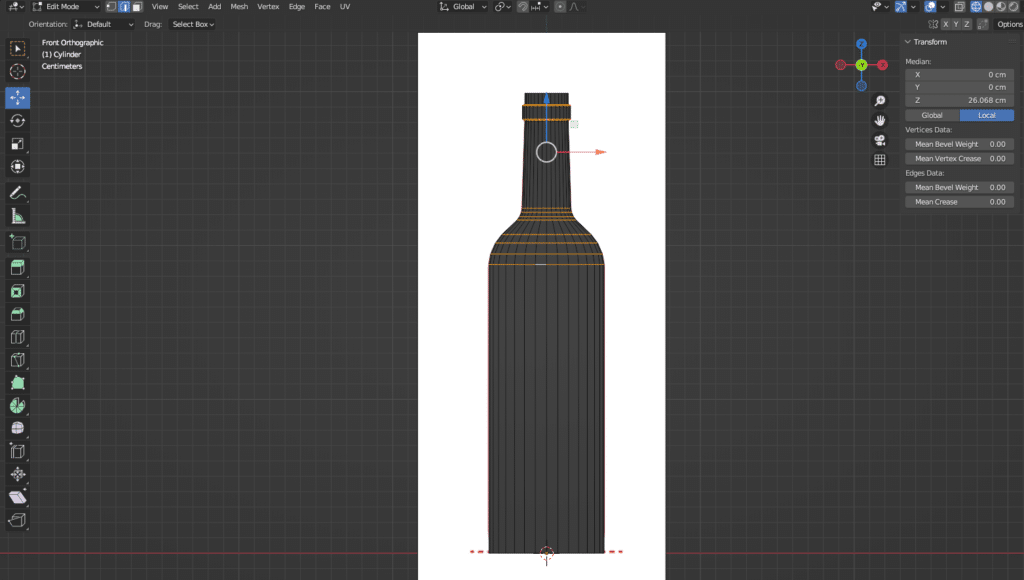
Step 7: Extrude the face’s inner side
On the bottom side, we will extrude the face’s inner side and fill the hole.
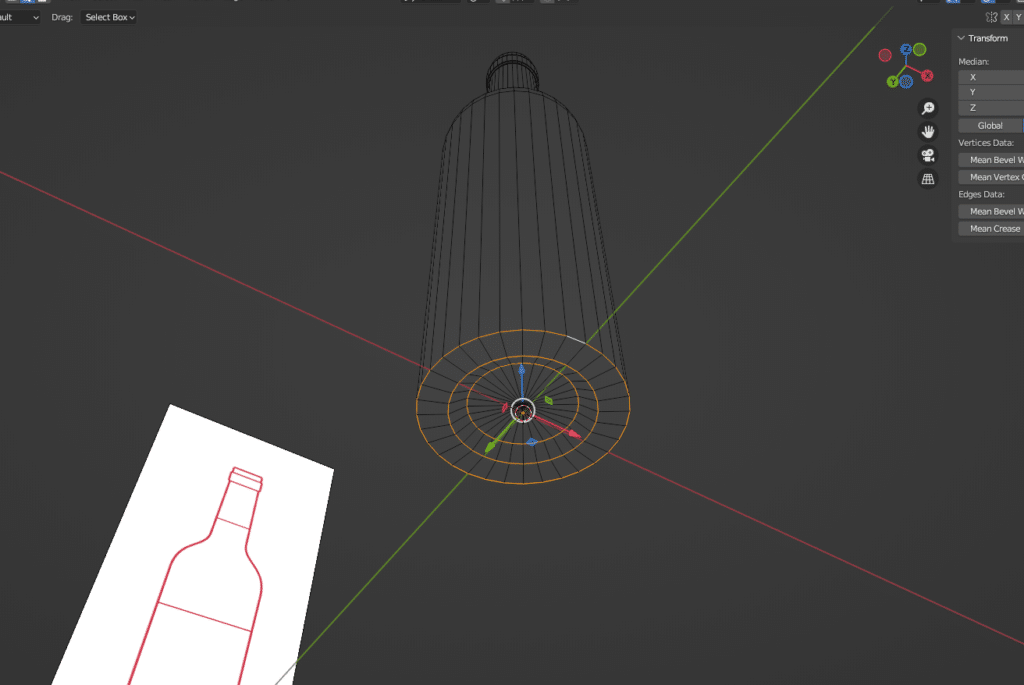
We will use a bevel to smooth this area.
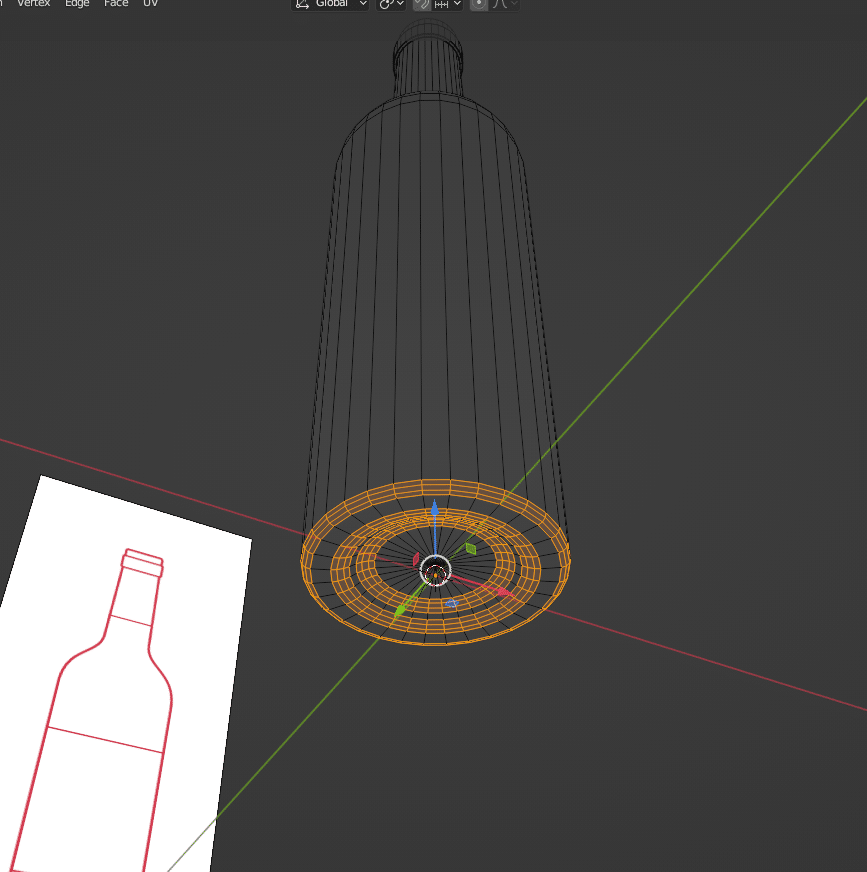
Then, select the top edges and extrude its inner side.
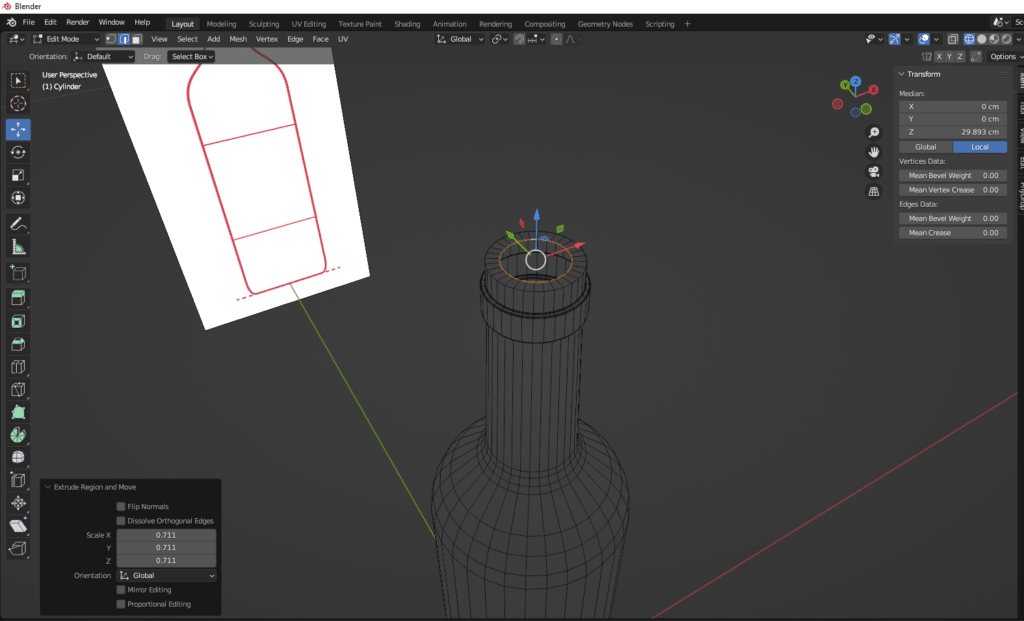
Repeat the process. Extrude the selected edges to create the inside wall of the bottle.
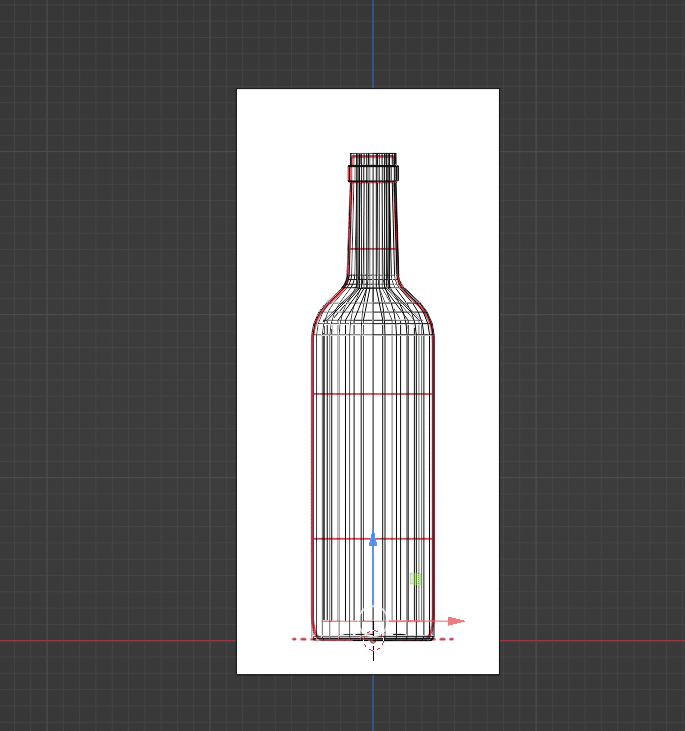
Again, bevel to adjust the inner side.
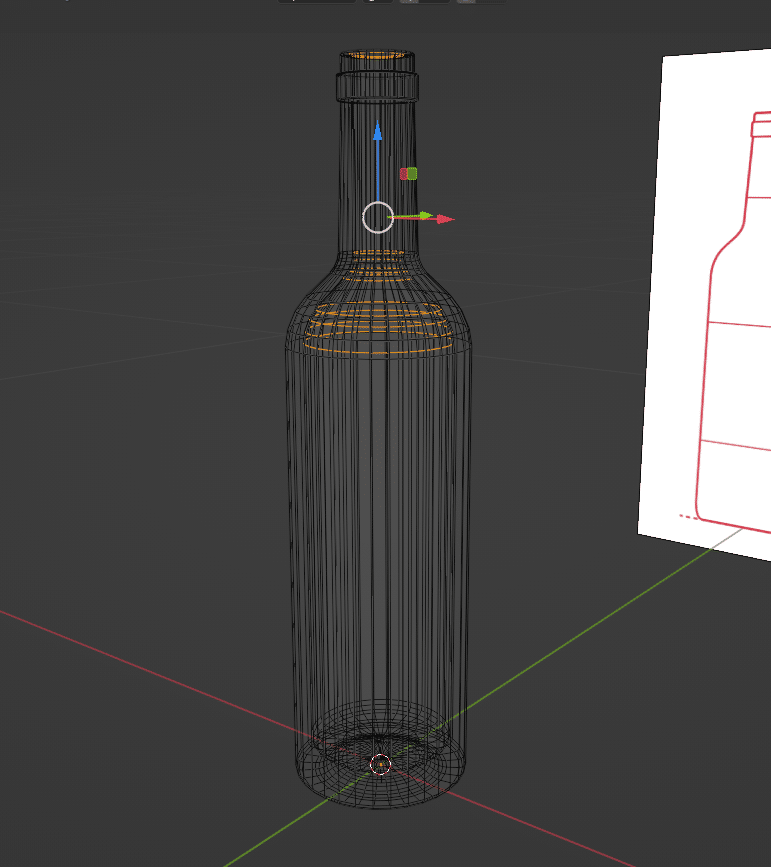
Step 8: Finalize the bottom to finish.
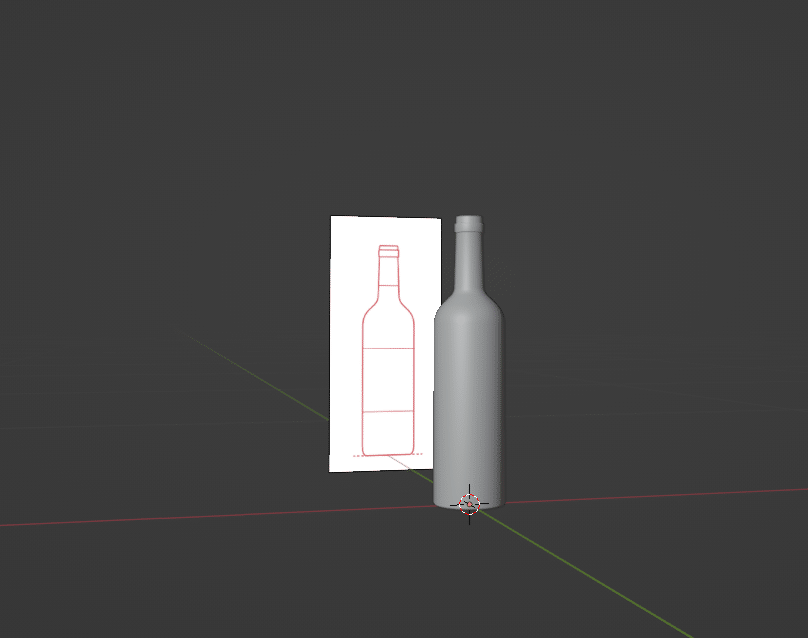
Close the inner bottom side and our bottle 3d model is completed.
5 Tips and Tricks to Improve Your 3D Model Quality
The difference between knowing and mastering work is an improvement. By practicing consistently, you are sure to improve. Check out these 5 tips to ensure you are practicing right.
Tip 1: Excel in the Basics
Being an ace in basic is the first step of mastering 3d modeling. Knowing all the tools of 3d software and how they work will ease the process of complicated tasks.
Tip 2: Use reference images
Use references of photos, sketches, samples, or other 3d models as a guideline. It will save time and the process will be faster as you have an approximate measurement of shapes, proportions, or information like textures, etc. You will receive refined topology and a close to precise and realistic model.
Tip 3: Begin with Low Poly
When starting to create a 3d model, go with low-poly. Low poly are the basic designs with simple and few shapes. With low poly, you can easily create, change, and adjust your model. You can make the learning process more convenient by choosing pre-made models as well. You aim to learn the process, so start simple. You’ll upgrade next level by mastering the current one.
Tip 4: Use Lighting Techniques
Lighting brings out the best look of any subject. So experiment with different setups, soft or illuminated setups, ambient effects, direct sunlight, etc along with their placement to set the right mood for the environment.
Tip 5: Understand File Formats
Know the difference between file formats used for 3d modeling, specifically converting to 3d printing. Understanding the file objectives will ensure smooth processing and operation.
3DS: Used mostly for simple models.
STL: Best for 3d Printing.
OBJ: Perfect for high-quality modeling, and cross-platform compatibile.
3MF: Good for advanced projects with colors or materials.
FBX: Most suited for 3D animation.
PLY: Best for in-detail models for 3d scanning.
GLTF/GLB: Works well for AR/VR.
You May Also Read: What Is 3D Animation? Types, Software, Workflow, and Use Cases
Partner with Industry Experts for 3D Modeling Services
The modern world is always revolving soon. To keep pace with the industrial requirements, 3d modeling has emerged as an essential part. Visualizing, designing, and prototyping- depending on the 3d models.
To ensure precise, realistic in-detail modeling creation, hiring experts’ solutions is necessary. Clipping Path Studio’s 3d modeling services provide customized solutions to cater business’ needs.
Backed by a team of 20+ 3D artists, we create 3d models that turn your vision into reality. Access to –
- Fastest turnaround times
- Expertise in premium 3d modeling software
- Cost, time, and resource-saving tailored solutions
- Scalable, high-resolution, well-developed model creation
Conclusion
3D modeling gets easier as soon as you learn the tools of your chosen software.
We hope this article has aided your learning curve and finding the right software to learn the process of 3d modeling.
Stay tuned to the CPS blog for more similar skill-mastering articles.
