
Using a green screen can really expand your creative horizons as a photographer or designer. It’s like having the freedom to place your subject in any environment you dream up. Whether you’re working on a film, product photos, or social media content, learning how to remove the green screen in Photoshop can really boost your skills.
What you’ll learn in this article
The Importance of Removing the Green Screen in Photo Post-Production
Getting green screen removal right is crucial for a professional look. Any green left behind can ruin the effect. Make sure the edges are clean and the transitions between your subject and background are smooth to create an image that looks real and effectively tells your story.
Overview of Green Screen Technology
Green screen technology is a game-changer for creatives. It lets you shoot a subject against a green backdrop and then easily swap out the background in post-production. This technique is widely used in photography and videography to transport your subjects anywhere you want, from exotic landscapes to futuristic cityscapes.
The magic happens when you know how to remove a green screen in Photoshop. Removing the green background allows you to place your subject in any setting without the hassle of complex setups. This creative freedom means you can easily create visually stunning scenes, making your work stand out.
Why Accurate Green Screen Removal Matters
Getting the green screen removal spot-on is key for professional images. If any green is left behind, it can ruin the effect and distract from your subject. Whether you’re figuring out how to remove a green screen from a photo or dealing with reflections, accuracy is crucial. It helps keep your audience focused and fully engaged with your work.
How to Remove Green Screen in Photoshop – Step by Step
Learning how to remove the green screen background in Photoshop can greatly improve the quality of your images. Here’s a detailed, step-by-step process for achieving professional results.
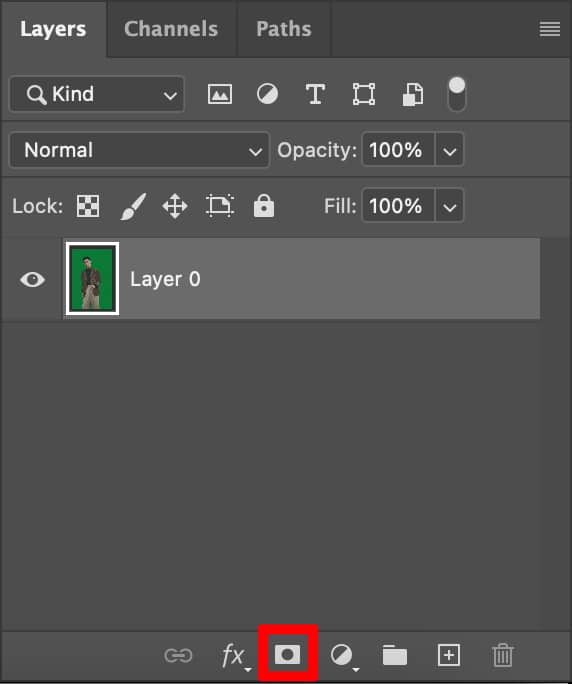
1. Preparing Your Image for Green Screen Removal
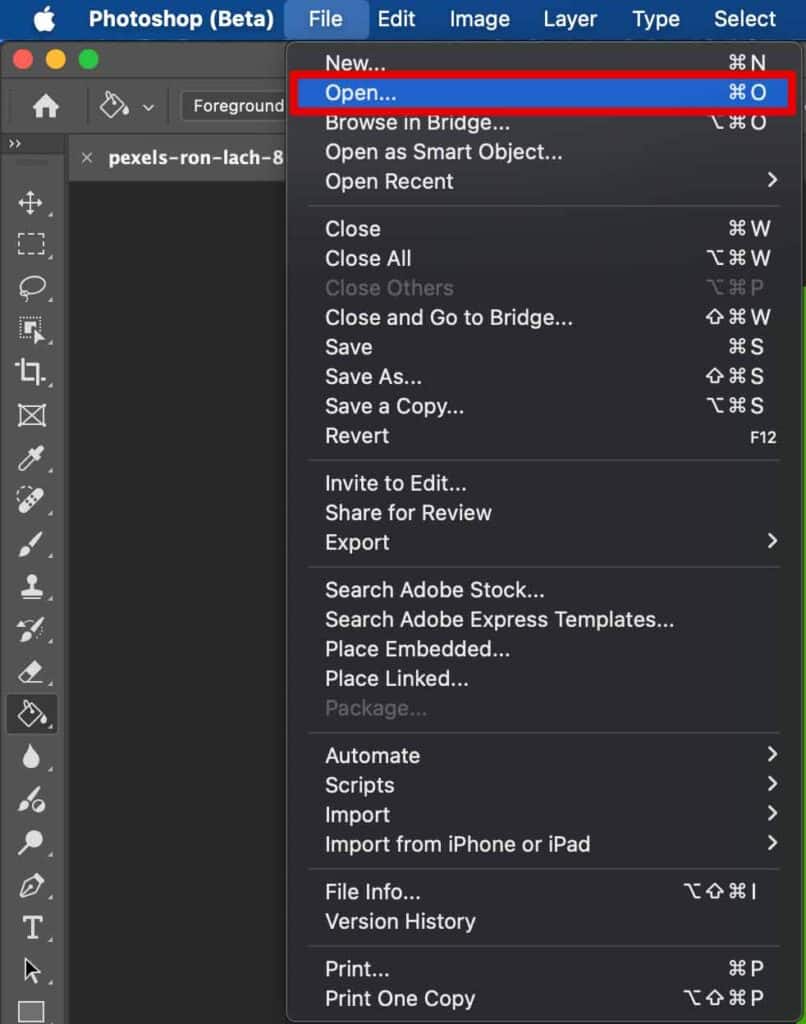
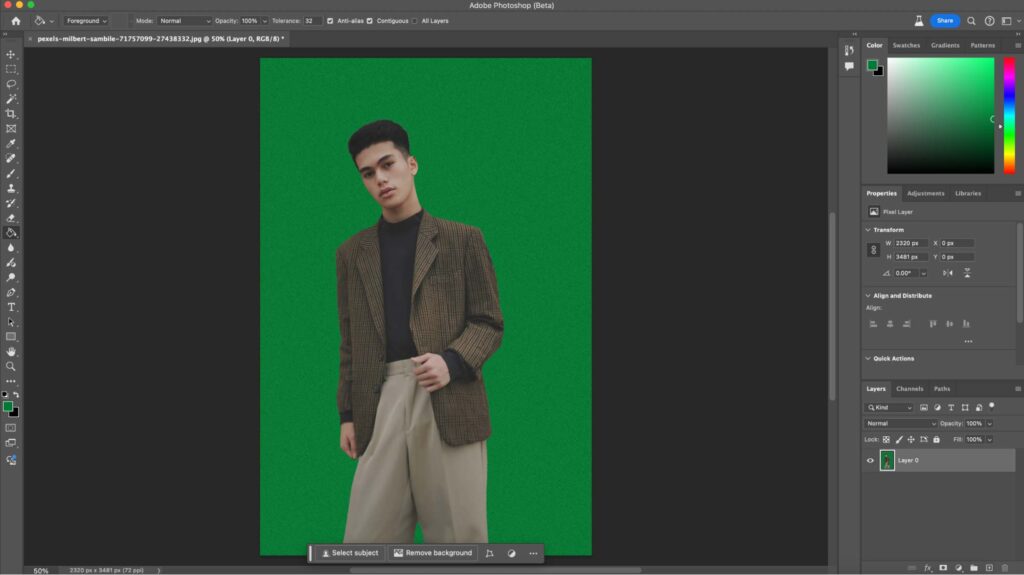
Start by opening your image in Adobe Photoshop, either by dragging it into the workspace or using the “File” > “Open” option. Ensure your image is high resolution to facilitate precise edits, which will help you effectively remove the green screen from the photo in Photoshop.
2. Using the Select Color Range Tool
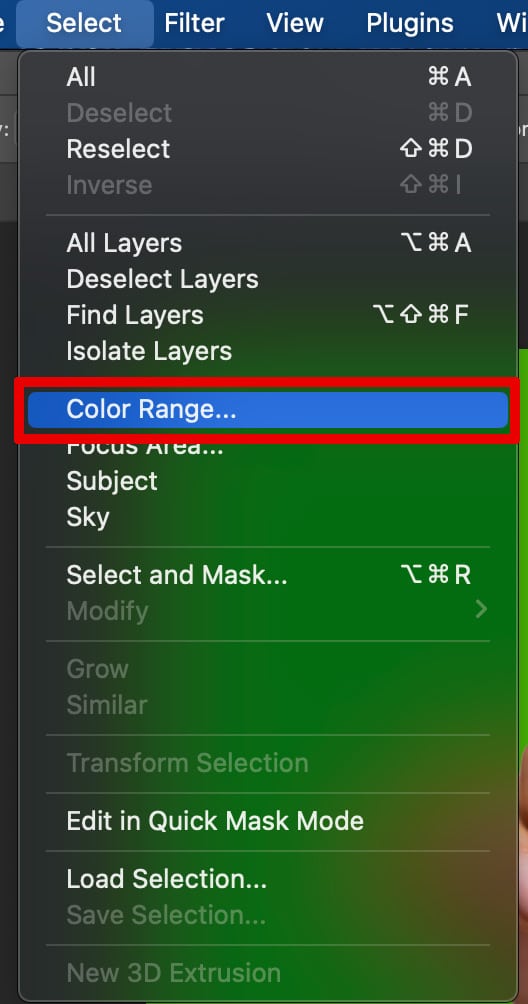
To isolate the green background, navigate to “Select” > “Color Range” and use the eyedropper tool to click on the green area. Adjust the “Fuzziness” slider to capture all shades of green while avoiding your subject, and preview your selection to ensure accuracy.
3. Refining the Selection with the Magic Wand Tool
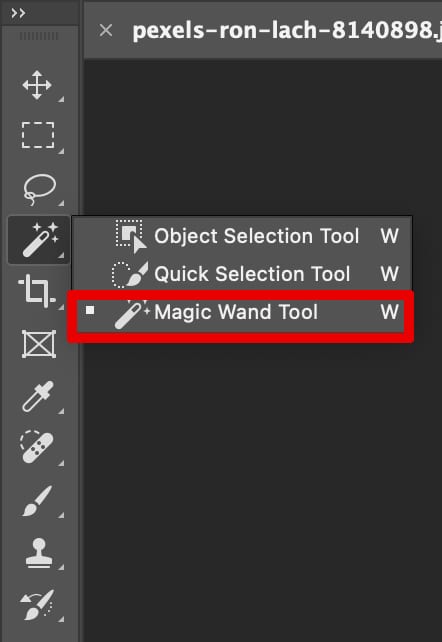

If your initial selection isn’t perfect, select the Magic Wand Tool from the toolbar and click on any remaining green areas. Adjust the “Tolerance” level to around 30 to improve precision, and use the “Refine Edge” option to smooth any rough edges for a cleaner look.
4. Removing the Background with Layer Masks

Apply your selection to a layer mask for non-destructive editing by clicking the “Add Layer Mask” icon. Refine edges with a soft brush, adjusting mask density and feather for smooth transitions and cleaner edges.
Enhance Your Images with Our Expert Background Removal Service
Our team at Clipping Path Studio specializes in providing top-notch background removal services to elevate your images to the next level. By delivering precise and professional results, we ensure your visuals are flawless for marketing purposes or personal projects.
Benefits of Professional Background Removal
Letting our team handle background removal saves you time and ensures every detail is spot-on. We provide smooth backgrounds, crisp edges, and no extra artifacts, so your images look top-notch and your story comes through clearly.
FAQs for Removing the Green Background
How do I make a green background transparent in Photoshop?
To make a green background transparent, use the Select Color Range tool to isolate the green area. Apply a layer mask to remove it, revealing transparency. Export the image as a PNG to preserve the transparent background for various projects.
What tools in Photoshop are best for removing a green screen background?
The Magic Wand, Select Color Range, and Layer Masks are key tools. The Magic Wand is quick but less precise, while Select Color Range offers better control. Layer Masks allow for non-destructive editing, making them ideal for complex images requiring detailed adjustments.
What is the Select Color Range feature, and how do I use it?
The Select Color Range feature isolates specific colors in an image. Go to “Select” > “Color Range,” then use the eyedropper to select the color. Adjust “Fuzziness” to refine, and apply the selection to a layer mask for precise editing.
Can I remove a green screen using Layer Masks in Photoshop?
Yes, Layer Masks enable non-destructive editing, making them ideal for green screen removal. Create a mask to hide the green background, allowing for easy adjustments and refinements without permanently altering the original image. This technique is perfect for complex images.
What should I do if there is a green spill on my subject after removing the green screen?
Identify green spill areas and create a new layer in “Color” blend mode. Use a soft brush to paint over the spill with suitable colors. Use adjustment layers, like Hue/Saturation, to fine-tune colors and eliminate unwanted green tints for a polished look.
The Value of Mastering Green Screen Removal in Photoshop
Mastering removing a green screen in Photoshop is a valuable skill that enhances your creative projects. Practice and refine your technique to achieve professional results. As you become proficient, you’ll unlock new possibilities in visual storytelling and creative applications across various media.
Additional Resources for Learning Photoshop
To deepen your Photoshop skills, explore tutorials on platforms like YouTube, enroll in courses on sites like Udemy or Coursera, and join community forums like Adobe’s Photoshop Community. Continuously explore Photoshop’s capabilities to stay updated with new features and enhance your creative potential.
