
The Healing Brush in Photoshop precisely eliminates unwanted blemishes, scratches, and other imperfections, maintaining the natural texture by sampling and blending pixels of an image. It blends pixels from one area to another to remove imperfections. It is a versatile photo retouching and repair tool that allows you to adjust brush settings like size, hardness, mode, source, and sample to get the desired result.
Ever wondered how to make photo imperfections disappear like magic with a Healing Brush Tool? This blog post will reveal all the secrets of how to use the Healing Brush Tool in Photoshop. We will walk you through all the steps to transform your images effortlessly with six alternative Tools: Spot Healing Tool, Patch Tool, Clone Stamp Tool, Dodge and Burn Tool, Content-Aware Fill Tool, and Remove Tool.
What you’ll learn in this article
- 1 How to Use the Healing Brush Tool in Photoshop?
- 2 Additional Photoshop Tools to Remove Spot, Acne, and Blemishes
- 2.1 Tool 1: Spot Healing Brush Tool: What is it?
- 2.2 Tool 2: Patch Tool in Photoshop: What is it?
- 2.3 Tool 3: Clone Stamp Tool in Photoshop: What is it?
- 2.4 Tool 4: Content-Aware Fill Tool in Photoshop: What is it?
- 2.5 Tool 5: Remove Tool in Photoshop: What is it?
- 2.6 Tool 6: Dodge and Burn Tool in Photoshop: What is it?
- 3 What is the Healing Brush in Photoshop?
- 3.1 What is the Photoshop Healing Brush Tool Used for?
- 3.2 Where is the Healing Brush Tool in Photoshop?
- 3.3 What is the Shortcut for the Photoshop Healing Brush Tool?
- 3.4 When Should I Adjust the Settings of the Healing Brush?
- 3.5 What is the Spacing for the Healing Brush Tool?
- 3.6 Can you Adjust the Size and Hardness of the Spot Healing Brush Tool?
- 3.7 Why is my Spot Healing brush painting black?
- 3.8 Why is the Photoshop Healing Brush Tool Not Working?
- 4 Outsource Your Photo Retouching and Repairing Services from Clipping Path Studio
How to Use the Healing Brush Tool in Photoshop?
The Healing Brush Tool in Photoshop works by sampling a source point and then applying that sample to another area, effectively “healing” or blending imperfections. When you select a source point by holding Alt (Option on Mac) and clicking, Photoshop copies the texture and color from that point.
Here’s a step-by-step guide to repairing and retouching imperfections with the Healing Brush Tool:
Step 1: Getting Started with the Healing Brush Tool
To begin, open Photoshop and select the Healing Brush Tool from the left-side toolbar or click the “J.” Now, adjust the brush size and hardness to suit your editing needs. Also, set the brush options from the top panel, like Mode, Aligned, Sample, and Diffusion.

Step 2: Selecting Areas and Source Points in Photoshop
Zoom in for precision and press the Alt (Windows)/Option key (Mac) to set a source point. Release it, then click to correct using sampled pixels.
Step 3: Applying Healing Brush Edits in Photoshop
Once you have the source, you can click on any imperfections. However, be mindful of how much you use one area to avoid over-editing. Experiment with various source points for natural results. Repeat this step until you are happy with how the skin or image looks.
Step 4: Saving and Exporting Your Edited Image in Photoshop
When satisfied, save your edited image in your preferred format. Keep both original and edited versions for reference and future enhancements.

Additional Photoshop Tools to Remove Spot, Acne, and Blemishes
In addition to the Healing Brush, Photoshop has other tools that help you to remove spots, acne, and blemishes precisely with quality, including:
Tool 1: Spot Healing Brush Tool: What is it?
The Spot Healing Brush Tool removes blemishes, dust spots, and imperfections from photos by sampling pixels from the surrounding area to seamlessly blend and replace the selected blemishes.
How to Use the Spot Healing Brush Tool in Photoshop?
Create a blank layer to use the Spot Healing Brush Tool in Photoshop. With this tool, you can remove small objects like trash or power lines. Let’s discover a step-by-step guide below:
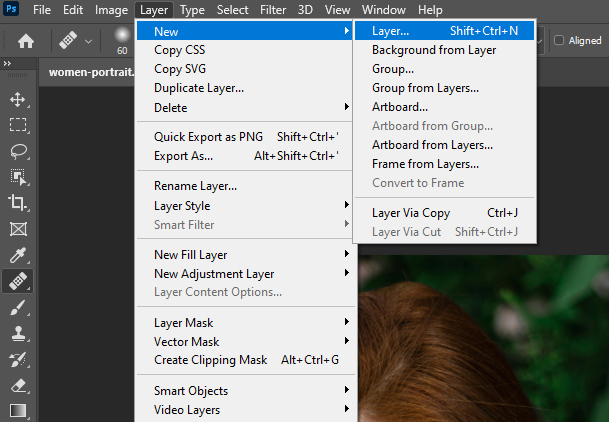
Step 1: Create a new layer
Create a blank layer by clicking the “Layer” option from the top bar. Working on a separate layer safeguards your original file. Check out the photo shown below and follow the process. [Rename the layer as “Spot Healing”]
Step 2: Select the Spot Healing Brush Tool
Select the Spot Healing Brush from the Photoshop toolbar and ensure you select the right one.

Step 3: Adjust the toolbar settings
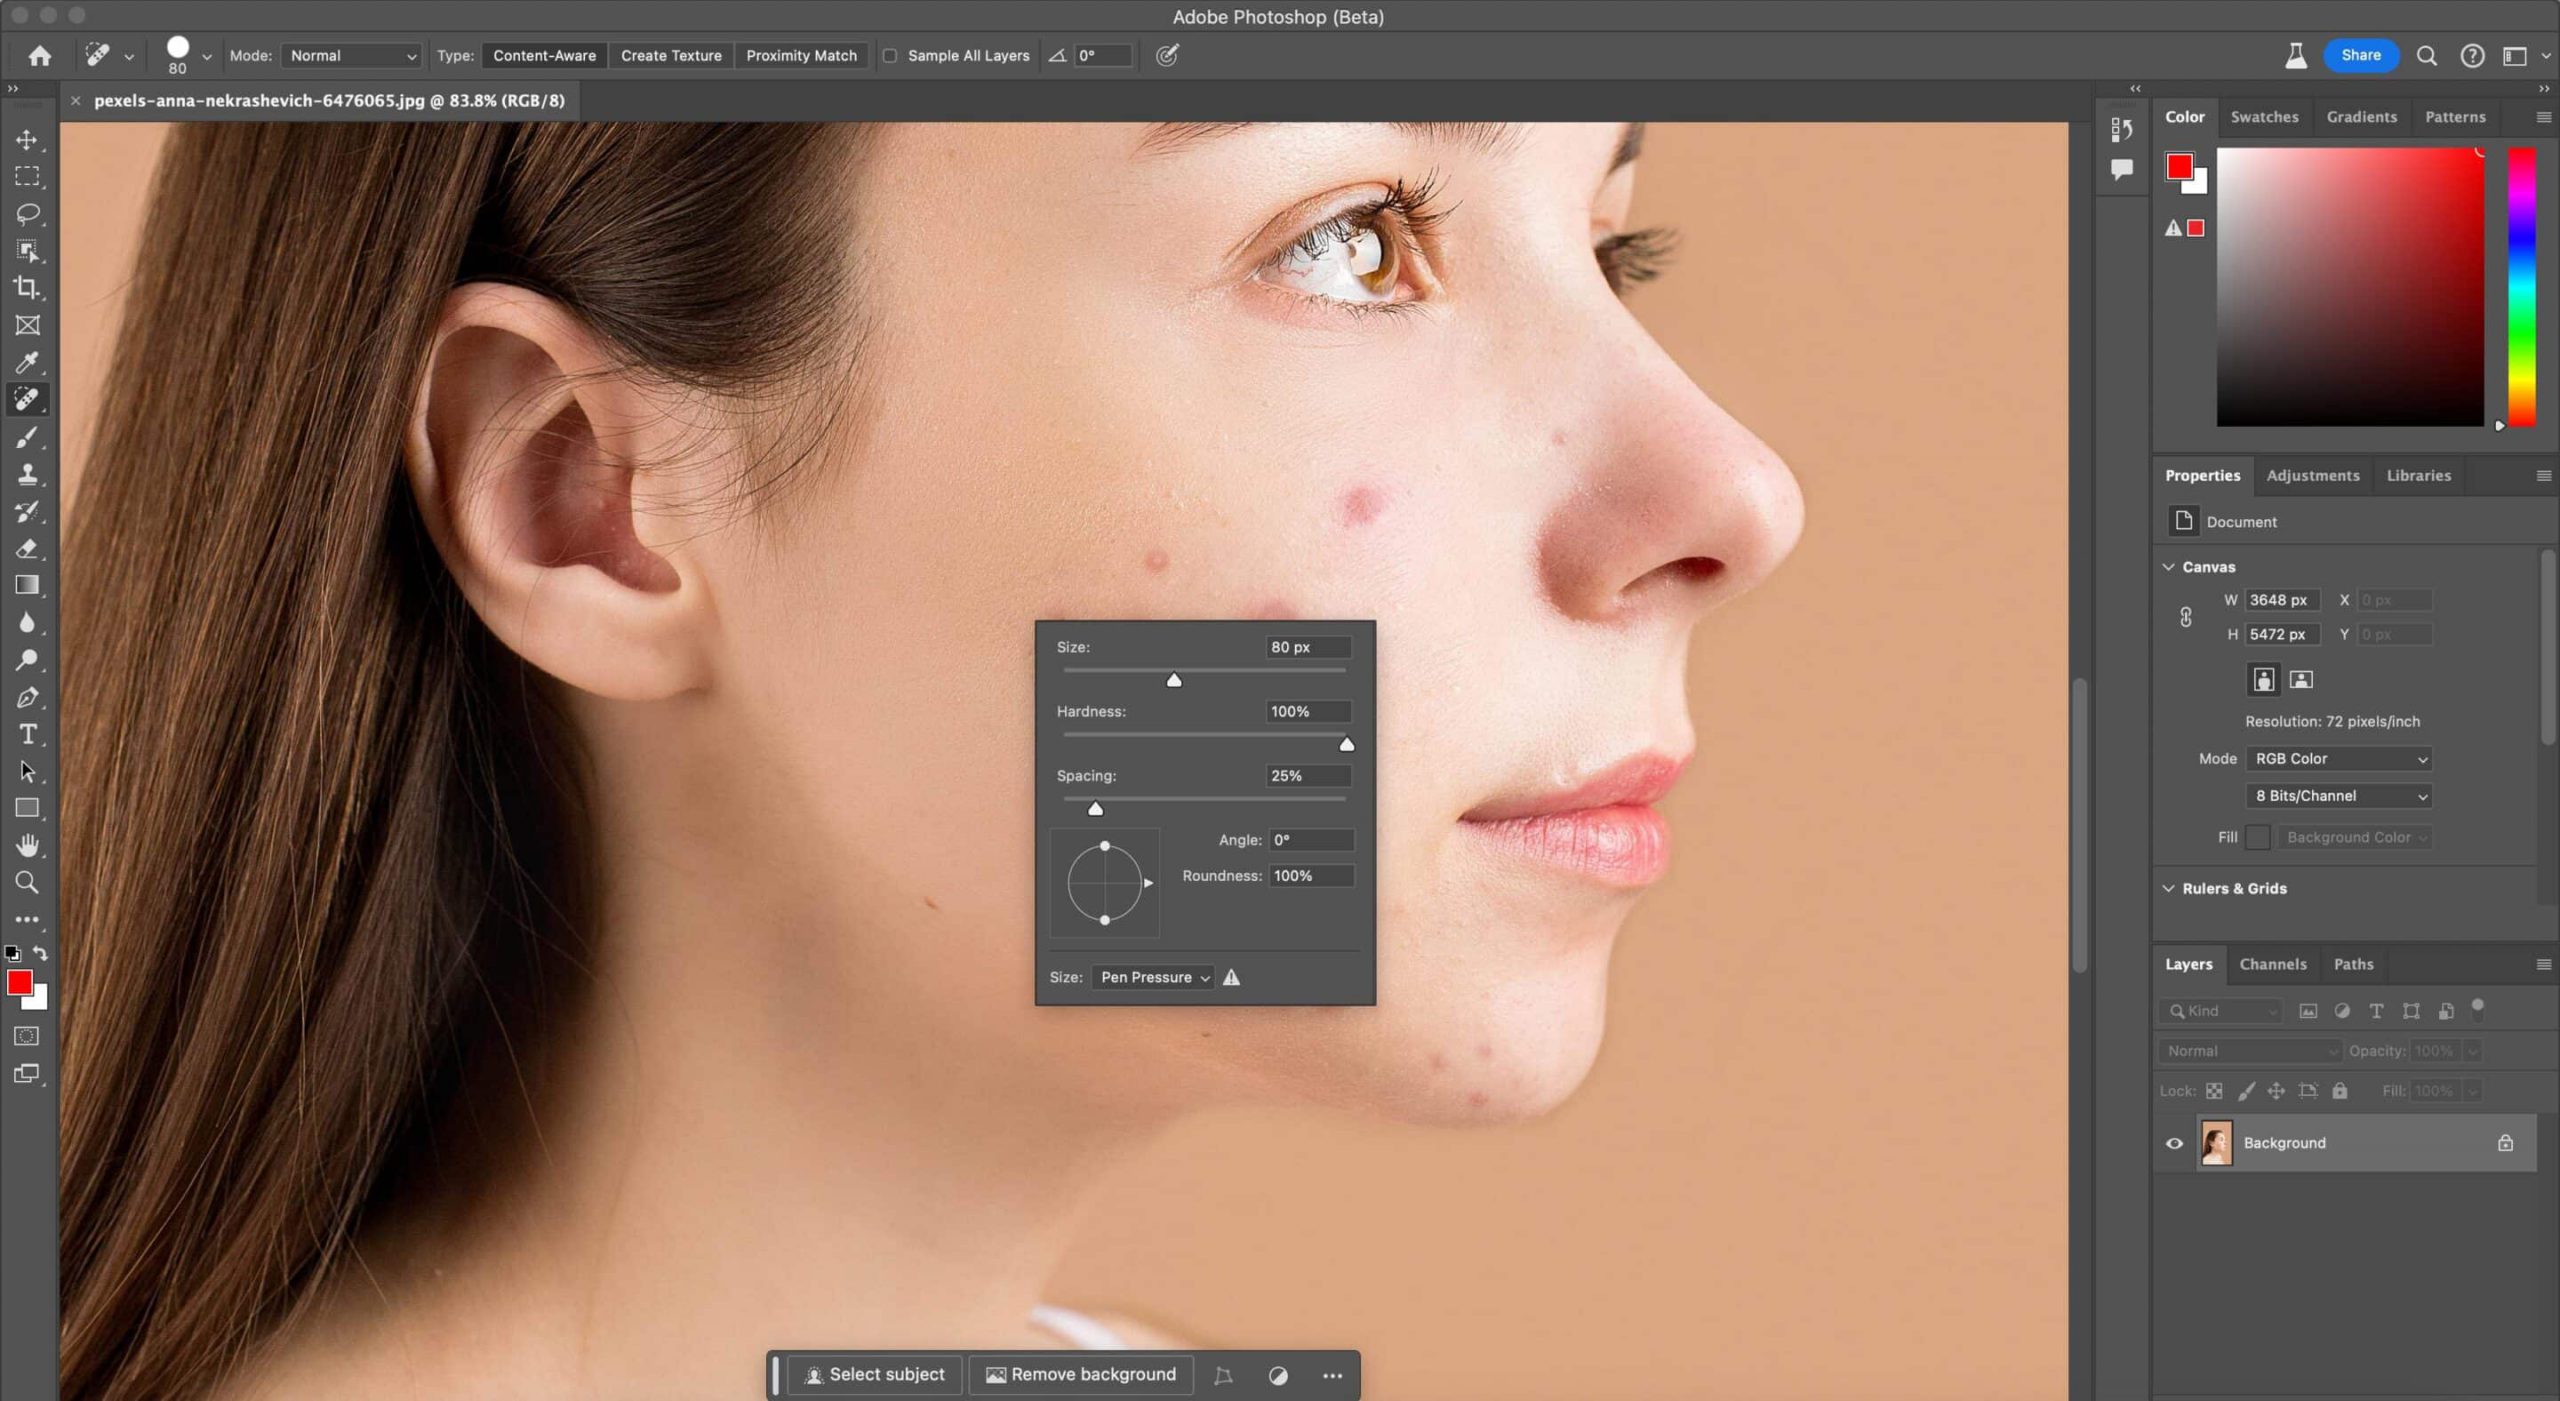
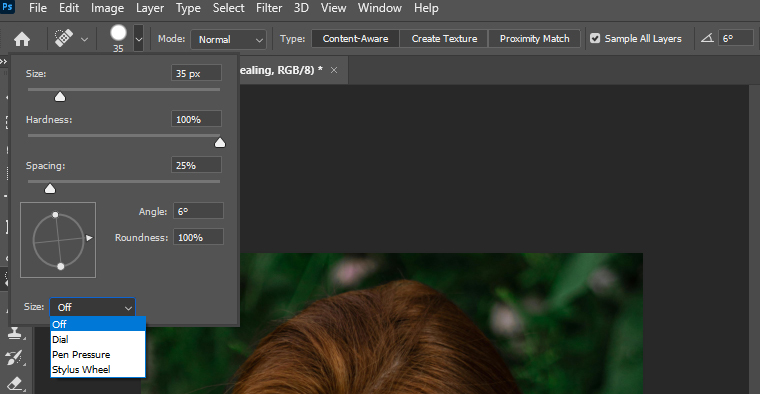
The second step is to open the brush options from the top bar, indicating the “Circlesign.” Here, you’ll find the three primary brush options: Size, Hardness, and Spacing. Adjust brush size, hardness, and spacing from the settings shown below. Ensure the Sample All Layers is checked and the Mode is set to Normal. [Use the bracket keys “[” makes brush smaller & “]” makes brush larger].
In the brush menu settings, you can change the brush’s softness. A soft brush produces better results, while a hard one makes edges sharp and noticeable.
Step 4: Choose the brush type
There are three types of Spot Healing Brush: Content-Aware, Create Texture, and Proximity Match. If you choose Content-Aware, you’ll get the best results. The Create Texture option helps you generate a pattern from the pixels around the area you are trying to replace. With the Proximity Match, Photoshop will count pixels just outside of the Spot Healing Brush circle for replacement pixels.
Step 5: Start to retouch
Set a hardness of 50%, a spacing of 25%, and the roundness is set to 100% before starting retouching. Zoom in (Control/+) to make any adjustments perfectly. Simply brush the blemishes area and ensure the result meets your final results.
- How Do You Reset Your Photoshop Spot Healing Brush Tool?
First, select the Spot Healing Brush Tool, go to the brush tool settings, and select the “Reset Tool” option, as shown in the image below:

What is the Difference Between Spot Healing Brush and Healing Brush Tool?
The key difference between Spot Healing Brush and Healing Brush in Photoshop is the working procedures and the level of user control. For more details, let’s check out below:
| Key Points | Spot Healing Brush | Healing Brush |
|---|---|---|
| Working procedures | No manual sampling is needed, it uses an algorithm to automatically sample surrounding areas and blends the texture, lighting, and shading. | Manual sampling is needed; press the Alt key and click the source point. |
| Use cases | Best for fast and simple fixes, like removing spots, acne, or small distractions in the background. | Ideal for complex retouching tasks, like removing large blemishes, repairing specific textures, and color details. |
| Benefits | Automatic and fast, no setup is required. | Customizable, you decide the source for the texture. |
Tool 2: Patch Tool in Photoshop: What is it?
The “Patch Tool” in Photoshop is a retouching tool that allows you to eliminate distractions and replace a selected item or area of an image with pixels from another part of the same image. Photo editors love this repairing tool for its flexible functionality. Though similar to the Healing Brush Tool, it provides more accurate results.
- When to use Patch Tool in Photoshop?
You can use the Patch Tool in Photoshop to remove distracting elements like blemishes, dust, books, and so on from an image. Also, you can duplicate and insert a specific element into other areas.
How to Use Patch Tool in Photoshop?
Here’s a step-by-step guide on using a Patch Tool in Photoshop.
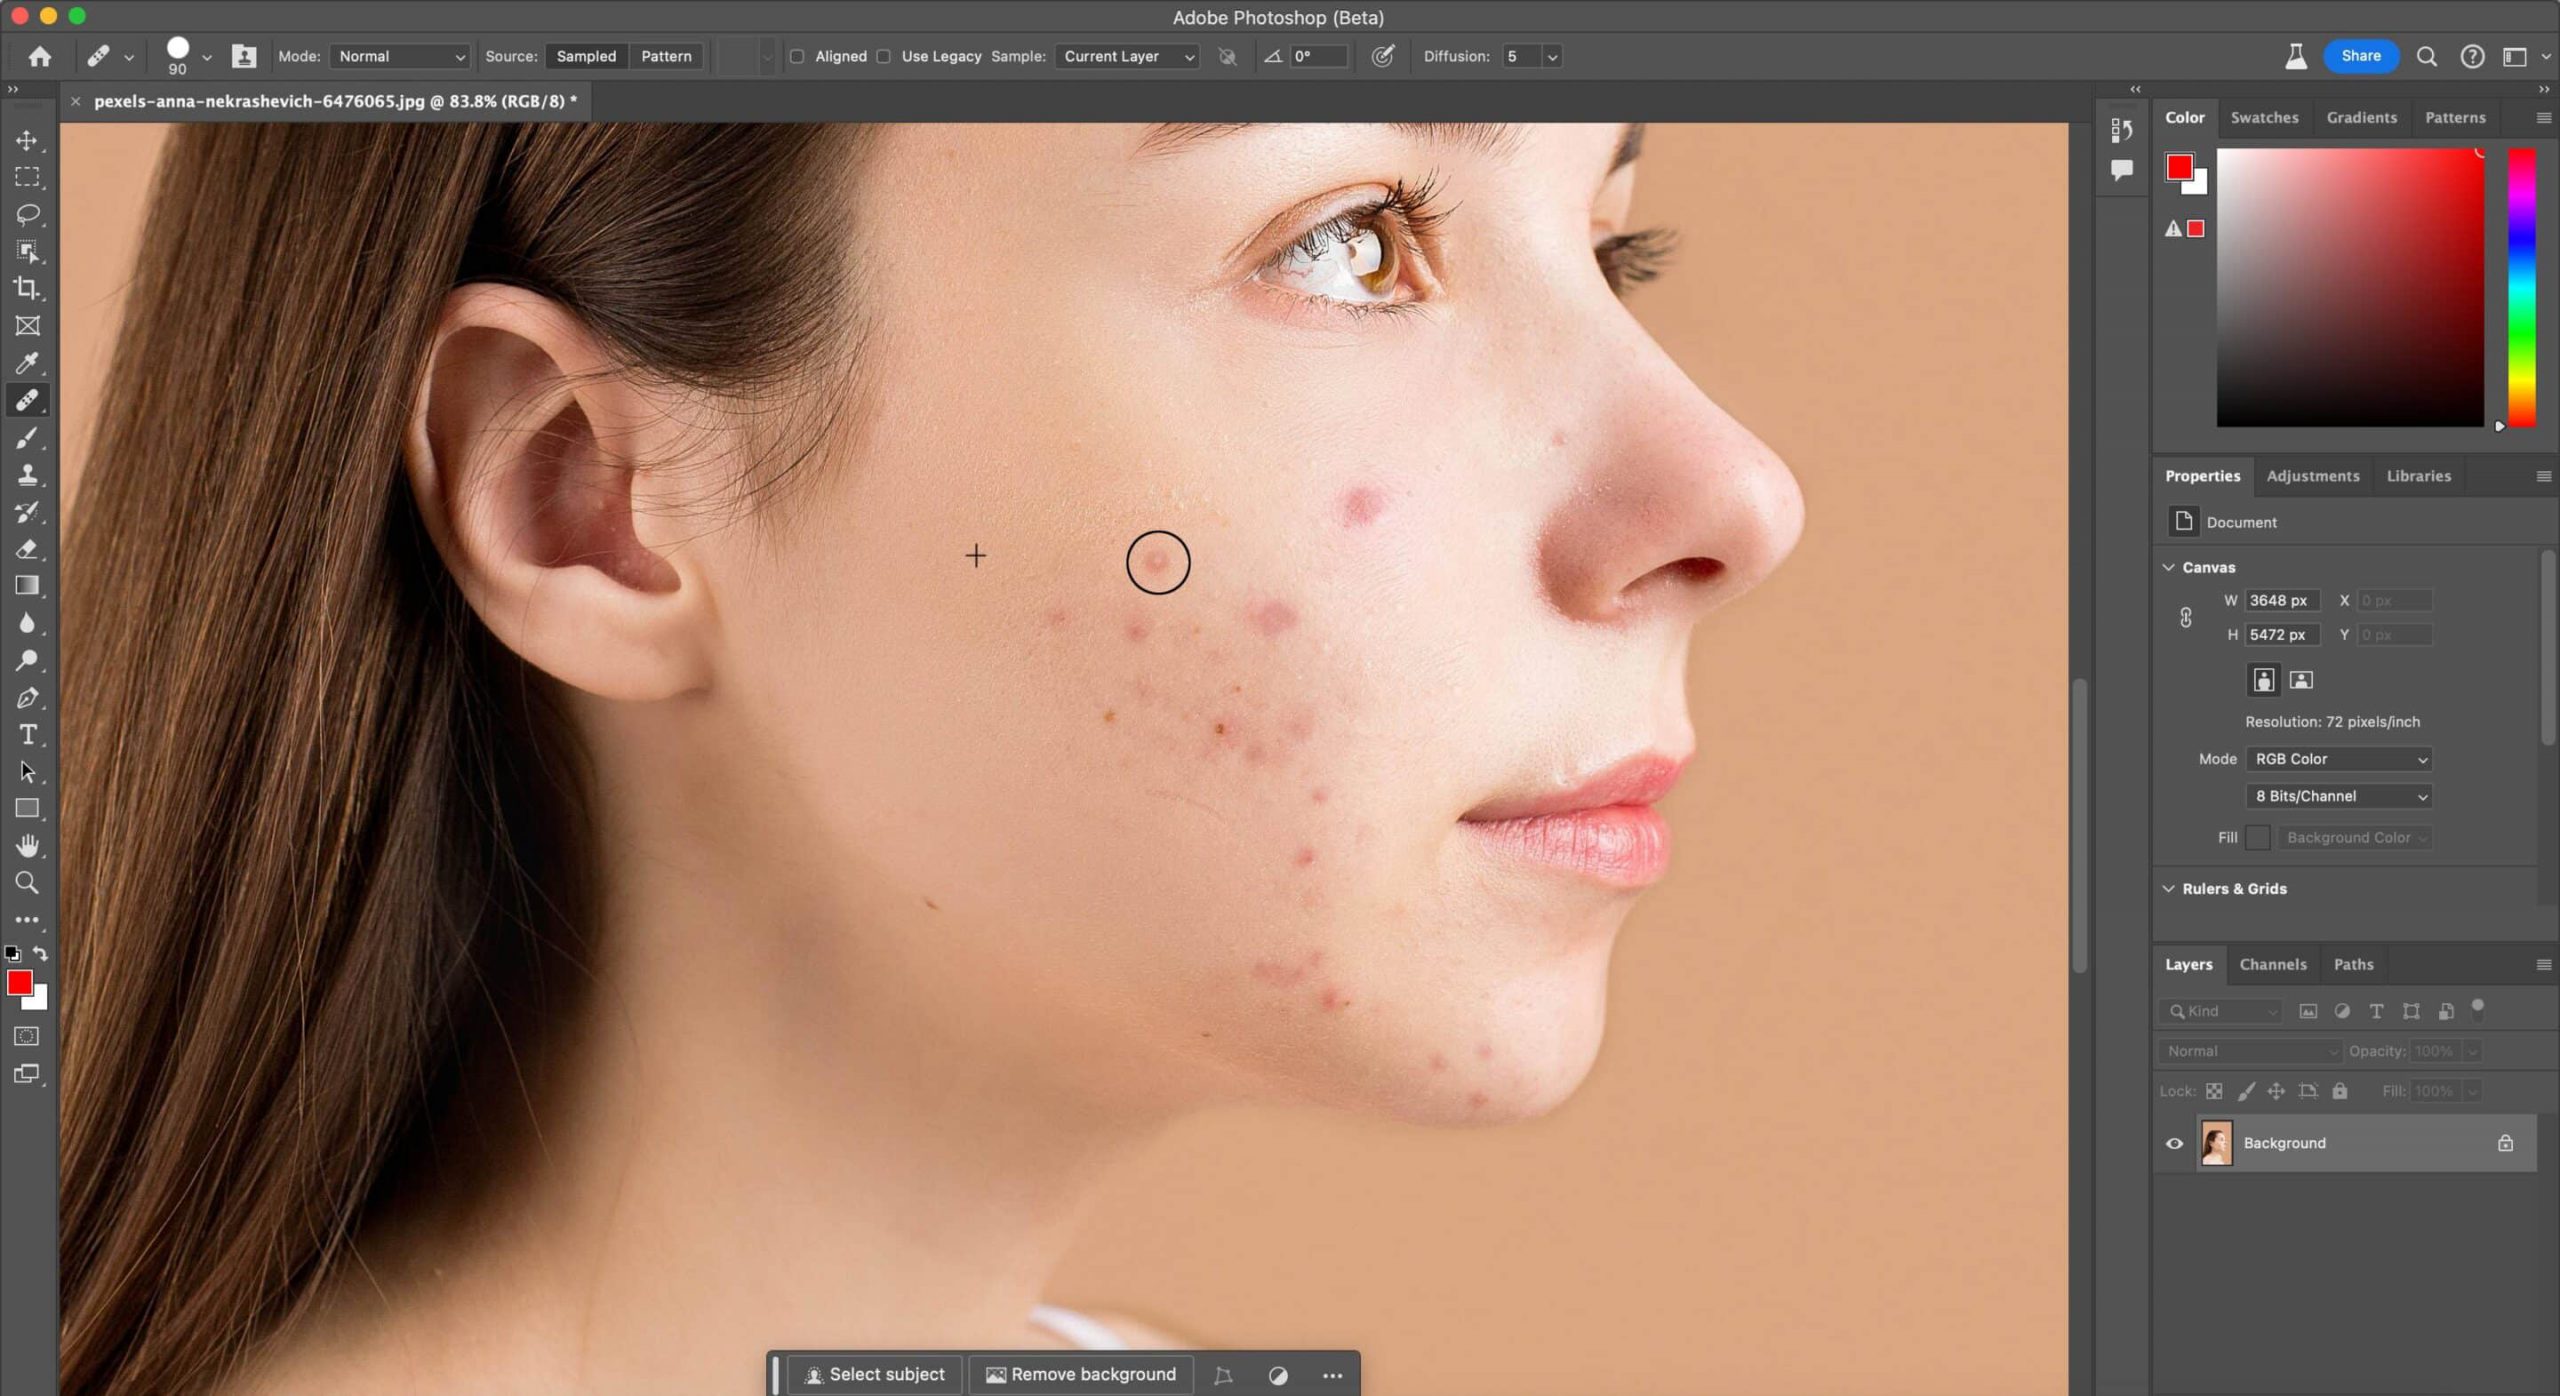
Step 1: Select the Patch Tool (J) from the toolbar. If you can’t be able to use the Patch tool, click and hold the Healing Brush Tool where you find the Patch Tool.
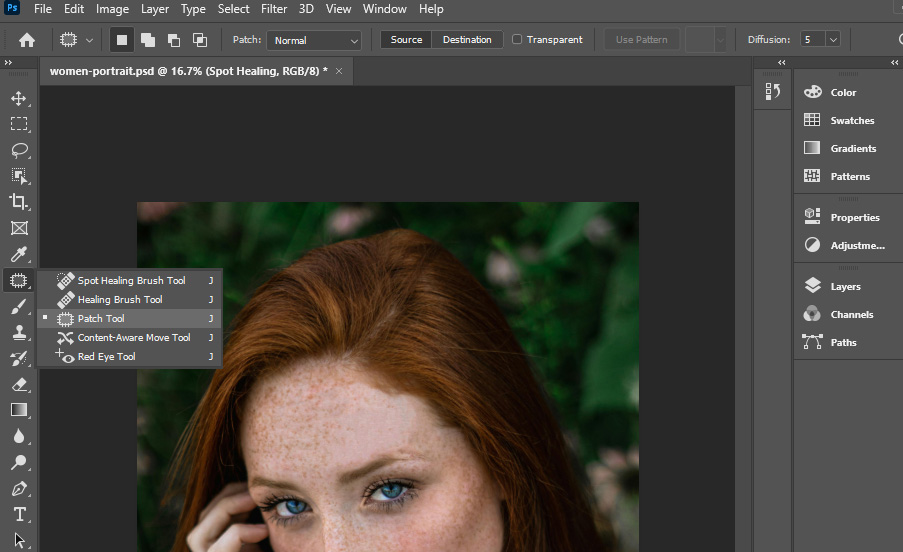
Step 2: From the top tool options bar, choose Normal as the Patch option, and select either Source or Destination and Diffusion is 5.
Note: when you select Source, it’ll instruct Photoshop to patch the selected portion of the image. If you select Destination, it’ll instruct Photoshop to use the selected area to patch a different portion you want to replace.

Step 3: Draw the selection around the blemishes or acne you want to remove. Simply draw a selection border over an area on the model face like the Lasso Tool using your mouse cursor. Ensure the setting is selected to “Source” to perform the desired action.
Step 4: Now, drag the selection object or blemishes to the area you want to cover. Ensure the results meet your plan. However, to patch the Destination, drag the selection to another part of your image where you want to copy the selected pixels.
What is the Difference Between Spot Healing Brush and Patch Tool?
The key difference between Spot Healing Brush and Patch Tools lies in their distinct functionalities and workflows. Below is a comparison table:
| Key Points | Spot Healing Brush | Patch Tool |
|---|---|---|
| Purpose | Removes small imperfections (acne, blemishes, etc.). | Provides more control over the image area selection and replacement. |
| Work procedures | Brush over the area you want to fix and it blends the imperfection sampling nearby pixels. | Select an area or item, and simply drag it over the area where you want to patch the selected area. |
| Use Cases | Ideal for quick fixes and no need for manual sample selection. | Useful for complex retouching tasks, like removing objects from a scene, smoothing out textures, or reshaping parts of an image. |
Tool 3: Clone Stamp Tool in Photoshop: What is it?
The Clone Stamp Tool is perfect for duplicating or repairing areas of an image with precision. Press “S” to sample an area and paint over imperfections, making it useful for seamlessly retouching, removing objects, or blending details. Like the Patch Tool, you get amazing retouching results, but requires manual painting and exact copying of pixels.
- When to use a Clone Stamp Tool?
You can use the Clone Stamp Tool to copy texture, color, and detail exactly from the source. The common uses of this Tool are photo restoration, duplicating elements, background cleanup, and so on.
- Why can’t I use the Clone Stamp Tool?
If you haven’t defined a source point, sample settings are incorrect, or don’t use a layer that doesn’t contain any pixels, the Clone Stamp tool in Photoshop might not be working. So, to fix this, ensure you define a source point by holding down Alt/Option and clicking on the area you want to clone from.
How to Use the Clone Stamp Tool in Photoshop?
Here’s an easy-to-follow step-by-step guide to using the Clone Stamp Tool in Photoshop:
Step 1: Select the Clone Stamp Tool (S) and customize Tool settings like size, Hardness, and Blending mode to get the perfect desired result.

Step 2: Press the Alt key (Windows) or Option key (macOS) and click the area of the image you want to copy. That way you set a starting point that the tool copies.
Step 3: Release the Alt or Option key and drag over the new area where you want to place your copied content.
Step 4: The Clone Stamp Tool will copy content from the source and paint it into the new area.
What is the Difference Between the Clone Stamp and Healing Brush Tools?
The difference between the Clone Stamp and the Healing Brush Tools lies in how they work and the results they produce. Here’s a detailed comparison table:
| Key Points | Clone Stamp Tool | Healing Brush Tool |
|---|---|---|
| Purpose | Copies pixels from one area of an image to another, without blending. | Copy pixels from a source area and blend them with the texture, color, and lighting of the target area. |
| How it works | Manual source area selection by holding Alt (Windows) or Option (Mac) and clicking on the source points. | Work similarly to the Clone Stamp Tool but it blends the sampled pixels with the surrounding area to create a natural result. |
| Use case | Ideal for recreating a missing detail like a repeated tile or object, without automatic blending. | Perfect for removing wrinkles, scratches, or small distractions where seamless blending is required. |
Tool 4: Content-Aware Fill Tool in Photoshop: What is it?
The “Content-Aware Fill” is an effective and powerful tool in Photoshop to remove acne, blemishes, and spots. This tool allows seamless blending with surrounding skin textures to achieve a natural look by removing small imperfections. It is an AI-powered Tool with advanced algorithms and artificial intelligence to determine the best pixels for filling. You can remove unwanted objects, people’s backgrounds, distractions in a scene, and many more.
How to Use Photoshop’s Content-Aware Fill Tool?
The Content-Aware Fill tool use guide is as follows:
Step 1: First, select the blemish area or unwanted area using a selection tool like the Lasso or Marquee Tool in Photoshop.

Step 2: After that, select the “Edit” option from the top toolbar and choose the “Content-Aware Fill” option.
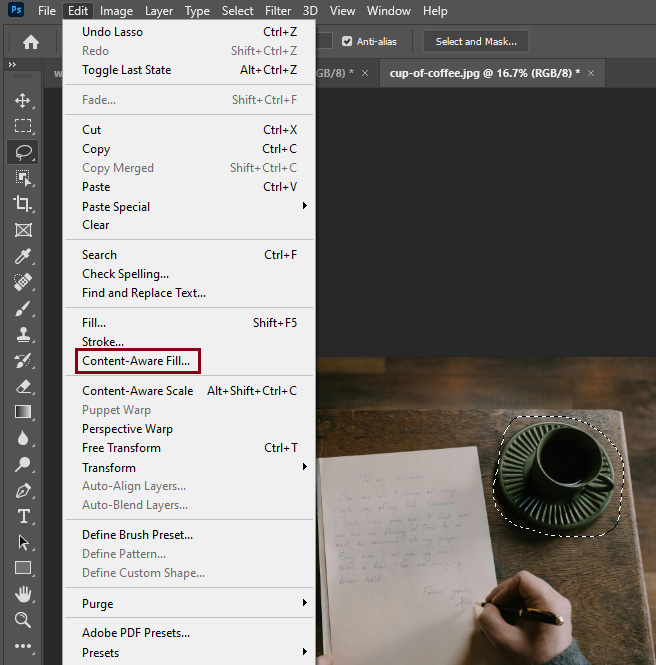
Step 3: Check the preview pop-up and ensure you like the result. For more complicated images, you may use other tools. Now, save your project, and don’t forget to work on a New Layer.
What is the Difference Between the Content-Aware Fill Tool and the Healing Brush Tool?
The key difference between “Content Aware Fill” and “Healing Brush” lies in precise touch-ups. The Content-Aware Tool automatically fills and blends a selected area by analyzing surrounding pixels. On the other hand, healing brush works by sampling a source area manually and blending it with the target area to match lighting, shade, and texture.
Tool 5: Remove Tool in Photoshop: What is it?
The Remove Tool is an AI-powered Photoshop tool for removing unwanted objects, distractions, people, and more from images. Also, you can use it to remove blemishes, acne, spots, or dust from a photo. The key benefits of this new tool (released in 2025 under the Healing Brush Tool option) are:
- It analyzes surrounding pixels, blends them over the blemishes, and provides a natural outlook.
- Ises AI pattern recognition.
- Permits multiple brushstrokes.
How to Use Photoshop’s Remove Tool?
To use the Remove Tool, you must install the latest version of Adobe Photoshop 25.12 because this tool is newly added and available in Photoshop 2025 and its Beta Versions. Here’s a step-by-step guide to using Photoshop’s Remove tool flawlessly:
Step 1: Select the Remove Tool nested under the Spot Healing Brush Tool or click the “J” as a shortcut key.
Step 2: Select Size to set the brush size, turn on “Sample All Layers” to sample data from all visible layers, and turn off “Remove after each stroke” to access multiple strokes of the brush before applying the fill.
Step 3: Select the “Settings” ⚙️icon to change the color and opacity of the overlay.
Step 4: Draw a loop or brush over the specific area you want to remove. If the option “Remove after each stroke” is unchecked, select the commit icon after every brush stroke.
Step 5: Select your preferred settings from the “Mode” dropdown menu (Auto, Generative AI on, or Generative AI off).
Tool 6: Dodge and Burn Tool in Photoshop: What is it?
In Photoshop, the Dodge and Burn Tool lightens (dodge) or darkens (burn) specific areas of an image, adding depth and contrast. Adjusting brush size and exposure settings allows you to control specific areas, like under-eye circles, wrinkles, or pores. Photoshop experts prefer to work on separate layers when applying these techniques to maintain non-destructive editing.
- What is the purpose of the Dodge-and-Burn Tool?
Dodge and Burn Tools are used to adjust an image’s highlights (changing the light areas), midtones (changing the middle range of grays), and shadows (changing the dark areas). Most commercial retouchers use this technique to preserve texture, reduce the appearance of blemishes, and enhance facial features while maintaining a natural look.
How to Use Photoshop’s Dodge and Burn Tool?
Follow a step-by-step guide to use Photoshop’s Dodge and Burn Tools:
Step 1: Select the Dodge or Burn Tool from the toolbar that is shown in the picture below.
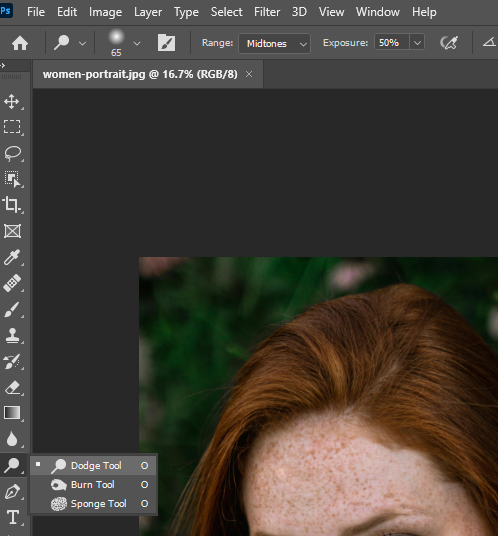
Step 2: Choose a brush tip, set Brush settings, and select range type (midtones, shadows, and highlights) from the top options bar.
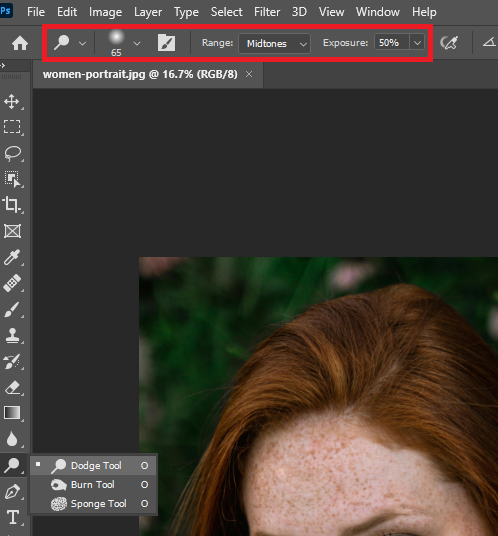
Step 3: Set the exposure level to control how much lightening or darkening you want.
Step 4: Click the airbrush button to use the brush and select the Protect Tones option to minimize clipping in the shadows and highlights.

Step 5: Now start dragging over the specific part of the image you want to lighten or darken, ensuring a natural outlook.
What is the Healing Brush in Photoshop?
The Healing Brush in Adobe Photoshop helps you to remove imperfections, such as spots, acne, blemishes, wrinkles, etc., from an image. This tool is similar to Spot Healing Brush tool with more control. It blends pixels from a sampled area to the target area. You can use the key to access the Healing Brush in Photoshop, which is “J,” or find it from the Photoshop toolbar. Don’t remove the birthmark, permanent spot, and another natural spot that gives one person a unique identity.
With this powerful retouching and repair tool, you can –
- Select a sample point by clicking on a clean area of the image and blending it with the area you want to fix.
- Repair imperfections, like scratches, wrinkles, dust spots, etc.
- Copy detail and blend the brightness and color qualities of the retouch area.
- It is a versatile tool that allows you to adjust options such as size, hardness, mode, and source.
- Useful to work on a separate layer to keep the original image intact.
What is the Photoshop Healing Brush Tool Used for?
The primary use of the Photoshop Healing Brush Tool is to repair imperfections, blemishes, or unwanted elements by blending the texture, lighting, transparency, and shading of a sample area into the target area. Some common uses of the Healing Brush Tool are:
- Restoring old photos by eliminating scratches, spots, or stains.
- Removing distracting objects like dust or others.
- Smoothing out transitions where skin textures are required to match perfectly.
- Replacing a damaged or irregular area with a smooth and clean texture without destroying a natural glow.
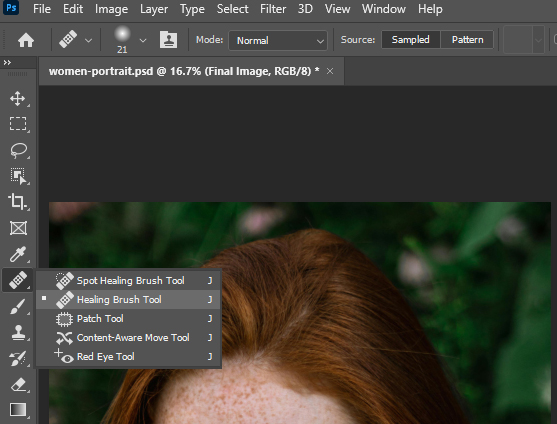
Where is the Healing Brush Tool in Photoshop?
The Healing Brush Tool in Photoshop is located in the toolbar. Simply, press the “J” key on your keyboard and you’ll get access to the Healing Brush Tool. However, you can also click and hold the Spot Healing Brush Tool to get access to other popular photo-retouching tools. Take a look at the picture to find your Healing Brush Tool.
What is the Shortcut for the Photoshop Healing Brush Tool?
In Photoshop, the shortcut key for the Healing Brush Tool is “J”. Pressing “J” on your keyboard allows you to access the Healing Brush Tool for efficient editing quickly.
When Should I Adjust the Settings of the Healing Brush?
You should adjust the settings of the Healing Brush Tool whenever you need to change the brush size, hardness, or sampling area to remove the imperfections. But ensure that the sampled area blends with the area you’re fixing and represents a natural look.
What is the Spacing for the Healing Brush Tool?
The spacing for the Healing Brush Tool refers to the distance between each individual brush “footprint” when you click and drag. Mainly, it controls the brush stroke smoothness, like a higher spacing creates more visible gaps between brush applications. However, the default spacing setting is around 25%, which works great for most images.
Can you Adjust the Size and Hardness of the Spot Healing Brush Tool?
Yes, you can adjust the size and hardness of the Spot Healing Brush Tool in Photoshop. After selecting the Healing Brush, you can change the brush size using the bracket keys “[” and “]” (or by right-clicking and adjusting the brush size in the options panel).
Why is my Spot Healing brush painting black?
Your Spot Healing Brush painting is black because the Photoshop foreground color is set to black. Check the color swatches at the top of your Photoshop Window and ensure the color on the left is set to a lighter color. Other potential causes are:
- Blend mode issue: Double-check your blend mode to ensure the brush is set to “Normal.”
- Dark area being sampled: If you click on a very dark area to fix pixels with the Spot Healing Brush, it might try replicating that dark area.
- Incorrect layer selection: Ensure you work on the correct layer where you apply the Spot Healing Brush tool.
Why is the Photoshop Healing Brush Tool Not Working?
The Photoshop Healing Brush Tool might not work due to incorrect settings like the wrong sampling source, blending mode not set to “Normal,” low opacity or flow, the selection of an incorrect layer, or a locked layer. So, ensure the several factors, like –
- Blend mode is set to “Normal,”
- The “Sample” setting is set to “Current and Below” or “All Layers,”
- The opacity and flow range is set to a high percentage.
- Work on the correct layer and not lock.
Outsource Your Photo Retouching and Repairing Services from Clipping Path Studio
Learning how to use the Healing Brush Tool in Photoshop is time-consuming, but outsourcing retouching services eliminates a bottleneck in your workflow instantly without compromising quality. Outsourcing offers numerous benefits, whether you’re a professional photographer with a tight schedule or someone seeking expert touch-ups.
Speed and Efficiency
Time is often critical in photography and digital imaging. Outsourcing to experienced professionals, like Clipping Path Studio, can significantly expedite the editing process. You can focus on capturing more moments while our skilled experts swiftly enhance your images.
Expertise and Precision
Photo editing is an art that requires skill and a sharp eye for detail. Professional editors possess the experience and knowledge to deliver impeccable results. They understand the nuances of various editing tools, including how to use the Healing Brush Tool in Photoshop, ensuring your images look their best.
Consistency and Quality
You can expect consistent, top-quality results when you outsource skin retouching services from our reputable editors. Your images will undergo meticulous editing, maintaining the same high standards for each project.
Cost-effective
With us, you get budget-friendly retouching services and in-house graphic designers who are dedicated to meeting deadlines without sacrificing quality. Also, you’ll concentrate on your work smoothly.
Advanced Editing Techniques
Outsourcing provides you with expert retouchers with complex techniques like background removal, color correction, image manipulation, and many more. At Clipping Path Studio, our in-house professional graphic designers provide high-quality works and fulfill complex image retouching requirements.
24/7 Customer Support
Whenever you feel to share your work details or require suggestions, feel free to contact or email us. We’re available 24/7 to deliver you quality work within the estimated time. Take advantage of a Free Trial or Get a Quote!
