
A transparent image background refers to an image or graphic that has no background color, usually represented by a gray-and-white checkerboard pattern. These backgrounds allow images, logos, designs, and e-commerce product listings to integrate seamlessly into various backgrounds, blending different elements and enhancing the overall visual appeal.
E-commerce professionals, product photographers, and marketers utilize transparent backgrounds to eliminate distractions, making products visually appealing and increasing the likelihood of customer engagement. Professional photo editors utilize various Photoshop tools to create a transparent background in an image, including the Subject tool, Background Eraser tool, Magic Eraser tool, Magic Wand tool, Lasso tool, and Pen tool.
How to Make an Image Transparent Background in Photoshop Using the Select Subject Tool
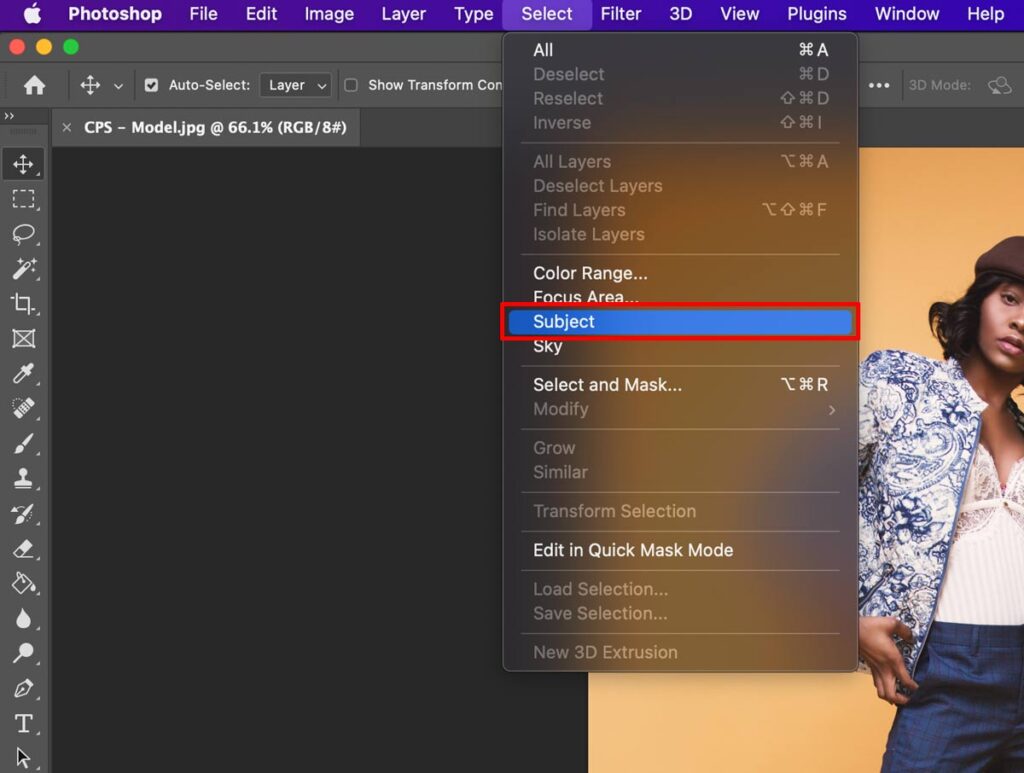
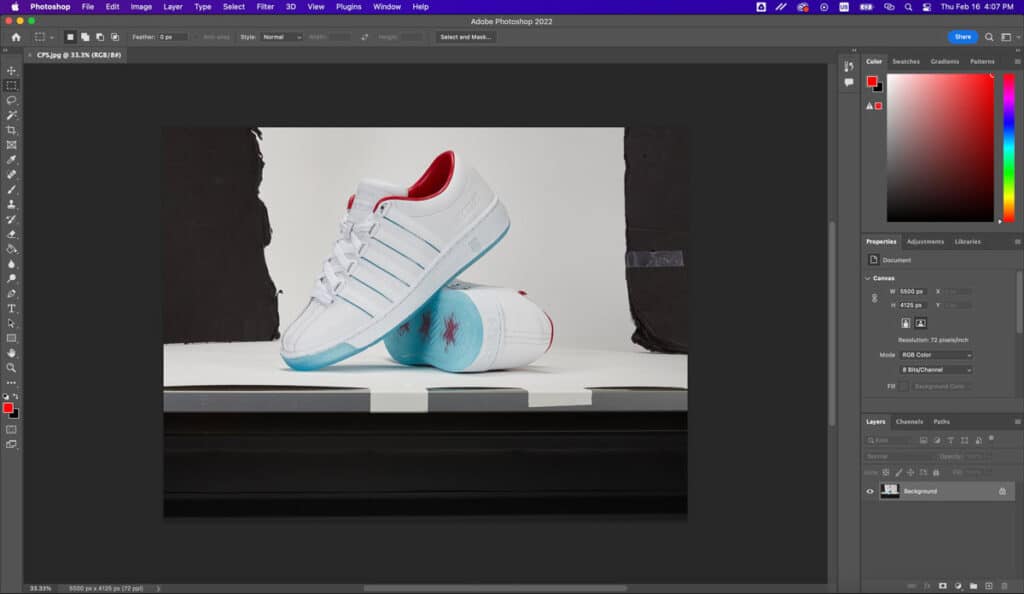
To make an image background transparent using the Subject tool in Photoshop, first select the subject by clicking “Select > Subject” to create a selection. After selection, refine the selection and create a layer mask to isolate the subject, making the image background transparent. Remember, the tool utilizes artificial intelligence to identify the main subject. Here is a step-by-step guide to using the “select subject” tool.
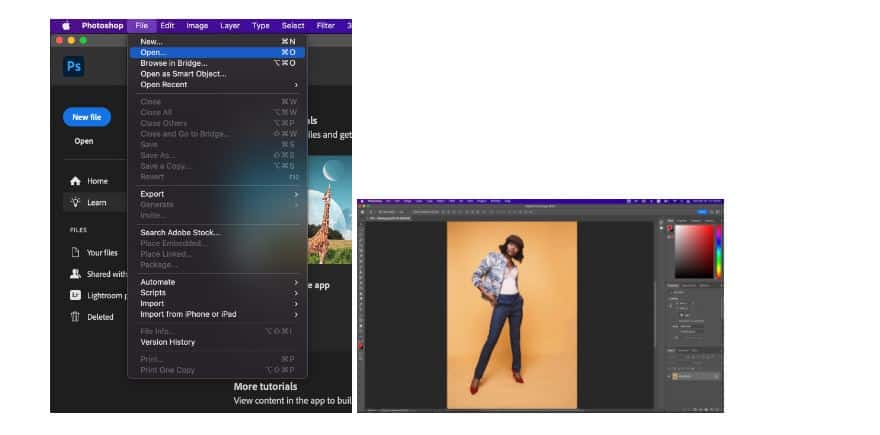
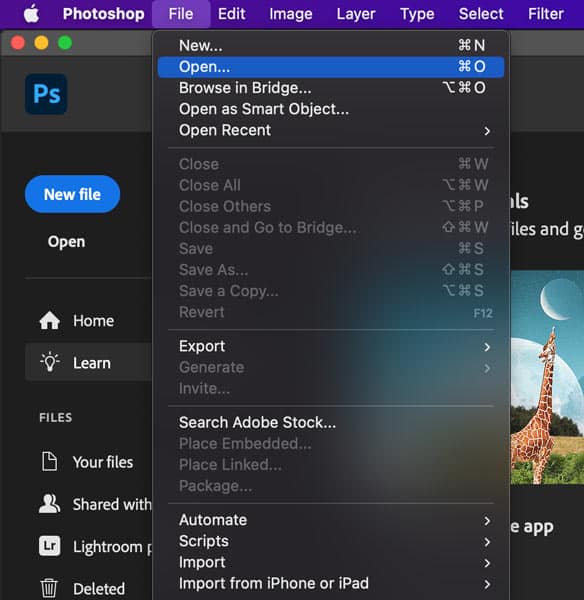
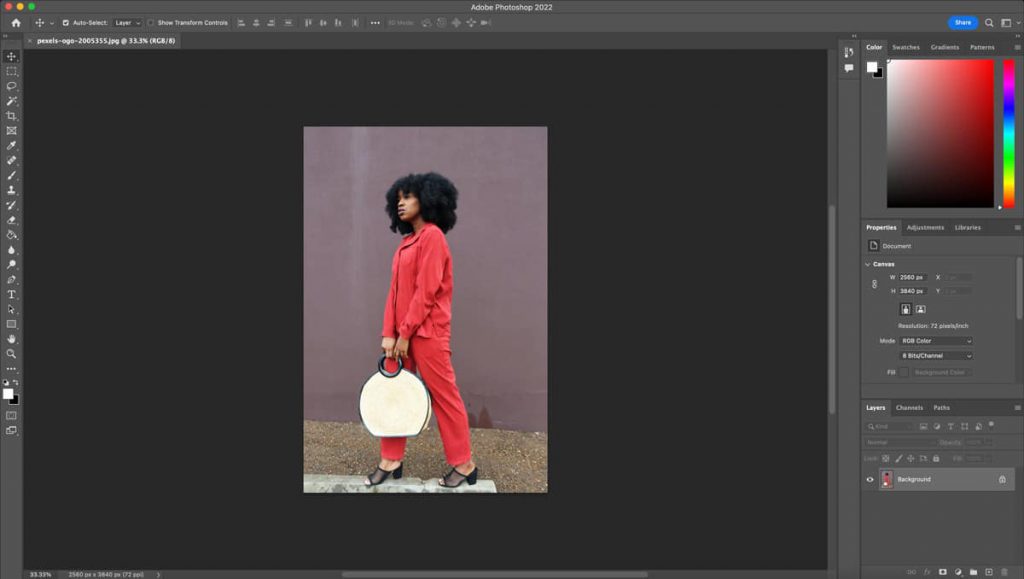
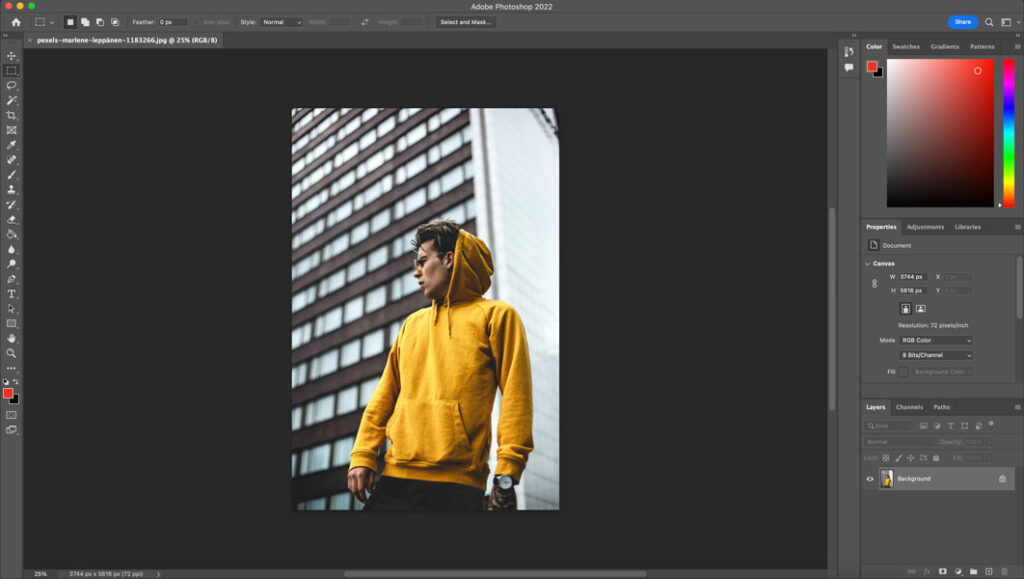
Step 1: Open Your Image in Photoshop
Begin by opening your image in Photoshop. You can do this by going to “File” > “Open” and selecting your image from your file directory.
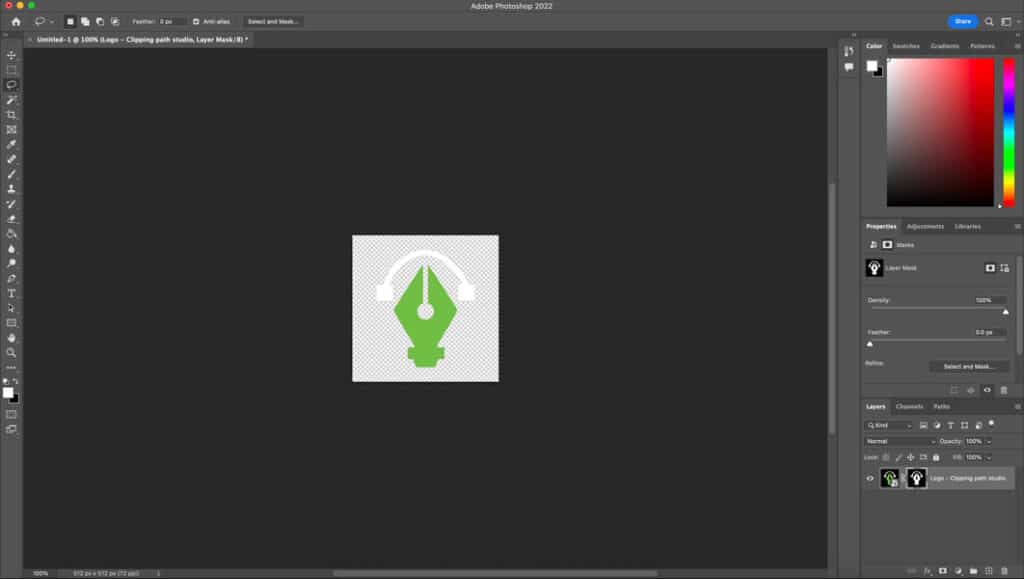
Step 2: Select the Subject Tool
In the Toolbar, select the Subject tool. You can also use the keyboard shortcut “W” to access the tool.
Step 3: Let Photoshop Make a Selection
Click on the subject you want to isolate. Photoshop will analyze the image and create a selection around the subject using artificial intelligence.

Step 4: Inverse the Selection
Once you’re happy with the selection, you can invert it to select the background. To do this, go to “Select” > “Inverse” or use the keyboard shortcut “Shift + Ctrl + I” (Windows) or “Shift + Cmd + I” (Mac).

Step 5: Delete the Background
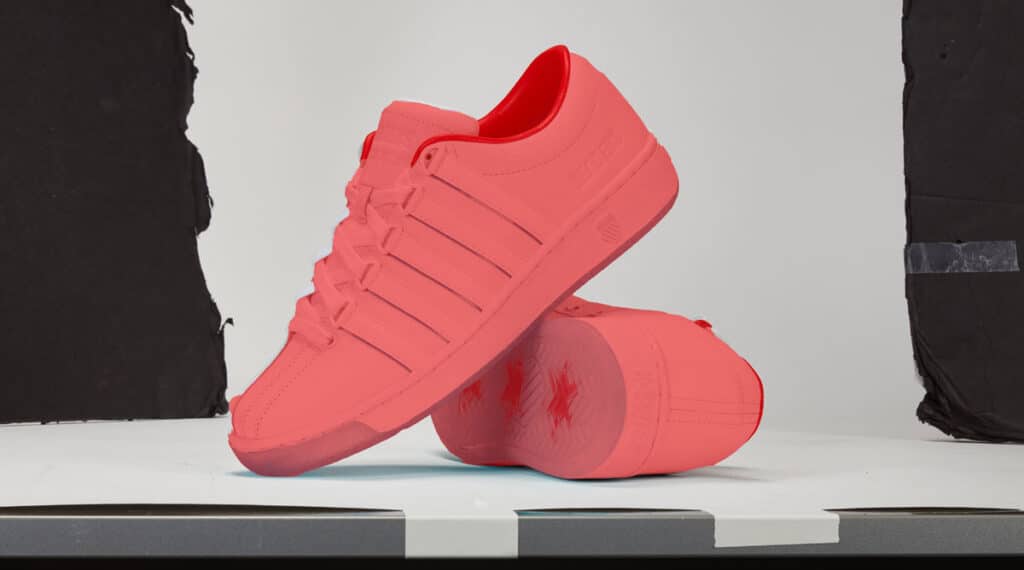
With the background selected, press “Delete” to remove it from the image. This will reveal the transparent background.

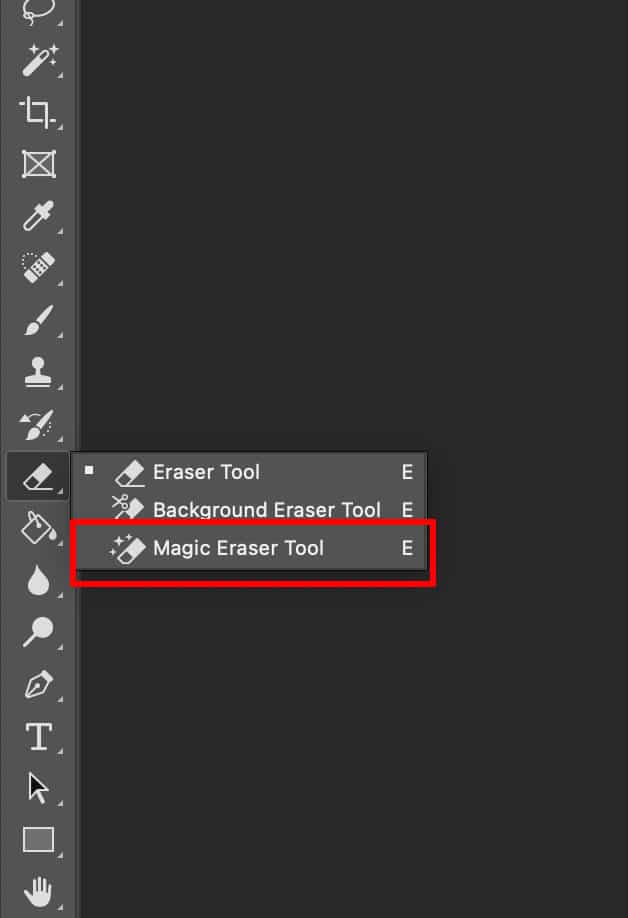
How to Make an Image Transparent in Photoshop Using the Background Eraser Tool
To make an image transparent in Photoshop using the Background Eraser tool, select the subject, adjust its settings, and erase the background using the Background Eraser tool. Here’s a more detailed breakdown:
Step 1: Open Your Image in Photoshop
Start by opening your image in Photoshop. You can do this by going to “File” > “Open” and selecting your image from your file directory.

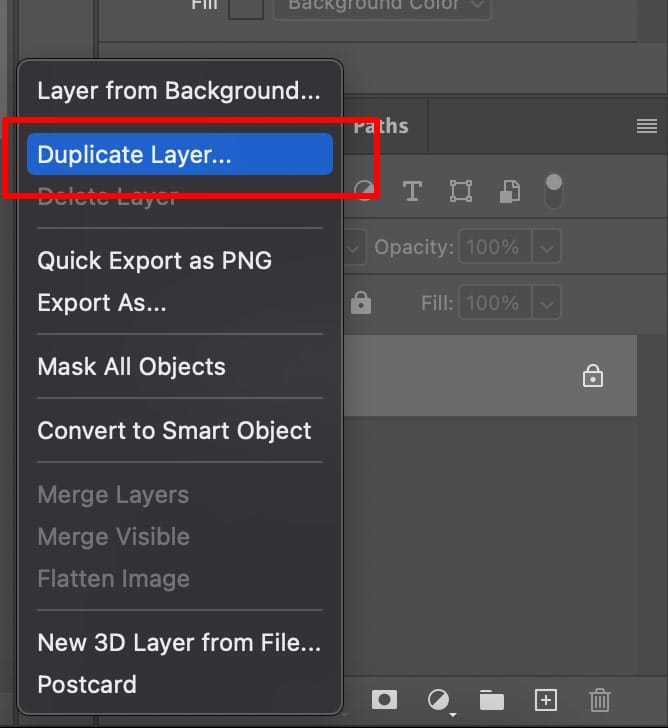
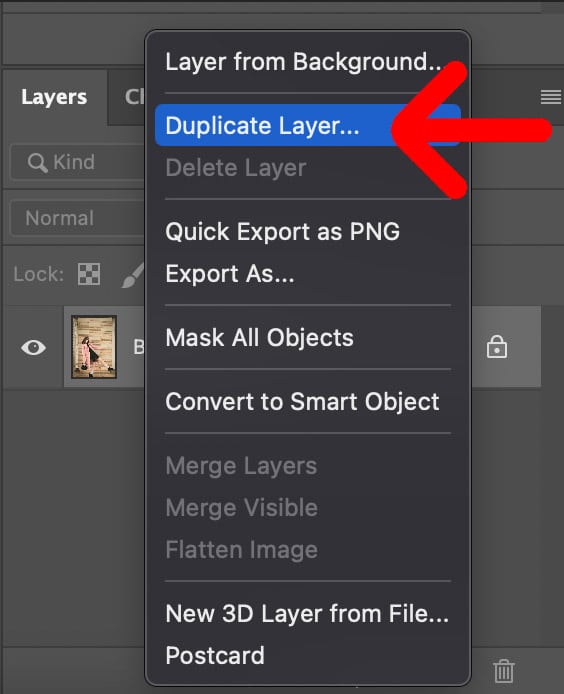
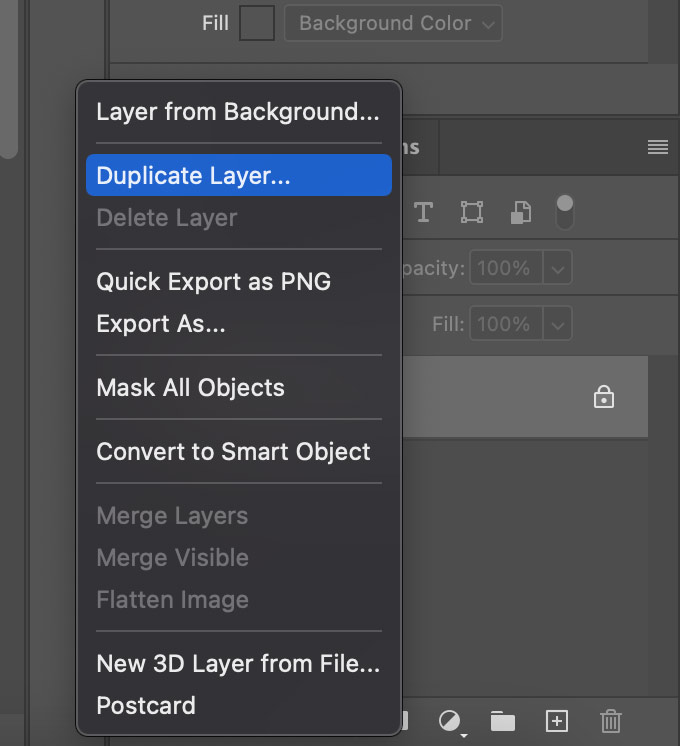
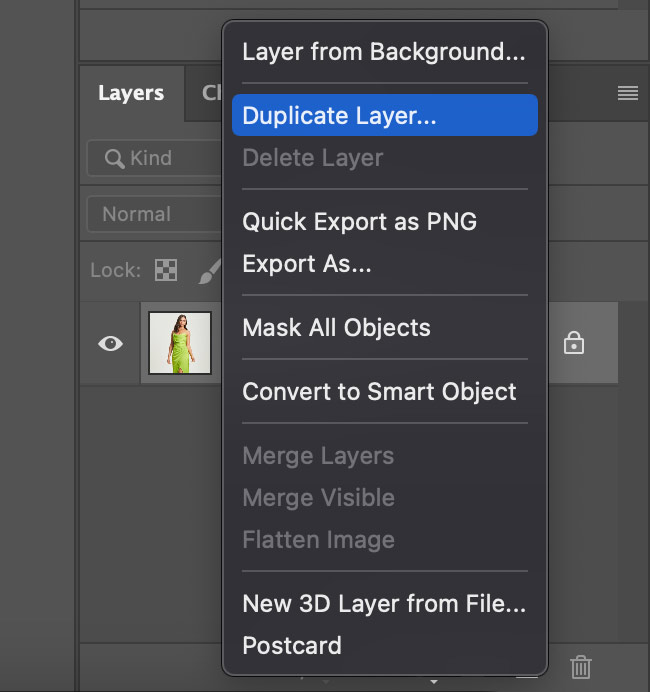
Step 2: Duplicate the Background Layer
To avoid making any permanent changes to your original image, duplicate the background layer by right-clicking it in the Layers panel and selecting “Duplicate Layer“.
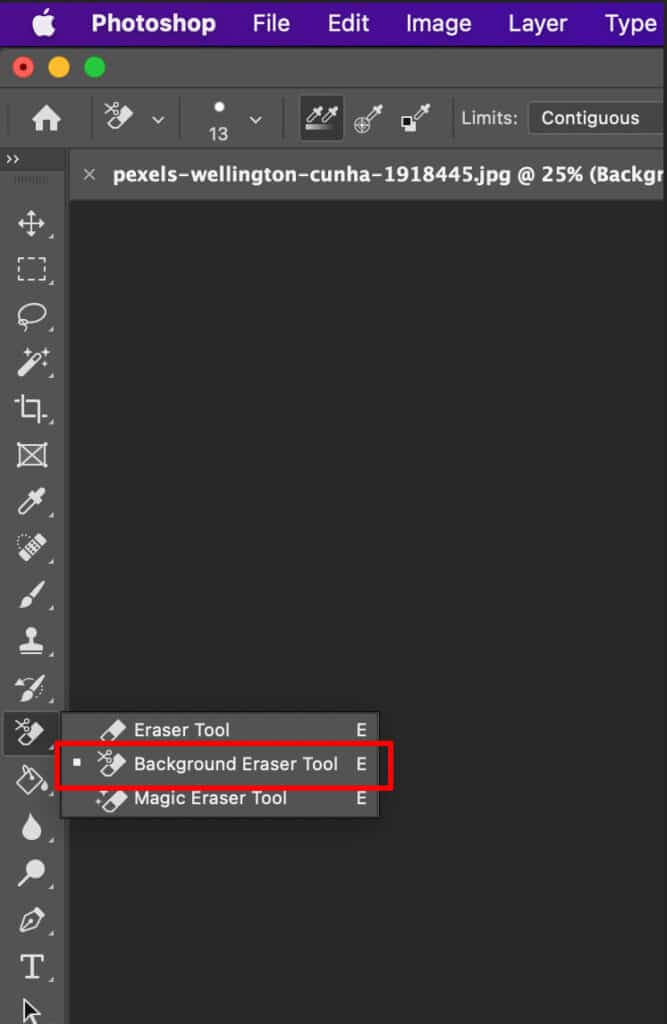
Step 3: Select the Background Eraser Tool
In the Photoshop Toolbar, select the Background Eraser Tool. If you can’t find it, click on the Eraser Tool to see more options and select the Background Eraser Tool from the list.
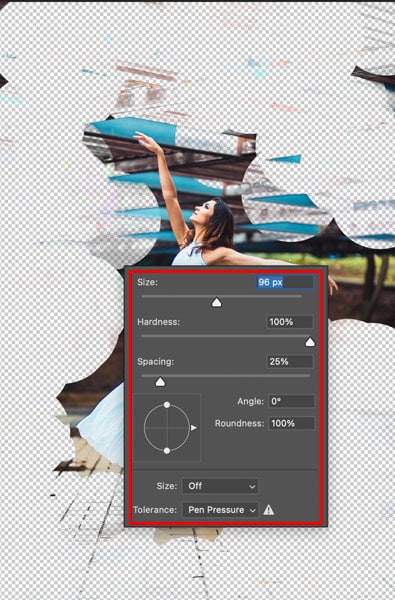
Step 4: Adjust the Background Eraser Tool Settings
In the Options bar, you can adjust the settings for the Background Eraser Tool to suit your needs. The most important setting is the Sampling option, which determines which pixels the tool samples to erase the background.
You can set it to “Continuous” to sample continuously while you drag or “Once” to sample only when you release the mouse button. You can also set the Limits option to “Discontiguous” to erase all similar pixels or “Contiguous” to erase only adjacent pixels.

Step 5: Start Erasing the Background
Click and drag the Background Eraser Tool over the areas of the image you want to erase. The tool will automatically erase any pixels that match the color you click on while leaving the rest of the image intact.
If you make a mistake or erase part of your subject, you can press “Ctrl + Z” (Windows) or “Cmd + Z” (Mac) to undo it.

Step 6: Refine the Edges
Once you have erased most of the background, you may notice some parts that need more refinement. To do this, reduce the tool size and zoom in on the image. Carefully erase any remaining parts of the background, and be careful not to touch the subject.
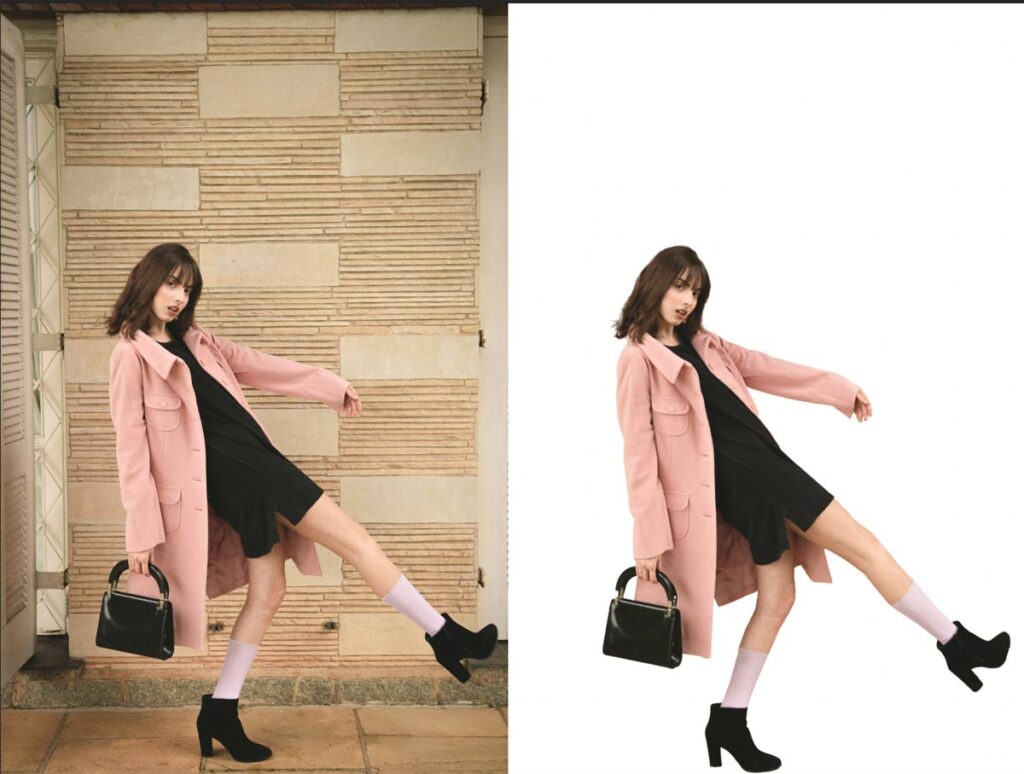
Final Image – Before and After

How to Make a Transparent Background in Photoshop Using the Magic Eraser Tool
To create a transparent background in Photoshop using the Magic Eraser tool, first duplicate the background layer, select the Magic Eraser tool, adjust its settings, and then remove the background. Below, we’ve highlighted the key steps:
Step 1: Open Your Image in Photoshop
To get started, open your image in Photoshop by clicking “File” > “Open” and selecting the image you want to work on.

Step 2: Duplicate the Background Layer
Next, duplicate the background layer by right-clicking on it in the Layers panel and selecting “Duplicate Layer“. This will create a new layer that we can work on without affecting the original image.
Step 3: Select the Magic Eraser Tool
In the Photoshop tools menu, select the Magic Eraser Tool. If you can’t see it, right-click on the Eraser Tool and select it from the drop-down menu.
Step 4: Adjust the Magic Eraser Tool Settings
In the Options bar, you can adjust the settings for the Magic Eraser Tool. You can set the Tolerance to determine how much of the background will be erased in one click.
If your background is a solid color, you can set the Tolerance to a higher number, but if your background has more variations in color, you may need to set it lower.

Step 5: Click on the Background to Remove It
With the Magic Eraser Tool selected, click on the background you want to remove. The tool will remove any pixels of a similar color to the area you clicked on.
You may need to experiment with the Tolerance setting to find the right balance between removing the background and preserving the edges of your subject.

Step 6: Clean Up Any Remaining Areas
After removing the bulk of the background, you may notice some areas that need more attention. You can switch back to the regular Eraser Tool to clean up any remaining bits of the background. You can also use the Zoom tool to examine the image in greater detail.
How to Make Background Transparent in Photoshop Using the Magic Wand Tool
The Magic Wand tool is a selection tool that automatically selects areas of similar color and tone within an image. It works by sampling the color of a clicked pixel and selecting all contiguous pixels within a specific tolerance range (sharing similar color values). Below, we’ve highlighted a clear process for using the Magic Wand tool to make the background transparent:
Step 1: Open Your Image in Photoshop
Open your image in Photoshop. You can do this by going to “File” > “Open” and selecting your image from your file directory.
Step 2: Duplicate the Background Layer
To avoid making any permanent changes to your original image, duplicate the background layer by right-clicking it in the Layers panel and selecting “Duplicate Layer.“
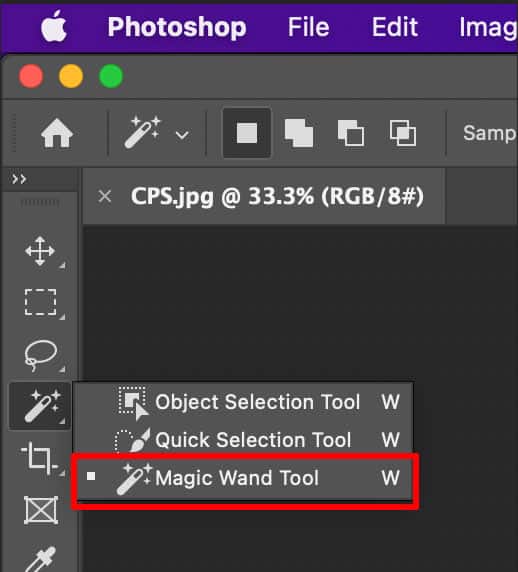
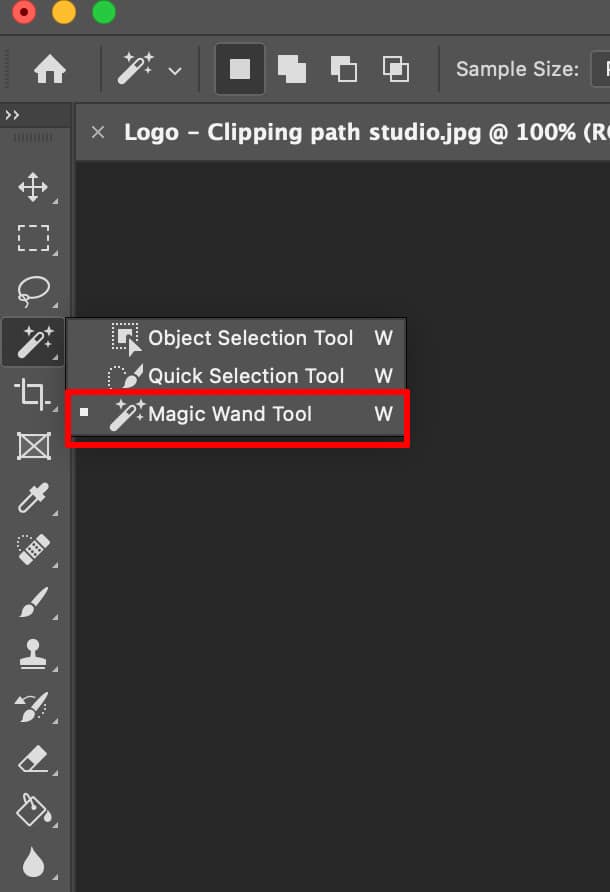
Step 3: Select the Magic Wand Tool
In the Photoshop tools menu, select the Magic Wand Tool. If you can’t find it, click and hold on to the Quick Selection Tool to see more options and select the Magic Wand Tool from the list.
Step 4: Adjust the Magic Wand Tool Settings
In the Options bar, you can adjust the settings for the Magic Wand Tool to suit your needs. The most important setting is the Tolerance option. You can increase the Tolerance to select more pixels or decrease it to select fewer pixels.

Step 5: Click on the Background to Select It
Click on the background of your image with the Magic Wand Tool to select it. The tool will select all similar pixels based on the Tolerance setting. If the selection isn’t perfect, you can hold down the Shift key and click on other areas to add them to the selection.

Step 6: Inverse the Selection
Once you’ve selected the background, you can invert the selection to select the subject instead. To do this, go to “Select” > “Inverse” or press “Shift + Ctrl + I” (Windows) or “Shift + Cmd + I” (Mac).

Step 7: Refine the Selection
After inverting the selection, you may notice some parts that need more refinement. To do this, reduce the tool size and zoom in on the image. Carefully use the Magic Wand Tool to add or subtract from the selection until you have a clean and accurate subject selection.

How to Create a Transparent Background Using the Lasso Tool in Photoshop
The Lasso tool is an effective freehand selection tool that allows users to draw a border around the desired area. You can select irregular shapes and areas where other selection tools (i.e., the Marquee tool) may not be suitable. It has three variations: the Regular Lasso, Polygonal Lasso, and Magnetic Lasso. For now, we’ve mentioned the Regular Lasso tool’s step-by-step guide to create a transparent background:
Step 1: Open Your Image in Photoshop
Begin by opening your image in Photoshop. You can do this by going to “File” > “Open” and selecting your image from your file directory.
Step 2: Duplicate the Background Layer
To preserve your original image, it’s best to duplicate the background layer. Right-click on the background layer in the Layers panel and select “Duplicate Layer”.
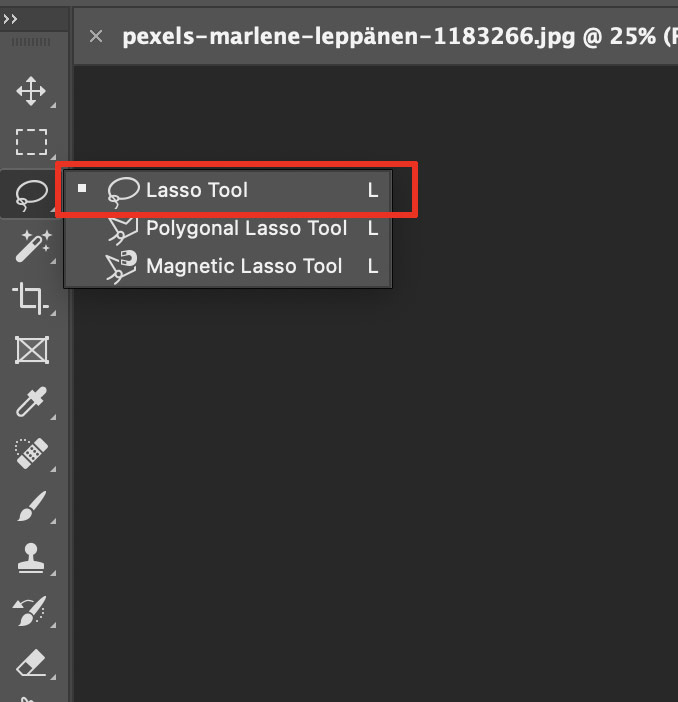
Step 3: Select the Lasso Tool
In the Tools panel, select the Lasso Tool. You can also use the keyboard shortcut “L” to access the tool.
Step 4: Trace Around the Subject
Use the Lasso Tool to trace around the subject. Start by clicking on one point on the subject’s edge and trace around it, clicking at regular intervals to create anchor points. Once you’ve completed the loop, the selection will close automatically.

Step 5: Refine the Selection
With the selection made, you may want to refine it to make it more accurate. You can do this by holding down the “Shift” key, clicking and dragging to add to the selection. You can also use the “Feather” option in the “Select” menu to soften the edge of the selection.

Step 6: Inverse the Selection
Once you’re happy with the selection, you can invert it to select the background. To do this, go to “Select” > “Inverse” or use the keyboard shortcut “Shift + Ctrl + I” (Windows) or “Shift + Cmd + I” (Mac).

Step 7: Delete the Background
With the background selected, press “Delete” to remove it from the image. This will reveal a transparent background.

How to Make a Transparent Background Using the Photoshop Pen Tool
To create a transparent background using the Photoshop Pen tool, follow these steps: create a path around the subject to make a selection, invert the selection to protect the subject, and then delete the background. Here’s a step-by-step guide for more details:
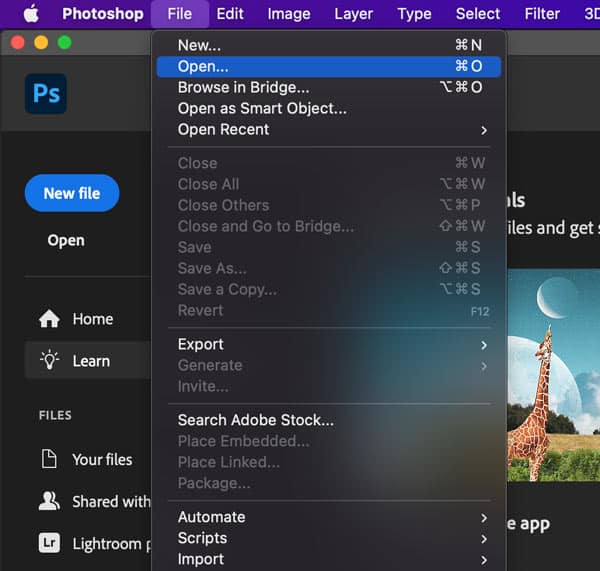
Step 1: Open Your Image in Photoshop
Let’s start by opening your image in Photoshop. You can do this by going to “File” > “Open” and selecting your image from your file directory.
Step 2: Duplicate the Background Layer
To avoid making any permanent changes to your original image, duplicate the background layer by right-clicking on it in the Layers panel and selecting “Duplicate Layer“.
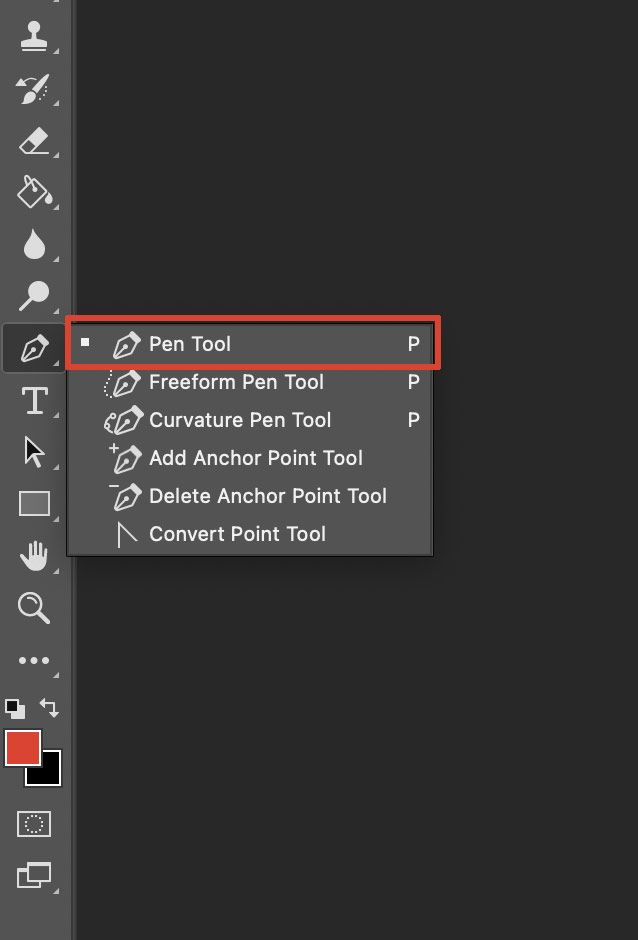
Step 3: Select the Pen Tool
In the Toolbar, select the Pen Tool. You can also use the keyboard shortcut “P” to access the tool.
Step 4: Trace Around the Subject
Use the Pen Tool to trace around the subject. Click and drag to create anchor points and use the handles to adjust the curve of the line. Be as precise as possible, especially around the edges of the subject.

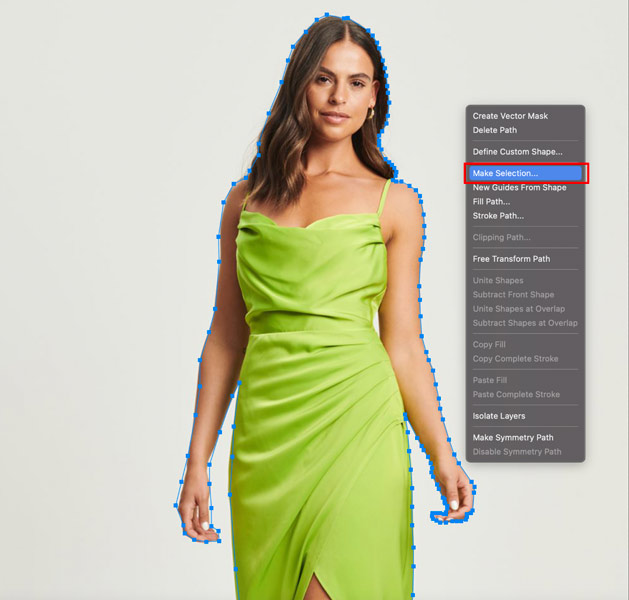
Step 5: Create a Path
Once you’ve traced around the subject, right-click on the path and select “Make Selection“. Set the “Feather” option to 0 pixels and click “OK“.
Step 6: Inverse the Selection
With the subject selected, you can now invert the selection to select the background. To do this, go to “Select” > “Inverse” or use the keyboard shortcut “Shift + Ctrl + I” (Windows) or “Shift + Cmd + I” (Mac).

Step 7: Delete the Background
With the background selected, press “Delete” to remove it from the image. This will reveal a transparent background.

How to Make a White Background Transparent in Photoshop
To make a white background transparent in Photoshop, you can use the “Remove Background” quick action or manually by using selection tools and the “Delete” key. Here, we’ve highlighted a step-by-step process to create a white background transparently:
Step 1: Open Your Image in Photoshop
Begin by opening your image in Photoshop. You can do this by going to “File” > “Open” and selecting your image from your file directory.
Step 2: Select the Magic Wand Tool
In the Toolbar, select the Magic Wand Tool. You can also use the keyboard shortcut “W” to access the tool. Make sure you adjust the tolerance according to how similar your background and subject are.

Step 3: Click on the White Background
Click on the white background with the Magic Wand Tool. You should see a selection around the white background.

Step 4: Inverse the Selection
With the white background selected, you need to inverse the selection to select the subject of the image. To do this, go to “Select” > “Inverse” or use the keyboard shortcut “Shift+Ctrl+I” (Windows) or “Shift+Cmd+I” (Mac).
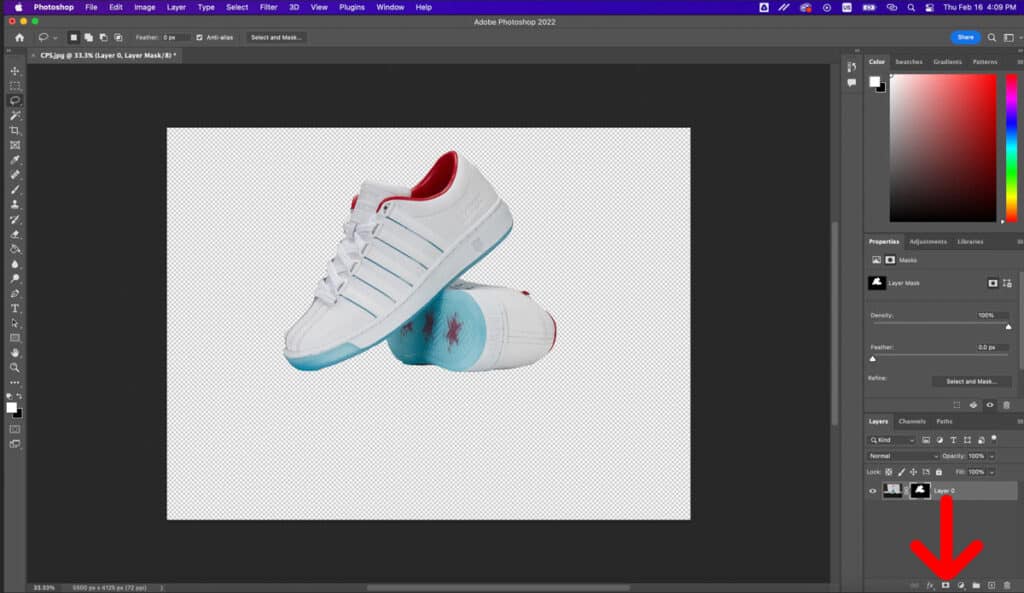
Step 5: Add a Layer Mask
With the active selection, click on the “Add Layer Mask” button at the bottom of the Layers panel. This will add a layer mask to your layer.

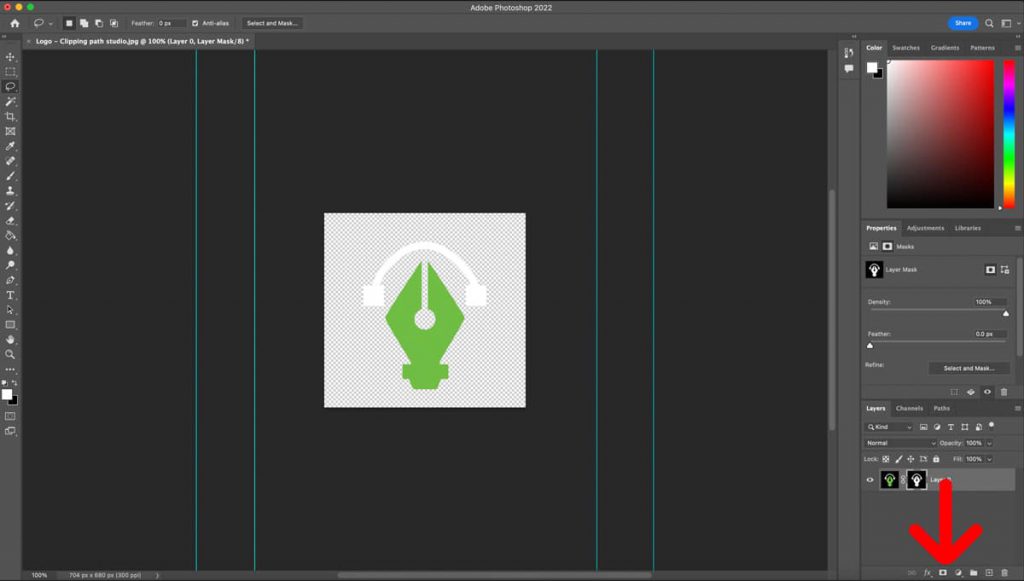
How to Make a Logo Transparent in Photoshop
To make a logo transparent in Photoshop, remove the background from your image using the Magic Wand tool, Quick Selection, or Pen tool to select or delete the background. After that, save your logo as a PNG file to preserve transparency. Here’s a more detailed breakdown:
Step 1: Open Your Logo in Photoshop
Begin by opening your logo in Photoshop. You can do this by going to “File” > “Open” and selecting your logo from your file directory.
Step 2: Select the Magic Wand Tool
Go to your Photoshop tool lists and select the Magic Wand Tool.
Step 3: Click on the Background
Click on the area around your logo. If multiple colors exist, press Shift and click to add to the selection.

Step 4: Inverse Your Selection
You’ll need to select the opposite of the image. Do this by using the keyboard shortcut “Shift + Ctrl + I” (Windows) or “Shift + Cmd + I” (Mac).

Step 5: Add a Layer Mask
Click the layer mask button at the bottom of your layers to remove the background.

How to Make a Simple, Transparent PNG Image in Photoshop?
To create a simple, transparent PNG image in Photoshop, first, you need to create a new document (go to File > New). Then, select the background using Photoshop’s Selection tools to remove it, delete it, hide it, or remove any remaining background layers. Here’s a step-by-step guide to make a transparent PNG image:
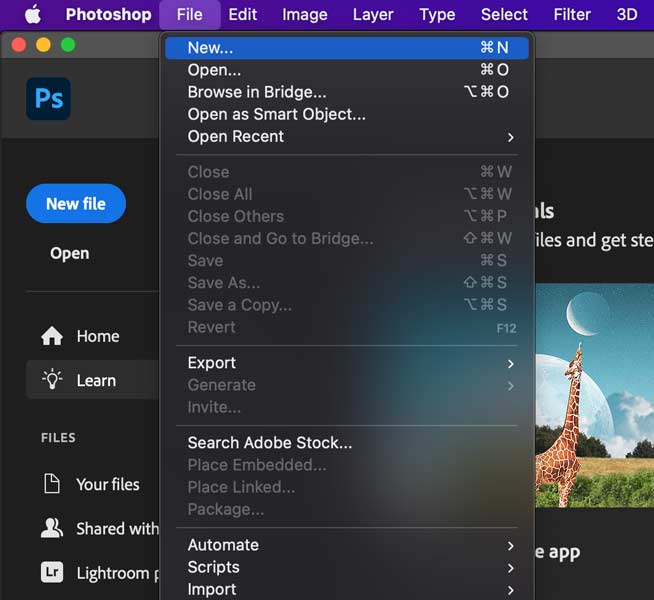
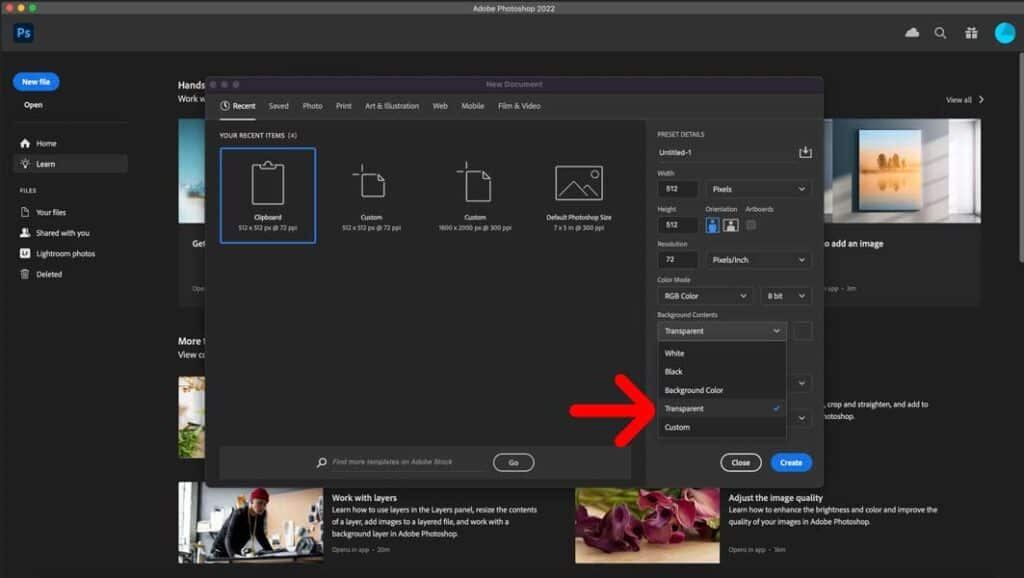
Step 1: Create a New Document
Start by creating a new document in Photoshop. Go to “File” > “New” and set the dimensions of your image. Set the background contents to “Transparent” in the “Background Contents” dropdown menu.
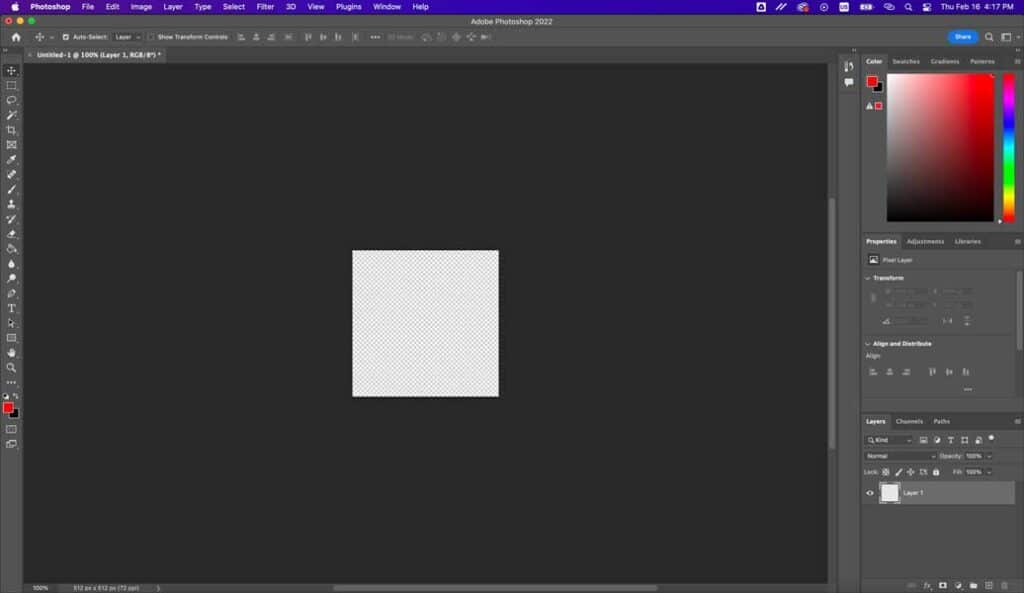
Step 2: Add Your Image or Text
Next, add your image or text to the new document. You can do this by using the “Place” command to import an existing image or create new text with the Text Tool.
Step 3: Adjust the Image or Text
Adjust the size, position, and color of your image or text.
Best Tips:
- For complex images, try to use a combination of tools for the best results.
- Refine your selections by adjusting the tolerance, feathering, or using the Refine Edge/Mask options for cleaner edges.
- When you work with a solid color, the Magic Wand tool is the best tool.
- But for the detailed image, use the Pen tool and create a path.
- Save the file as a PSD file to preserve the layers and transparency.
- When exporting, ensure that the “Transparency” option is enabled to save the transparent background.
- But for exporting a GIF, ensure to check the “Save Transparency”.
Watch the video tutorial on how to make an image background transparent in Photoshop by Joshua Malik.
What is a Transparent Image Background in Photoshop?
In Photoshop, a transparent image background refers to an image that has no visible color, pattern, or solid background, allowing whatever is behind the image (on a website, design, or video) to show through. It is a powerful asset in modern visual marketing, e-commerce, branding, and digital design. You gain full control over how and where the image is highlighted, making it adaptable to a wide range of platforms and formats.
What File Type is a Transparent Background Image?
GIF and PNG are the two file types that support transparency. The PNG file format is popular for web graphics due to its wide range of colors and transparency. In contrast, GIF images support 1-color transparency.
Are Transparent Background Images Better for Logos?
Yes, transparent background images are preferred for logos due to their versatility and professional appearance. This allows logos to blend with different backgrounds, preventing color clashes and ensuring consistent branding across digital platforms.
Why Should You Use Transparent Background Images for E-commerce?
You should use transparent background images for e-commerce to enhance product visibility, brand consistency, and conversion rates, as to background removal services, which allow you to highlight product key features. Here are all the key reasons behind using transparent background images for your e-commerce business or brand:
- Enhanced versatility: Transparent backgrounds are effective in displaying products on any background color or design without any distractions. For example, Nike’s shoe store, where you notice most of their shoes are displayed on a white background, highlighting key features.
- Professional & consistent product catalogs: Transparent backgrounds highlight the product, creating a clean, professional look that draws the user’s eye to the product details, variations, and features that build potential buyers’ trust.
- Faster loading, Better performance: Transparent PNG images can be optimized and are smaller in size than high-resolution images with complex backgrounds. For example, Sephora, the popular beauty brand, uses transparent images to display their skincare, hair, and other beauty accessories to give buyers a realistic feel.
- Versatility across platforms & designs: Product transparent image backgrounds are perfect for website product pages, social media posts, email marketing banners, and marketplace listings (Amazon, eBay, Etsy, etc).
- Supports creative & seasonal campaigns: Transparent background images are easy to repurpose into themed campaigns – whether it’s for black Friday, winter/summer sales, or new arrivals.
Where Can You Use Transparent Background Images Effectively?
You can use transparent background images in different digital marketplaces, including:
- Profile pictures: Using transparent profile images and signatures gives a polished, professional look on LinkedIn, company websites, or digital documents.
- E-commerce product listings: Transparent images are popular in online stores like Amazon, eBay, and others to showcase products without any distractions. Also, its clean background helps to grab online buyers’ attention to the item and fulfill their needs.
- Web design & landing pages: Transparent images can be easily layered on any background, ideal for hero banners, feature sections, and custom backgrounds.
- Social media marketing & advertising: You can use transparent background images in Instagram stories, Facebook ads, YouTube thumbnails, and Pinterest pins.
- Logos and branding: Transparent logos are used on websites, business cards, packaging, and promotional materials, considering the background color or design. This reinforces brand identity and professionalism.
- Video production & animation: In video production, transparent PNGs are used for overlay animations, lower thirds, product showcases in motion graphics, and more.
- Icons, stickers & watermarks: You can effectively add transparent icons and stickers to apps, websites, or printed materials without visual clutter. And image watermarks help you to maintain aesthetics.
