
Retouching skin in Photoshop can come with many challenges. There is a fine line between over-editing skin and under-editing skin. However, using the methods outlined in this blog post will help you edit skin effectively that looks naturally done.
I’ll show you how to improve the quality of your portraits by removing blemishes, cleaning up the skin, and more without losing quality. You will learn how to smooth skin in Photoshop while retaining all the necessary details using the high pass filter and more amazing methods to obtain perfectly retouched skin.
What you’ll learn in this article
- 1 Why Should You Do Skin Retouching in Photoshop?
- 2 Why is It Important to Keep Skin Texture in Photoshop?
- 3 Why the High Pass Filter is Great for Smoothing Skin
- 4 How to Smooth Skin in Photoshop?
- 4.1 Step 1: Open Your Desired Image
- 4.2 Step 2: Duplicate Your Image Layer Two Times
- 4.3 Step 3: Turn Off the Top Layer
- 4.4 Step 4: Add a Gaussian Blur
- 4.5 Step 5: Re-activate the Top Layer
- 4.6 Step 6: Adding the High Pass Filter
- 4.7 Step 7: Change the Layer Style
- 4.8 Step 8: Removing the Blemishes
- 4.9 Step 9: Remove the Redness
- 4.10 Step 10: Finalizing the Skin Tone
- 5 Why You Should Work with a Professional to Help with Your Skin Retouching in Photoshop
- 6 Final Thoughts
Why Should You Do Skin Retouching in Photoshop?
Photoshop is the perfect tool for skin retouching. This method of retouching shows you how to smooth skin in Photoshop without messing up the quality of your image. There are other retouching apps that some people use, like Facetune, but I would highly recommend not using these applications in a professional setting. The final product is compressed and can’t compete with the amazing qualities of Photoshop.
Why is It Important to Keep Skin Texture in Photoshop?
Retaining your skin texture while editing in Photoshop makes the image more realistic. Sometimes when you edit, you can lose important attributes of the skin, making it look over-retouched and fake. I’ll walk you through the important steps to smooth skin in Photoshop while keeping all of the skin texture.
Why the High Pass Filter is Great for Smoothing Skin
A high pass filter keeps the information in an image with a high frequency while reducing the information with a low frequency. The element of the high pass filter is designed to make the center pixel brighter than the pixels around it. Using the high pass filter, we retain as much information as we need to keep the photo more realistic.
I’ll touch on the high pass filter more in this tutorial, but it’s good to note why we use this form of skin retouching before we get too far.
How to Smooth Skin in Photoshop?
Learning how to smooth skin in Photoshop can help you remove pesky pimples, freckles, dust particles or any other marks to get that beautiful, perfect portrait every time. Whether it’s wedding photographs or model shoots, you can use professional skin retouching in Photoshop.
Some people worry that skin-enhancing techniques can give your photographs a fake appearance, but if you do it right, you won’t have to worry about that. In this tutorial, we are going to discuss some of the most popular Photoshop skin retouching methods. In the end we will discuss which one is the best. Let’s begin.
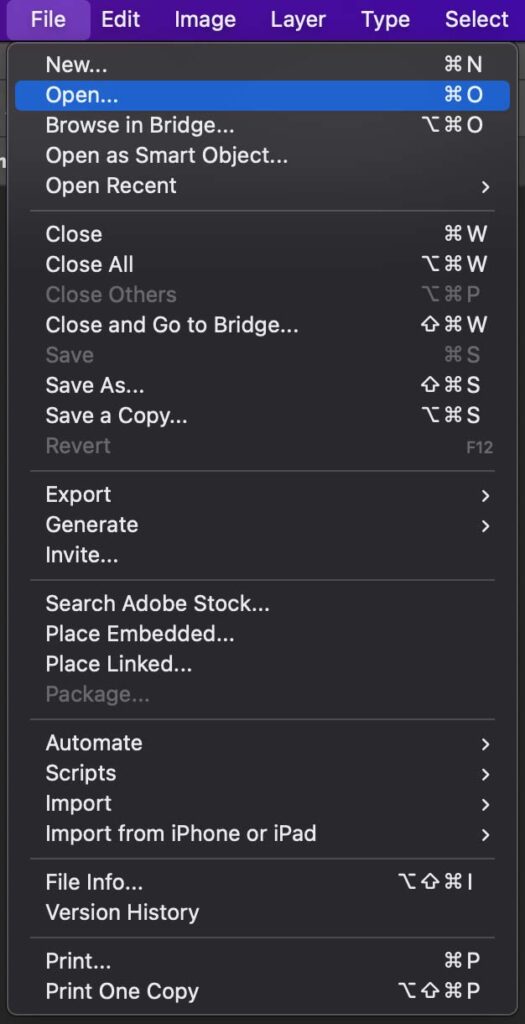
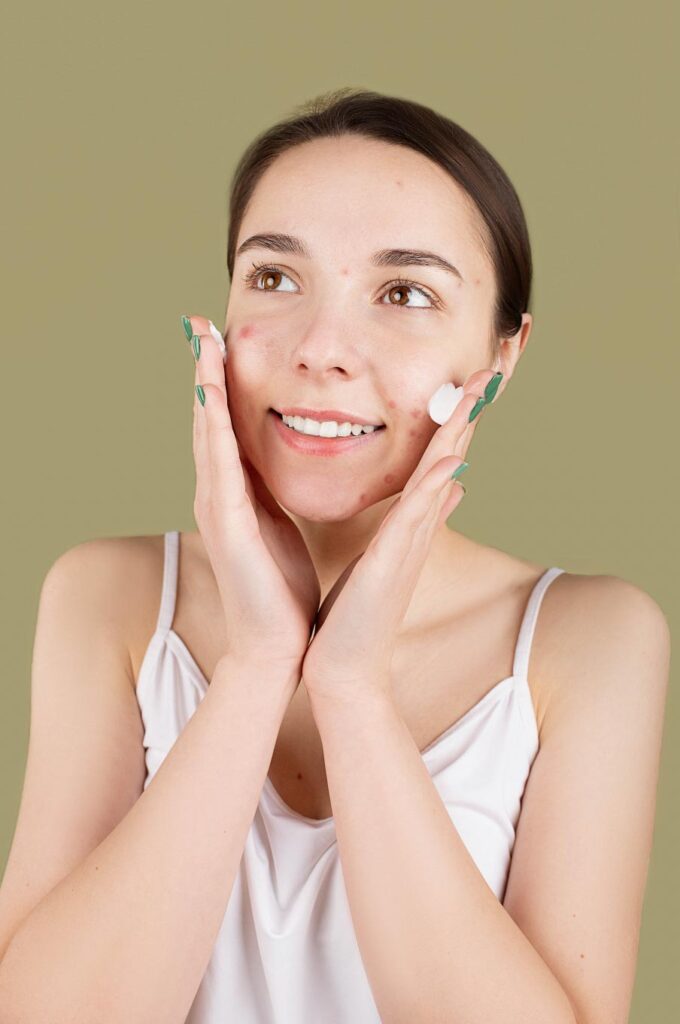
Step 1: Open Your Desired Image
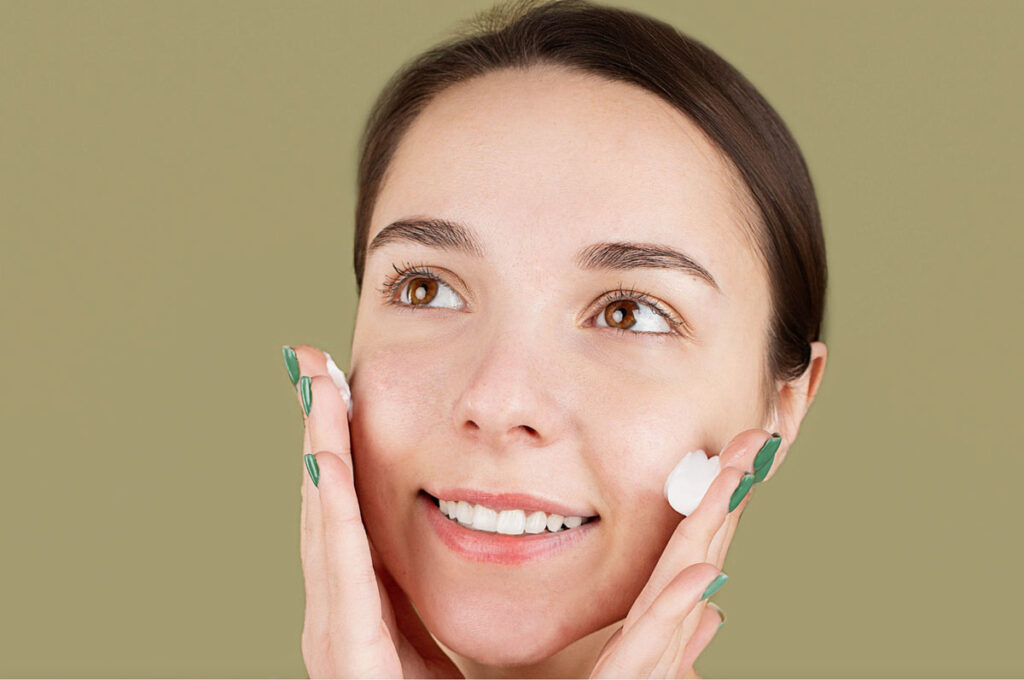
Once Photoshop is open, go to File > Open and select your image.
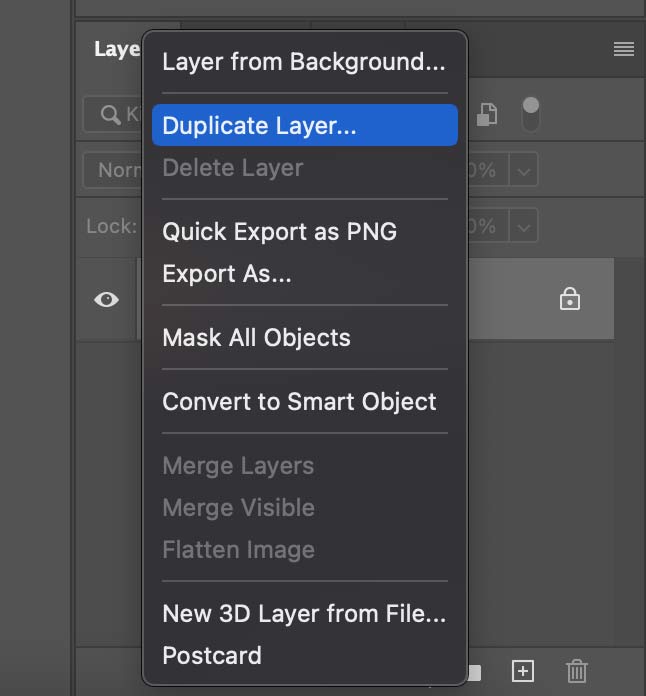
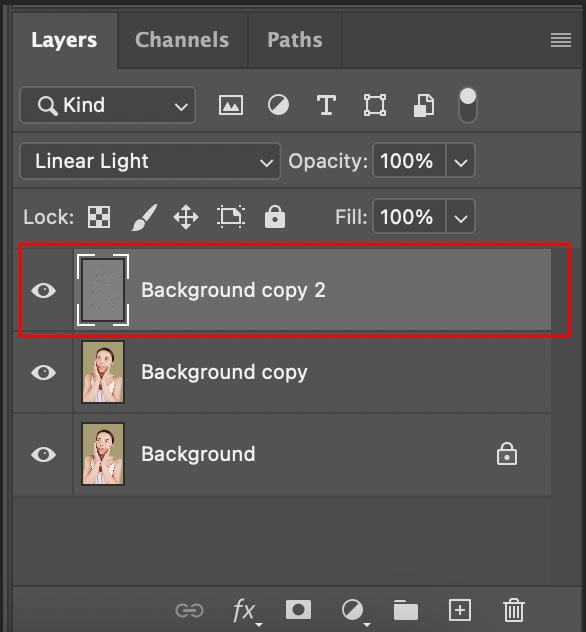
Step 2: Duplicate Your Image Layer Two Times
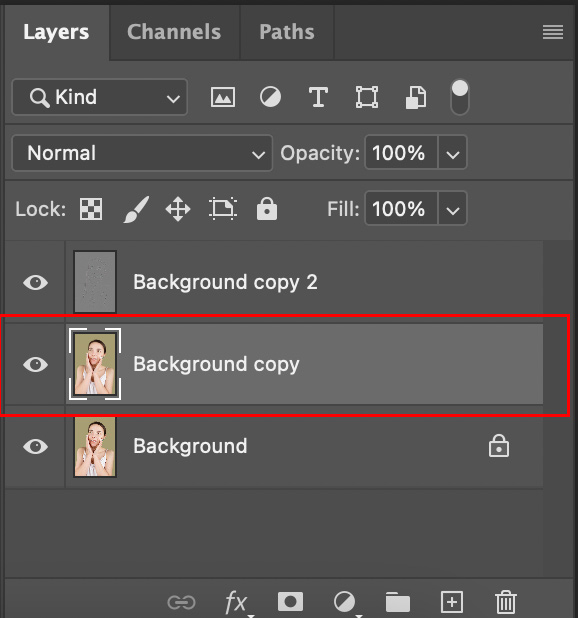
Right-click on the background layer. Select “duplicate layer.” Repeat this step twice so you have three identical layers.
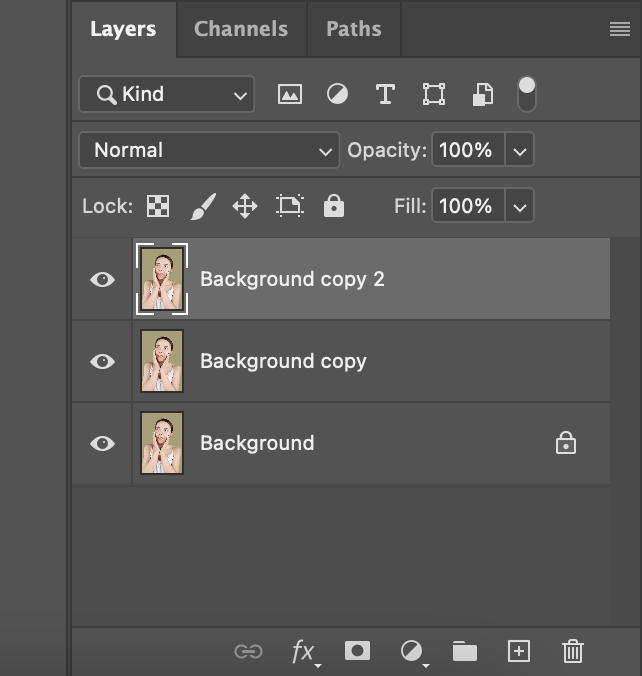
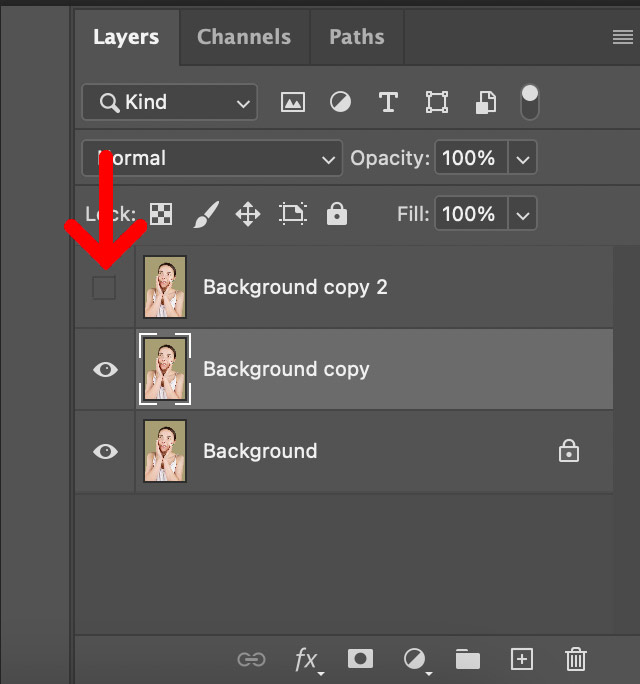
Step 3: Turn Off the Top Layer
Click on the eye next to the very top layer. In this demonstration, we are hiding “Background copy 2.” Once it is deselected, select “Background copy” or the second layer.
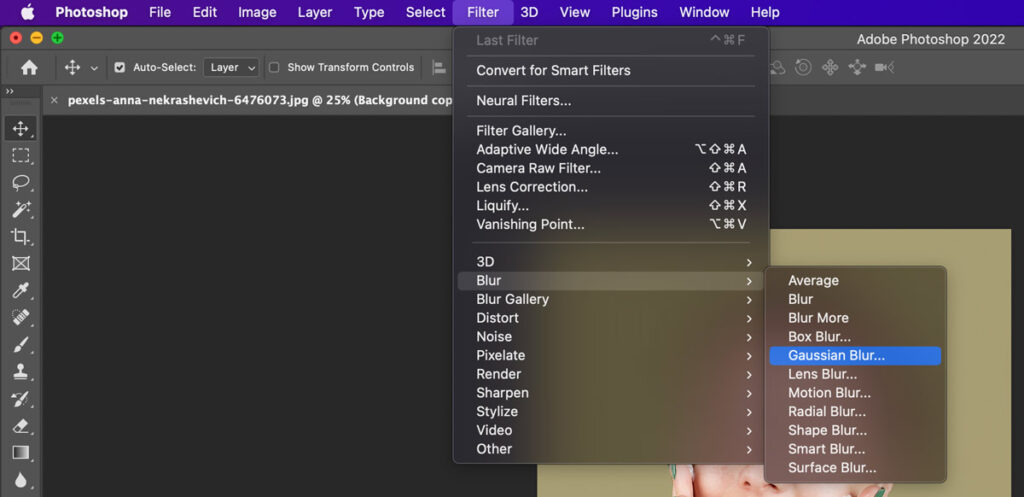
Step 4: Add a Gaussian Blur
Go to File > Blur > Gaussian blur.
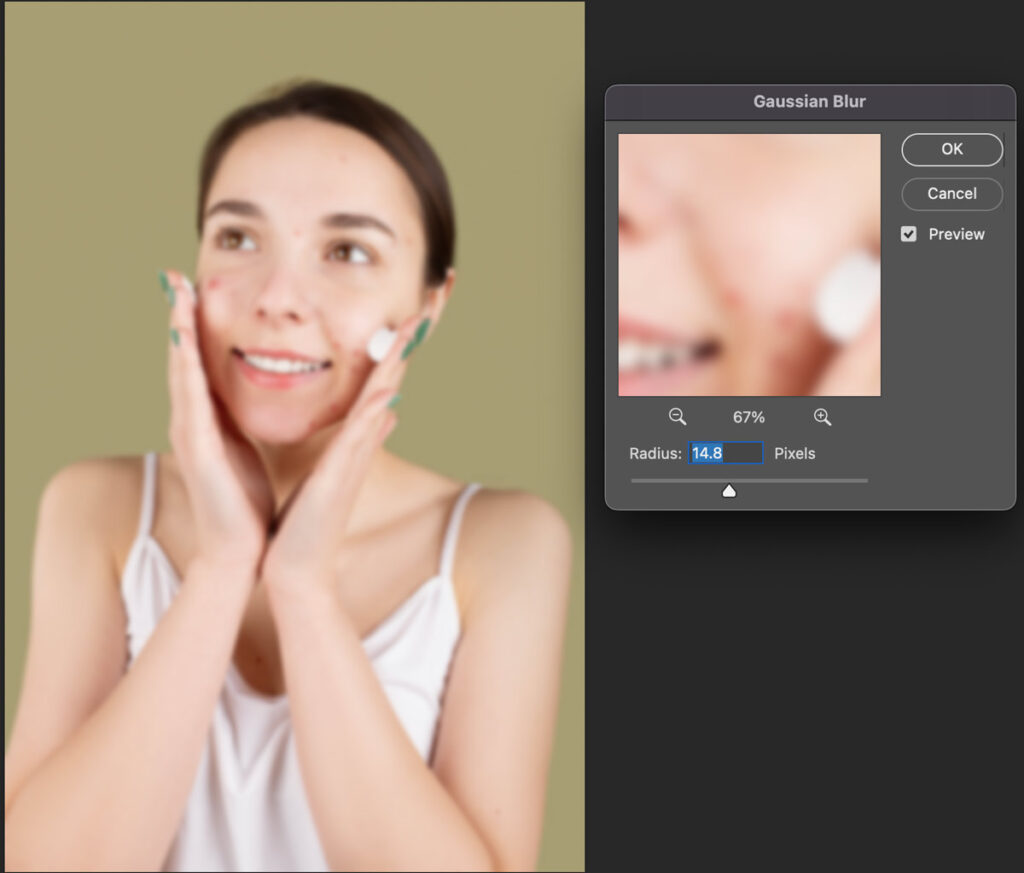
Once you have opened the window, adjust the amount of the blur so the shades of the color blur together. This will vary on each image, but if you follow along with the reference image, adjust your radius to 14.1.
When the shades begin to blend and you are happy with it, press “OK.”
Step 5: Re-activate the Top Layer
In your layers tab, re-select the eye next to your top layer. In this demonstration, I reselected the layer named “Background copy 2.”
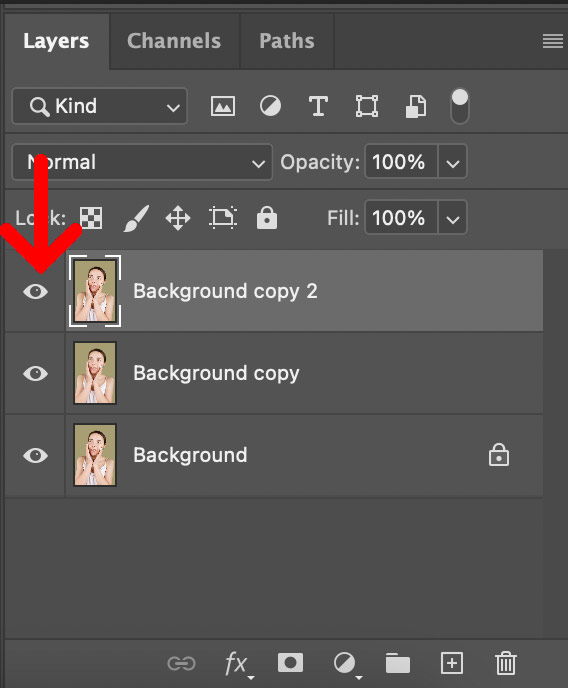
Once it has been reactivated, make sure that the layer is selected.
Step 6: Adding the High Pass Filter
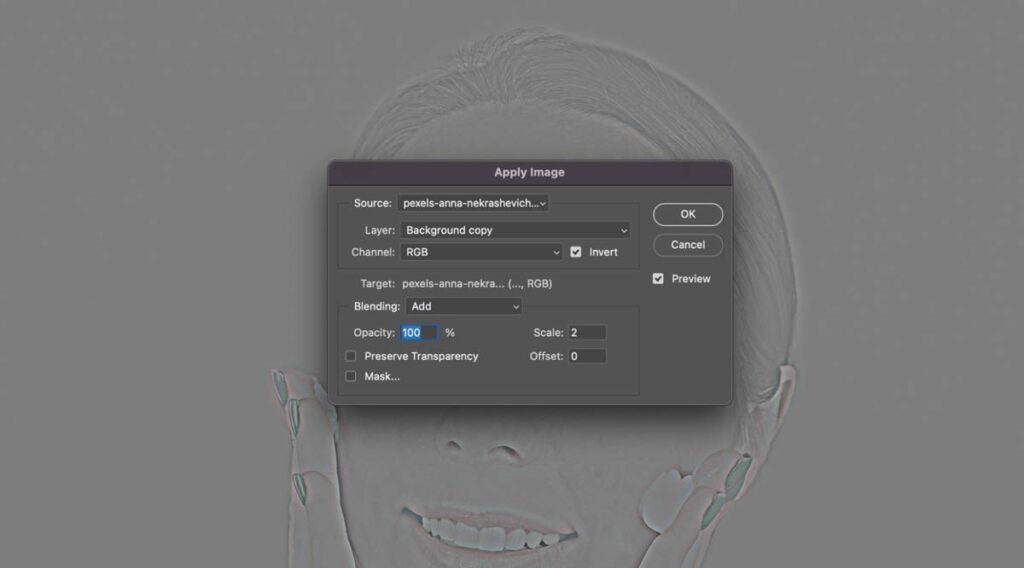
Go to Image > Apply Image
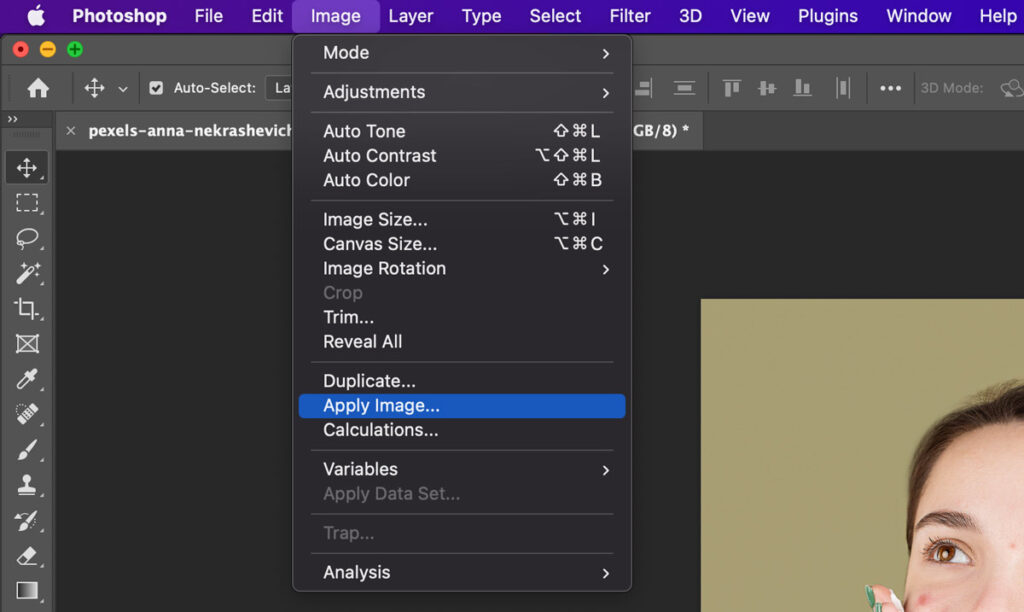
Once the menu has opened, click on Layer > Merged.
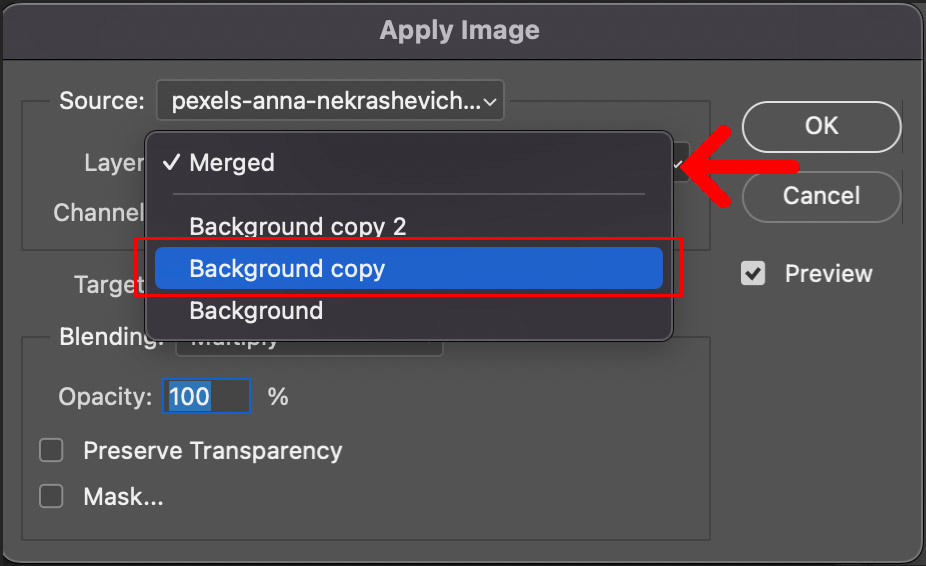
Select the second layer. In this example, it is “Background copy.”
Once selected, you will change the channel from “Multiply” to “Add.”
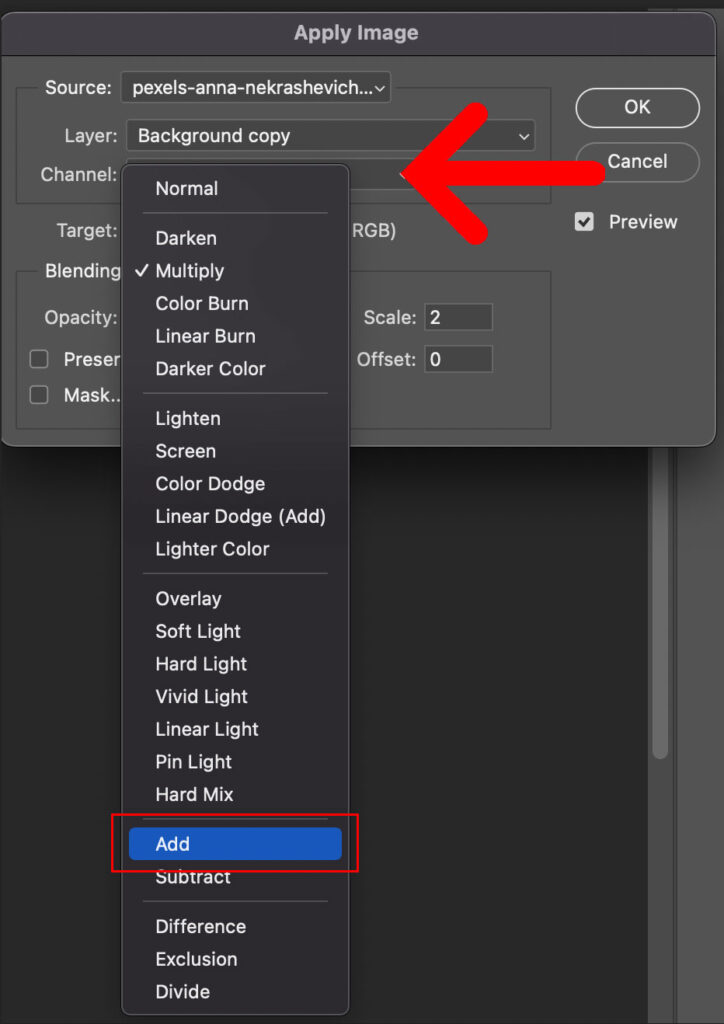
Ensure “invert” has been checked and the scale set to 2. Leave the rest of the settings as they are.

Press “OK.”
Your image will look completely grey, like this:
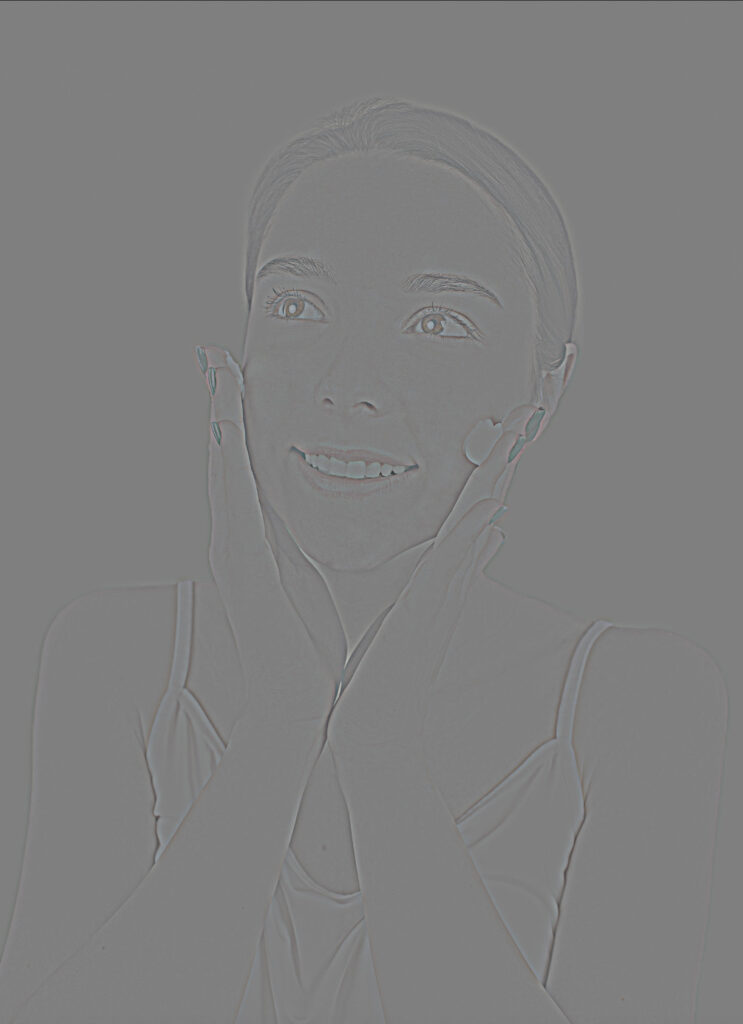
Don’t worry, your image is completely fine when it looks like this! This is exactly why the high-pass filter is great for smoothing skin. We’ve now successfully separated the skin texture from the tones of the skin.
Step 7: Change the Layer Style
Make sure the top layer is selected. In this demonstration, the top layer is called “Background copy 2.” Click the dropdown menu and change the style from “normal” to “linear light.”
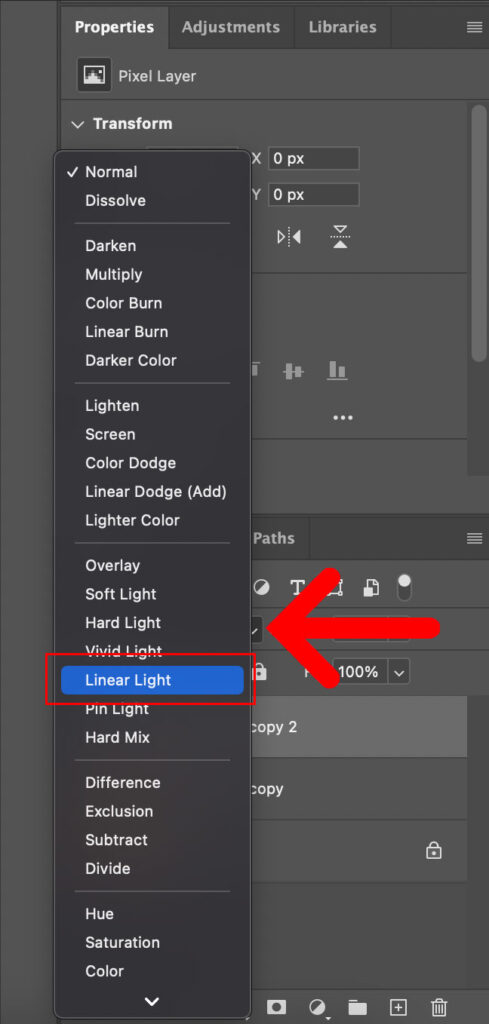
Once you select “linear light,” your image will look like this:
Step 8: Removing the Blemishes
First, select the top layer. In this demonstration, the layer name is “Background copy 2.”
Then go to your toolbar and select the “patch” tool.
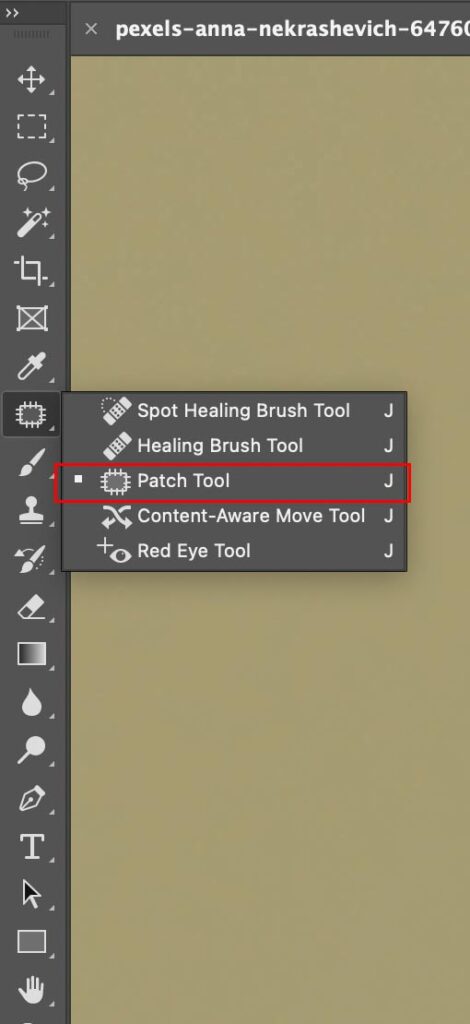
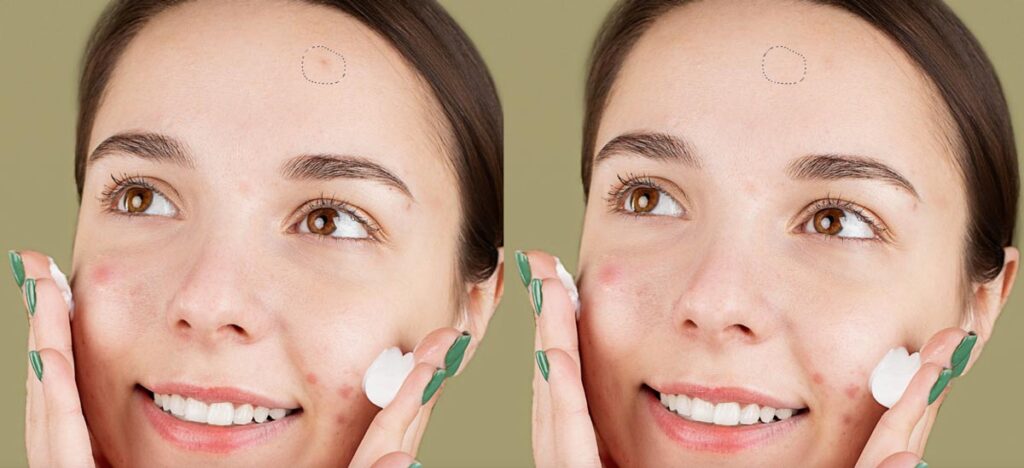
Go around the skin, circling each of the blemishes. This is how to smooth skin in Photoshop while keeping all the great texture.
While this isn’t a noticeable difference, we will correct the color later on in the process. We are just removing the different bumps in the texture of the blemishes.
Continue removing the blemishes around the model’s face. Sample skin near the blemish to ensure the angles are similar.
Step 9: Remove the Redness
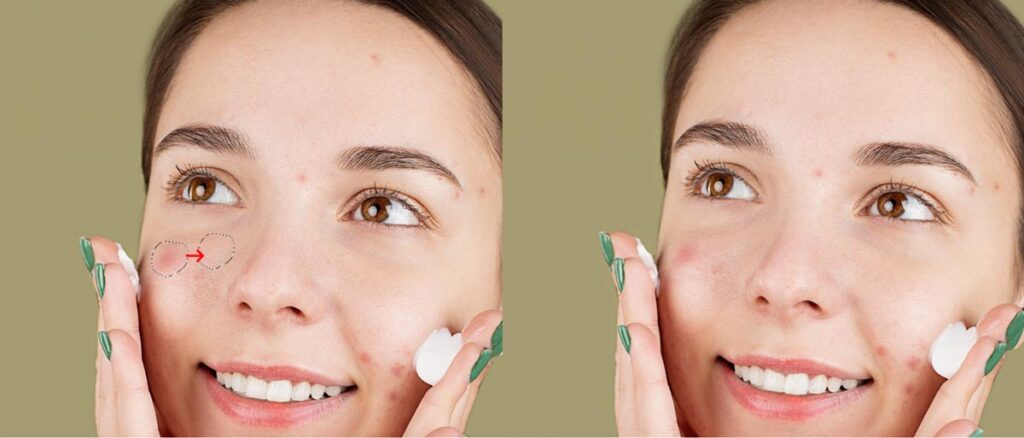
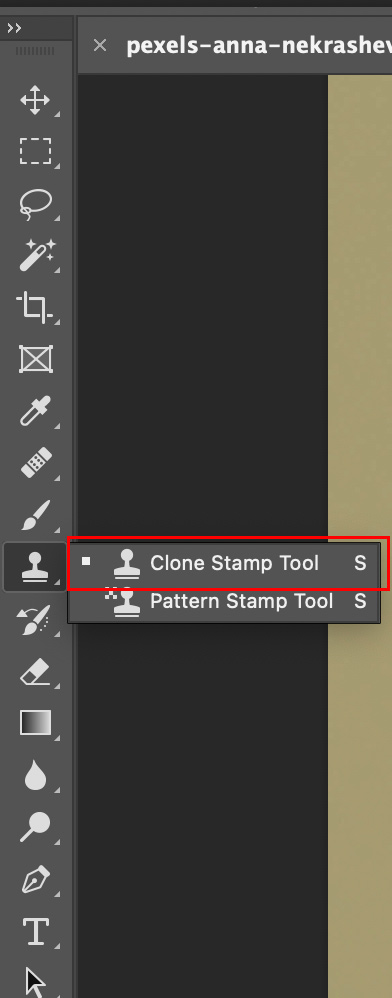
Once you remove all of the blemishes and their texture, it’s time to remove the redness. We will do this by selecting the “Stamp” tool. The goal is to now subtly stamp over the undertones, while preserving the texture. This is how to smooth skin in Photoshop in a way that doesn’t disrupt the texture and gives a flawless tone throughout.
First, make sure your top layer is selected. In this demonstration, that is “Background copy .”
Next, go to your toolbar and select the “Stamp” tool.
Select the soft brush, and change the hardness of the stamp to 0%. You can do this by right-clicking the image.
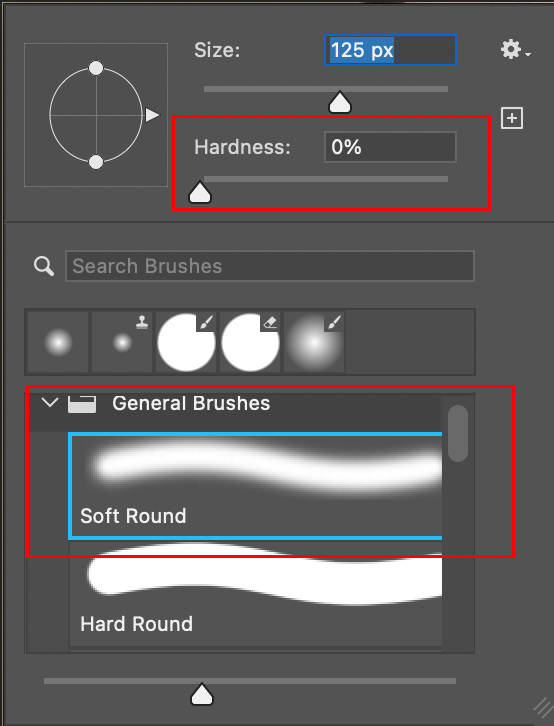
Once you have a soft brush that is at 0% hardness, you can adjust the size of the brush. Now it is time to stamp around the redness to make it the same shade as the skin around it.
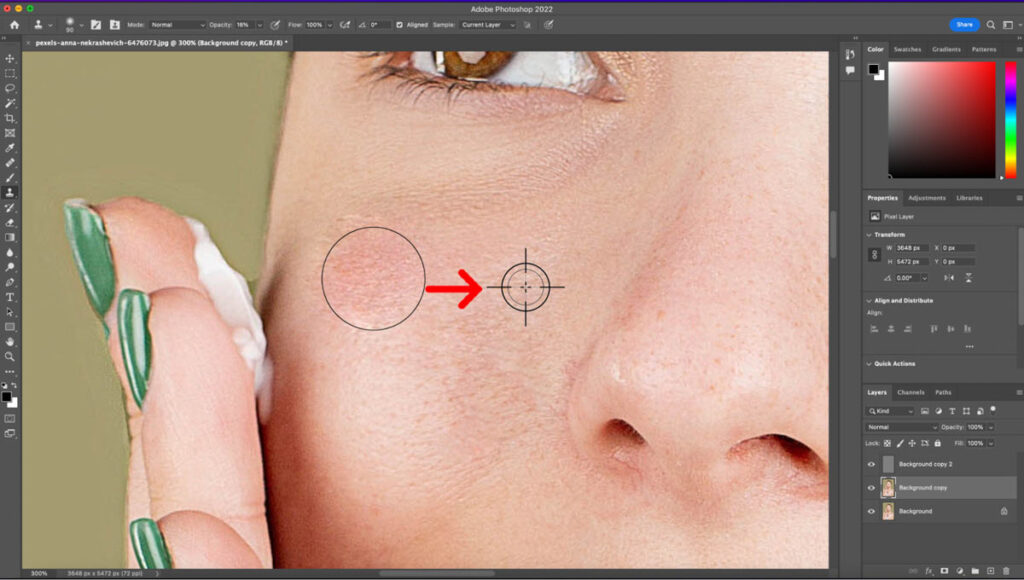
Do this by moving your brush and adjusting its size. Once you are happy with the size, hold “shift” and a crosshair will come up. Select the skin tone next to the blemish. You can see in the reference image above that the stamp was selecting the skin right next to it. That way, the shade is almost identical.
Repeat this process until all of the blemishes are removed.
Step 10: Finalizing the Skin Tone
Once you remove all of the blemishes, it’s time to retouch the skin tone. Make sure your second layer is still selected. In this example, it is “Background copy.”

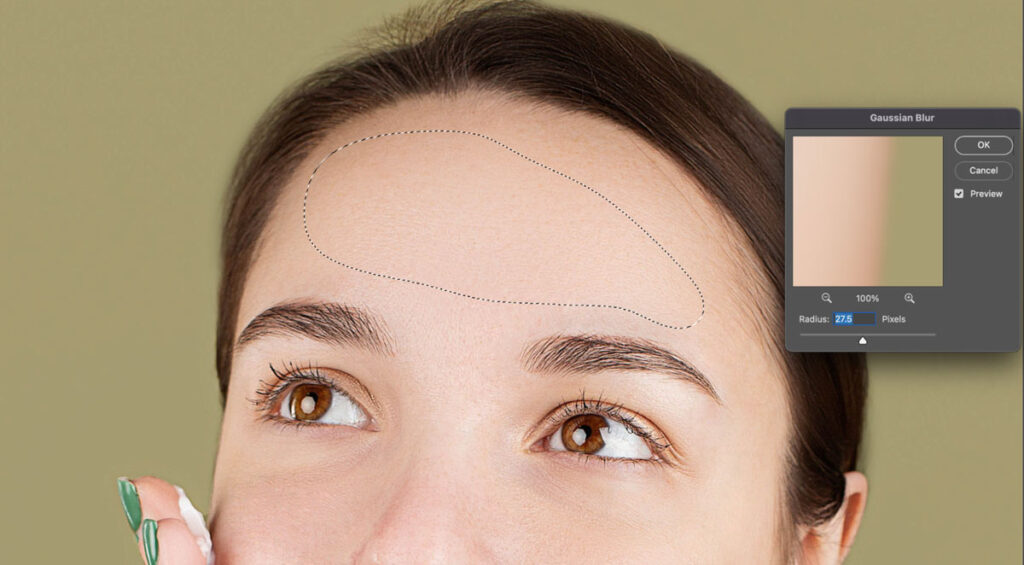
Next, go to the “lasso” tool on your toolbar.

Once selected, it’s time to blur the undertones of the skin.
Make your lasso selection in one area of the face. You can do this by clicking and dragging the lasso in a circle.
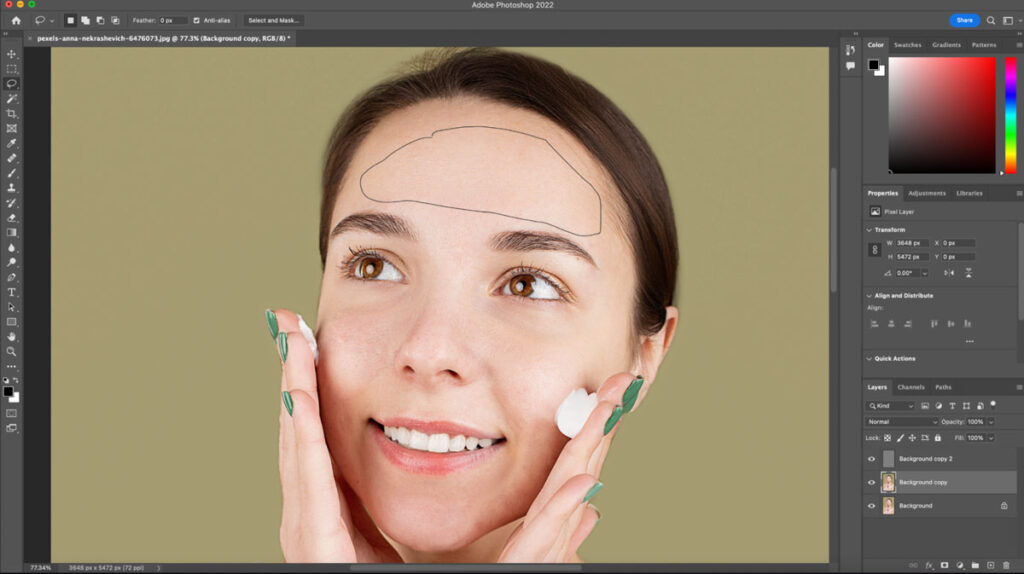
Next, right-click on your selection and select “feather.”
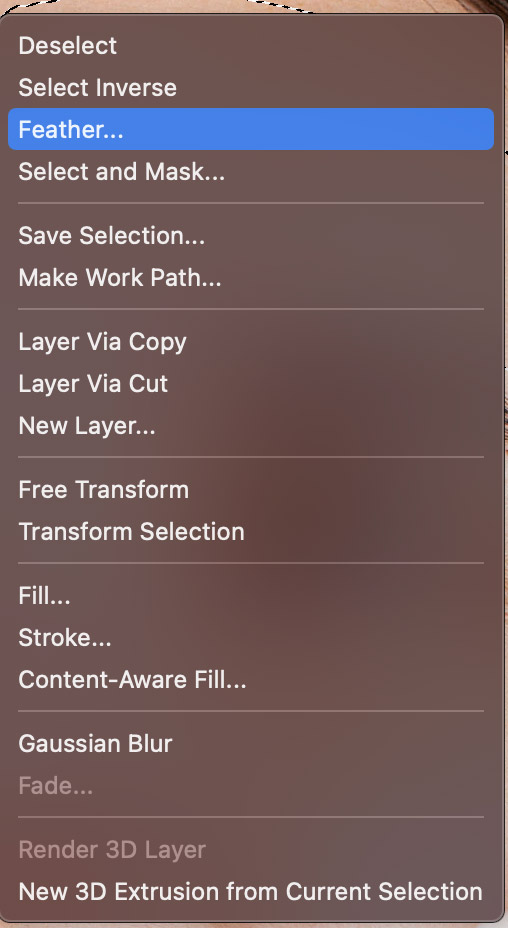
Change the feather selection between 20-30. This will make it so there are no harsh lines on your image.
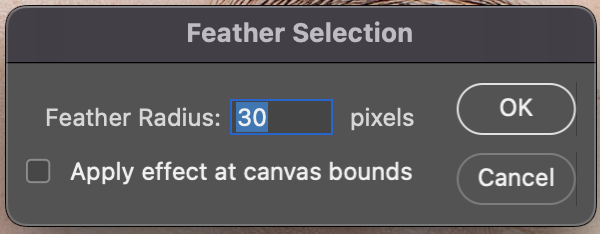
Press “OK” when you are happy with your feather radius.
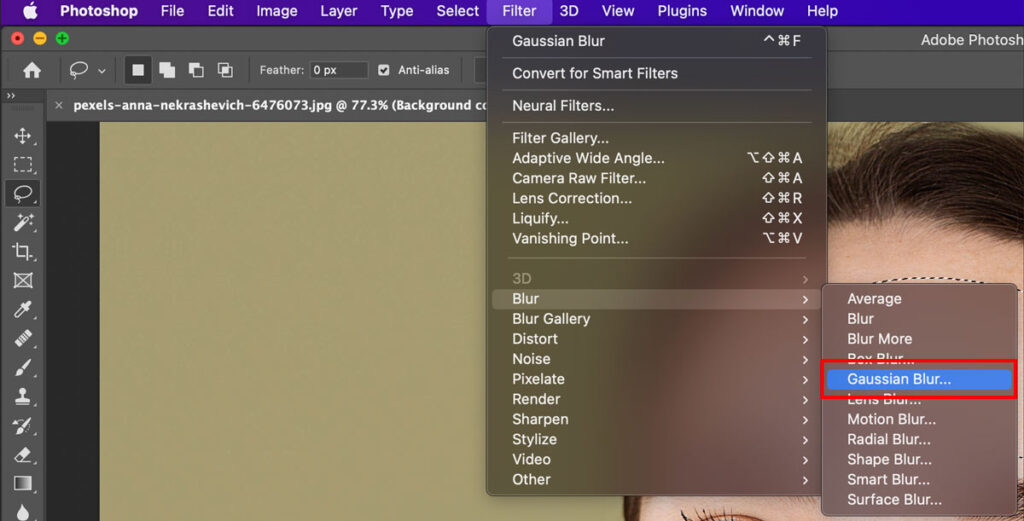
Next, go to your menu bar. Select “filter” then “blur” then “Gaussian blur.”
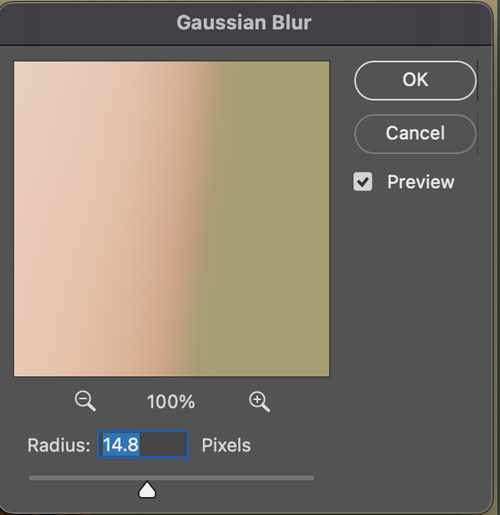
Play around with the radius until you see the preview on the screen and you’re happy with the result. This is how to smooth skin in Photoshop without losing any of your quality. You’re utilizing the second layer for the shades of the skin tone while retaining the skin texture from the top layer.
Repeat that process throughout the image. Make sure to select similar areas.
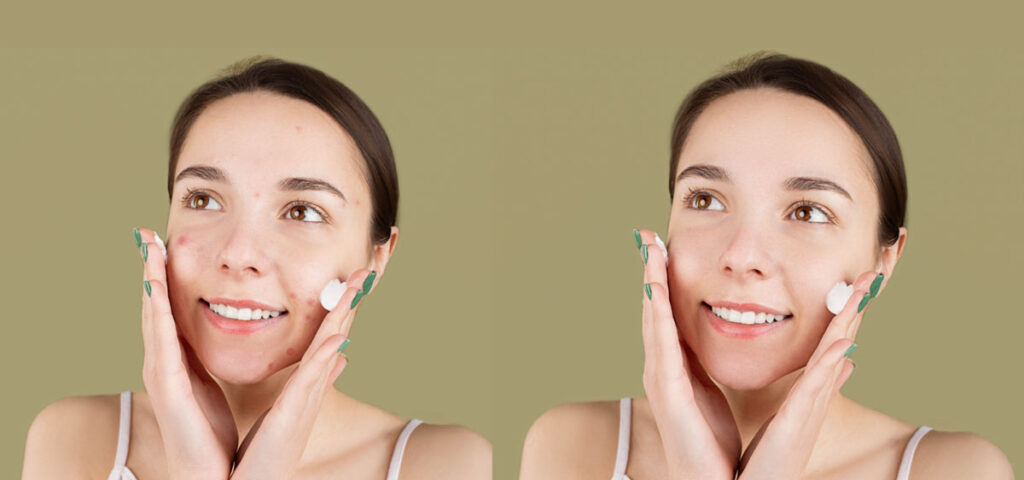
And that’s how to smooth skin in Photoshop without losing your skin texture! As you can see, we successfully removed the blemishes, evened out the skin tone, and made the image look picture-perfect without losing quality.
Watch Video Tutorial:
Why You Should Work with a Professional to Help with Your Skin Retouching in Photoshop
There are many reasons why you should work with professional editors to help you with your skin retouching needs.
They Have Extensive Experience with Photoshop
While there are some apps out there to help you with basic skin retouching, nothing comes close to skin retouching in Photoshop. A professional understands how the face shape is, where the lighting is coming from, and what the final shot should look like. Working with a professional is a great investment that will give you images of the highest quality.
They Know How to smooth skin in Photoshop Without Losing Quality
One unfortunate side effect of not using a professional is smudging together the pixels of the image. The problem with this type of editing is that the more you process the image, the less real it looks. A professional editor using Photoshop to retouch skin will provide you with perfect images that are not unrealistic.
They are Great at Turning Around High-quality Work in Short Amounts of Time
Professional editors are well-versed with the software, which means your photos will come back to you fully edited in much less time than if you edit them yourself. They work quickly and pay attention to your deadlines, ensuring you have high-quality images ready to go.
I highly recommend looking into working with our team of professional photo retouchers. They have a proven track record of providing clients with perfectly retouched images.
Final Thoughts
There are many ways how to smooth skin in Photoshop, but I showed you one of the most effective ways. Using the high pass filter helps retain the skin’s texture while evening out the skin tone. This way of retouching gives you the most control over your images and doesn’t tarnish the quality.
This detailed guide covered everything you need to know, but you must practice what you have learned here. So, don’t forget to keep practicing and soon you will become a pro at Photoshop.
