
Image cut out means separating a part of an image or removing the background to create a transparent one. The photo cut out image process allows working on a certain part of an image while keeping the rest of the area untouched.
If you’re a photographer or editor, you need to know how to cut out an image in Photoshop to enhance the focus on the object, improve the visual appeal, and make it professional. There are 10 best ways to cut out images, such as the Pen tool, Quick Selection tool, Object Selection tool, Rectangular/Elliptical Marquee tool, Lasso tool, Magic Wand tool, Layer Mask, Adobe Photoshop Express, Background Removal tool, and Color Selection tool.
This article will describe all these quick and easy ways to cut out an image in Photoshop, and when you should use the tools.
How to Cut Out an Image in Photoshop – 10 Best Ways
You can cut out an image in Photoshop using different selection tools, such as Pen tool, Object Selection tool, Lasso tool, Marquee tool, and so on. Here, we’ve highlighted the 10 best individual ways, including:
How to Cut Out an Image in Photoshop With the Pen Tool?
The pen tool gives complete freedom to work manually on an image. You’ll select the edge of an image by creating a clipping Path. The fineness of the selection depends on how accurate your selection is.
Step 1: Open Adobe Photoshop
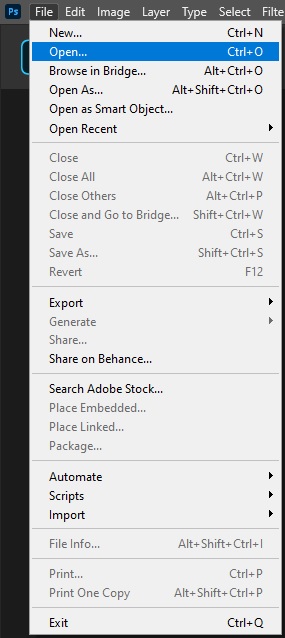
Open your edited image in Adobe Photoshop. To do this, go to the “File” option (at the top left) and select the “Open” option to choose an image from your computer.
Step 2: Duplicate Layer
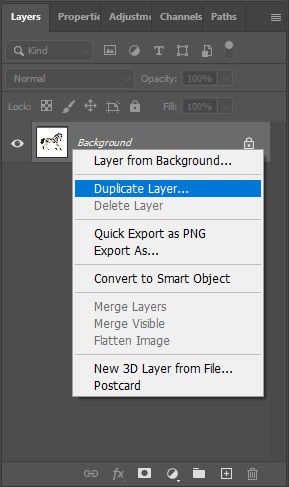
Before editing, ensure to Duplicate Layer to make a copy of the layer so that your changes may not affect the final image.
Step 3: Take the Pen Tool
Choose the Pen tool from the toolbar on the left or use the keyboard shortcut key “P” to quickly select it.

Step 4: Create Clipping Path
After taking the pen tool, at first, zoom your image to see the edges clearly. You can keep it around 200% or 300%. This will allow you to draw the path accurately. Now, start pointing to the edges of the object you want to cut out. These points are called Anchor points. Keep marking till you reach the starting point.
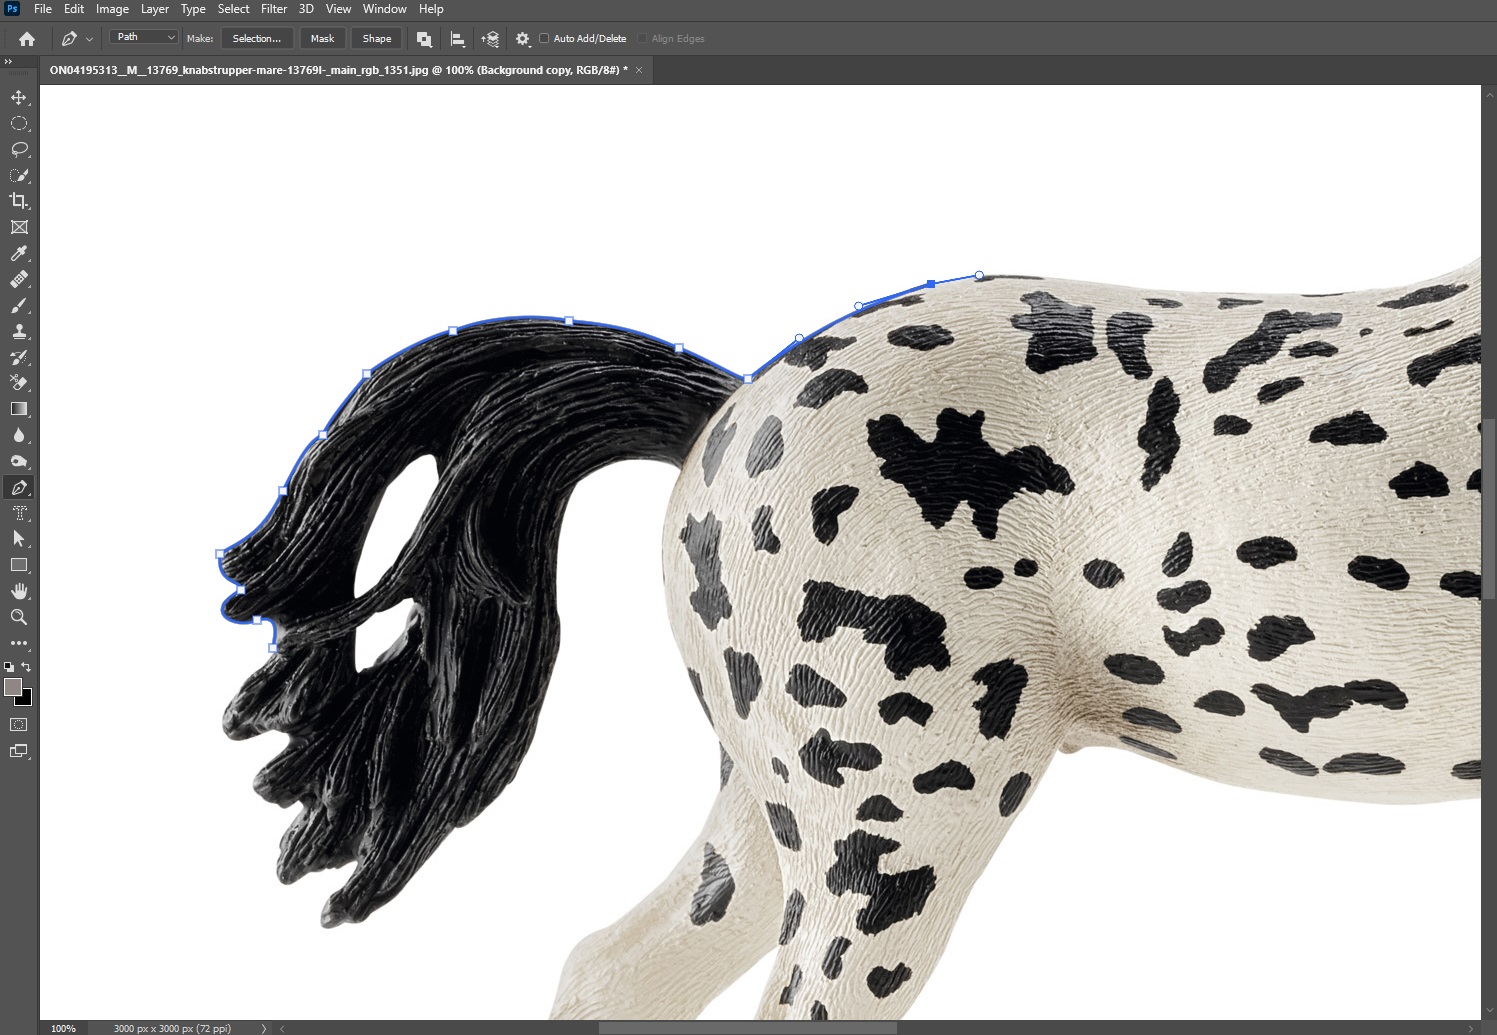
Try to create the path accurately so that it looks natural.

Step 5: Make Selection
When you’re done creating the clipping path, right-click on the image. Now, click on Make Selection. This will select the area.
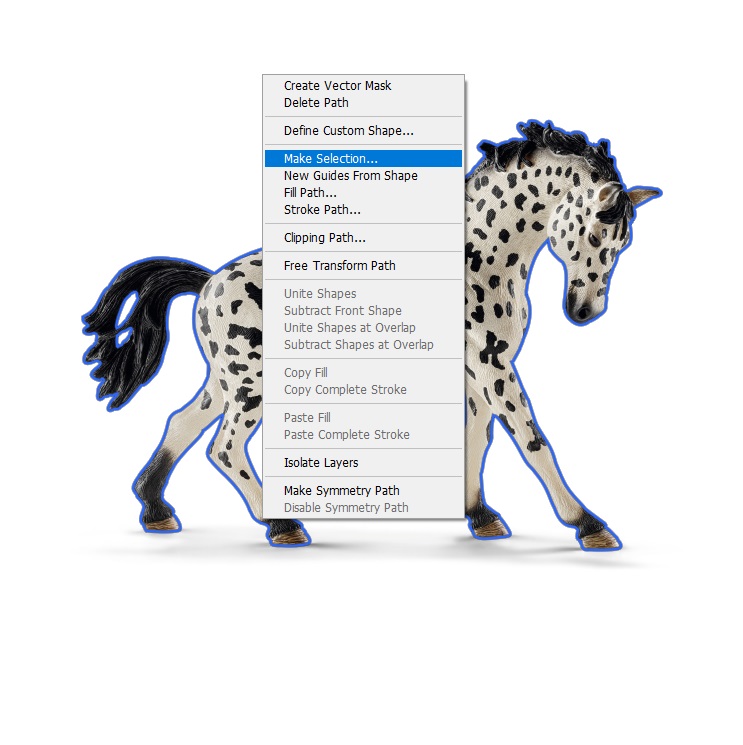
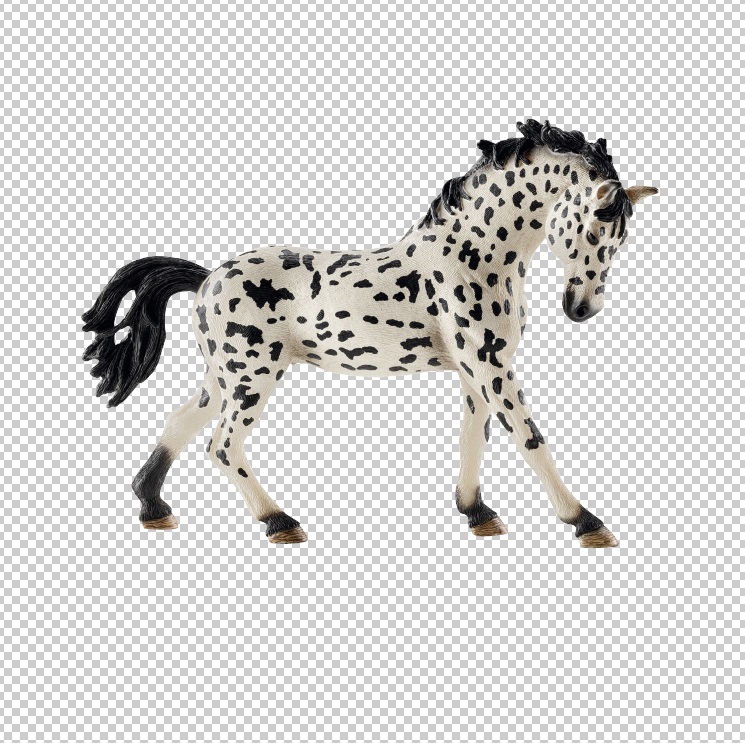
Now you’ve separated the selected part from the image. You can use the selected part in whichever way you want.

Step 6: Cut Out Image Background
Now, your selection is ready. This part is now separated and can be used in whichever way you want. You can hide the object by pressing delete, or add a Layer Mask to remove the photo background, or do any other corrections you want to make.
When Should You Use the Pen Tool to Cut Out an Image?
You should use the Photoshop Pen tool to cut out an image when you need maximum precision for subjects with complex edges, clean, well-defined selections, and so on. You can adjust anchor points and path directions with the Pen tool. Here’s when and why the Pen tool is the best choice:
- Creating sharp, smooth, and professional-looking cutouts. Ideal for products, logos, or objects.
- Complex or curved shapes of objects, like jewelry, cars, or electronics.
- High-resolution work or when you need to ensure the selection remains smooth and scalable.
- When you want to edit, you have the flexibility to refine your selection.
How to Cut Out an Image in Photoshop Using Quick Selection?
Quick Selection works with artificial intelligence, which can select a subject automatically. You don’t even need to tell it which one is the subject. This can automatically identify the subject.
Step 1: Open Your Image
After opening the Adobe Photoshop software, drag and drop the image you want to cut out, or click the “File” option (at the top left) and choose the “Open” option.

Step 2: Duplicate Layer
Right-click on the Background Layer and select Duplicate Layer to make a copy of the layer. Or you can do it by pressing Ctrl+J on the keyboard.

Step 3: Take the Tool
From the toolbar menu, select the Quick Selection tool. It’s at the upper portion of the toolbar.
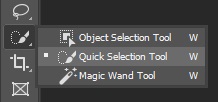
Step 4: Select Subject
Now, click on Select Subject from the top menu.

Now, this tool will automatically find and select the subject from the image.
Step 5: Edit Selection
As this is artificial intelligence, there is a good possibility that it might not be able to select the area accurately. So, you’ll have to work on the selection. Go to the top menu and adjust your brush size according to your needs.

If you want to include an area inside your selection, just click there. And if you want to remove an area from the selection, press Alt on your keyboard and then click on the area.

Step 6: Cut Out Image Background
Now, your selection is ready. This part is now separated and can be used in whichever way you want. You can hide the object by pressing delete, or add a Layer Mask to remove the background, or do any other corrections you want to do.

Looking for the best ways to remove unwanted objects in Photoshop? Check out our detailed tutorial and master the techniques for flawless, professional edits!
When Should You Use the Quick Selection Tool to Cut Out an Image?
You should use the Quick Selection tool to cut out an image where you need to make fast, accurate selections with well-defined edges and contrasts. Here’s when you can use this tool:
- When you want to detect similar textures and colors, this tool is effective for this editing.
- When you want quick edits and bulk processing.
- When you want to add or remove from selections, make it flexible for refining the selection.
- Isolating elements foregrounds or backgrounds in an image.
How to Cut Out an Image With the Object Selection Tool?
Object Selection Tool is also a kind of automatic tool. You’ll have to draw a box around the subject to indicate which area you want to select. And then, this tool will select the subject inside the box.
Step 1: Open Adobe Photoshop
Go to File and click on Open to open the image file you want to work on.

Step 2: Select the Quick Selection Tool
Don’t forget to duplicate the layer before cutting out the image to keep the original image file in the intake.

However, use the keyboard shortcut key “W,” and you will notice that the Object Selection tool has been selected. Under the tool, you get access to the Quick Selection tool.

Step 3: Mark the Area
Draw a box around the subject you want to cut.

This will select the area.

Step 4: Edit Selection
Like before, there is a possibility of not getting an accurate selection as this is an automatic tool. So, select the Quick Selection Tool again and correct the selection by adding or removing the area from the subject.
Step 5: Cut Out Image Background
Now, your selection is ready. This part is now separated and can be used whichever you want. You can hide the object by pressing delete, adding a Layer Mask to remove the background, or making any other corrections you wish to make.
Want to master the best techniques for creating a pure white background in Photoshop? Dive into our step-by-step tutorial
When Should You Use the Object Selection Tool to Cut Out an Image?
You should use the Object Selection tool to cut out an image with clean and distinct edges. This tool is effective in the following scenarios:
- Subjects with distinct boundaries and good contrast from the background, like products, people, or animals.
- You want to select one or more objects in a complex scene.
- When you need a quick cutout without the precision of the Pen tool.
- Complex scenes with distinct items.
How to Cut Out an Image With the Lasso Tool?
If you want to isolate products with complex edges, other effective Photoshop tools are the Lasso tool (the Polygonal Lasso tool or the Magnetic Lasso tool). You can access the tool using the keyboard shortcut key “L”. Below, we’ve showcased the image cut out process with the Lasso tool.
Step 1: Open the Image in Photoshop
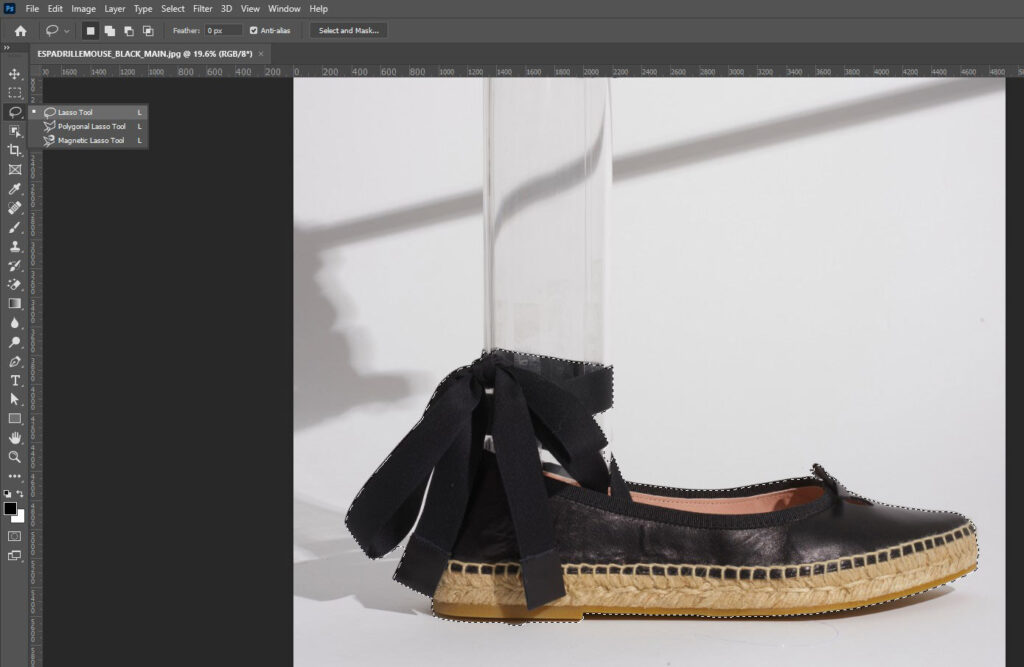
Open your edited image in Photoshop and then select the Lasso tool. Here, we’ve used the Polygonal Lasso tool to remove or add some parts of the selection.
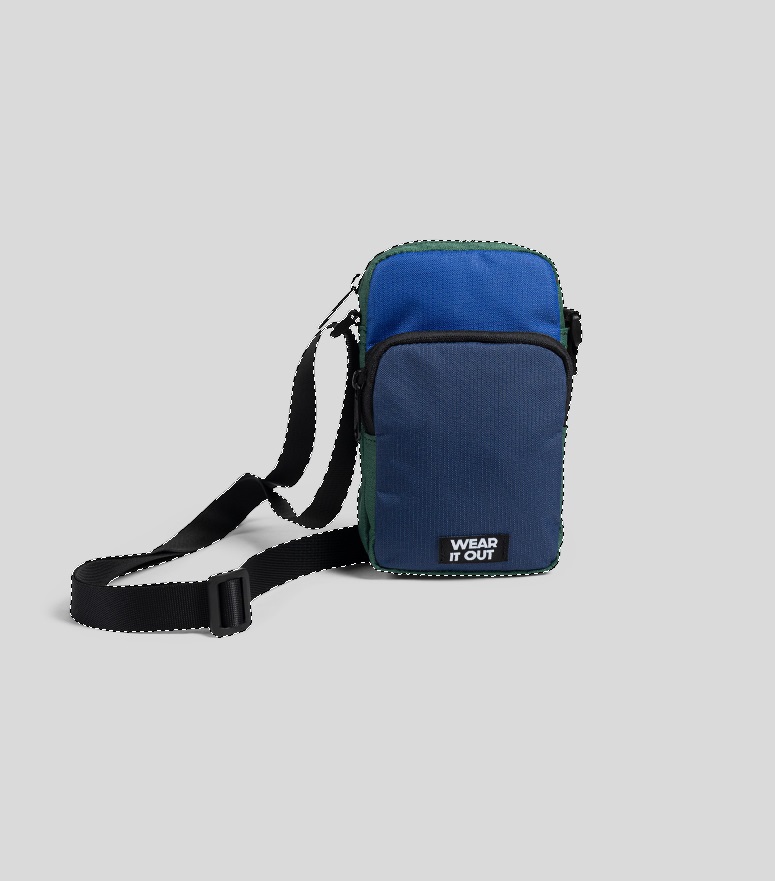
Step 2: Select the Product/Subject
Use the Shift key to add a selection or Alt to remove it to make a more precise selection to cut the product out. Or, left-click the mouse and drag the selection path around the product. Repeat this process until you’ve drawn a complete outline around the object, and join the last point with the first to finish the selection.
Step 3: Create a New Layer to Correct the Detail
Once you’ve finished the drawing selection and are satisfied with the cutout, press Ctrl+J to create a new layer containing only the selection path.

When Should You Use the Lasso Tool to Cut Out an Image?
You should use the Photoshop Lasso tool to cut out complex edges, busy backgrounds, and so on. Here’s a breakdown of the difference:
- Irregular shapes with no fine details.
- Adding/removing parts of a selection.
- Rough, fast selections (non-precise cutouts).
How to Cut Out an Image With the Rectangular/Elliptical Marquee Tool?
To cut out an image with the Rectangular/Elliptical Marquee tool, first select the desired layer and draw a selection around the area you want to cut out. Detailed steps are highlighted below:
Step 1: Select the Rectangular/Elliptical Marquee Tool
Use the keyboard shortcut key “M” to access the Rectangular Marquee tool, or you could use the Elliptical Marquee tool. This selection method is simple and effective to use for some design purposes.

Step 2: Cut Out an Image
If you want to cut out a rectangular portion, use the Rectangular Marquee tool. However, for round or oval cutouts, use the Elliptical Marquee tool. Simply select the part of the photo cutout you want and then press Ctrl/Cmd+J to paste the cutout image into a new layer.

When Should You Use the Rectangular/Elliptical Marquee Tool?
The Rectangular/Elliptical Marquee tool should be used for rectangular/circular areas. These tools are useful for making selections within images to isolate portions. Here are the reasons behind using these tools to cut a person out of an image in Photoshop:
- Isolating geometric areas or portions, such as banners, buttons, or image borders.
- Creating circular or oval effects, like creating vignettes or highlighting faces and other circular elements.
- Applying adjustments or effects to defined regions.
How to Cut Out an Image With the Magic Wand Tool?
To cut out an image with the Magic Wand tool, click the keyboard shortcut key “W,” select the area you want to isolate, and adjust the tolerance as needed. Here’s a more detailed process:
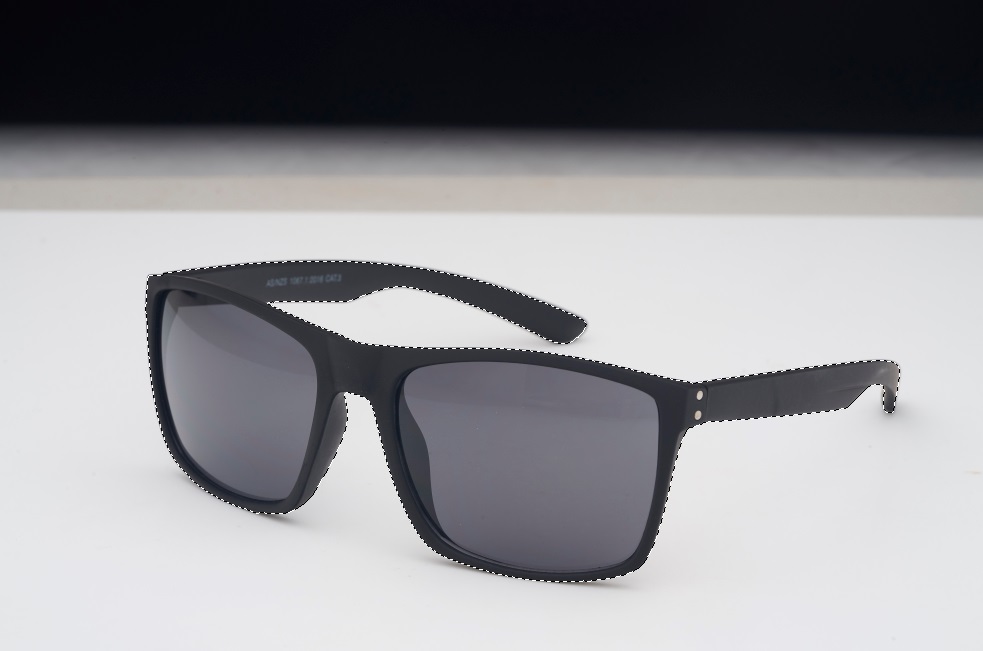
Step 1: Select the Magic Wand Tool
The Magic Wand tool is located underneath the Object Selection tool. Click and hold the tool to get access to the Magic Wand tool.

Step 2: Select the Area to Cut Out
Click on the part of the image you want to isolate. The tool selects all connected areas with similar tones or colors.

Step 3: Adjust Tolerance
Adjust the tolerance setting, like increasing or decreasing, to refine your selection. Low tolerance (20-30) precise selections and high (40-50) grabs more similar shades.
Step 4: Delete the Image Background
Click the area where you want to delete the image background, and the Magic Wand Tool will automatically select pixels with similar colors and tones. However, you can select the adjacent pixels from the “Contiguous” option.

When Should You Use the Magic Wand Tool?
You should use the Magic Wand tool when you want to create selections based on colors. This tool effectively selects pixels of similar color with a single click. Other factors are:
- Isolating contiguous color areas.
- Removing plain backgrounds or selecting objects with consistent colors.
- Quick edits (basic masking, color changes, or background removal) with simple color boundaries.
How to Cut Out an Image With the Layer Mask Tool?
Another effective cut out image hack is using the Layer Mask tool. You can do it yourself, but the best way is to outsource to the best clipping path service for precise editing. Here’s a step-by-step guide on how to trace and cut out an image in Photoshop with a Layer Mask:
Step 1: Select the Object with the Selection Tools
Create a selection using any previous techniques (Lasso tool, Marquee, etc.), then hit the Add Layer Mask icon in the Layers Panel.
Step 2: Adjust the Cut Out with White and Black Colors
After masking, you can adjust your cutout using a standard brush in white and black colors. Select the Mask in the Layers panel and paint it black where you want to remove a part or white to reveal a part of the image.
When Should You Use the Layer Mask Tool?
You can use the Layer Mask tool to hide or reveal parts of a layer, allowing for non-destructive editing and control over transparency. Some useful photo editing options are:
- Image compositing,
- Modify background colors and
- Cutting out objects when applying adjustments like filters or brightness to specific areas without affecting the entire layer.
How to Cut Out an Image in Adobe Photoshop Express?
To cut out an image in Adobe Photoshop Express, you only need to upload photos that you want to edit and select the editing type like remove object, remove background, and so on. Here’s a detail on how to cut an image out in Photoshop Express:
Step 1: Open Adobe Photoshop Express
Click the “Adobe Photoshop Express” link and sign in with your Adobe account if you have one. If you’ve none, create one and then start uploading photos. Adobe Photoshop Express is a free AI photo editing tool.
Step 2: Access the Quick Actions to Cut Out/Remove the Background
You can click the “+” icon from the top left or click the “View all” option to access the Quick Actions if you can’t find the “Remove Background”.

Click the Remove Background option and upload the image you want to cut out an object or remove the background.

When Should You Cut Out an Image in Adobe Photoshop Express?
You can use Adobe Photoshop Express for simplified cutout tools, making it ideal for quick edits on the go, such as –
- When you need fast background removal for Facebook, Instagram, or TikTok posts.
- When removing simple backgrounds or objects without advanced manual masking is required.
- Remember, high-end e-commerce products require manual photo editing for precision edits.
How to Cut the Background Out of an Image in Photoshop?
You can cut out the background of an image in Photoshop with the Quick Actions tool in Photoshop. Below, we’ve highlighted detailed steps:
Step 1: Access the Discover Panel
Go to Photoshop Help settings, and then Photoshop Help to use the Search icon (top right) or keyboard shortcut Ctrl/Cmd+F. Click on “Quick Actions” within the Discover Panel.


Step 2: Select Remove Background
Another effective way to get access to the “Quick Actions” is to click the “Window” option, select the “Properties”.

Step 3: Remove the Background
Ensure the layer containing your image is unlocked in the Layers Panel and create a new layer where you can perform editing. Click on the “Remove Background” option within the Quick Actions and get a transparent background instantly, like the image we’ve represented below!


When Should You Cut the Background Out of an Image?
You should cut the background of an image in Photoshop when you want to create a transparent or custom background or enhance the image’s impact for a specific purpose, like product listings, campaigns, and so on. Examples of when background removal is useful:
- Making product photos more professional and appealing on websites like Amazon, eBay, etc.
- When you want to communicate a specific message.
- When you want to enhance impact for specific marketing purposes, like professional headshots, websites, and so on.
How to Cut Out an Image With the Color Selection Tool?
Another effective method is to cut out an image with the Color Selection tool. Let’s take a look below for in-depth details:
Step 1: Choose the Color Range Option
Go to the Select option from the top Photoshop settings and choose the “Color Range”, select the color of the image background with the Eyedropper Tool, and adjust the selection using the Fuzziness setting. Click “OK” after selecting the background.


Step 2: Copy and paste the Cut Out Image to a New Layer
Go to Select and choose “Inverse” and then cut the image out using Ctrl + C and Ctrl + V.
Photoshop Cutout Challenges & Ways to Overcome
Photoshop cutout challenges are wispy hair, tight corners, and intricate shapes. But you can handle all those challenges with a little help from the Photoshop tool. For example,
1. When you’re working with hair, use the Refine Edge Tool. Here’s how to use it:
- Make your selection and avoid selecting any background pieces, even if there’s hair there.
- Click the Select and Mask from the Select options. Inside the Select and Mask workspace, choose the Refine Edge from the right-hand side of the panel.
- Brush over stray hairs around your subject’s edges and then return to the Select and Mask properties panel on the right, scroll to the bottom, and choose Output to Layer Mask.
2. Tight corners and angles:
- Use the Polygonal Lasso tool to select geometric shapes with straight lines. Simply click the around edges by holding down the Shift key and create perfect 90 and 180-degree angles.
3 Unconnected shapes:
- Use the Lasso tools (Freehand Lasso, Polygonal Lasso, or Magnetic Lasso) for precise selections.
- You can also use the Quick Selection tool to add or subtract from the selection to refine the cut.
- For multiple selections, clicking and dragging the Quick Selection tool within the desired areas is ideal for selecting unconnected shapes.
- Use the Select and Mask workspace to refine/edit edges and remove unwanted areas.
How Does an Image Cut Out Service Help You with Your E-commerce Product Photos?
An image cut out service helps you with your e-commerce product photos by isolating products from unwanted or busy backgrounds, making them professional and visually appealing with a sole focus. A 2024 report published in Innovative Imaging Professionals titled Product Photography Statistics and Facts You Need to know reports that 78% of internet buyers desire superior product images for retail displays. Photo retouching or cut out allows customers to get detailed feature ideas about products that build trust and confidence. Other benefits are as follows:
- E-commerce cut-out service improves product focus and listings by highlighting its details and features.
- Clean, pixel-perfect product images provide a professional outlook that helps to build a brand, enhancing trust and credibility.
- Cut out images are effective to use on different digital platforms, like social media, campaigns, websites, etc.
- High-quality, optimized product images attract potential customers and provide SEO benefits, like faster website loading times, better search engine rankings, and so on.
As an e-commerce store owner, product photographer, or entrepreneur, you might face difficulties in Photoshop cutting out images from the background and other retouching. So, it’s better to let the professionals handle it and get professional-level work within an estimated time. Clipping Path Studio’s experts offer manual image editing services over the years. You can try their free trial to make a decision!
FAQs about the Cut Out an Image in Photoshop
Can I copy and paste a cut-out image into another Photoshop document?
Yes, you can copy and paste a cut-out image into another Photoshop document. Here’s the process to do it:
- Use a selection tool, like Lasso, Marquee, or others, to select the image area you want to copy.
- Go to Edit > Copy or use the keyboard shortcut Ctrl (Windows)/Cmd (Mac) +C.
- Open the Photoshop document where you want to paste the copied image. Afterward, go to Edit > Paste or use the keyboard shortcut Ctrl/Cmd + V.
How do I cut out a complex object with hair or fur in Photoshop?
You can use a combination of selection tools to cut out a complex object with hair or fur in Photoshop, including the Quick Selection tool, Pen tool, Refine Edge brush, and Content-Aware Fill for cleanup.
How do I cut out a selected area in Photoshop?
You can cut out a selected area in Photoshop by making a selection through the Quick Selection tool, Marquee tool, or other Photoshop tools. Here’s a more detailed breakdown:
- Make a selection: Use tools like Rectangular Marquee tool, Lasso tool, Magnetic Lasso tool, Photoshop Express, or others to select the area you want to cut out. However, you can use the Quick Selection and Magic Wand tools for distinct edges or similar colors. However, you can use the Photoshop Pen tool for more precise selections.
- Cut & paste the selected area: After making your selection, go to Edit > Cut (or Ctrl/Cmd+X) to remove the selected area from your image. After that, you can paste the cut out area into a new layer or document.
- Adjust & Refine: If you need to refine your selection to make it professional, you can use the Select and Mask feature (Select > Select and Mask) to adjust edge detection and other options.
How to cut out and paste an image in Photoshop?
Use Ctrl/Cmd+X to cut and press Ctrl/Cmd+V to paste the selection to the desired location or layer. You can use different selection tools, like Lasso, Marquee, Magic Wand, and others, to highlight the specific area of the image you want to move or copy.
How do you auto cut out an image in Photoshop?
You can automatically cut out an image using the Photoshop AI tool Adobe Photoshop Express.
What’s the difference between cutting out an image and removing the background?
The key difference between cutting out an image and removing the background involves the final results and purpose of editing. Cutting out an image refers to isolating the subject or object to place it on a new background, while background removal helps to create a transparent background, allowing the subject to be placed on any desired background.
Final Overview
- An image cutout refers to the process of removing a subject or object from its background within an image without losing image quality and details.
- There are 10 best cutout processes: Pen tool, Quick Selection tool, Object Selection tool, Rectangular/Elliptical Marquee tool, Lasso tool, Magic Wand tool, Layer Mask, Adobe Photoshop Express, Background Removal tool, and Color Selection tool.
- Outsourcing cutout editing services saves your time and resources, and you get pixel-perfect product images that increase conversion rate.
