
Video color correction refers to the video post-production steps where the colors, hue, saturation, highlights, shadows, and white balance are fixed. Professionally made color correction creates a foundation for technical editing of video footage. The best color correction software professional video editors use is Davinci Resolve 20, Filmora, Adobe Premiere Pro, Final Cut Pro, PowerDirector, etc.
Color correction is different from color grading in terms of purpose. Correction fixes issues, and grading involves creativity. Applying color correction before video editing allows for optimal compression, accurate codec interpretation, and GPU acceleration. The e-commerce industry, advertising and marketing agencies, fashion and apparel industry, and the entertainment industry mostly use video color correction services.
What you’ll learn in this article
- 1 What is Video Color Correction?
- 2 What are the Best Color Correction Software?
- 3 How Do You Color Correct a Video?
- 4 How Do You Fix Skin Tone During Video Color Correction?
- 5 Why Do Old Videos Have a Yellowish Tint?
- 6 Why Does the Background of the Video Turn Black After Color Correction?
- 7 Should You Color Correct Before or After Editing?
- 8 What is the Difference Between Color Correction and Color Grading in Video?
- 9 How Much Does a Video Color Correction Cost in New York, USA?
- 10 Can AI Color Correct Your Video?
- 11 FAQ’s
What is Video Color Correction?
Video color correction is a video editing process that adjusts, refines, and enhances the color, hue, saturation, luminance, brightness, contrast, white balance, and shadows of images to expose proper color properties and achieve accurate color representation. It is the fundamental method in video editing to fix technical issues in raw footage for creating a balanced look.
The impact of color correction in videos lies in quality, professional presentation, and viewers’ engagement. From the entertainment industry, e-commerce industry, advertising and marketing agencies, fashion and apparel industry, prioritize accurate colors on videos for various reasons as follows.
- Improve the video narrative for better message delivery
- Build brand credibility
- Convey professionalism
- Achieve a brand-specific look and
- Boost viewers’ engagement and retention rate.
Is Video Color Correcting Worth It?
Yes, video color correction is worth it mainly for 3 reasons: creating a foundation for a technical editing application, developing a consistent and high-quality video narrative, and delivering a detailed, vibrant, and understandable content flow for a positive viewers’ experience.
1. Creating a Technical Foundation for Advanced Editing
Applying color correction creates optimal contrast, exposure, and color balance in videos. As a result, video editors can easily apply advanced-level editing and solve technical issues. This technical precision eliminates video processing time, production cost, and creates online platforms ‘ compatible videos.
2. Developing a Consistent Brand Narrative
Color correction maintains visual consistency across all video content. Professional video editors follow brand guidelines to build identity in professional standards. When watching a consistent approach in videos, viewers subconsciously recognize and start trusting that brand.
3. Enhancing Viewer Experience
Professionally color-corrected videos contain vibrancy and detailed visuals that create a realistic and immersive experience. Expert video editors merge sound, background music, and effects with the clips, creating well-synchronized and balanced content that contributes to the brand’s conversion and ROI.
Is a Video Color Remover Worth It?
Video color color remover isn’t worth it if the purpose involves large-scale color removal, commercial intent, and brand building. Popular AI solutions such as DaVinci Resolve, CapCut, etc, offer plenty of automated solutions that lack perfection, precision, and humanized creativity and finishing. Relying on human video editors provides a brand-specific solution to fulfil commercial goals.
Video color remover is worth it for personalized works, or for new content creators, as it would perform a one-touch solution that those color-removing tools offer.
What are the Best Color Correction Software?
The best color correction software are DaVinci Resolve, Filmora, Adobe Premiere Pro, Final Cut Pro, CapCut, and PowerDirector. These tools offer comprehensive color correction and color grading features such as LUTs, color wheels, auto-balancing, highlights, shadows, curves, masks, along AI-assistance to fulfill basic to advanced and custom color editing tasks with professional output.
1. DaVinci Resolve 20
DaVinci Resolve is a free professional-grade video editor software widely renowned for its powerful node-based color workflow. Its advanced level capabilities create cinema-quality grading across formats and industries, making it a top choice for colorists and video editors.
Color Correction Feature Da Vinci Resolve 20 Offers
- Node-based color grading workflow
- Advanced color wheels and curves
- Professional scopes and waveforms
- HDR and wide color gamut support
- Color match and timeline grade tools
- Power Windows for selective corrections
- LUT support and custom LUT creation
- 32-bit image processing
2. Filmora
Filmora is a user-friendly premium video editing software that features intuitive color correction tools, such as preset filters and one-click adjustments, making professional-looking color grading accessible without complex workflows.
Color Correction Feature Filmora Offers
- One-click color correction presets
- Basic color wheels and sliders
- LUT support and application
- Color match functionality
- Auto color enhancement
- HSL adjustments
- Brightness and contrast controls
- Color grading templates
3. Adobe Premiere Pro
Adobe Premiere Pro is an extensive and professional-grade video editing solution, comes in a subscription-based format. It offers Lumetri Color tools and seamlessly integrates with Adobe Creative Cloud for uninterrupted workflows. Premiere Pro’s color correction capabilities are effective for filmmaking, content creation, etc.
Color Correction Feature Adobe Premiere Pro Offers
- Lumetri color panel with comprehensive tools
- HSL secondary corrections
- Color match and auto-balance
- Integration with Adobe After Effects
- Color wheels and curves
- Creative color looks and presets
- LUT support and creation
- Vectorscope and waveform monitoring
4. Final Cut Pro
Final Cut Pro is professional video editing software by Apple for Mac users. Its features cover built-in color correction tools, automatic balance options, and manual controls, optimized for Mac hardware with efficient rendering performance.
Color Correction Feature Final Cut Pro Offers
- Automatic color balance and correction
- Color masks for selective adjustments
- Match the color between clips
- Secondary color correction
- Broadcast-safe color monitoring
- Color wheels and color curves
- Built-in color board
- Custom LUT support
6. PowerDirector
PowerDirector is a feature-rich video editing software that offers both automatic and manual color correction tools. It is a paid video editor with professional-grade color grading capabilities. PowerDirector has an intuitive interface that is suitable for both new users and professional video editors.
Color Correction Feature Power Director Offers
- TrueTheater Color enhancement
- White balance adjustment
- Selective color correction
- Color replacement tools
- LUT support and application
- Manual color correction wheels
- Color match functionality
- Professional color scopes
How Do You Color Correct a Video?
To color correct a video, adjust the video’s white balance, color tones, exposure, and contrast to produce natural and consistent visuals. The process also includes evaluating footage, synchronizing clips, balancing colors, adding sound and music, fine-tuning highlights and shadows, and applying LUTs if needed to create cohesive results.
Step 1: Evaluate Your Footage
Review the raw footage to identify color cast, underexposed, or overexposed parts. Use Video scopes (waveform, vectorscope) or reference monitors for that.
Step 2: Set White Balance
Adjust the temperature and the tint to rectify the presence of color cast. Ensure the white appears neutral, so that the overall color harmony and skin tones will be natural.
Step 3: Adjust Exposure and Contrast
Balance the dark and light areas by adjusting shadows, midtones, and highlights in photos. Appropriate correction in exposure prevents loss of photo information.
Step 4: Refine Colors with Tools
Fine-tune hue and saturation by using color wheels, curves, or HSL sliders. Enhance skin tones, boost brand colors, or match shots for consistency.
Step 5: Apply LUTs or Presets (Optional)
Load a LUT (Look-Up Table) for a creative or cinematic look and to speed up workflow. Make sure to fine-tune it for the specific project.
Review adjustments with vectorscope and waveform monitors to ensure legal broadcast levels, consistent saturation, and balanced luminance across clips.
How Do You Know What Color to Use for Color Correcting?
You can know about the color to use for color correction in video through different tools, such as neutral references (black, white, or gray areas) and video scopes like the vectorscope or waveform. They reveal if the images look too warm, cool, or tinted; whereas correcting towards neutral ensures accurate skin tones and consistent visuals.
Here is a chart of what colors to use for balancing any specific colors cast.
| Color Issues | Color Corrector |
|---|---|
| Redness | Neutralize with a green color corrector. |
| Yellow/orange | Balance with a blue color. |
| Dark spots & circles | Apply a peach color corrector. |
| Bluish night cast | Add orange tones to restore natural skin. |
| Green Tint | Apply the Magenta color corrector and vice versa. |
| Over-warm/sallow footage | Balance with subtle lavender/cool tones. |
How Do You Fix Skin Tone During Video Color Correction?
The step-by-step guide to fixing skin tone during video color correction is as follows.
Step 1: Import Your Video
Open the color correction editing software and upload your footage.
Step 2: Evaluate the Footage
Watch and spot the parts or use scopes or reference monitors to identify where skin fixing is required, such as uneven skin tone, color casts, imbalance of tone, etc.
Step 3: Adjust White Balance
Edit the temperature and tint; it should bring natural and neutral color and rectify unwanted color casts and mixed lighting.
Step 4: Use Scopes for Precision
Check the vectorscope to align skin tones with the skin tone line. Then, check the waveform for balancing brightness and contrast.
Step 5: Fine-Tune Hue and Saturation
Look for the appearance of reds, oranges, and yellows, and adjust them for a realistic appearance of skin tones. Refrain from using over-saturation.
Step 6: Apply Secondary Corrections / Masking
Make selective adjustments to edit without affecting other objects, use masks or HSL keying.
Step 7: Apply LUTs or Presets (Optional)
Subtly apply LUTs to enhance skin tone consistency across footgates. Play back the video to compare before and after.
Why Do Old Videos Have a Yellowish Tint?
Old videos have a yellowish tint due to chemical degradation, outdated recording technology, and physical wear of the film itself. Older cameras had limited white balance control and a harsh lighting setup, producing warm tones. Moreover, the auto white balance system at that time was also responsible for creating a yellow tint. Advanced color correction techniques allow solving this issue with fine-tuning white balance, temperature, and hues.
How Do You Remove Yellow Color from Video?
Here is the step-by-step to remove the yellow color from the video.
Step 1: Import and Evaluate Your Video
Upload the video into your color grading software and check skin tones, background, and highlighted parts thoroughly to identify yellowish areas.
Step 2: Adjust White Balance
To neutralize yellow casts, decrease the temperature toward blue and adjust tint toward magenta or green.
Step 3: Use Color Wheels or Curves
Refine shadow, midtone highlights with RGB curves or color wheels in your software. Decrease the yellow level, keeping the other color intact.
Step 4: Correct Specific Hues
Adjust the orange and yellow channels by using HSL (Hue, Saturation, Luminance) tools. It will create natural skin tone and natural backgrounds.
Step 5: Apply Scopes
Use vectorscope and waveform monitors to check if the brightness level and skin tones look accurate. Play back your video and check before-and-after results.
What Does a Blue Color Corrector Do?
A blue color corrector neutralizes the yellow/orange tone in the video footage and balances the excess color appearance towards a natural and neutral look. By countering the warm color casts, blue makes the tones appear even overall. A blue corrector also corrects lighting issues or footage that has a warm vibe.
What is the Orange Color Corrector Used for?
The orange color corrector is used for balancing blue and purple tones in videos. People with medium to deep skin or dark circles contain such tones that an orange corrector neutralizes. It cancels out those cool hues that appear due to shooting daylight or fluorescent light and creates a balanced look for makeup application.
Why Does the Background of the Video Turn Black After Color Correction?
The background of the video turns black after color correction because of issues in adjustment layers, extreme color values, graphic driver conflicts, codec, and exporting problems, etc. Troubleshooting these technical issues would solve and prevent the occurring problems.
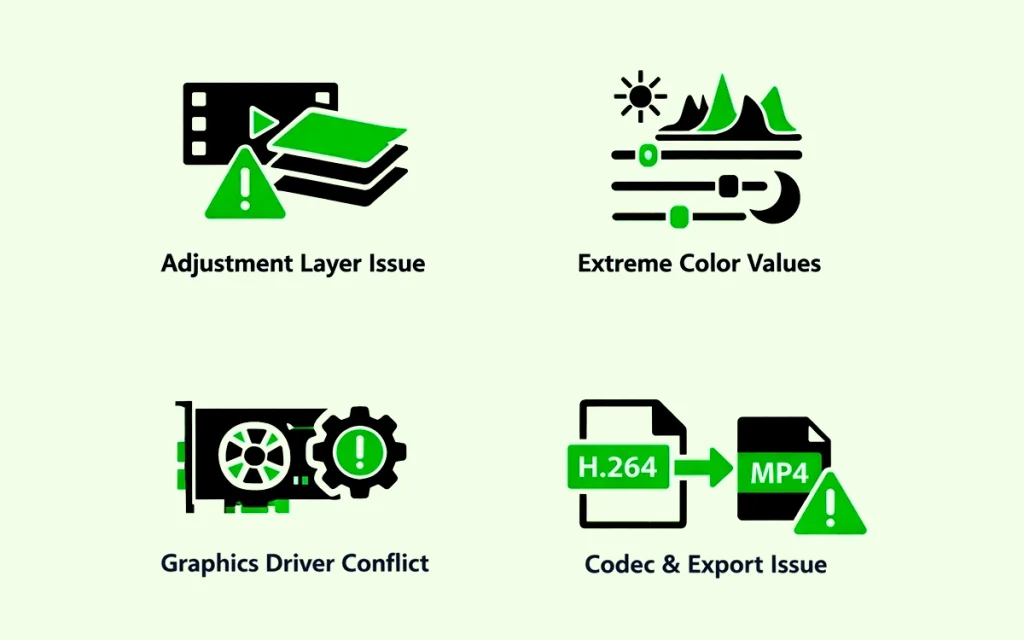
Issues in Adjustment Layers
When using Lumetri Color to create adjustment layers to apply color correction effects, it may cause a black appearance. The reason is that at that time, the adjustment layer didn’t properly process the video track, creating a null output display.
Solution: Instead of using an adjustment layer, apply color correction effects directly to the clips. Or, reset the process by deleting or recreating the adjustment layer.
Extreme Color Values
Using highlights, shadows, and exposure beyond normal parameters can produce a black background, causing instability in video editing.
Solution: Reset all color correction sliders and start with neutral positions. Moderately adjust the values, -50 to +50 is recommended.
Graphics Driver Conflicts
Videos can also turn black due to corrupted or outdated graphics drivers. GPU acceleration mismatching with video editing effects creates a black screen during playback and rendering.
Solution: Update the graphics drivers. If the problem remains, disable GPU acceleration.
Codec and Export Problems
Using the H.264 format for video may cause a black screen during export because either the color space didn’t match or there were rendering errors. These glitches are visible when the videos are heavily color corrected.
Solution: Export videos in MP4, MOV, or other video formats. Reduce color correction intensity before exporting.
Should You Color Correct Before or After Editing?
Color correct before editing to establish a solid foundation and to ensure optimal compression, accurate codec interpretation, and GPU acceleration. Initial correction balances exposure, contrast, and white balance, giving you properly exposed footage to work with. This prevents editing decisions based on poorly lit or color-imbalanced clips.
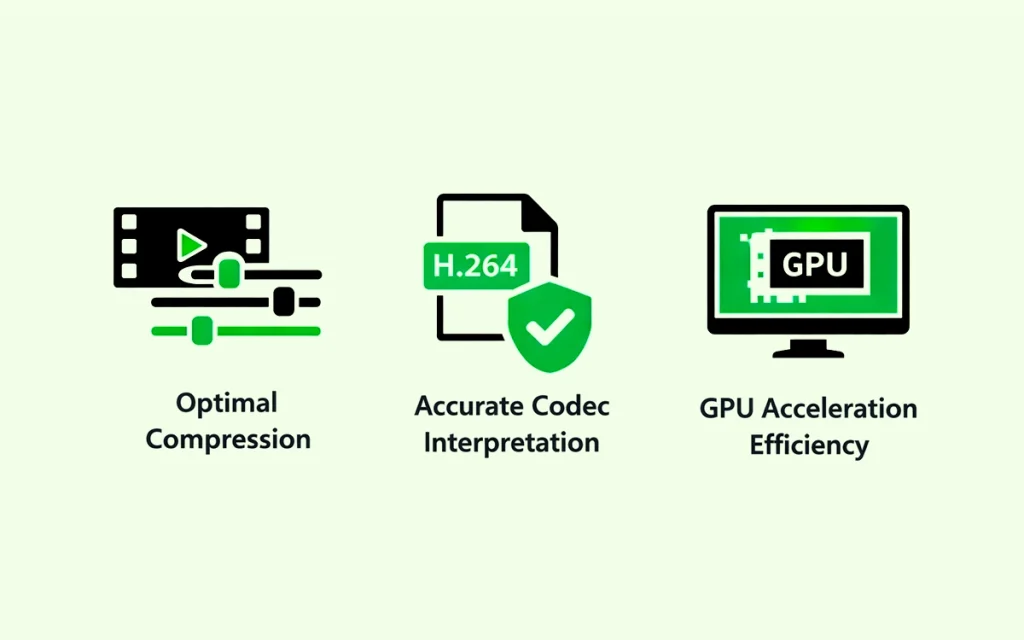
- Optimal Compression: Applying color-correcting video footage before editing optimizes your video footage for detail and advanced editing. Normalizing colors and balancing exposures allows you to reduce the workload in editing software in real-time. So when played, you get smooth output and faster rendering.
- Accurate Codec Interpretation: Colors and exposure in videos appear differently, considering video codecs and camera profiles. Implementing a primary color correction upfront, you create a standard color space for more editing. As a result, unexpected color shifts, color casts, or color inconsistencies don’t appear during mixing different camera footage or while using different codecs.
- GPU Acceleration Efficiency: Many modern video editing and color grading tools provide a GPU for accelerated processing. By correcting colors before editing, you allow the software to create a pre-rendered, color-corrected version of the footage. This can offload processing from your CPU, resulting in a more responsive editing experience and more efficient use of your hardware’s resources.
Should You Color Correct After Removing Video Background?
You should color correct after removing the video background when matching a subject to a specific new background’s lighting condition, in compositing multiple elements and each requiring color balancing, if the process to remove the video background introduces color artifacts, and during applying different color grades.
You should color correct before removing the video background, while matching the lighting and color temperature of the video subject with the new background, ensuring color-balanced footage for chroma key, ensuring proper saturation, green color, and a well-lit subject in green screen keying, and during monitoring and maintaining the overall colors in videos.
What is the Difference Between Color Correction and Color Grading in Video?
The main difference between color correction and color grading in video is the purpose of the video. Color correction fixes technical issues, creating a foundation for color grading, which is a creative step of shaping video style, atmosphere, and theme. Color correction introduces realism to and precision to videos, whereas color grade in video brings a cinematic and creative look.
Color Correction: Color correction refers to the technical adjustment of colors to restore a natural and consistent look. The purpose of color correction is to make sure the colors in videos appear similar to the human eye.
Color Grading: Color grading refers to the artistic application of colors to achieve specific emotions and themes that evoke viewers’ emotions. The purpose of color grading is to develop a unique look and enhance the narrative to tell the brand story.
Differences between color correction and color grading in video are as follows.
| Topic | Color Correction | Color Grading |
|---|---|---|
| Process | A foundational step, it comes first. | A creative and artistic step, it comes after color correction. |
| Methods Include | Adjusting white balance, exposure, and saturation to correct for errors. | Application of specific color palettes, tones, and artistic looks. |
| Objective | Technical and problem-solving skills to normalize footage for creative application. | Creative, subjective, and storytelling to enhance visual storytelling and fulfil custom or platform-specific requirements. |
| Output | Creates a neutral, natural, and consistent look. | Develops a specific theme, emotion, or style in videos. |
| Examples | Matching colors of different camera footage, making whites neutral, editing underexposed parts, etc. | Applying a warm, vintage look, creating a dark, moody feel for a thriller, etc. |
How Much Does a Video Color Correction Cost in New York, USA?
Video color correction cost in New York, USA cost starts at $20 per hour. If the video footage is complicated, the coloring price starts at $150. The pricing significantly varies based on video footage quality, the video editor’s expertise, the complexity of the videos, and the timeline.
Why is Color Correction so Expensive?
The color correction service is expensive because it requires specialized skills, technical knowledge, and a deep understanding of color sense. Professional photo editors make a judgment call during applying colors that synchronize with the vibe and theme a video needs to deliver.
Being a complex process, color correction requires a well-balanced color palette, multiple techniques to bring up a creative and realistic view. The process involves multiple specialized products to achieve the output, which causes the color correction cost to rise.
How Many Hours Does a Video Color Correction Take?
A video color correction takes from 2 hours to 8 hours, depending on the level of color application, project complexity, and video time length. Basic color correction takes around 3 hours, medium color correction takes around 5 hours, and applying custom and advanced-level color correction takes more than 1 business day.
Can AI Color Correct Your Video?
AI can color correct your video only if the content in the videos is simple to change. As AI video color correction uses machine learning to auto-adjust color-related elements such as exposure, white balance, contrast, tones, etc, it follows the instructions on a surface level. Video editing software offers different AI filters to correct colors on videos, for example, the Auto Color feature of Premiere Pro, the Neural Engine of DaVinci Resolve, etc.
AI cannot color correct your video when the video includes complex lighting, cinematic intent, creative styles, adjusting skin tone, multiple camera shots, etc. In that case, human video editors excel as they perform hand-drawn color correction to make precise edits to create sensible content.
Why Should You Choose Hand-Drawn Color Correction in this AI Era?
You should choose hand-drawn color correction in this AI era to gain creative control over visuals, establish the right mood, and ensure a natural flow of storytelling. Though AI offers speedy solutions and is effective for repetitive tasks, human editing surpasses AI in terms of precision, consistent presentation, and balancing lightness and darkness.
Manual color correction ensures the model’s skin tone appears realistic, and videos turn out cinematic or creative. Hiring hand-drawn color correction in the AI era allows you to access expert video editors who skillfully place the theme and emotions your video needs. They balance lighting inconsistency, create artistic intent, making them engaging and relatable to your target audience, contributing to the video marketing purposes.
Why Should You Choose Clipping Path Studio for Hand-drawn Color Correction?
You should choose Clipping Path Studio for hand-drawn color correction to ensure high-quality, aligned, and synchronized video narrative for your brand. Our expert video editing team creates each frame with the highest manual care.
Instead of solely relying on automated tools, they implement their industry knowledge to change video colors, hues, saturations, highlights, etc, with a hand-drawn approach. This approach preserves details and colorizes videos in a realistic manner. You can rest assured of receiving balanced lit visuals, accurate skin tones, and a professional look in videos.
FAQ’s
What is a LUT in video?
Look-Up Table or LUT in video is a digital preset containing instructions for remapping color values. It is used for quick application of consistent color grading, match shots, or a cinematic look in videos to change appearance. It saves time and maintains accurate and consistent visual styles across multiple pieces of footage.
Are LUTs only for video?
Luts are not only for video, but also for photo, films, broadcasting, 3d rendering, visual effects, and any workflow where precise and repeated color correction is needed. In photography and photo editing, LUTs offer a stylized look. In films and broadcasting, LUTs are used for matching monitor, camera, or lighting setups. In 3d rendering and visual effects, LUTs allow consistent color application throughout CG elements.
What is S-Log3 in the video?
S-Log3 in video is a Sony-developed video recording system that uses a logarithmic gamma curve. It closely replicates scanned film and offers smooth transitions between tones and colors, suitable for capturing natural footage. Having a wide dynamic range, S-Log3 preserves details in shadows and highlights.
What is OpenColorIO (OCIO) in video?
OCIO in video is an open-source color management system that ensures consistent color interpretation across different monitors, software, formats, and users within a single project. OCIO creators can apply LUTs, use color spaces, and maintain accurate colors throughout the collaborative projects.
What is the DCI-P3 color in the video?
DCI-P3 in video is a widely adopted color space for digital cinema projection, developed by Digital Cinema Initiatives (DCI). It is used for ensuring a consistent and vibrant look across different digital projectors, especially in movie theaters. DCI-P3 offers a much wider range of colors, especially in the reds and greens.
How damaging is color correction?
Color correction is damaging only when it is done by amateurs or AI-based software without monitoring. The damage appears as the limits of original footage quality, and other parameters cross. They introduce inaccuracy in colors and maximize damage. To minimize damage, assign a professional video color correction service and use high-quality videos to edit.
What is the free AI tool for color correction?
The free AI tools for color correction are online editors such as Fotor and Media.io. Now, specialized AI tools such as Evoto AI also offer a color-matching feature. If you are knowledgeable in video editing software, Adobe Premiere Pro, DaVinci Resolve offer built-in color adjusting solutions.
