

Flawless product photo editing with Photoshop can greatly enhance the quality of product photos, instill customer trust, and increase sales for online businesses. Photoshop can be used for background removal, color correction, lighting correction, adding shadows, and other fine edits. This involves using the Pen Tool for background removal, the Clone Stamp Tool for blemish removal, and adjustment layers for color correction.
Product photos with pure white backgrounds, RGB 255, 255, 255, can meet marketplace standards and increase clicks and sales for online businesses. This tutorial will guide you on how to edit product photos with Photoshop to meet marketplace standards, maintain visual consistency, and increase clicks and sales for online businesses.
What you’ll learn in this article
- 1 How to Edit Product Photos in Photoshop?
- 1.1 Step 1: Duplicate Your Background
- 1.2 Step 2: Select Your Object
- 1.3 Step 3: Remove the Product Background
- 1.4 Step 4: Cropping Your Image in Photoshop
- 1.5 Step 5: Retouching Your Product in Photoshop
- 1.6 Step 6: Color Correction for Product Photography
- 1.7 Step 7: Add Shadow to Your Product Images
- 1.8 Step 8: Add a Reflection
- 1.9 Step 9: Final Touches to Your Product Images
- 2 Why Should You Edit Your E-commerce Product Photos?
How to Edit Product Photos in Photoshop?
To edit photos in Photoshop, various tools are used for different purposes. For instance, the Object Selection Tool is used for removing backgrounds, while the Healing Brush and Clone Stamp Tool are used for retouching, adjusting light and shadow to add depth, and more. Editing creates clean, professional, and marketplace-ready images that boost visual quality, buyers’ trust, and e-commerce sales.
The step-by-step guide to editing product photos in Photoshop is as follows.
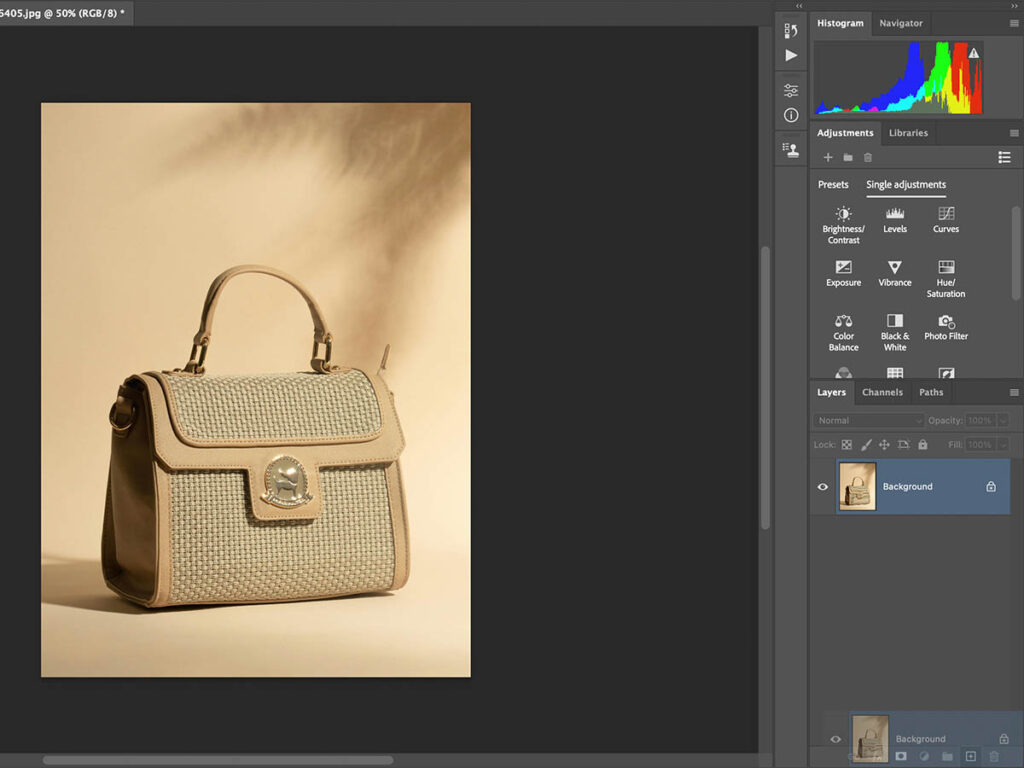
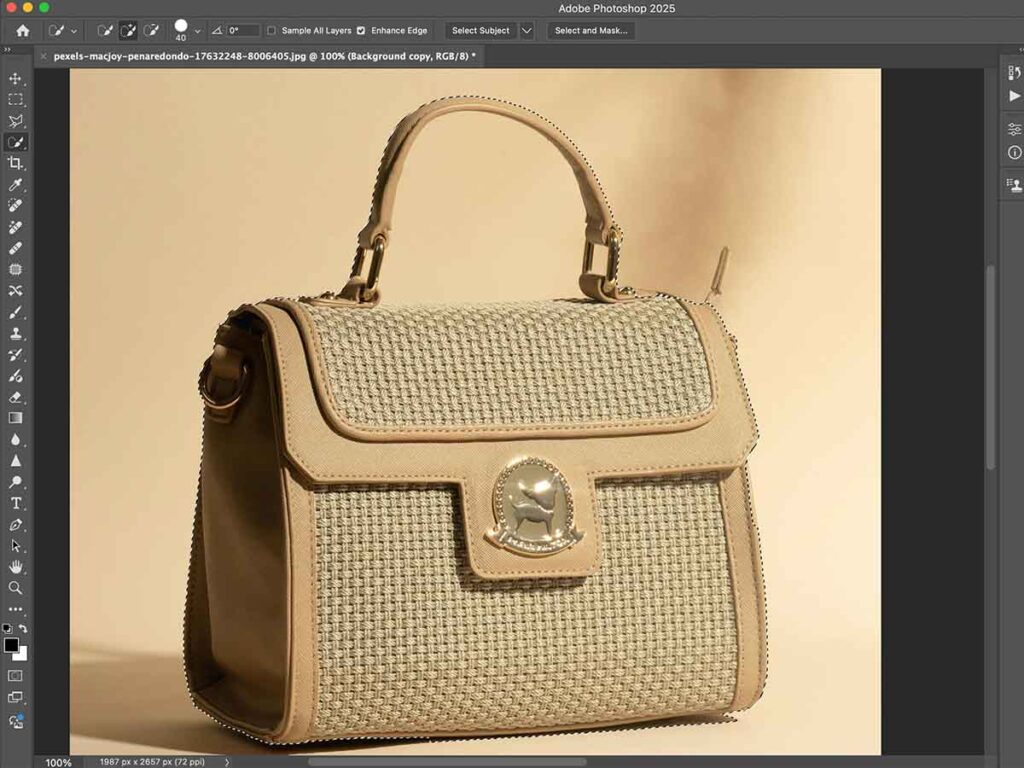
Step 1: Duplicate Your Background
- Open your product image in Adobe Photoshop.
- Duplicate the background layer to keep the original image safe.
- Press Cmd + J on Mac or Ctrl + J on Windows.
- You can also drag the background layer onto the Create a New Layer icon.
Step 2: Select Your Object
A clean background removal process is the most crucial step in editing product photos in Photoshop. In this step, you get to know the different methods of removing the background, starting from the easiest and quickest method, and the most precise one.
It’s better to choose a product image with a background that is similar to the subject, so that AI also struggles to detect. In the following method, you’ll see the fine-tune method for the best possible results.
Method 1: Select Object with Object Selection Tool
The Object Selection Tool uses AI to pick out products fast. It’s popular for e-commerce sites where speed matters.
1. Select Your Subject
- Choose the Object Selection Tool from the toolbar.
- Click Select Subject in the top bar, or hover over the image and click the overlay if it appears.
- Clean backgrounds give better results.
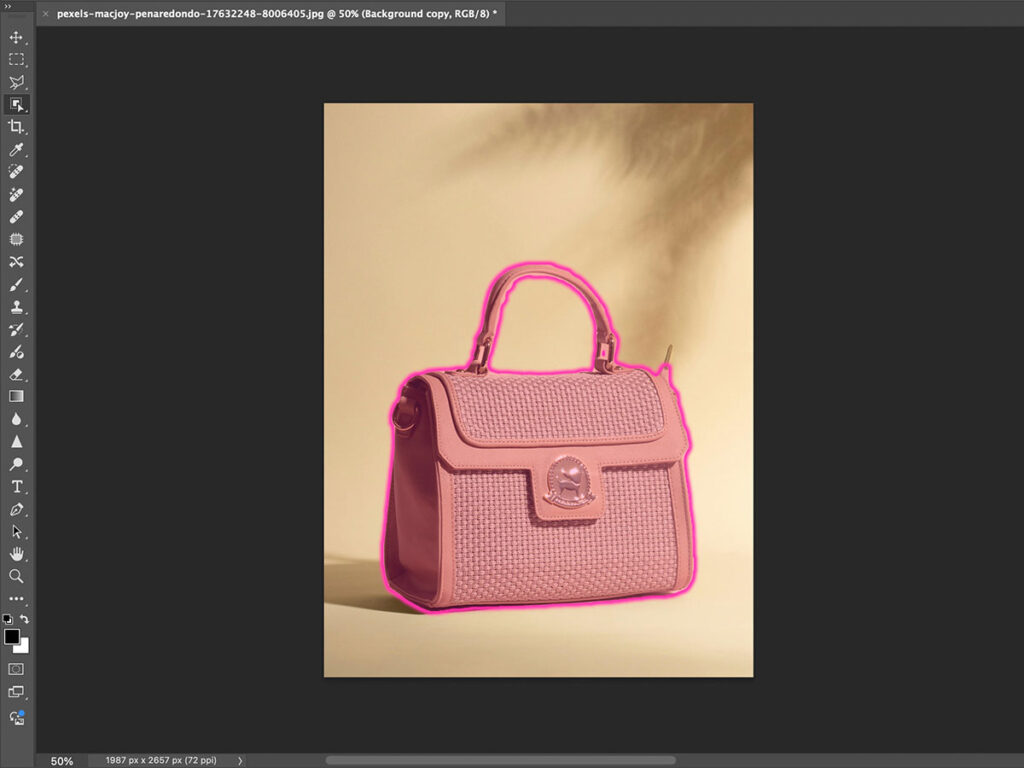
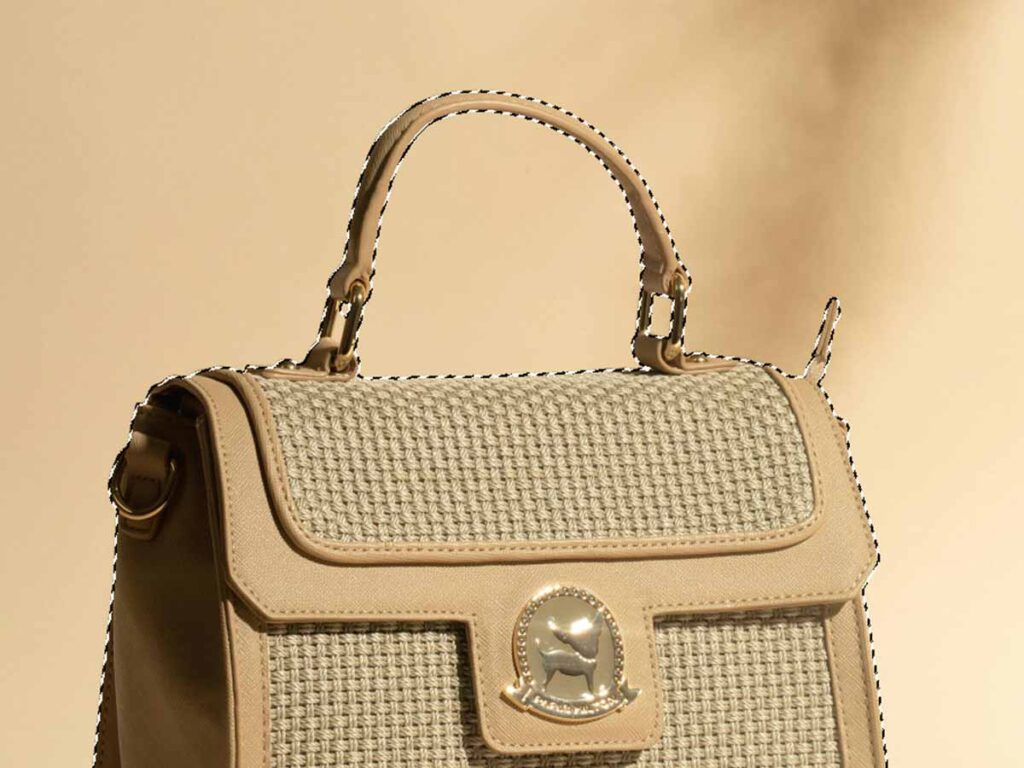
2. Adjusting Your Selection
- Zoom to 100–200%.
- Check edges for gaps or overlaps.
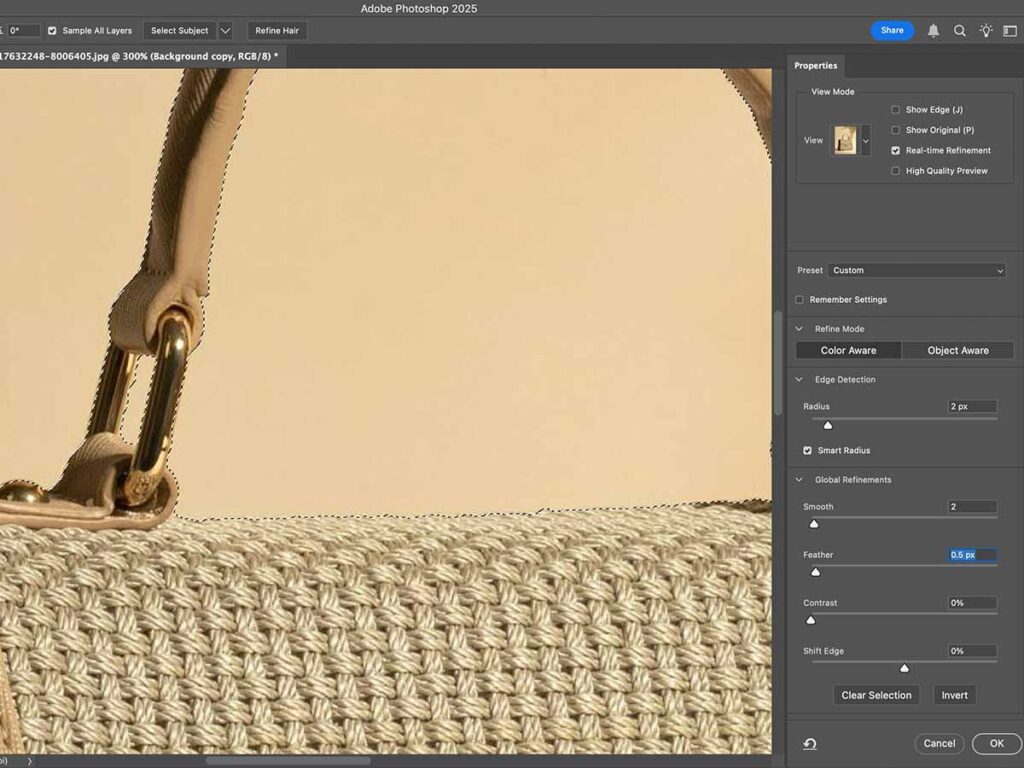
- Click Select and Mask to fine-tune.
- Use the Refine Edge Brush for detailed edges like fur.
Suggested Settings: Radius 2px, Smart Radius on, Smooth 1, Feather 0.5px.
3. Fix Errors and Confirm
- Use the positive brush to add missing areas.
- Use the negative brush to remove extra parts.
- Press OK when edges look natural.
Method 2: Select Object with Quick Selection Tool
The Quick Selection tool is the most used and fastest method for product photos in Adobe Photoshop. You can find this tool as an icon of “Paintbrush and Dotted Circle” in the top left-hand toolbar.
1: Select Your Subject
- Select the Quick Selection Tool and brush over the object.
- The selection expands automatically.
- You can also click Select Subject to start.
Step 2: Adjusting Your Selection
- Zoom to 200%.
- Switch between the Add and Subtract brushes to fix mistakes.
- Adjust brush size to follow edges closely.

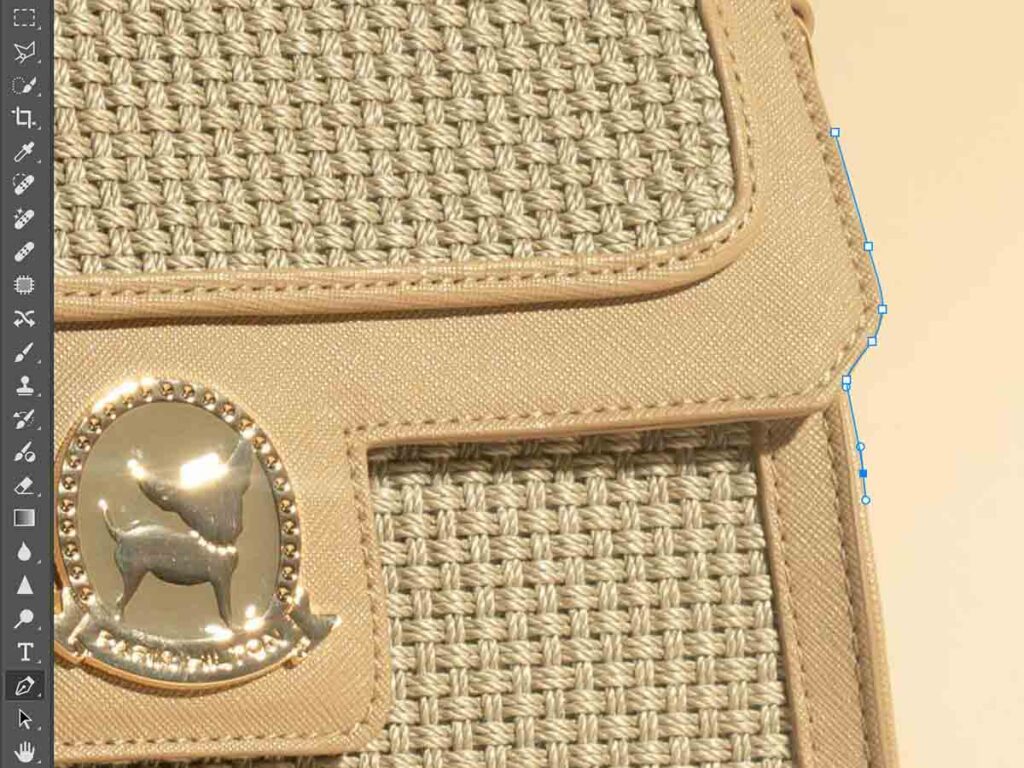
Method 3: Select Object with Create a Path
If you find none of the above options work with your project or aren’t giving the accuracy you require, then the best solution is to create your own path using the Pen Tool. Although this process is a bit time-consuming, it gives the most precise way to make a path in Photoshop.
1. Trace Around Your Subject
- Select the Pen Tool. Zoom to 200%.
- Click to place anchor points and drag to shape curves.
- Follow the outline until the path is closed.
2. Fill in Missing Areas
- Click Make Selection Box.
- Set Feather Radius to 1–2px for smooth edges.
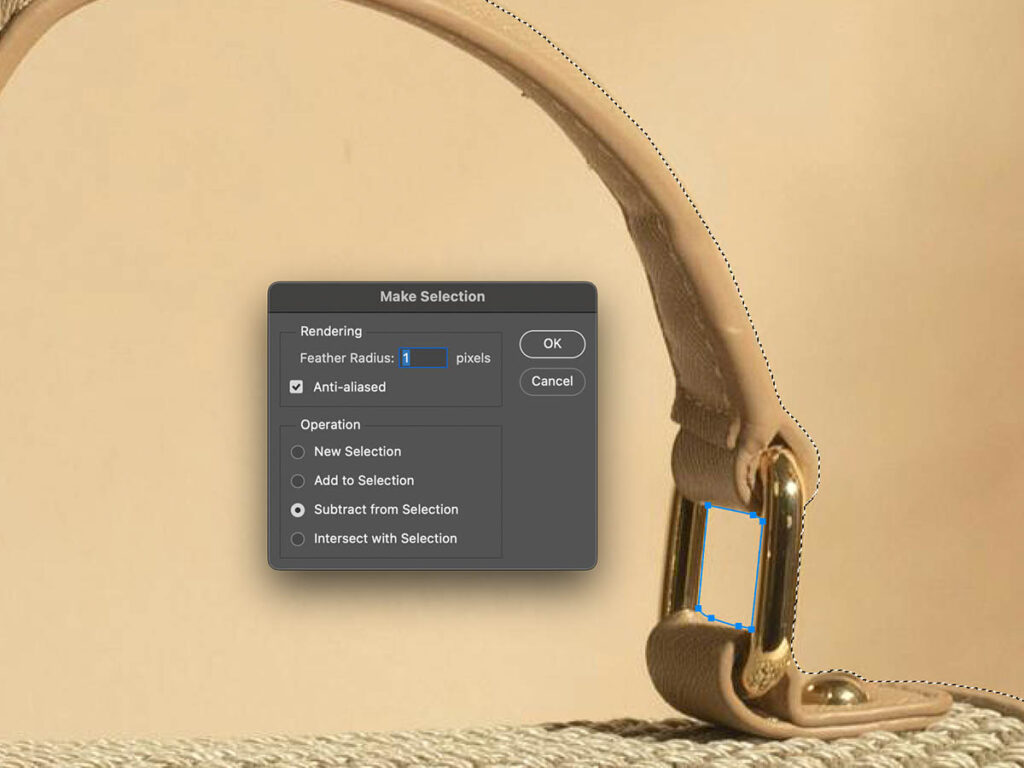
3. Remove Gaps if Needed
- Create paths around missing areas.
- Convert them to selections using Subtract from Selection.
- Repeat until the shape is clean.
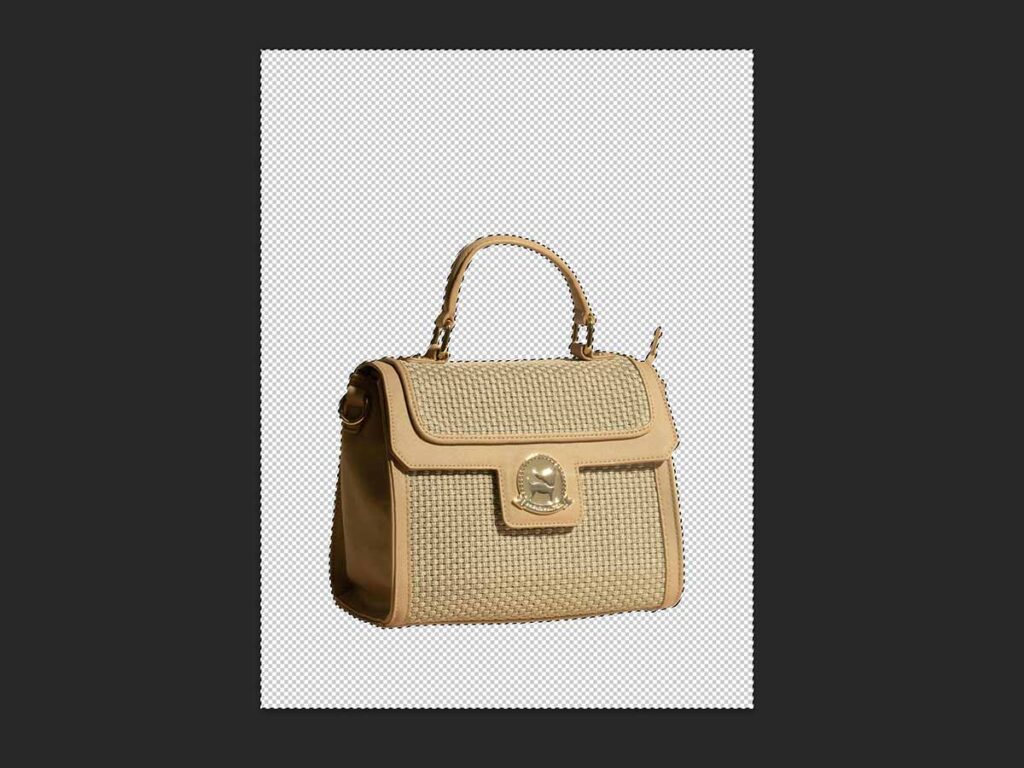
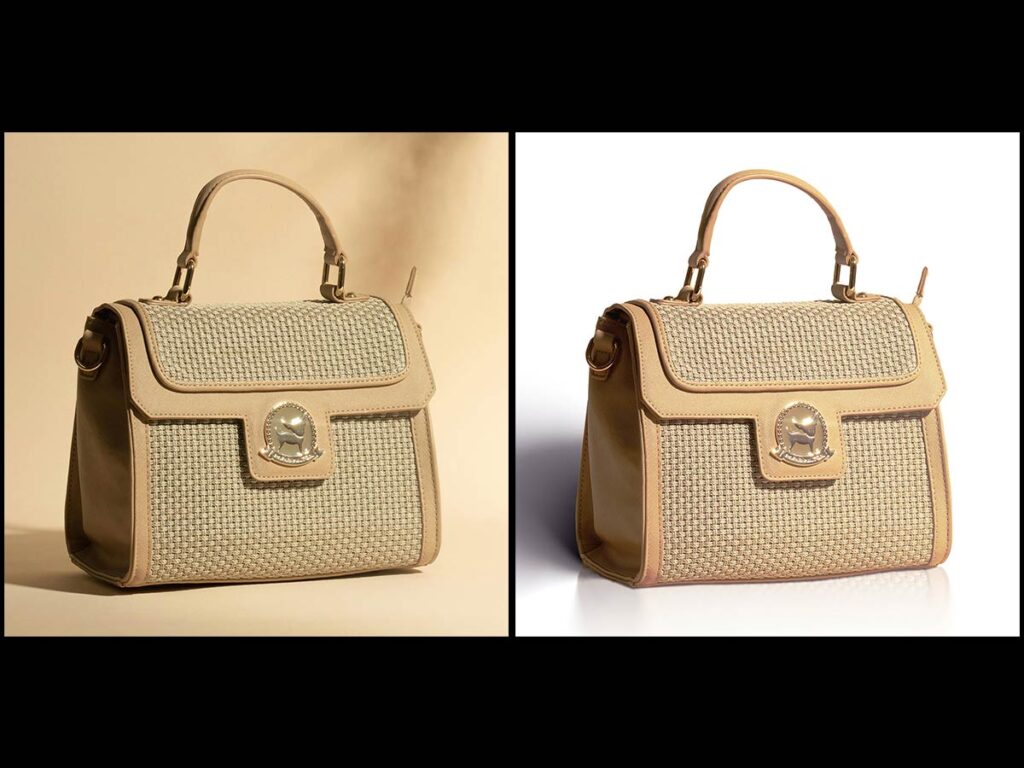
Step 3: Remove the Product Background
Remove the background and place your product on a clean, professional backdrop. This removes distractions, highlights details, and works well for e-commerce, marketing, and graphic design.
1. Inverse Your Selection
Press Cmd+Shift+I (Ctrl+Shift+I on PC) to invert your selection. Or go to the top toolbar and click “Inverse.” You’ll see the dotted line move outside the frame.
2. Delete The Background
Press “Backspace” to delete the background. If a dialog box appears, duplicate your layer first.
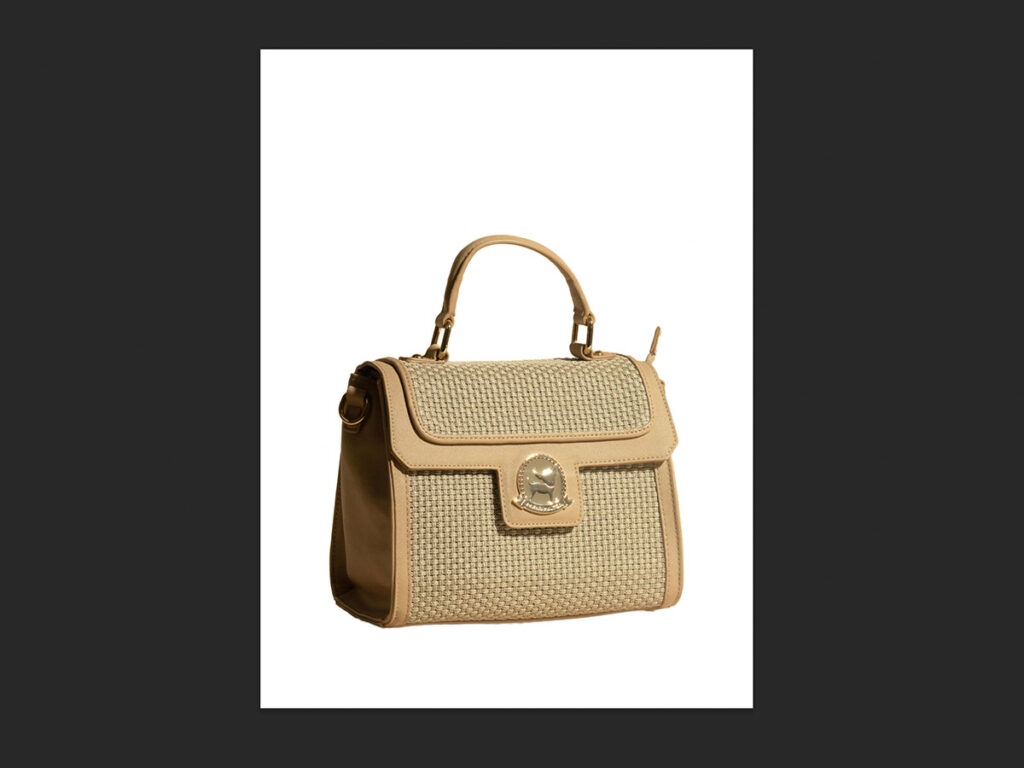
3. Create a New Solid Color Layer
- Click “Create New Fill or Adjustment Layer” at the bottom of the Layers panel (circle split into two shaded halves).
- Choose “Solid Color,” pick your color, and apply. White is recommended for a clean, professional look.
Step 4: Cropping Your Image in Photoshop
You already know the basic product photo editing process in Photoshop. Now let’s focus on cropping the image correctly.
1. Decide Where the Image Will Be Used
Start by identifying the platform. Use a square crop for social media. If the image is part of a set, keep the same size for all images. Then select the Crop Tool from the left toolbar.
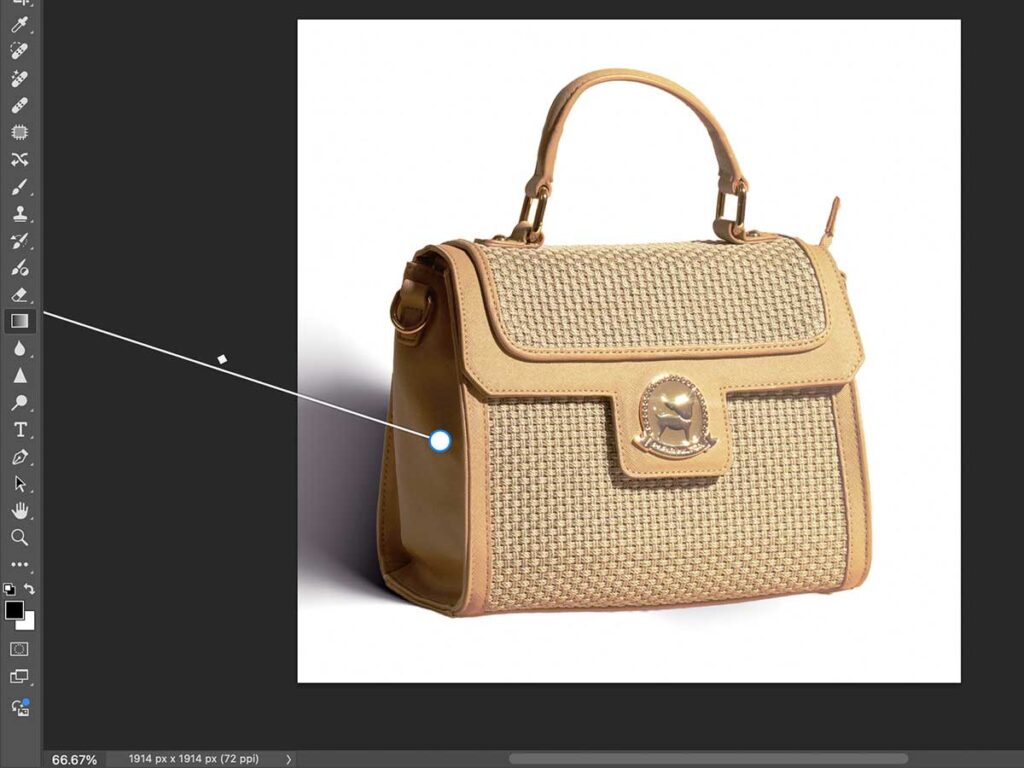
2. Straighten the Product Image Using the Straighten Tool
Before cropping, make sure the product is straight and free of distractions.
- Go to the top toolbar.
- Click the Spirit Level icon.
- Draw a line along a straight horizontal or vertical edge of the product.
- Release to auto-straighten the image. If the angle feels off, undo with Cmd + Z or Ctrl + Z and adjust again.

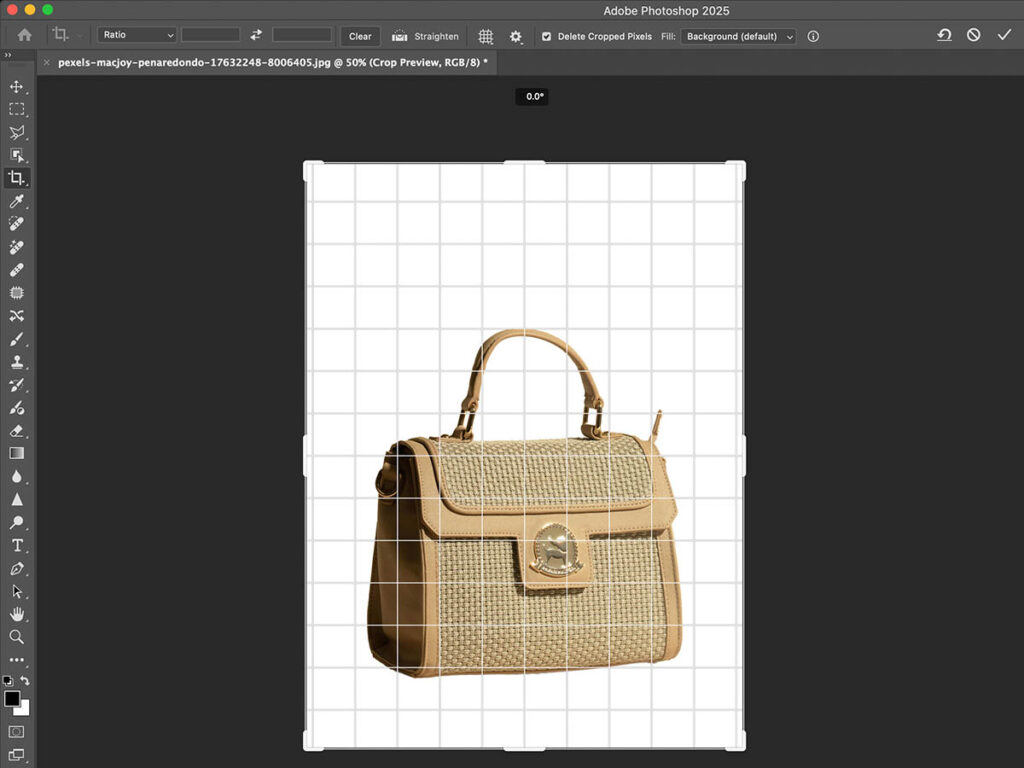
3. Straighten the Product Image by Rotating It Manually
If auto-straighten does not work, use the Crop Tool to rotate the image.
- Click outside the image and drag to adjust the angle.
- Watch the degree value closely to fine-tune the rotation.
- The grid overlay helps align the product accurately, which makes this method more reliable.
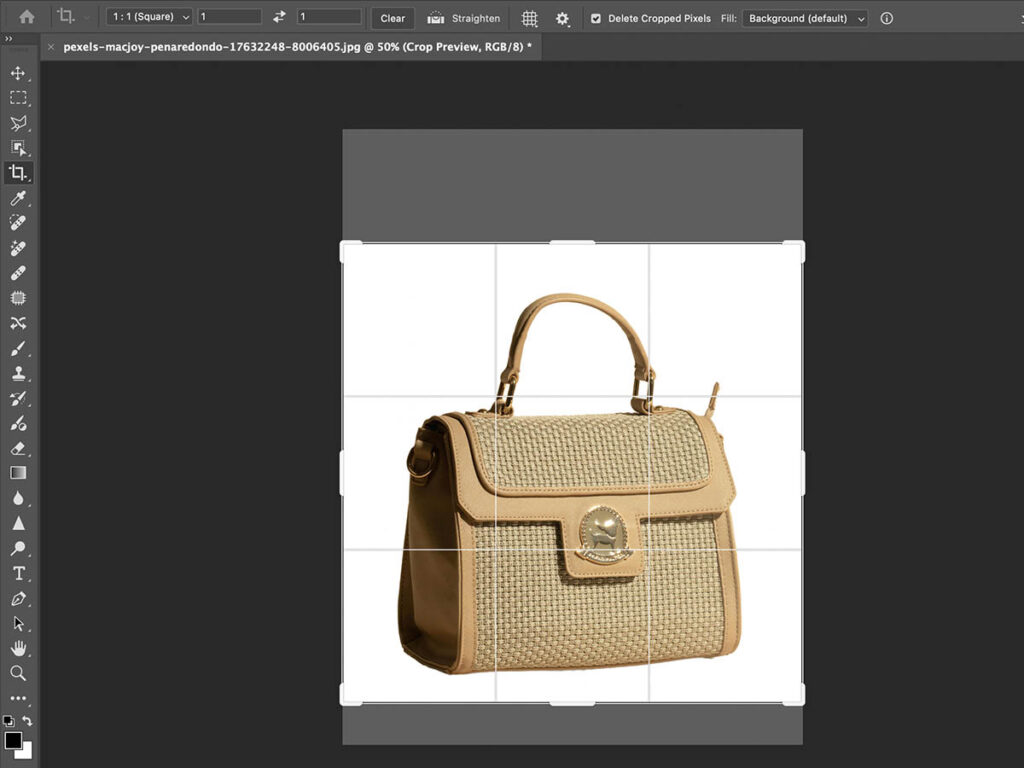
4. Crop the Product Image to Frame It Properly
With the Crop Tool still active, drag the edges inward to adjust the frame. Choose a preset aspect ratio from the Ratio menu or enter a custom size. To keep the original proportions, drag from a corner while holding Shift. Use the rule of thirds grid to balance the composition and finalize the crop.
Step 5: Retouching Your Product in Photoshop
As we have reached close to finishing, before your export, make sure to refine all the small details, as now the main focus will be on the product.
1. Spot Removal: Use Photoshop to clean dust, blemishes, or unwanted marks. Make sure you’re on the correct layer.
2. Heal Small Blemishes: Select the Spot Healing Brush, adjust brush size, zoom in, and click or drag over imperfections. For tricky patterns, use the Clone Stamp instead.
3. Fix Patterns with Precision: Select the Clone Stamp Tool. Set high Opacity and Flow for smooth results. Hold Alt (PC) to pick a matching area, then paint over the spot. Adjust anchor points as needed for perfect matching.
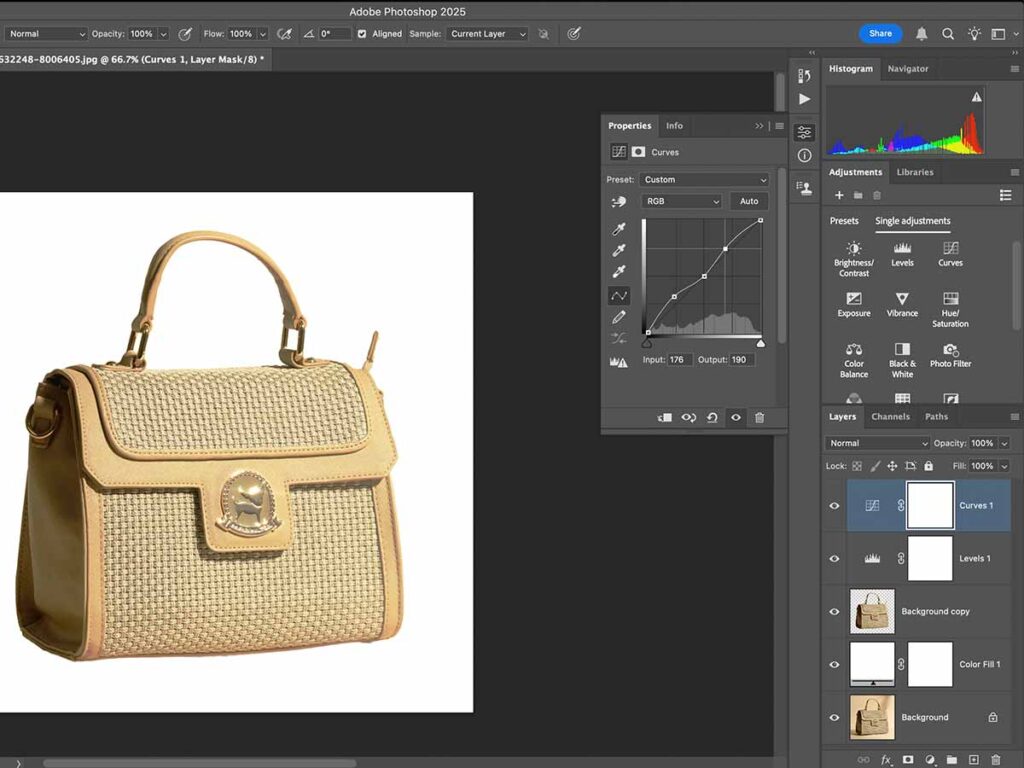
4. Adjust Tones: Use Levels or Curves to refine brightness and contrast. Remember, tonal changes can affect color, so complete this step before color adjustments.
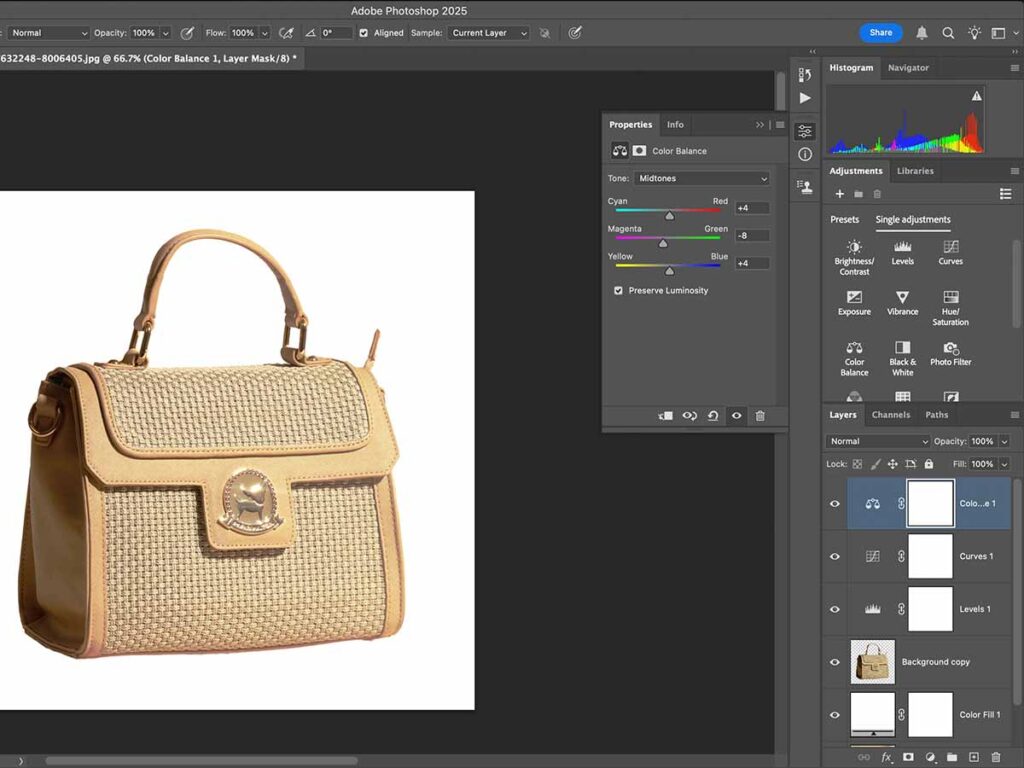
Step 6: Color Correction for Product Photography
Color correction is essential for making products look appealing and accurate. Use Color Balance and Hue/Saturation as adjustment layers to fine-tune tones without damaging the original image. Keeping the actual product nearby helps you match real colors, build customer trust, and reduce returns caused by color mismatch.
Step 7: Add Shadow to Your Product Images
Adding a shadow to your product image in Photoshop can turn any regular or flare image into a three-dimensional photo. And by adding shadow, give a realism and make it feel like the product is coming out of the image.
1. Add the Base Shadow
Use This Method to Add a Clean, Natural Shadow Under Your Product:
- Check the light direction using the original photo.
- Create a new layer below the cut-out image.
- Use the Polygonal Lasso Tool to select the base of the product.
- Extend the selection in the shadow direction.
- Press Option + Backspace (Alt + Backspace on PC) to fill with black.
- Repeat until the shadow looks natural.
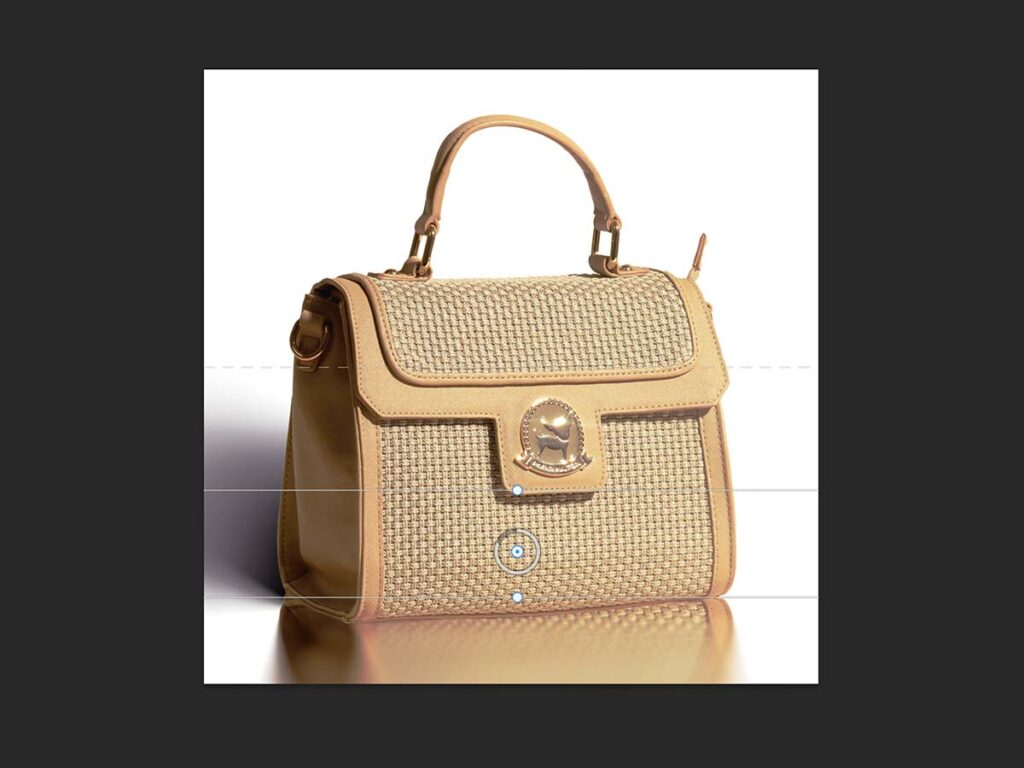
2. Add a Blur
Indeed, shadow doesn’t add any defined edges; this needs to adda blur to make the image look stronger, as if it moves away from the object.
- First, for smart filters, go to “Filter > Convert”, then, if required, adjust the necessary effects.
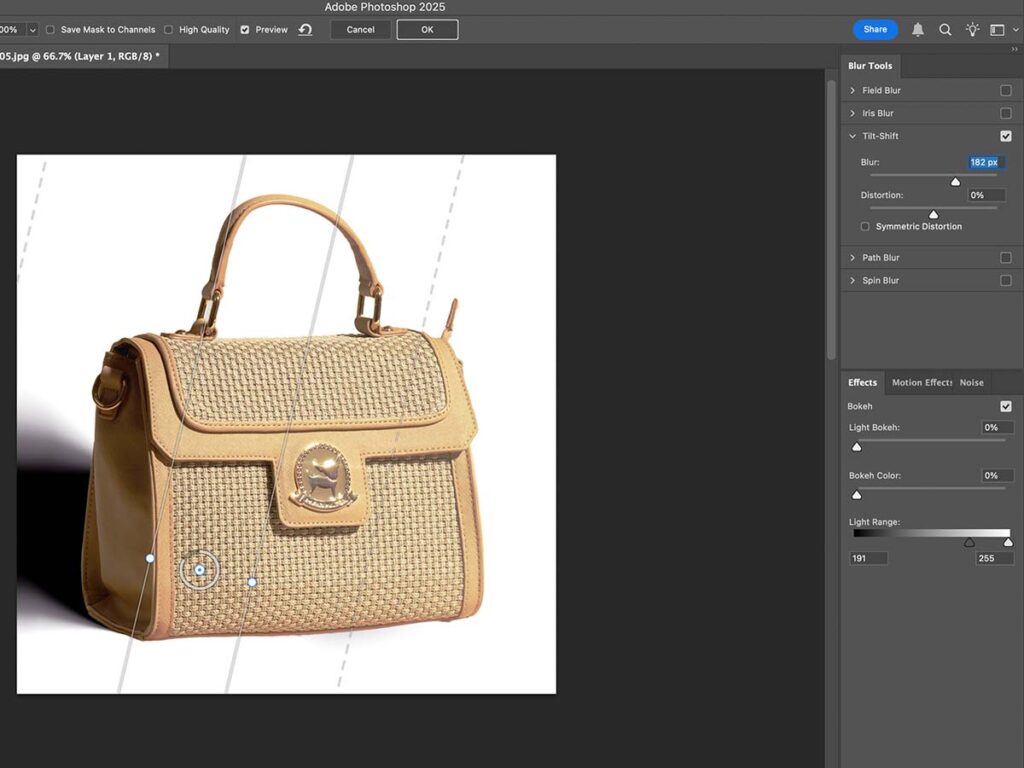
- Choose Filter > Blur Gallery > Tilt-Shift
- Place the Middle Point around the center of your product and adjust it based on the shape of the product and its shadow.
- Rotate the direction of the filter to match the direction of the shadow.
- Change the Blur slider under the Blur tool panel, from the right-hand side of the screen. However, edit according to the preference, but the recommended number is 180px.
- The two lines around the center control where the blur begins, and the outer lines control where it ends.
- Adjust only the lines that follow the shadow’s direction until the shadow looks natural.
3. Fine-Tune Your Product Shadow
Now we will add a gradient to make it more subtle as it fades off.
- Select the shadow layer and click on Layer Mask at the bottom of the Layers panel. This icon looks like a rectangle with a circle cut out inside it.
- Select the Gradient tool from the toolbar on the left.
- With the mask layer selected, click on a product near where the shadow starts and drag a gradient toward the shadow.
- Adjust the start and end points until it looks nice and natural.
- For a more precise look, use a soft brush with 0% hardness and low opacity to erase any areas that look off.
If the shadow still looks too prominent, reduce the layer’s opacity in the Layers panel.
4. Final Touch
Shadows are always darkest where the object meets the surface. To recreate this effect, we will draw a dark line by hand.
Begin by creating a new layer, placing it under the main layer with the product, as before.
- Use the brush tool with 0% hardness, and set both opacity and flow to 100%.
- Make the brush very small, and zoom in on the product’s edge at the bottom.
- Click on the product edge so that half of the brush circle is visible.
- Shift-click on the edge. It does not have to be precise, as this will add to the effect.

Complete the process by reducing the layer’s opacity.
Step 8: Add a Reflection
Finally, complete your edit by adding a simple shadow. Then, you can enhance the presence of your product with a reflection.
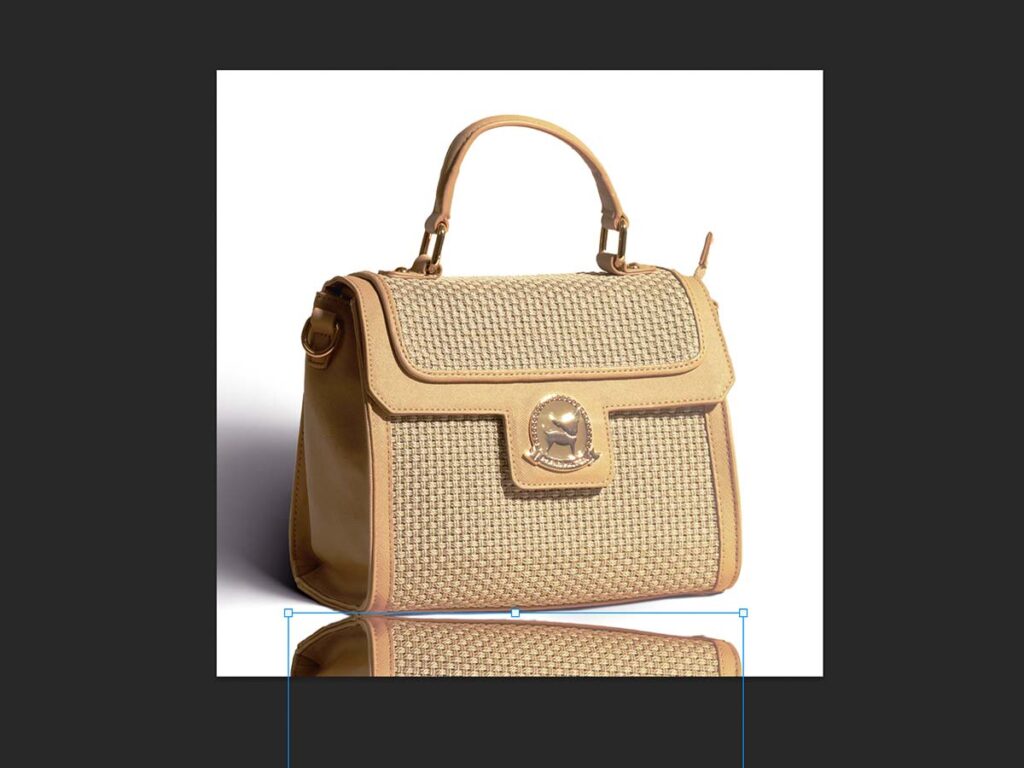
1. Set Up the Reflection
- Make a copy of the top layer of your cut-out product. This can be done by dragging the layer to Create a New Layer or using the keyboard shortcut Cmd + J (Ctrl + J on PC).
- Place this new layer directly below the original layer.
- Enter Transform mode by using the keyboard shortcut Cmd + T (Ctrl + T on PC). Right-click your product and then click Flip Vertically.
- Move the flipped layer down so the bottom edges line up with the bottom of the original product. Ensure the reflection layer is behind the image.
- For a more realistic reflection, you can adjust the layer’s opacity. You may also want to add a layer mask with a soft gradient to create a gradual effect.
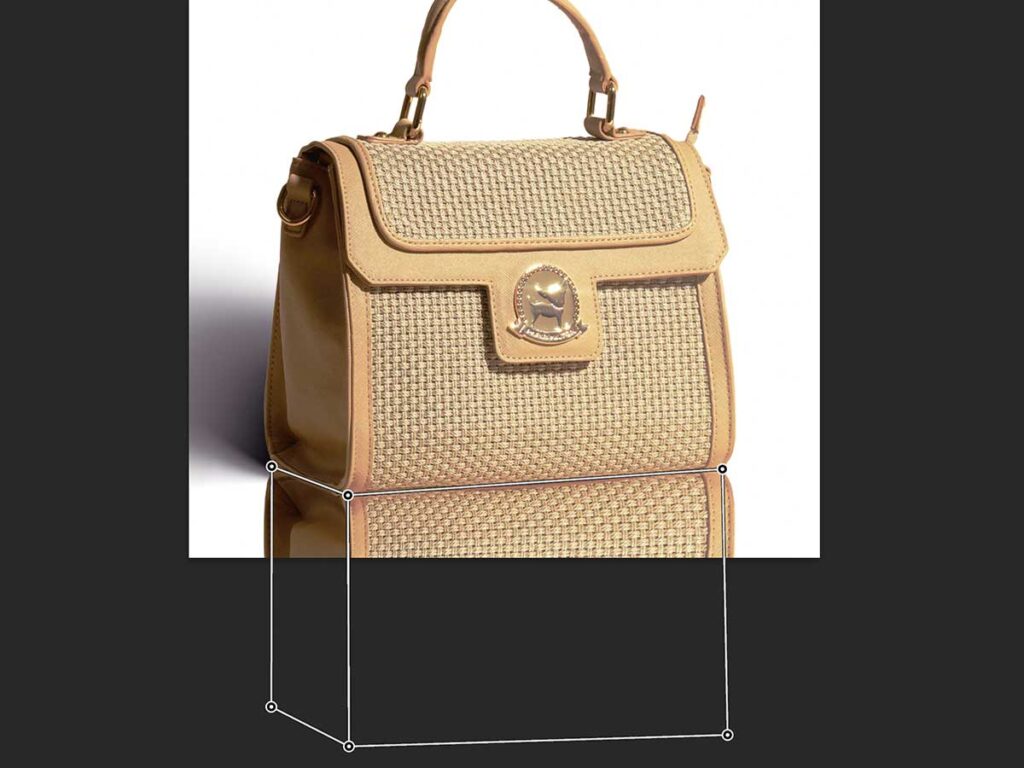
2. Perspective Warp
- Go to Edit > Perspective Warp.
- First, create a rectangle over the larger surface of the inverted product. If some of the duplicate product is hidden, create the rectangle based on the visible portion.
- Then, create a second rectangle to cover the adjacent surface, ensuring that it flows smoothly into the first rectangle.
- Click on “Warp” in the top menu bar.
- Make sure that the outer points are adjusted to fit the edges of the product, including those points that are tucked under the product, to accurately reflect the perspective of the product.
- Repeat or modify as needed to eliminate any gaps and to ensure that the rectangles cover all surfaces of the product.
3. Blur the Reflection
To make a realistic reflection in Photoshop, we need to blur and mask the image. These steps show the tools and adjustments needed to achieve it.
- Blur the image using the horizontal blur method (link to Add a Blur).
- Create a mask and add a gradient (link to Fine-Tune Your Shadow).
- Adjust the gradient to fix any irregularities in the reflection.

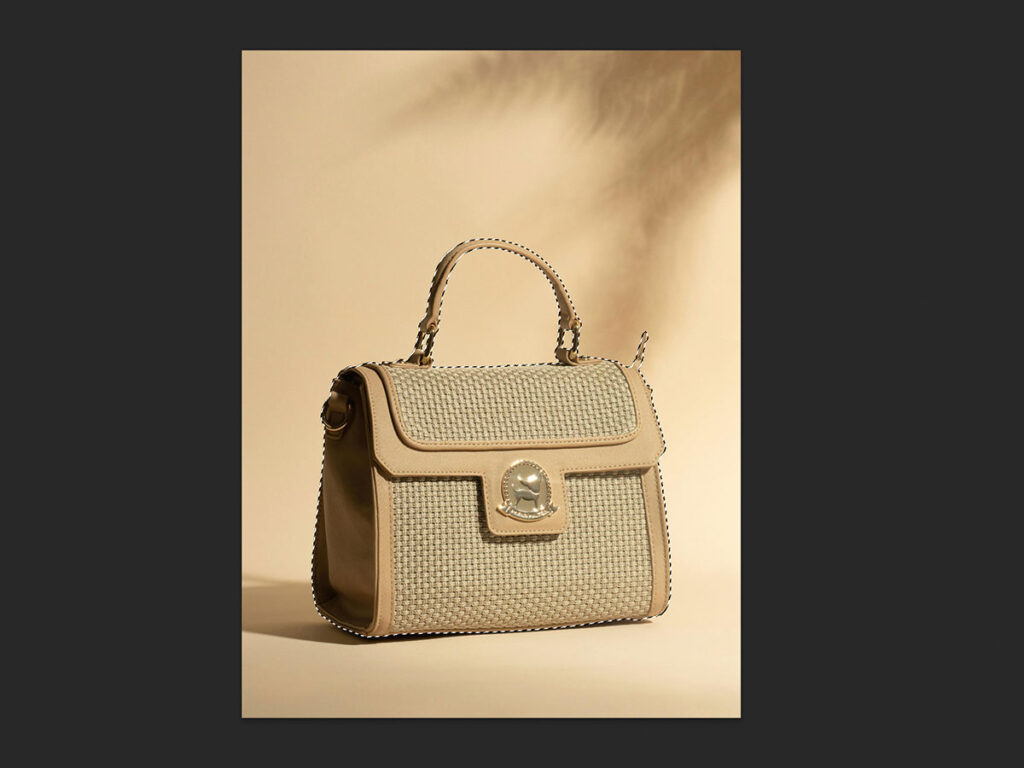
Step 9: Final Touches to Your Product Images
In the final step, add the finishing touches using professional product photo editing in Photoshop. This stage focuses on small refinements like sharpness, contrast, and background cleanup, followed by exporting the image in the correct format. These final adjustments ensure the product looks polished, consistent, and ready for use on e-commerce platforms.
1. Adjust Shrapness
Through these final adjustments in Photoshop, add a touch of sharpness to enhance details and bring clarity to the product image.
Here is the Process to Adjust the Sharpness:
- To select the main product layer, navigate to “Filter”, then click “Shrapen”, and then click “Unshrap Mask.”
- You can fine-tune the settings based on your preference, but a 1 px Radius and 20–30% Amount works well in most cases.
- Avoid over-sharpening, as too much sharpness can create harsh edges and make the product look unnatural.

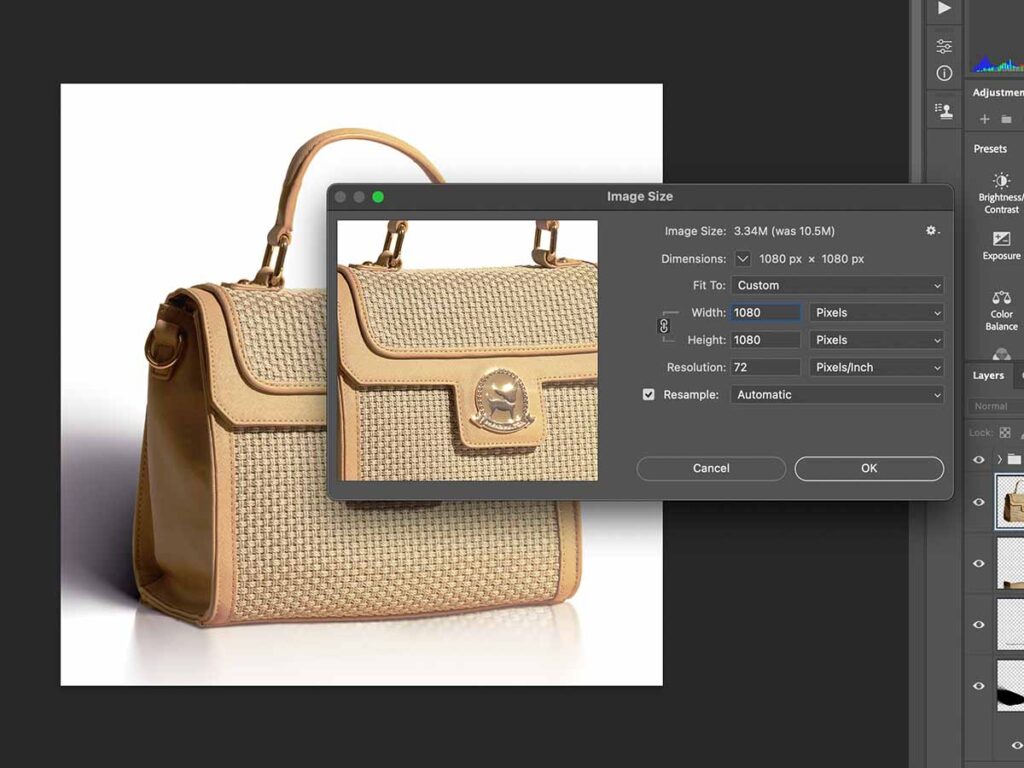
2. Exporting for Web
Fixate on where the product image will be used before exporting.
- Navigate to Image > Image Size.
- Set the resolution to 72 dpi (pixels per inch) for web use.
- For Amazon, keep the image at least 1000 pixels on the longest side. For Instagram, use 1080 × 1080 px for square posts. Use 1080 × 1350 px for portrait posts (4:5 ratio). And use 1080 × 566 px for landscape posts (1.91:1 ratio).
- Click OK after adjusting the size.
- Go to File > Export > Export As.
- Review the final settings and export the image.
Why Should You Edit Your E-commerce Product Photos?
Editing your e-commerce product photos is crucial because these images shape how customers see your brand and influence buying decisions. High-quality, consistent images build trust, keep shoppers engaged, and boost sales.
The reasons why you should edit your e-commerce product photos are as follows.
- Increase Sales: Sharp, professional photos help customers understand products and feel confident buying.
- Build Trust: Consistent lighting, colors, and clean backgrounds make your brand look reliable.
- Reduce Bounce Rate: Clear, focused images keep visitors engaged and exploring.
- Enhance Visual Appeal: Adjusted brightness, contrast, and clean backgrounds make products stand out.
- Ensure Color Accuracy: Correct lighting and color adjustments show products as they truly are.
- Create Brand Consistency: Uniform backgrounds and framing strengthen your brand identity.
- Meet Marketplace Standards: Editing ensures compliance with platforms like Amazon and Etsy.
- Optimize Loading: Properly edited and compressed images load fast without losing quality.
- Highlight Product Details: Sharpness and contrast reveal textures, shapes, and important features.
How Can You Make Your Product Stand Out?
To make your product stand out, focus on clarity, quality, and trust. High-quality visuals remove distractions, improve lighting, sharpen details, and keep colors accurate. Consistent backgrounds and natural shadows add depth, making your product look professional and desirable.
Here are six ways to grab attention and boost sales.
1. Highlight Your Unique Value: Show what makes your product different and why customers should choose it. Focus on the one key benefit they can’t get elsewhere.
2. Connect Emotionally: Use storytelling, lifestyle images, and relatable messaging to link your product to real needs and desires.
3. Invest in Packaging: Clean, high-quality packaging with smart branding makes your product feel premium and memorable.
4. Showcase Features Clearly: Use visuals and simple explanations to highlight what makes your product easier, smarter, or better.
5. Use Social Proof: Reviews, ratings, and customer photos build trust and reduce hesitation.
6. Target a Specific Audience: Focus your visuals, messaging, and offers on the customers who will value your product most.
How Do You Make All Your Product Colors Consistent in Photoshop?
To keep your product colors consistent, use Photoshop’s adjustment and color correction tools non-destructively. Start with Adjustment Layers like Curves, Levels, and Hue/Saturation to match tones.
The Color Sampler Tool checks exact values, while Layer Masks let you adjust specific areas without changing the whole image. Consistent white balance, lighting, and monitor calibration help your products look uniform across your store.
Step 1: Pre-Production Setup
- Grey Card: Set accurate white balance and exposure for true-to-life colors.
- Consistent Lighting: Use the same lighting for all shots to prevent color shifts.
Step 2: Photoshop Workspace
- Organize Panels & Layers: A clean workspace helps you edit efficiently.
- Adjustment Layers: Use Curves, Levels, and Hue/Saturation nondestructively.
- Open Images as Layers: Compare multiple products side-by-side for consistent edits.
Step 3: Color Matching Techniques
1. Match Color Tool
- Put products in the same document.
- Select layers to adjust.
- Go to Image > Adjustments > Match Color.
- Under Source, select the correct document and “ideal” layer.
- Adjust Fade and use Neutralize to remove color casts.
2. Curves Adjustment
- Add a Curves Adjustment Layer.
- Use the middle eyedropper on a grey card or neutral area.
- Adjust Red, Green, and Blue channels if needed.
- Apply a clipping mask to affect only the product.
3. Hue/Saturation & Color Range
- Select > Color Range and pick the product color with the Eyedropper.
- Add a Hue/Saturation Adjustment Layer.
- Adjust Hue, Saturation, and Lightness to match your reference image.
Step 4: Workflow for Multiple Products
- Save & Sync Settings: Preserve presets, adjustment layers, and actions for consistency.
- Use Actions: Automate repetitive tasks like resizing, sharpening, or color adjustments.

