
The most common product photography lighting setup consists of a 3-light setup, featuring one key light (primary), a fill light (secondary), and a backlight (additional). Depending on the photography setup, photographers use both natural and artificial lights, though artificial ones are more convenient due to their availability and portability, allowing them to be used anytime, anywhere. The most common types of photography lighting include continuous light, strobe, backlight, soft and hard lights, and lightboxes.
What you’ll learn in this article
- 1 What is the 3 Light Rule?
- 2 What Type of Lighting is Used in Product Photography?
- 3 What Are the Basics of Studio Lighting for Product Photography?
- 4 What is the Best Product Photography Lighting?
- 5 How Many Lights Are Needed for Product Photography?
- 6 How to Use Proper Studio Light for Product Photography?
- 7 What is the Best Lighting Setup for Product Photography?
- 8 How Do You Set up Product Photography Lighting?
- 9 FAQ’s
What is the 3 Light Rule?
The 3-light rule is a 3-point lighting setup that includes a key light, a fill light, and a backlight/rim light to evenly illuminate the setup. The key light defines the product’s form, the fill light adjusts shadow falloffs, and the backlight or rim light separates the subject from the background.
Professional photographers use the 3-light rule to reduce reflection and preserve textures. The cost to set up such a setup is flexible; you can use speedlights and reflectors if you are tight on or you can choose advanced strobe kits for professional-grade lighting output.
What Type of Lighting is Used in Product Photography?
There are mainly 2 types of lighting used in product photography: natural light and artificial light.

1. Natural Light
Natural light is the sunlight, especially used in indoor or outdoor photography. It is free and timely use of sunlight, allowing photographers to capture quality images in diffused and realistic colors with minimal equipment. To use natural light for a product photography shoot in golden hour, after sunrise, and before sunset (last hour).
2. Artificial Light
Artificial lights are a convenient option for shooting product photos anytime, anywhere. Being portable and having wide options to choose from, it is the first choice for professional photographers. It allows users control of illumination, removing reflections, adjusting shadows, and ensuring consistent color exposure. There are different types of artificial lights used in professional photography, such as continuous light, strobes, soft light, backlight, etc.
What Are the Basics of Studio Lighting for Product Photography?
The basics of studio lighting for product photography cover 3 necessary elements, which are the role of light sources, the type of lights, and controlling the illumination level. Managing all these together helps photographers create their unique lighting setup that allows control over lighting quality, direction, and appearance of the product.
1. Role of Light Sources
While preparing the lighting setup, analyze how many lights you will need to prepare an evenly-lit environment. Professional setups mostly have a 3-light setup. If you shoot jewelry, a lightbox is sufficient; a 2-light setup would be good enough to shoot flat-lay photos, but shooting a car would need more than 3 lights to cover the entire area.
The photography lights serve several purposes/roles in the setup, based on which photographers choose different lights as follows.
| Roles/Purposes | Light Sources |
|---|---|
| To use as the primary and brightest light source | Key Light |
| To reduce contrast and soften the harsh shadows of the key light | Fill Light |
| To create an outline to separate the subject from the background | Backlight, Kicker Light, Hair Light |
| To emphasize the background to control tone | Background Light, Set Light |
| To create a highlight on a reflective surface | Specular Light |
| To make texture and details pop | Contour Light |
| To eliminate shadows’ harshness and reflections | Diffusers |
| To bounce or reflect light into the shadow | Modifiers, Reflectors |
| To control shadows and prevent casting on specific areas | Modifiers |
2. Type of Lights
Depending on your photography purposes and workflow, choose the types of lights. Use continuous lights when you have to work for long hours. They are great for checking shadows and highlights’ appearance in real-time. You can use strobe lights to create short, sharp, and powerful bursts of light to focus product details.
3. Controlling the Illumination Level
Know the diffusers, reflectors, and modifiers to adjust the illumination level that each light produces. Diffusers such as softboxes, diffuser panels, or umbrellas produce soft light and spread a large area. It minimizes shadow harshness and reflection, creating a professional look. Grids, snoots, or barn doors produce hard light, focusing the light and creating sharp shadows. Reflectors bounce or reflect the light into the product.
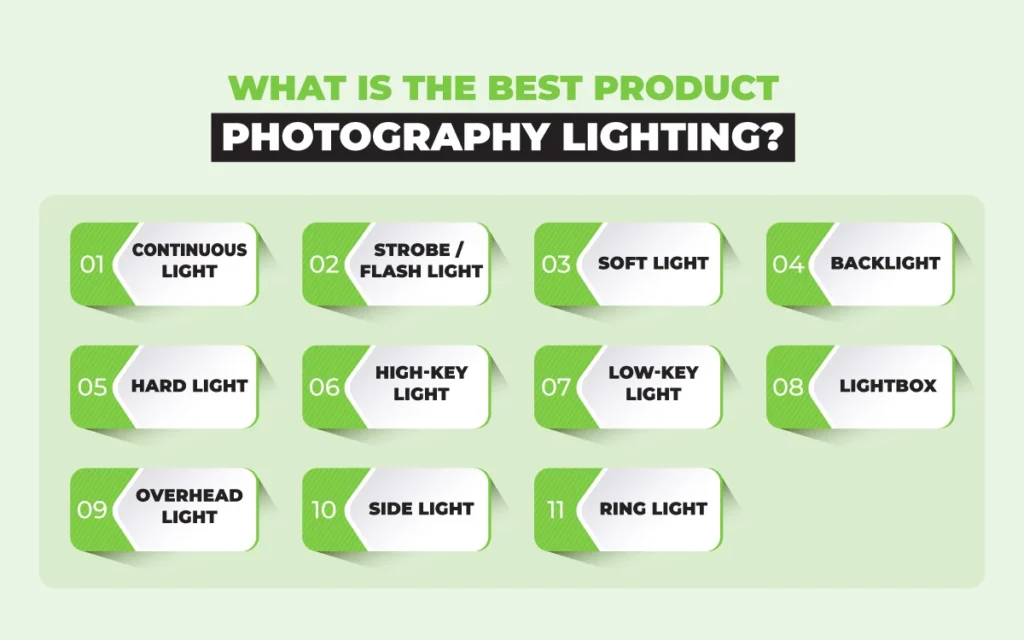
What is the Best Product Photography Lighting?
The best product photography lighting is the one that offers accuracy in color representation, consistency in light quality and illumination level, and control over the lighting quality. Taking these features into account, the best lights for product photography include continuous light, strobes/flash light, soft light, backlight, hard light, high-key and low-key light, lightbox, overhead light, side light, and ring light.
1. Continuous Light
Continuous lights offer consistent illumination due to LED panels, tungsten bulbs, fluorescent tubes, or HMI panels. As the light stays on, it allows photographers to have a real-time preview, which is suitable for taking product demo photographs, flat lay photographs, social media photos, and product videos.
2. Strobe/Flash Light
Strobes or flash lights emit a powerful burst of light and are best used for shooting products with precision, freezing motion. Flash lights or strobes may overpower ambient light, which produces sharp results. This is why they are used in shooting jewelry photography, electronic products, reflective products, etc.
3. Soft Lights
Softbox refers to diffused and even lighting, which softboxes, umbrellas, bounce surfaces, and panels create. The illumination tones down glare and shadow, and highlights product details. Softlights are best for shooting cosmetics products, apparel products, or miniature products where subtle texture needs highlighting.
4. Backlight
Backlight is placed on the back side of the product to create a glowy edge for filling the dark areas and separating the subject from the background. This light defines products’ shape and is best for shooting products that have a reflective surface, such as perfume photography.
5. Hard Light
Hard light creates high contrast and sharp shadows. A direct and small light source produces hard light to emphasize the product’s structure and edge. Hard lights work best for metallic fashion accessories, electronic products, or metallic products.
6. High-Key Light
High-key lighting produces evenly lit and bright scenes with minimal shadows. It creates clear light, making product presentation fresh and distraction-free. Use high-key light to shoot clothing products, cosmetics, and e-commerce white product photography.
7. Low-Key Light
Low-key light is used for producing high-contrast and dark scenes. So the photographers make selective highlights of the product, adding depth to the product presentation. Use low-key light for shooting artistic shots of perfumes, high-end designer items, etc.
8. Lightbox
A lightbox is a small and enclosed box that offers light from all sides to create evenly lit product images. Using it creates a shadow-free setup, removes glare, and creates professional-looking photos. Lightboxes are used for shooting small products, jewelry, electronic gadgets, etc.
9. Overhead Light
An overhead light is placed above a product to illuminate the product on a flat surface. It highlights symmetry, surface details, etc, for flat-lay/top-down product photography and food photography.
10. Side Light
Side lighting offers light on one side of the product, at a 90-degree angle. Side lighting enhances the product’s dimensions, material details, textures, designs, etc. Professional photographers use side light for food photography, leather, and fabric photography.
11. Ring Light
A ring light is a circular light that produces uniform illumination with minimal shadows. The product lighting setup appears professional and refined as it evenly emphasizes details. It is mostly used for e-commerce product photography and cosmetics product photography.
How Many Lights Are Needed for Product Photography?
3 lights are needed for product photography in a commercial setup, but it is not fixed or a rule. You can use only natural light to shoot products or use artificial lighting setups of one light or 2 lights, even more than 3 lights, depending on the location, size, and purpose of the product photography, and desired output.
The increased number of light sources contributes both to increased illumination and complication. It would create more light surrounding and also allow you to create product shots.
Are a Softbox and An Umbrella Necessary for Product Photography?
Yes, a softbox and an umbrella are necessary for product photography to control the illumination, adjust shadow and darkness, and create a diffused light in the photoshoot setup. But neither the softbox nor the umbrella is mandatory equipment to have on the set; you can use alternative options such as modifiers, reflectors, bounce cards to do what softboxes and umbrellas do.
How to Use Proper Studio Light for Product Photography?
To use proper studio light for product photography, place the key light close to the product at a 45-degree angle. The key light should be large and diffused for maximum softness. Now place a reflector or softbox opposite the keylight to bounce or reflect the light, softening the shadows and adding dimension in the setup.
If the product consists of a complex design or is medium to large in size, use a bright light in the background and use a 3-light setup. It would separate the subject from the background and add depth to it. Adjust or add more light to emphasize the products’ texture.
What is the Best Lighting Setup for Product Photography?
The best light setup for product photography is a 3-point light setup. Most professional photographers use this in indoor or studio photoshoots to ensure evenly lit and diffused illumination. Other lighting setups that are used for product shooting are one-light, two-light, 3-light, and specialized light setups.

1. The One-Light Setup
The 1-light setup includes a reflector with the key light. It is a foundational step and a budget-friendly option for beginner photographers. One-light setup is best for shooting medium to small-sized products. By using a reflector or bounce card, you can diffuse the illumination of the lights.
2. The Two-Light Setup
The 2-light setup includes a background light with the key light, good for shooting e-commerce and catalog product shots. It is a medium-budget setup, and the background light is aimed at creating a seamless background sweep. It ensures a perfect background for products during photography.
3. The Three-Light Setup
The 3-light setup includes an extra backlight or rim light with the 2-light setup. It is a professional photography lighting setup that offers control over dimensions. Three-light setup is best to use for shooting high-end marketing photos, e-commerce product shots, and complex or reflective products.
4. Specialty Lighting Setup
Speciality lighting setup is used occasionally, depending on the products. It requires specialized techniques so that the subject presentation looks professional. Examples of this type of lighting setup include side lighting, stripe rime lights, etc.
| Setup | Location | Best for |
|---|---|---|
| One-Light Setup | Indoor and Outdoor | Small to medium products to ensure a clean and classic look for practicing light shaping |
| Two-Light Setup | Indoor and Outdoor | Small to medium products To ensure a clean and classic look for practicing light shaping |
| Three-Light Setup | Indoor | High-end marketing to shoot dark or reflective products to capture products in three-dimensional separation |
| Side Lighting Setup | Indoor | E-commerce, catalog, and packaging shots to shoot products on a white background |
| Rim Lighting | Indoor | Shooting reflective shape and surface products |
How Do You Set up Product Photography Lighting?
To set up the product photography lighting, first position your product on a chosen surface and set the background. One of the product photography tips is to consider the product size, shape, design, and shooting purposes. Start with shooting in natural light and then take advantage of artificial lights and use a 1-light, 2-light, or 3-light setup that best suits your needs.
Place the key light directly in front of or above it, at a 45-degree angle. Then add a fill light to one side and other lights if necessary.
- A 1-light setup is just the key light with a reflector, best for creating a balanced and clean look for products.
- The 2-light setup includes key and fill lights and allows control over the contrast and shadows.
- The 3-light setup includes a backlight with the 2-light setup to ensure an evenly lit setup, diffused, and a professional look in photos.
How to Use Natural Light for Product Photography at Home?
Here is a step-by-step product photography lighting setup guide on how to use natural light for product photography.
Step 1: Choose the time during the morning or during the golden hour when the sunlight is soft.
Step 2: Place your product near a window where natural light enters. Make sure the window is positioned at one side of the product, not directly in front of it. It will work as the key light.
Step 3: Place a bounce card or reflector on the other side of the product to evenly illuminate the product and create flattering shadows.
Step 4: Use a white sweep for a seamless background. When the light is set, take some test shots to check how the light appears and adjust.
Where to Put Lights for Product Photography?
Put lights for product photography in 3 major positions during shooting, depending on your types of photography, which are direct in front or above (key light), on one side or both sides (fill light), and on the backside (backlight).
- Placing directly above or in front is the job of a key light, which is the main source for the photos.
- Lights that are placed on one or both sides are the fill lights that support the key light for a balanced spread light till the dark parts get away.
- The backlight is used to separate the subject from its background.
FAQ’s
What is split lighting?
Split lighting is a light and shadow casting technique where it is evenly halved to illuminate and darken the product to produce dramatic contrast, emphasizing texture, shape, and form. Split lighting is mostly used for shooting luxury products, branded items, and high-end accessories.
Are LED lights good for product photography?
Yes, LED lights are good for product photography, given that they produce continuous light, allowing photographers to adjust. These lights offer real-time previews, maintain consistent temperature, and save energy. So, whether you are shooting products for photography or videography, even in a small setup, LED lights are a suitable choice.
Are ring lights good for product photography?
Ring lights are good for product photography only if the products are small in size, for example, jewelry products, cosmetic items, etc. They ensure even lighting and shadowless illumination, ensuring uniformity in product presentation. Ring lights aren’t a good choice to shoot products if you want to add depth or shadows in product photos.
Is 200W enough for product photography?
Yes, a 200W light is sufficient to shoot small and medium-sized products. If you add softboxes or diffusers, the 200W will appear soft and consistent, which is perfect for shooting e-commerce products, catalog shots, and indoor or studio setups. However, 200W isn’t enough to shoot big products; you will need to increase illumination sources or watts to ensure even light.
Are ring lights better than softboxes for product photography?
No, ring lights aren’t better than softboxes for product photography, though they are used for shooting small-sized products. Softboxes allow more control over lighting direction, shadow, and diffusion to make the product texture and surface appear distinct. Lightbox spreads light to a limited space, whereas softboxes cover a large area.
What is the difference between a lightbox and FancyBox?
The difference between a lightbox and a fancybox is their identity and purpose a lightbox is a lighting tool, and a fancybox is a stylish packaging. Lightboxes offer diffused lighting and reduce shadows. Fancyboxes add depth to the product in the frame, but they don’t contribute to lighting.
