
To retouch photos in Photoshop, use Spot Healing Brush Tool, Healing Brush Tool, Patch Tool, Red Eye Tool, Clone Stamp Tool, Pattern Stamp Tool, Dodge and Burn Tool, and Content-Aware Tool. Retouching improves and helps eliminate imperfections, thus bringing out a detailed, professional, and highly convincing appearance on images.
What you’ll learn in this article
- 1 How to Retouch Photos in Photoshop Using Retouching Tools?
- 1.1 How to Retouch a Photo Using the Spot Healing Tool?
- 1.2 How to Use the Photoshop Liquify Tool to Retouch a Photo?
- 1.3 How to Use the Clone Stamp on Retouch?
- 1.4 How to Skin Retouch Using Modern Frequency Separation?
- 1.5 How to Retouch Images in Photoshop Using Dodge and Burn?
- 1.6 How to Retouch Your Pictures Using the Photoshop Patch Tool?
- 2 How Do You Retouch Eyes, Teeth, and Hair in Photoshop?
- 3 How to Retouch Product Photos in Photoshop?
- 4 How to Retouch Food Photos in Photoshop?
- 5 How to Retouch Old Photos in Photoshop?
- 6 Which Photoshop Tools are Used for Retouching in Photoshop?
- 7 What Does Photo Retouching Mean?
- 8 Where Can You Find Professional Photo Retouching in New York, USA?
- 9 FAQ’s
How to Retouch Photos in Photoshop Using Retouching Tools?
To retouch photos in Photoshop using retouching tools, there are different ways, such as the spot healing brush tool, the liquify tool, the clone stamp tool, modern frequency separation, the dodge and burn tool, and the patch tool.
How to Retouch a Photo Using the Spot Healing Tool?
Here is a step-by-step guide to retouching a photo using the spot healing brush tool.
- Prepare a layer
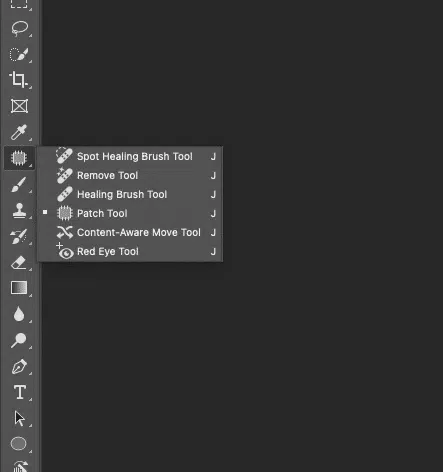
- Select the spot healing brush
- Retouch the photo
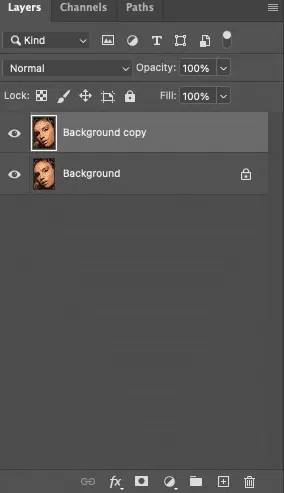
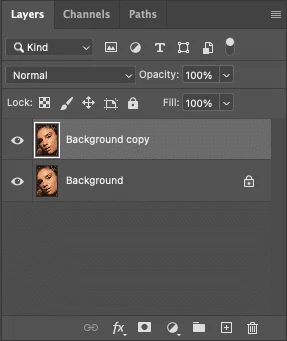
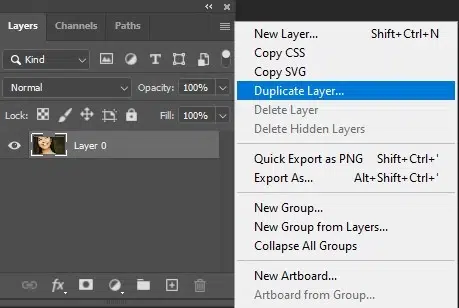
Step 1: Prepare a Layer
Duplicate your background layer (Ctrl/Cmd + J) for non-destructive processing. This allows you to switch back to the original image and rectify mistakes without affecting the original photo.
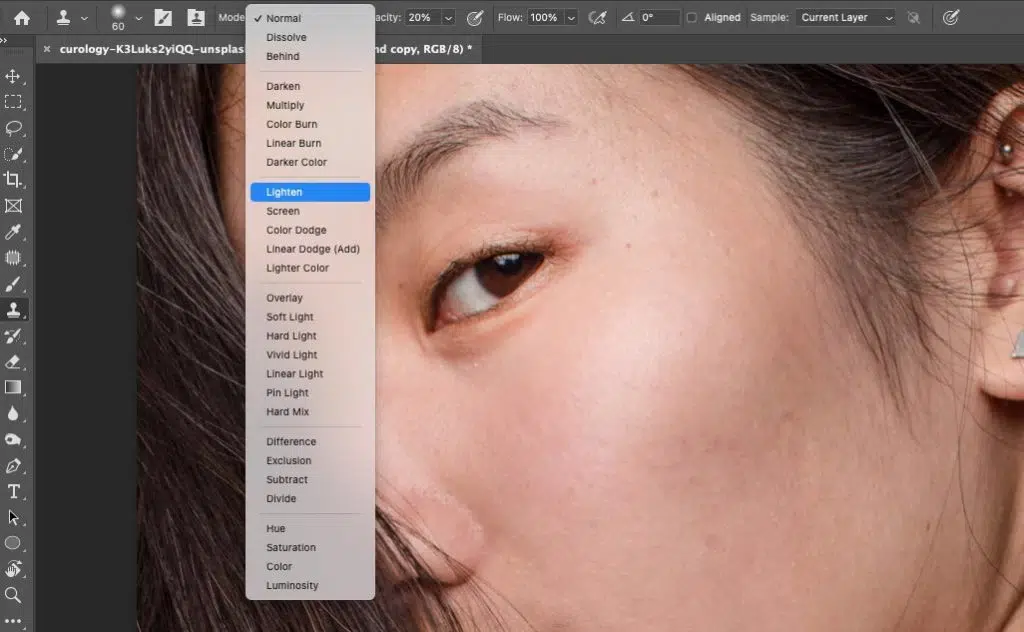
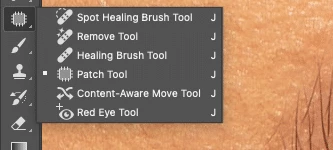
Step 2: Select the Spot Healing Brush
Choose the spot healing brush tool from the toolbar. In the options bar, enable Content-Aware to allow automatic sampling of surrounding pixels to create natural-looking corrections.
Alternatively, you can select lighten or darken under mode to preserve highlights or shadows, especially useful for product or portrait photography.
Step 3: Retouch the Photo
Click or drag over unwanted objects in your image. Photoshop will intelligently blend the area with surrounding pixels. Work in small areas, zoom in for precise working, and resample areas when required for the best output. After finishing, adjust the layer’s opacity to fine-tune the effect for a seamless look.

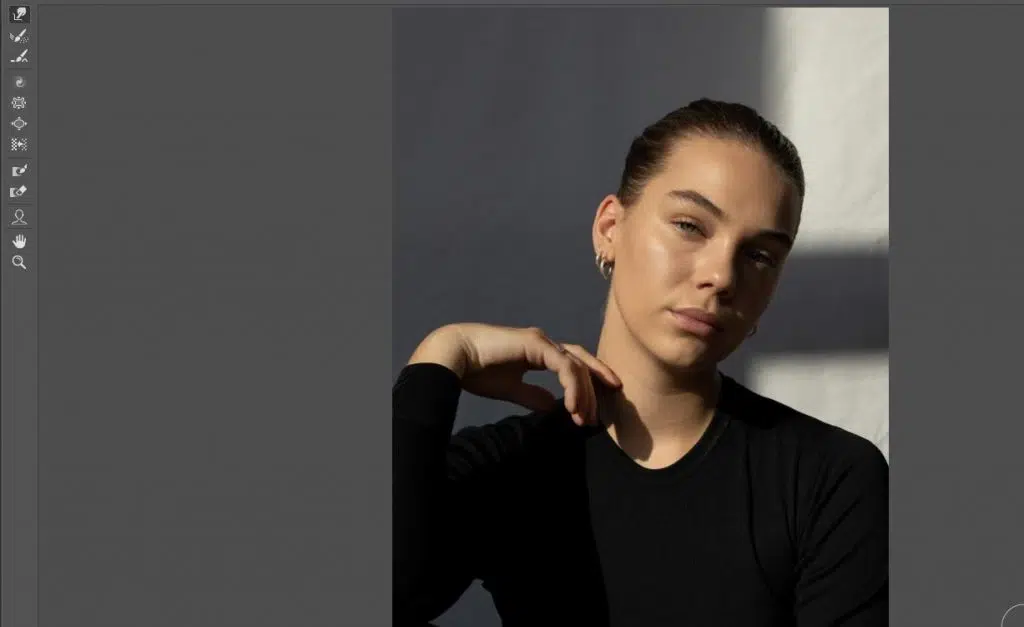
How to Use the Photoshop Liquify Tool to Retouch a Photo?
Here are the steps to use the Photoshop Liquify tool to retouch a photo.
- Prepare a layer and open the Liquify tool
- Select the forward warp tool
- Retouch and refine
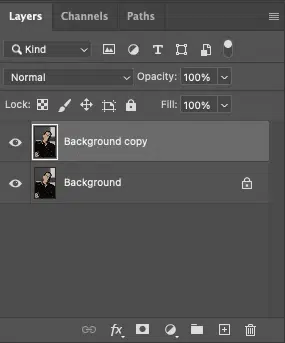
Step 1: Prepare a Layer and Open the Liquify Tool
Duplicate your background layer by pressing Ctrl/Cmd + J. Then, convert it to a Smart Object to work non-destructively.
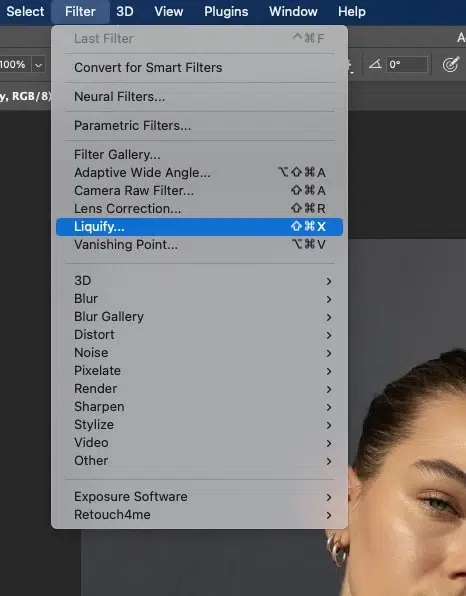
- Go to Filter
- Liquify to open the Liquify workspace
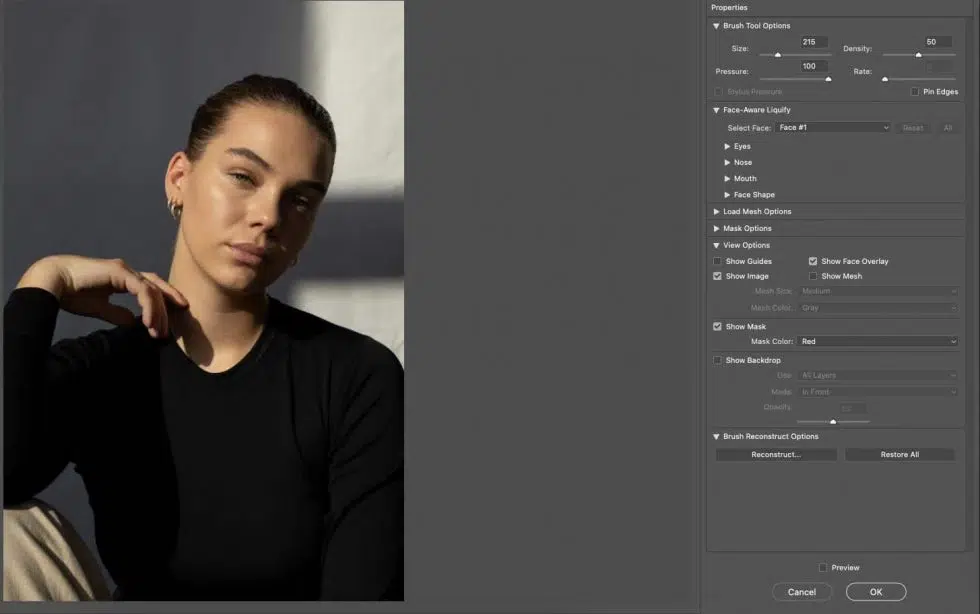
Step 2: Select the Forward Warp Tool
In the Liquify window, select the Forward Warp Tool (top icon). Adjust Brush Size, Pressure, and Rate in the Brush Tool Options for precise control. Use Face-Aware Liquify for portraits to automatically detect and adjust facial features.
Step 3: Retouch and Refine
Brush over areas you need to adjust, making subtle, controlled changes. Zoom in for a precise edit and modify the brush size if necessary. Once the edit looks fine, click OK to apply the changes. Combine this with Frequency Separation or Dodge & Burn layers afterward, for professional results.
How to Use the Clone Stamp on Retouch?
To use the clone stamp tool to retouch, follow these steps.
- Prepare the Clone Stamp Tool
- Sample and retouch
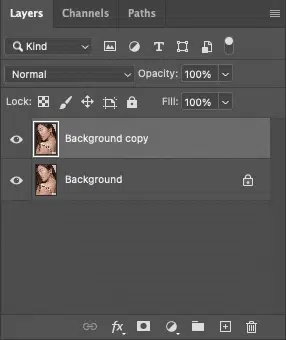
Step 1: Prepare the Clone Stamp Tool
- Set the blending mode to Lighten.
- Select the Clone Stamp tool.
- Duplicate your background layer (Ctrl/Cmd + J) to work non-destructively.
- Adjust opacity to 20%, and ensure Aligned is unchecked.
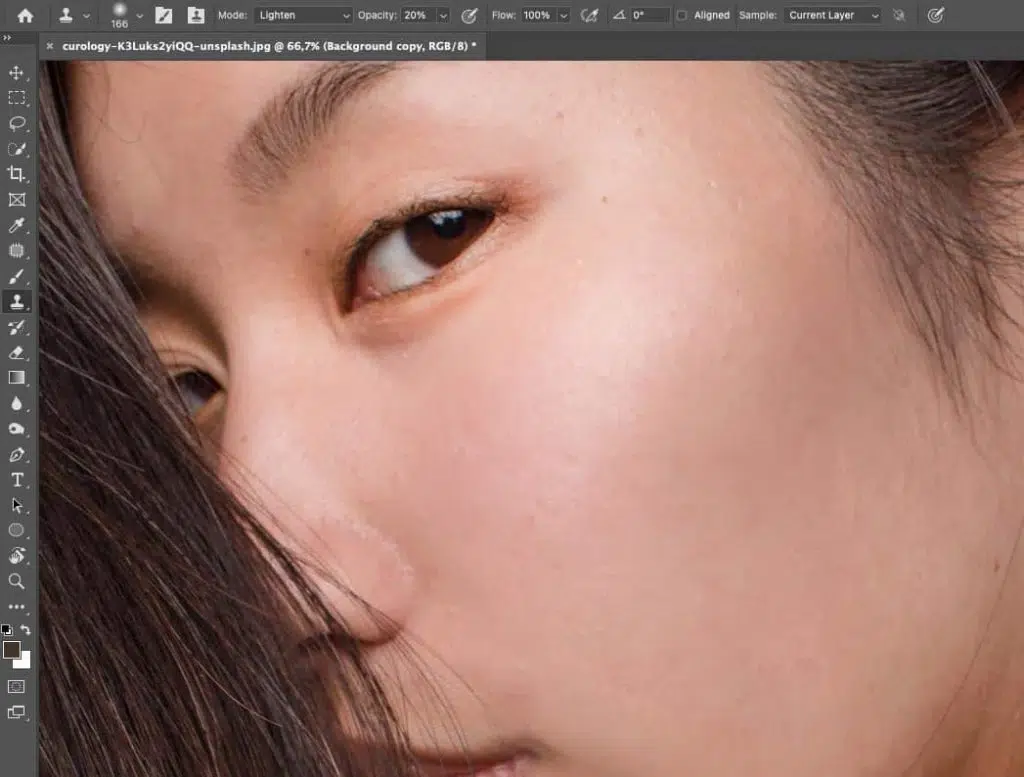
Step 2: Sample and Retouch
Hold Alt (Windows) or Option (Mac) and click on a clean area of your image to sample it. Then, brush over blemishes or unwanted areas, resampling frequently as needed. Continue until the objects’ surface looks smooth and natural.
How to Skin Retouch Using Modern Frequency Separation?
To skin retouch using modern frequency separation, follow this step-by-step guide.
- Duplicate and prepare layers
- Blur the low-frequency layer
- Create the high-frequency texture layer
- Edit and finalize
Step 1: Duplicate and Prepare Layers
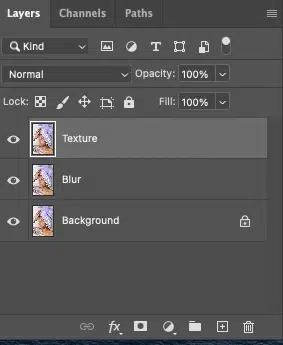
Open your image in Photoshop and press Ctrl + J / Cmd + J twice. Rename the lower copy Low Frequency (Color & Tone) and the upper copy High Frequency (Texture). Now, turn off the High Frequency layer.
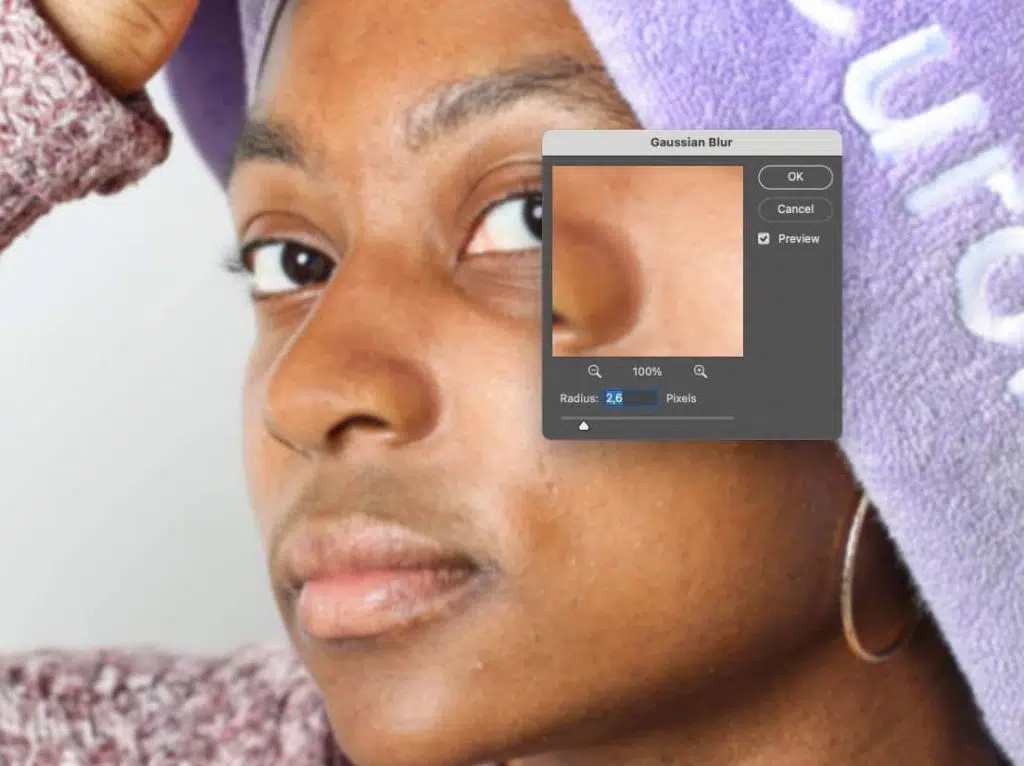
Step 2: Blur the Low-frequency Layer
Select the low-frequency layer. Go to Filter → Blur → Gaussian Blur. Apply just enough blur to remove skin texture while keeping facial shapes visible (typically 4–10 px).
Step 3: Create the High-frequency Texture Layer
Turn on and select the high-frequency layer. Now, go to Image and Apply Image and set.
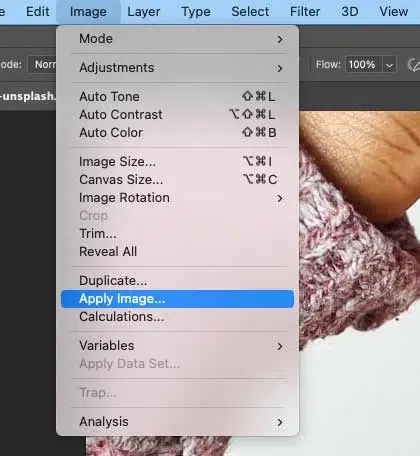
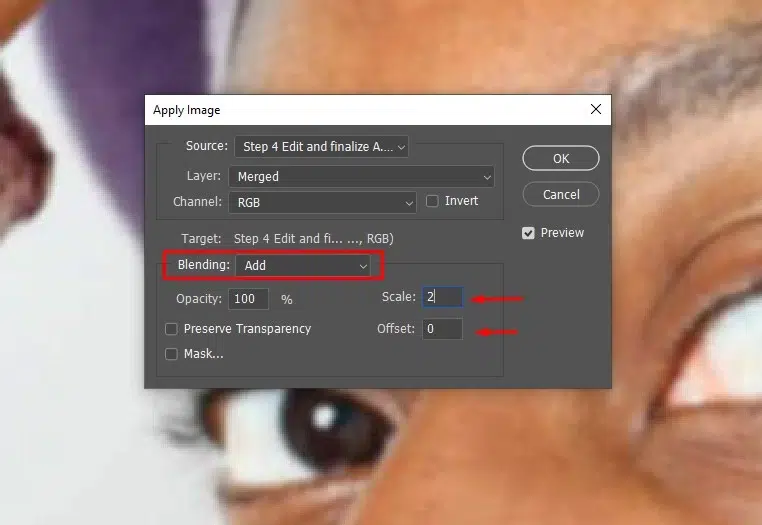
Recommendations for 16-bit images- Layer: Low Frequency, Blending: Add, Scale: 2, and Offset: 0
Recommendations for 8-bit images- Layer: Low Frequency, Blending: Subtract, Scale: 2, Offset: 128
Now, click OK, then set the Blend Mode to Linear Light.
Step 4: Edit and Finalize
After setting up your frequency separation layers, start by smoothing skin color and tone on the Low Frequency layer using either the Lasso Tool with Gaussian Blur or the Mixer Brush set to low flow.
Next, switch to the High Frequency layer to clean up texture imperfections like acne, fine lines, or blemishes using the Healing Brush or Clone Stamp (set to “Current Layer”). Once satisfied, group both layers (Ctrl/Cmd + G) to keep your workflow organized, adjust the group’s opacity if needed, and combine the result with Dodge & Burn for a polished, professional finish.
How to Retouch Images in Photoshop Using Dodge and Burn?
Follow these steps to retouch images in Photoshop using the dodge and burn tools.
- Create the Burn Layer
- Invert the burn mask
- Brush to darken areas
- Create the dodge layer
- Brush to lighten and balance
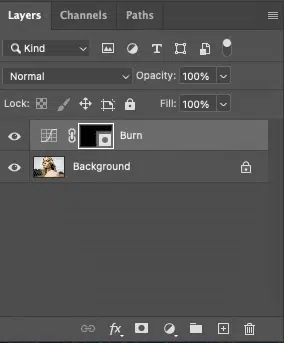
Step 1: Create the Burn Layer
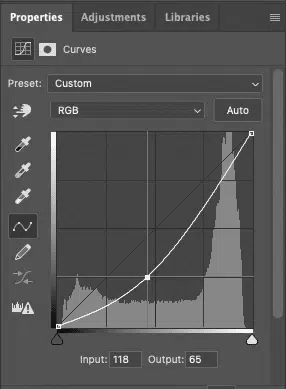
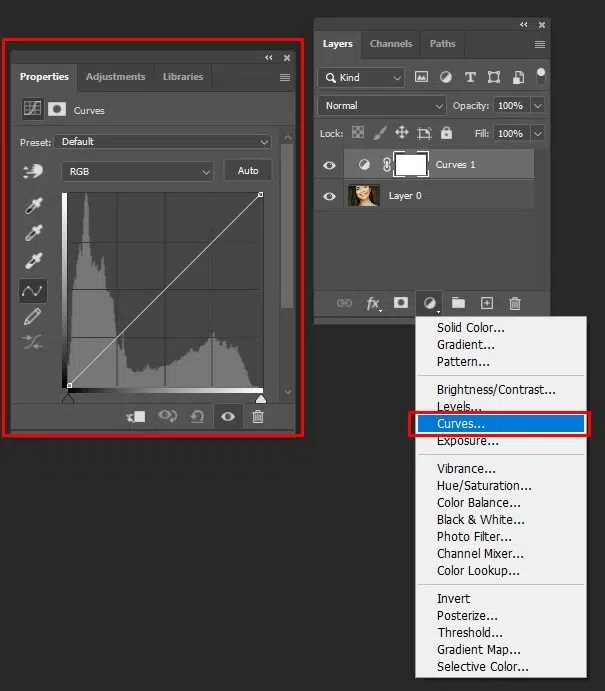
Go to Layers and create a New Adjustment Layer, then Curves. Drag the curve slightly downward to darken the image. Once done, rename the layer Burn.

Step 2: Invert the Burn Mask
Click the layer mask thumbnail on the Burn layer. Now, press Ctrl + I (Windows) or Cmd + I (Mac) to invert it to black, hiding the effect.
Step 3: Brush to Darken Areas
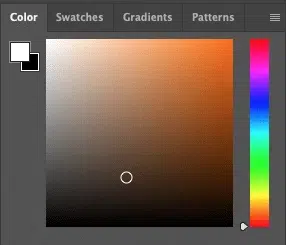
Press D to reset colors, then X to set white as the foreground. Now, select the Brush Tool (B) and use a soft, round brush. Set the brush opacity to 5–10% and paint over shadows, contours, and depth areas.
Step 4: Create the Dodge Layer
Go to Layers, then click New Adjustment Layer and Curves again. Drag the curve slightly upward to brighten the image. Rename this layer Dodge, then invert its mask (Ctrl/Cmd + I).
Step 5: Brush to Lighten and Balance
Softly paint over highlights and key areas you want to brighten, as white is the foreground. Fine-tune the edit by lowering layer opacity if you need a natural look.
How to Retouch Your Pictures Using the Photoshop Patch Tool?
Here is the process to retouch your pictures using the Photoshop Patch Tool.
- Select the patch pool
- Set patch mode
- Adjust Content-Aware settings
- Select the area and apply the patch
- Fine-Tune the patchwork
Step 1: Select the Patch Pool
Right-click on the Spot Healing Brush tool and choose the Patch tool. Alternatively, you can press J, then cycle until the Patch Tool is active.
Step 2: Set Patch Mode
In the Options bar, set Patch to Normal and choose Source mode.
Source: Select the problem area, then drag to a clean area (recommended).
Destination: Select a clean area and drag it over the problem area (used less often).
Step 3: Adjust Content-Aware Settings
Use the Diffusion slider in the Options bar. Set Low (1–3) to preserve texture edges, medium (4–6) for balanced blending, or high for softer blending.
Step 4: Select the Area and Apply the Patch
Draw a soft, loose selection around the area you want to fix. Do not make it too tight or too large so Photoshop can blend naturally. Next, click inside the selection and drag it to a clean area with similar texture and lighting. Release to let Photoshop automatically blend tone, color, and texture.
Step 5: Fine-Tune the Patchwork
Reapply the patch in smaller sections if needed. Use the Healing Brush Tool afterward for micro-retouching. Lower layer opacity when you are working non-destructively.
How Do You Retouch Eyes, Teeth, and Hair in Photoshop?
The ways to retouch eyes, teeth, and hair in Photoshop are described as follows.
How Do You Retouch Eyes in Photoshop?
Here is the step-by-step guide to retouching eyes in Photoshop.
- Duplicate the layer
- Enhance eye brightness with non-destructive dodge
- Add depth with non-destructive burn
- Sharpen the model’s eye details
- Mask Sharpening to the eyes
- Refine and finalize
Step 1: Duplicate the Layer
Duplicate the background layer by pressing Ctrl/Cmd + J to work non-destructively. Use the Remove Tool, Healing Brush, or Patch Tool and remove the small distractions or attention diverting elements around eyes, blemishes, stray hair, and uneven skintone. Remove the marks that are temporary, keep moles or birthmarks as they are.
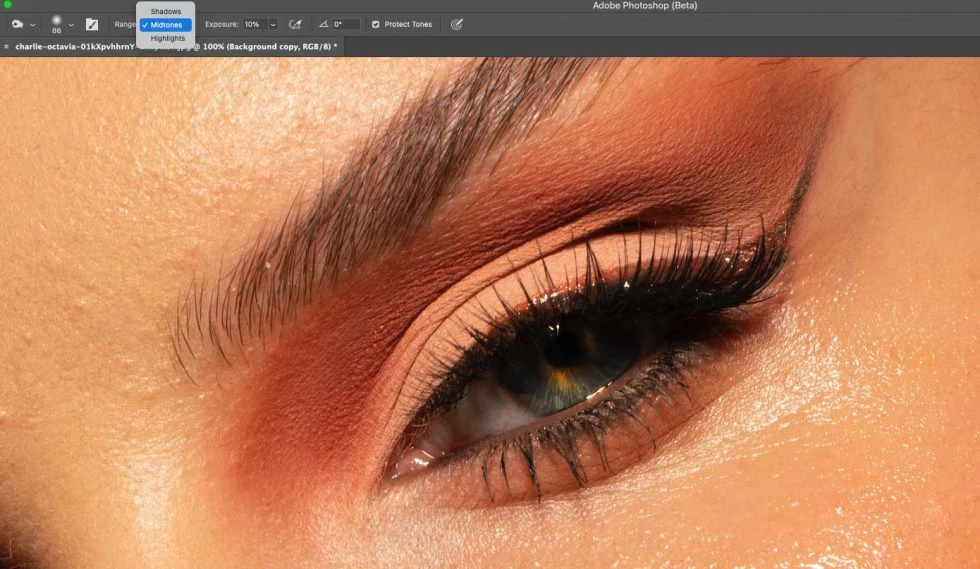
Step 2: Enhance Eye Brightness With Non-destructive Dodge
Create a Curves adjustment layer and slightly lift the curve to brighten. Invert the mask (Ctrl/Cmd + I), then use a soft white brush at 5–10% opacity to paint over highlights of the eyes (whites and catchlights).
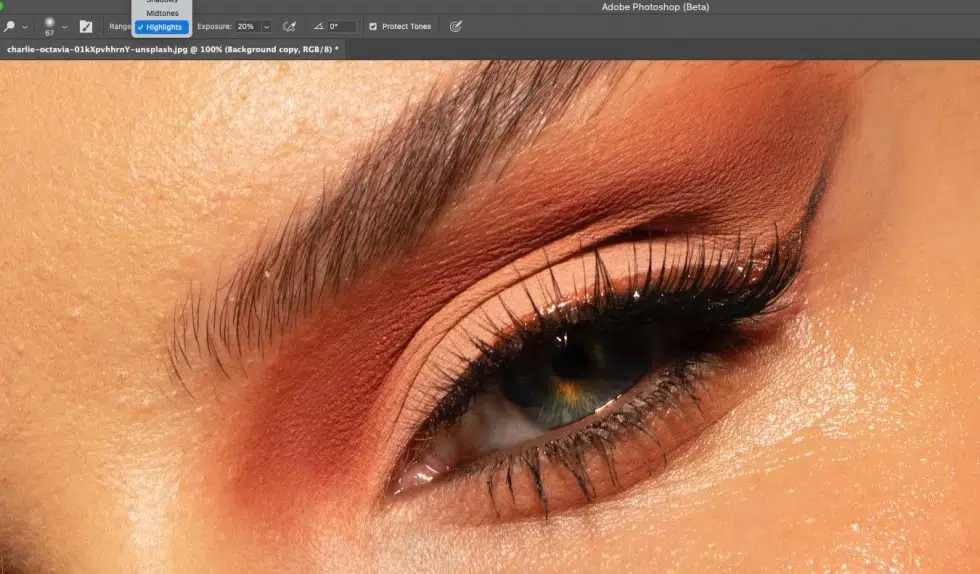
Step 3: Add Depth With Non-destructive Burn
Create another Curves adjustment layer, then pull the curve slightly downward, and invert the mask. Use a soft brush at 5–10% opacity. Paint over lashes, iris edges, and eye contours.
Step 4: Sharpen the Model’s Eye Details
Duplicate the top visible layer (Ctrl/Cmd + J).
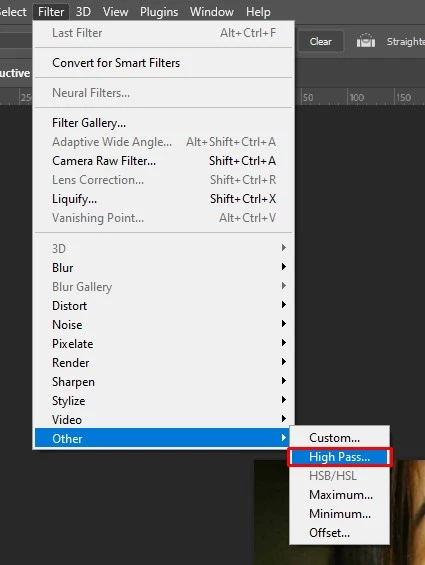
- Go to Filter
- Then click Other
- And then High Pass and set a low radius (typically 1–2 px).
Change the blend mode to Soft Light for subtle sharpening.
Step 5: Mask Sharpening to the Eyes
Add a layer mask to the High Pass layer and invert it to black. Now, with a soft white brush, sharpen the eyes only, and avoid skin and under eye parts.
Step 6: Refine and Finalize
Lower layer opacity if the effect feels strong. Keep the editing subtle for professional portrait results. Zoom out to check realism.
How to Whiten Teeth in Photoshop?
Follow these steps to whiten teeth in Photoshop.
- Open and zoom your image
- Select the teeth
- Apply hue/saturation adjustment
- Clean up and repeat
Step 1: Open and Zoom Your Image
Open your image in Photoshop and then zoom in on the face using Ctrl + + (Windows) / Cmd + + (Mac) to clearly see the teeth.

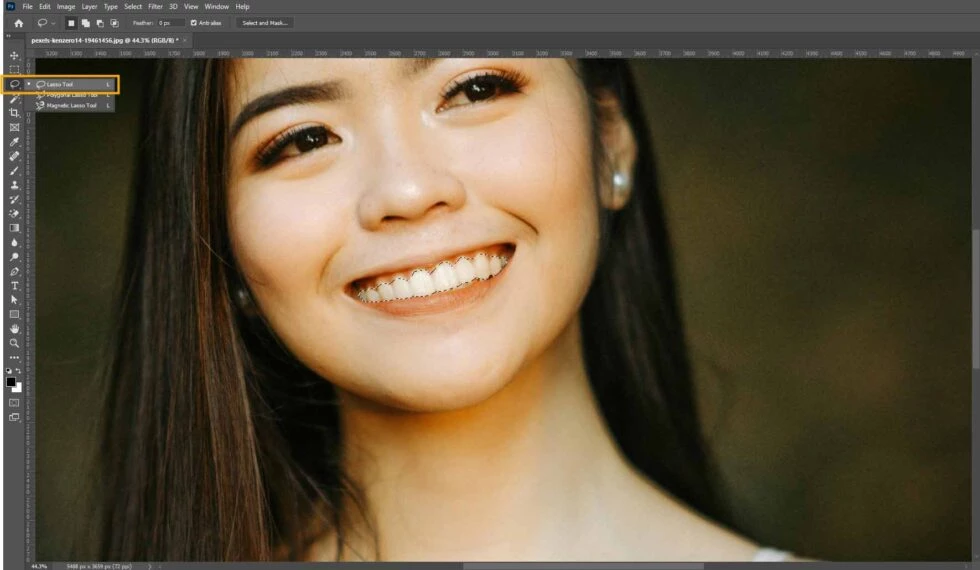
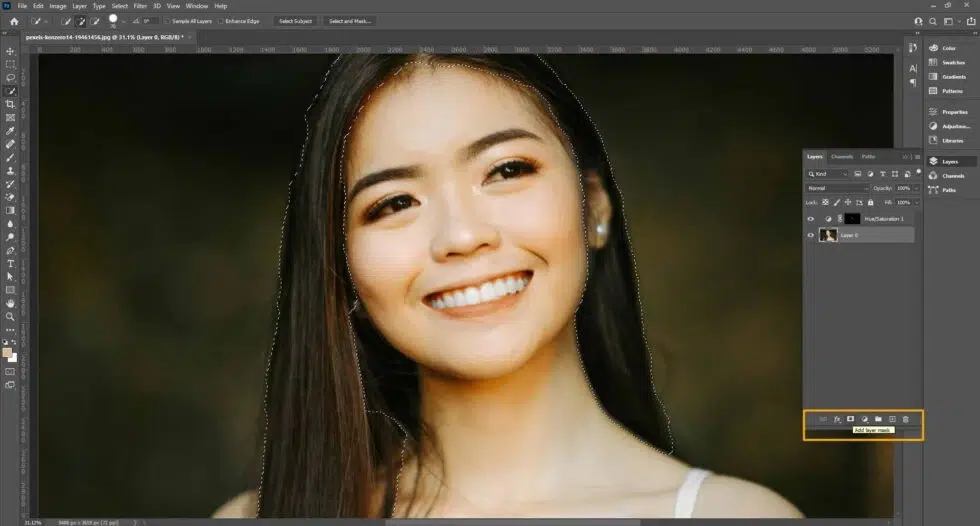
Step 2: Select the Teeth
Use the Lasso Tool or Object Selection Tool to draw a selection around the teeth. Refine the selection using Select and Mask.
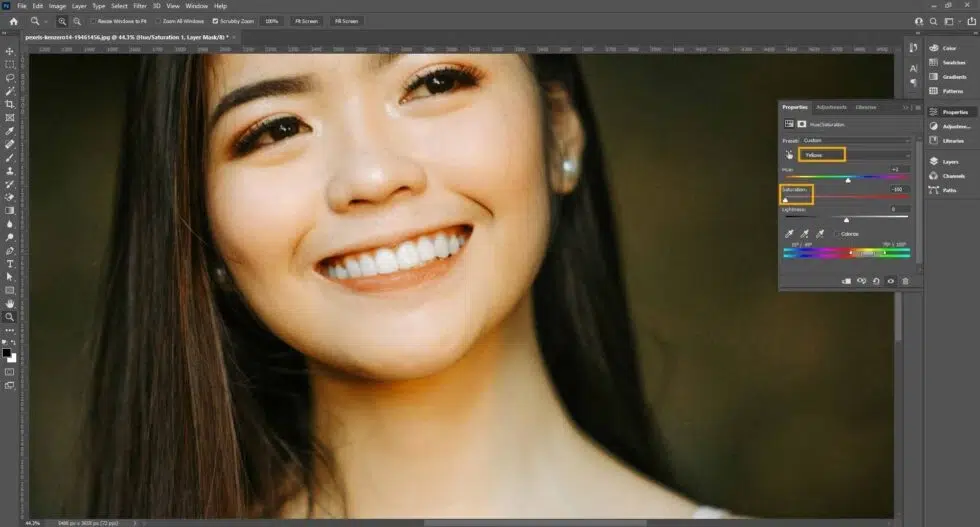
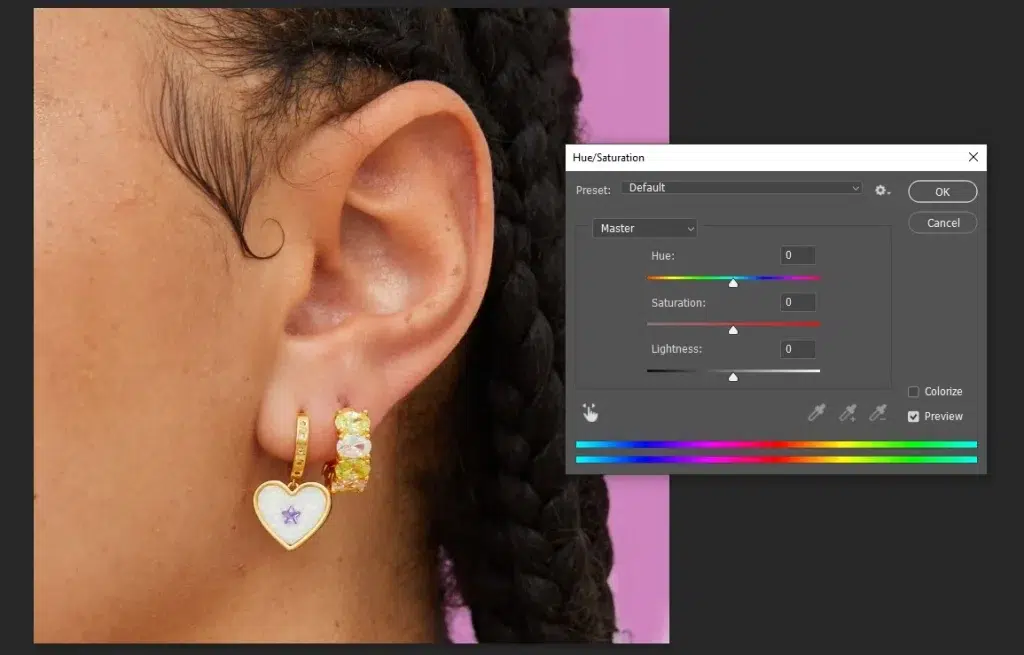
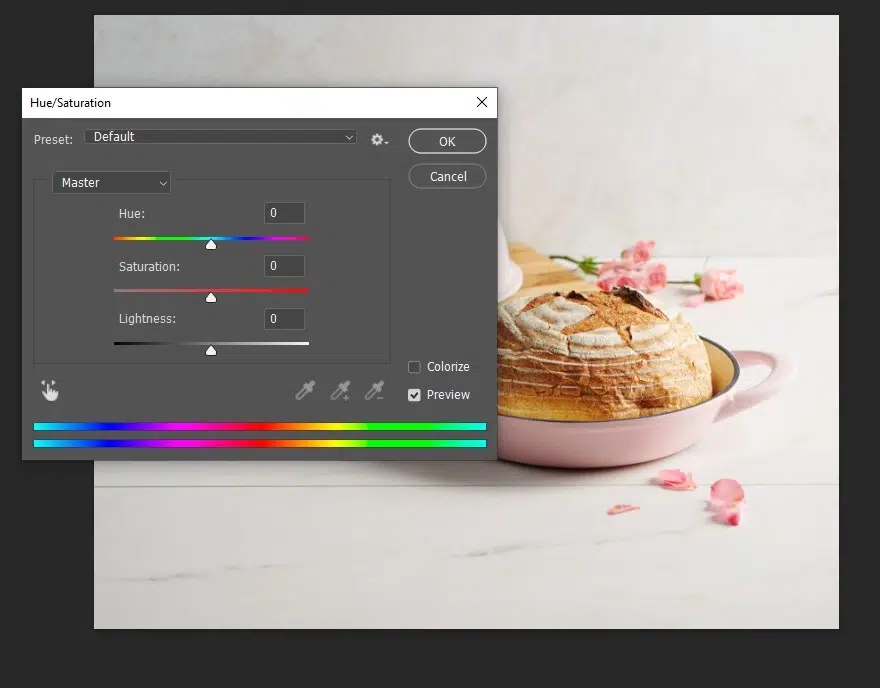
Step 3: Apply Hue/Saturation Adjustment
Add a Hue/Saturation adjustment layer clipped to the teeth selection.
- Go to the Properties panel
- Select ‘Yellows’ from the drop-down and reduce saturation to remove yellow tones.
- Adjust lightness slightly if needed to brighten teeth naturally.
Step 4: Clean Up and Repeat
Use the Brush Tool on the layer mask to fix the selection. Paint black to hide areas accidentally included (like lips or gums) and white to reveal the areas missed. Repeat the process for other subjects, keeping the effect subtle for a natural look.
How to Change Hair Color in Photoshop During Photo Retouching?
To change the hair color in Photoshop during photo retouching, follow these steps.
- Duplicate the layer and select the hair
- Create a layer mask
- Apply color adjustments
- Blend and refine
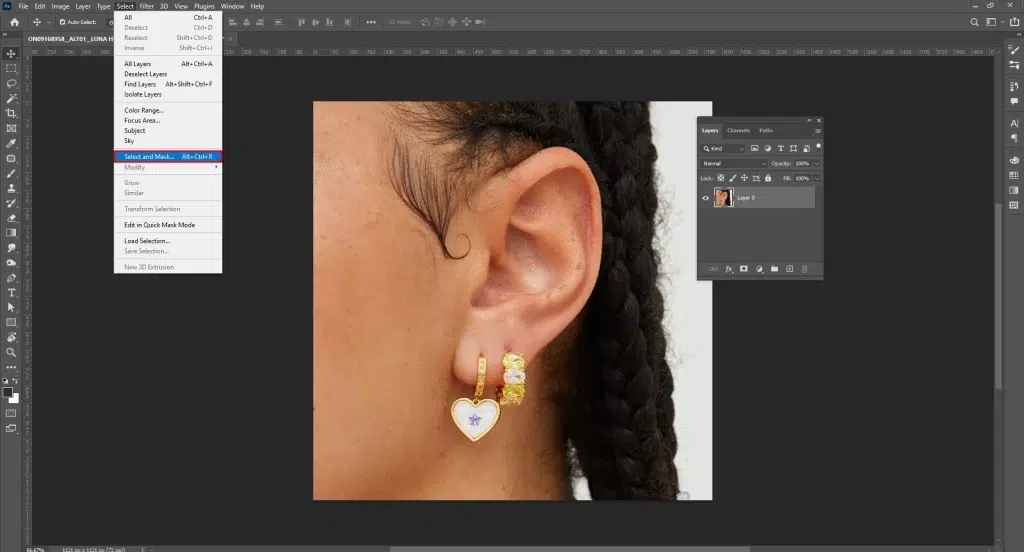
Step 1: Duplicate the Layer and Select the Hair
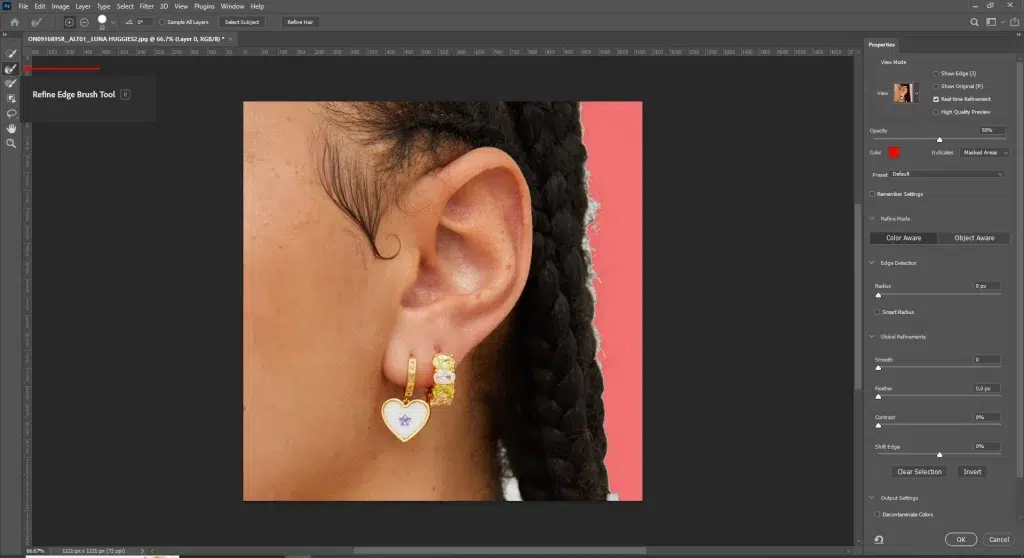
Duplicate the background layer by clicking Ctrl+J or Cmd + J. Use the Quick Selection or Object Selection Tool to select the hair, then refine edges with Select and Mask using the Refine Edge Brush.

Step 2: Create a Layer Mask
With the hair selected, add a layer mask so adjustments only affect the hair. Refine the mask by painting black or white as needed.
Step 3: Apply Color Adjustments
Add a hue or saturation adjustment layer clipped to the hair. Enable colorize and adjust hue, saturation, and lightness. Then, use selective color, color balance, or curves for fine-tuning.
Step 4: Blend and Refine
Set the adjustment layer’s blend mode to Soft Light (or Overlay) and refine edges for a natural look. Zoom in to perfect the hair strands and masking.
How to Retouch Product Photos in Photoshop?
Follow these steps to retouch product photos in Photoshop.
- Open, duplicate, and prepare the product image
- Clean the products’ surface
- Edit the background
- Adjust and export the image
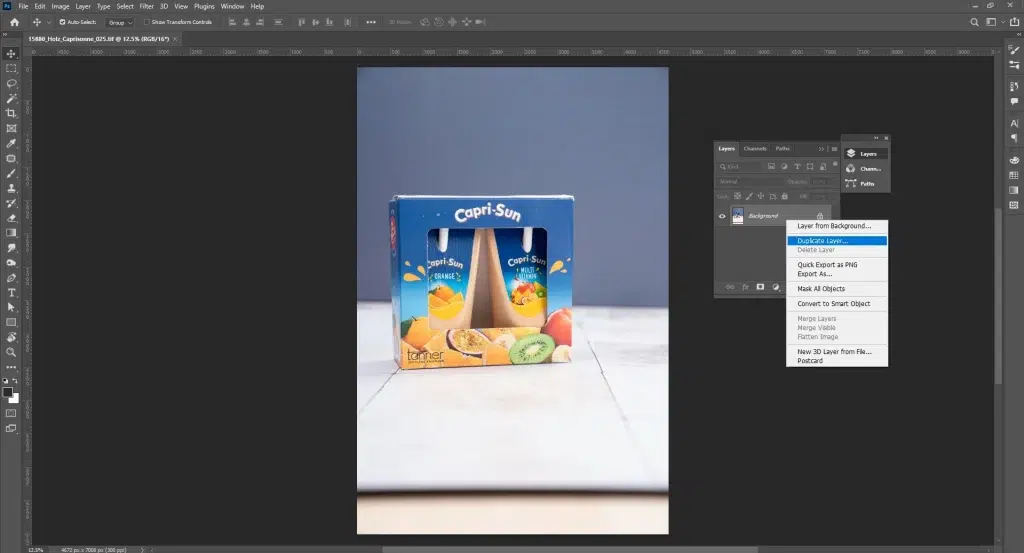
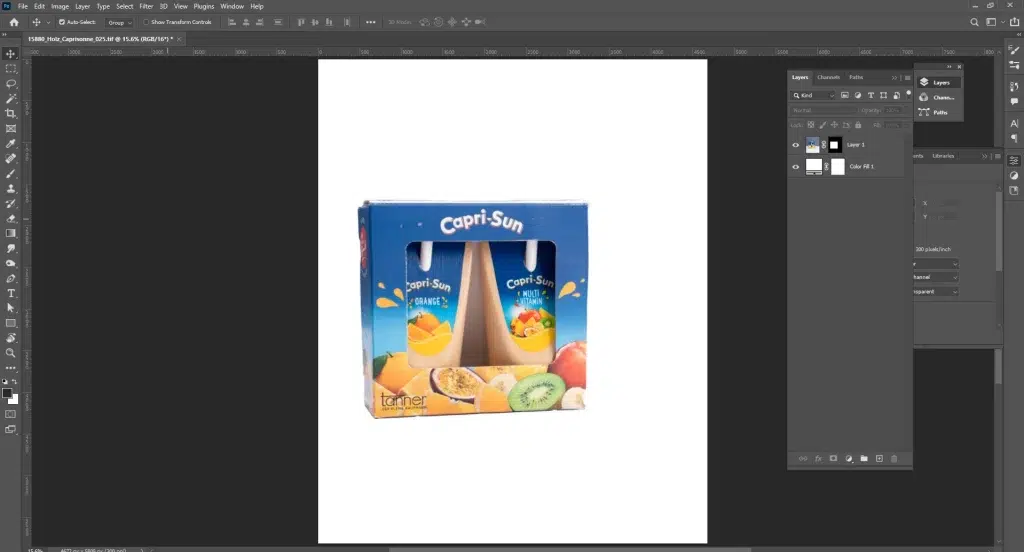
Step 1: Open, Duplicate, and Prepare the Product Image
Open your product image in Photoshop. Duplicate the background layer (Ctrl/Cmd + J) to work non-destructively. Convert the layer to a Smart Object for flexible edits, if needed.
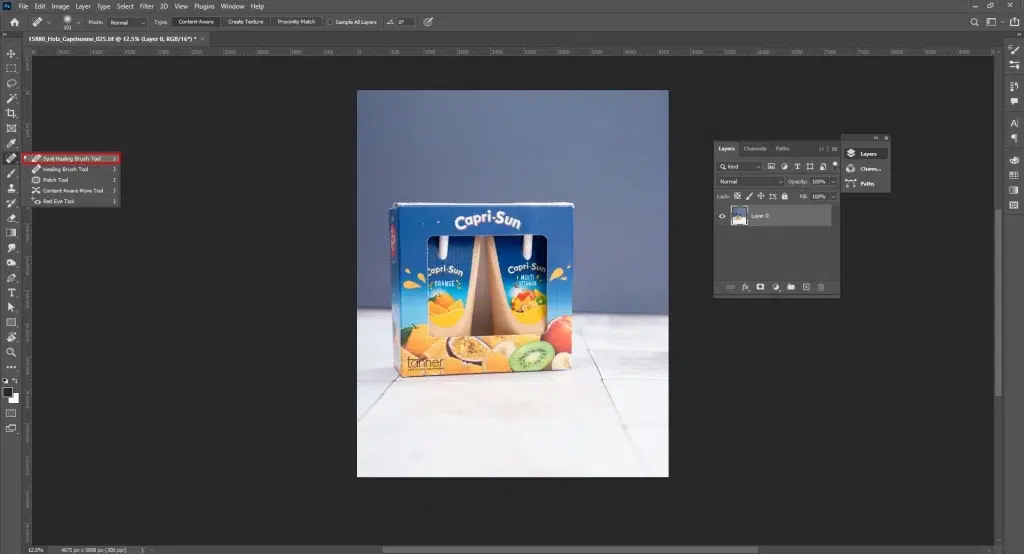
Step 2: Clean the Products’ Surface
Use the Remove Tool to eliminate distracting elements such as dust, scratches, marks, etc from the product. Use the Spot Healing Brush for removing tiny spots and the Clone Stamp Tool for large defects.
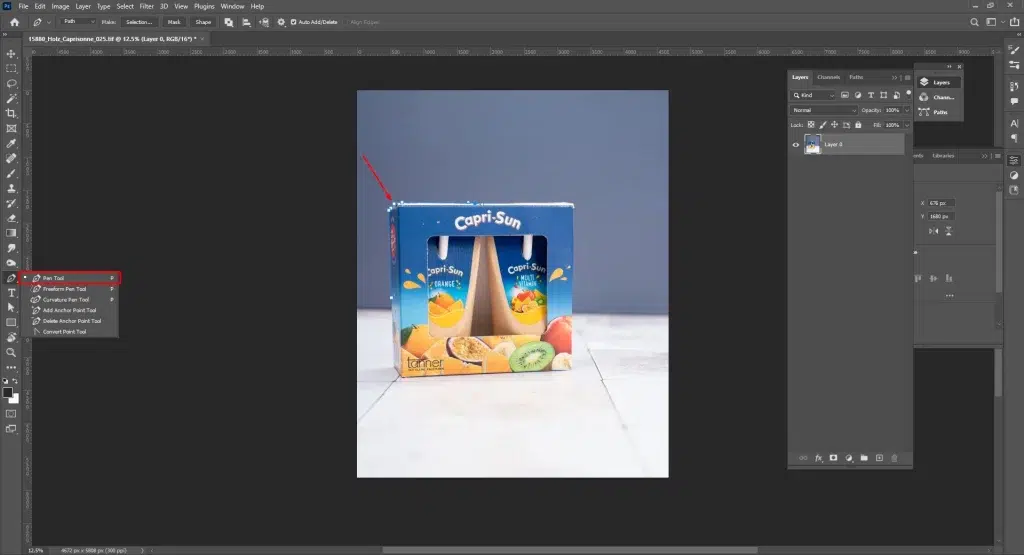
Step 3: Edit the Background
Go to Properties, then Remove Background or Select Subject for AI-based background removal. If the product is complicated, use the Photoshop Pen Tool for precise editing, place the product on a white background for e-commerce, or a context-based background for other platforms.
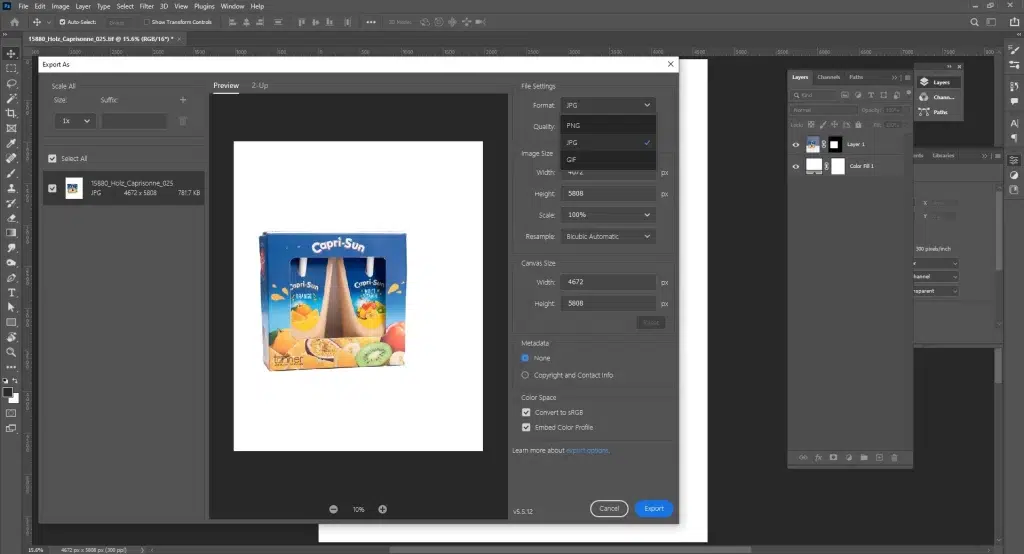
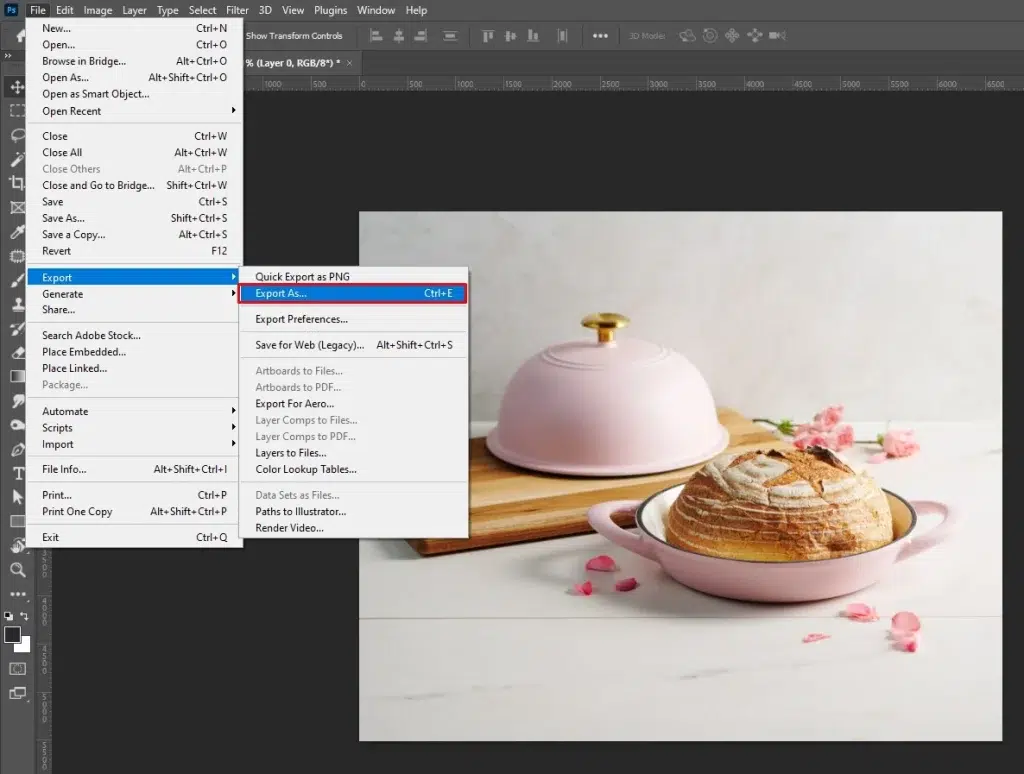
Step 4: Adjust and Export the Image
Add realistic shadows or reflections using layer styles. Crop and center the product, and resize according to platform requirements. Export in JPEG or PNG for web use. Always save a PSD for future edits.
How to Retouch Food Photos in Photoshop?
Here are the steps to retouch food photos in Photoshop.
- Crop and straighten the image
- Correct exposure, white balance, and base color
- Enhance texture and details
- Retouch distractions
- Refine and enhance colors
- Polish and export
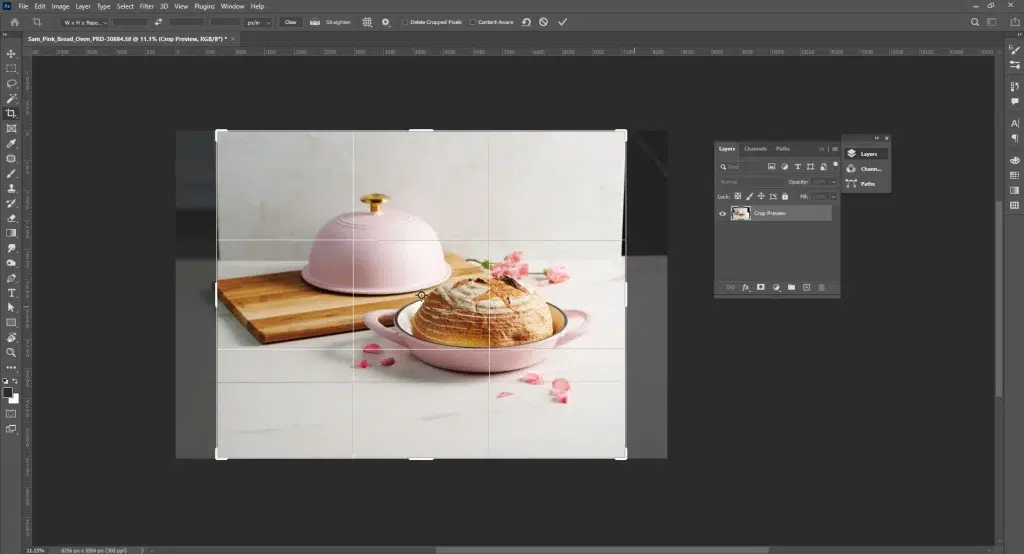
Step 1: Crop and Straighten the Image
Duplicate the background layer, then crop and straighten the image to improve composition. Make sure the dish looks balanced and aligned inside the frame.
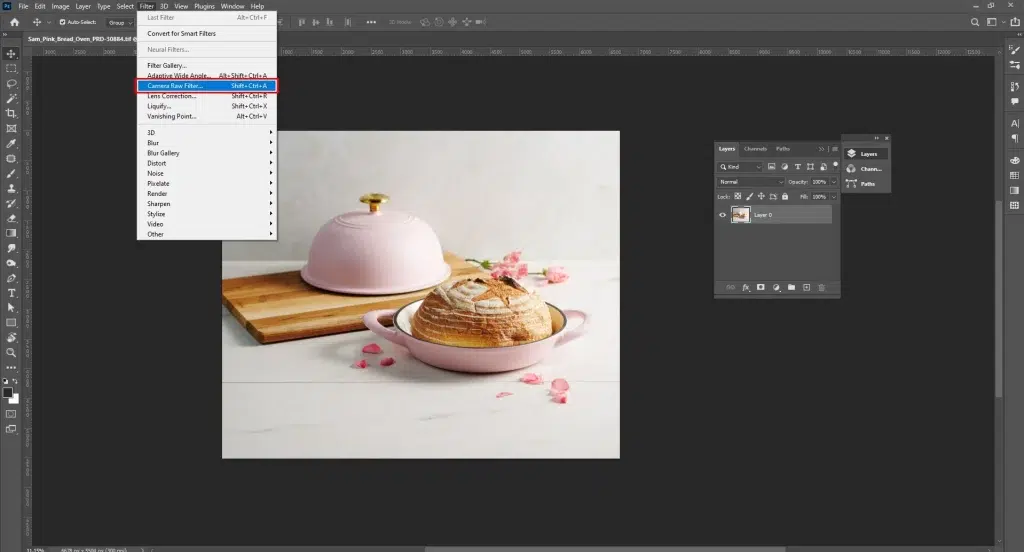
Step 2: Correct Exposure, White Balance, and Base Color
Use the Camera Raw Filter (Filter > Camera Raw) or Curves and Levels adjustment layers to fix exposure, contrast, and white balance. This ensures accurate, natural food colors before detailed retouching.

Step 3: Enhance Texture and Details
Increase clarity and texture selectively to highlight food details such as fresh ingredients, crispy edges, etc. Use light sharpening and subtle Dodge & Burn to enhance highlights and shadows, adding depth.
Step 4: Retouch Distractions
Remove food crumbs, stains, reflections, or plate blemishes using the Spot Healing Brush, Remove Tool, Clone Stamp, or Patch Tool from both foreground and background.
Step 5: Refine and Enhance Colors
Use Hue/Saturation, Selective Color, or masked adjustment layers to boost specific colors (such as greens, reds, or browns) without oversaturating the entire image. Keep tones appetizing and realistic.
Step 6: Polish and Export
Use Curves or Levels to fine-tune contrast and shape light for a three-dimensional look. Use masks to clean or replace the background. Zoom in for final refinements, save an editable PSD, and export optimized JPEG or PNG files for web or menus.
How to Retouch Old Photos in Photoshop?
Here are the steps to retouch old photos in Photoshop.
- Digitize and import
- Crop and straighten
- Apply AI photo restoration
- Manually repair the damaged areas and restore details
- Adjust and finish
Step 1: Digitize and Import
Scan the old photos at high resolution and open those in Photoshop. Duplicate or lock the original layer. Create a new blank layer above it for all retouching, for the original image to be untouched.
Step 2: Crop and Straighten
Use the Crop Tool to remove damaged edges. Then, straighten the image if needed. This process helps reframe the photo before detailed restoration begins.
Step 3: Apply AI Photo Restoration
- Go to Filter
- Click Neural Filters
- Then click Photo Restoration and apply automated scratch removal, clarity enhancement, and facial refinement.
Adjust the sliders carefully as needed, refrain from over-editing for natural output.
Step 4: Manually Repair the Damaged Areas and Restore Details
Use the Spot Healing Brush (Sample All Layers) to remove dust, scratches, and small defects. Use the Clone Stamp Tool for larger tears or missing areas. Alternatively, use the Lasso Tool to duplicate clean sections and blend them seamlessly into damaged areas.
Step 5: Adjust and Finish
Use Levels or Curves to rebuild faded contrast and correct exposure. Adjust colors with Hue/Saturation or Color Balance. Apply subtle sharpening to enhance details. For black-and-white images, use Neural Filters > Colorize, setting the blend mode to Color for realistic results.
Which Photoshop Tools are Used for Retouching in Photoshop?
Photoshop tools that are used for retouching in Photoshop include the Spot Healing Brush Tool, Healing Brush Tool, Patch Tool, Red Eye Tool, Clone Stamp Tool, Pattern Stamp Tool, Dodge and Burn Tool, and Content-Aware Tool.
1. Spot Healing Brush Tool (J)
The Spot Healing Brush Tool is used for automatic sampling of surrounding pixels. It is located in the Healing Tools group of the Photoshop toolbar and used for removing acne, scratches, blemishes, etc.
2. Healing Brush Tool (J)
The Healing Brush Tool stays beside the Spot Healing tools in the toolbar and is used while manually sampling a clean area. This tool blends texture, lighting, and color to fix skin imperfections, scratches, etc and preserves natural detail.
3. Patch Tool (J)
The Patch Tool is found in the Healing tools group, which allows users to select an unwanted area and replace it by dragging the selection to a clean source. The patch tool is best for editing blemishes, wrinkles, and object removal.
4. Red Eye Tool (J)
The Red Eye Tool sits under the Healing tools, used for quickly adjusting red-eye effects caused by flash photography and restoring natural eye color.
5. Clone Stamp Tool (S)
The Clone Stamp Tool is located in the Stamp tools. It is used for copying pixels from a sample source area for precise retouching, background cleanup, edge fixes, and detailed product photo corrections.
6. Pattern Stamp Tool (S)
The Pattern Stamp Tool is located with the Clone Stamp Tool. It is used for painting with a selected pattern, making it useful for reconstructing textures, filling repeated surfaces, or restoring patterned backgrounds.
7. Dodge and Burn Tool
The Dodge and Burn Tools are found in the tonal adjustment section. The Dodge tool lightens areas while the Burn darkens them. These tools are used for enhancing = highlights, shadows, contours, and depth in photos.
8. Content-Aware Tool
Content-Aware tool is an AI-powered tool and is integrated across multiple Photoshop features. You can access it via tools like the Spot Healing tool, the Patch tool, and the Remove tool. By intelligently analyzing surrounding pixels, it fills selections naturally.
What Does Photo Retouching Mean?
Photo retouching is a special category of photo editing used for enhancing and improving an image for commercial purposes by removing flaws, adjusting appearance, size, and maintaining professionalism. To explain photo retouching areas of editing, it covers cropping, coloring, manipulating, element adding or removing, background adjustments, object removal, image composition, etc.
Can AI Tools Help Retouch Photos?
Yes, AI tools can help retouch photos to perform basic tasks such as automatic background removal, skin smoothing, blemish removal, exposure balancing, and object cleanup. AI retouching accelerates repetitive tasks and boosts the work efficiency of visual creation. Retouching images always requires human retouchers’ supervision for creative judgement, precise editing, realistic and natural appearance to maintain brand consistency.
Is It Better to Retouch Photos in Photoshop or Using AI?
It is better to retouch photos in Photoshop for professional output, accessing complete manual control, precision in work, and situational judgment. AI is better for speed and basic editing, and updating to handle complex tasks, which require human oversight. So, using Photoshop is the industry standard to retouch images for any purpose and to get commercial output.
Where Can You Find Professional Photo Retouching in New York, USA?
There are many reliable photo retouching companies in New York, USA, such as Clipping Path Studio, Editing Live, Pixelz, RetouchUp, and Offshore Clipping. They are reputed for high-quality and large volume retouching solutions, faster turnaround, business-specific solutions for professional photographers, e-commerce businesses, online marketers, etc.
FAQ’s
What are the basics of retouching?
The basics of retouching include tasks that are easy to perform for the new learners, changes aren’t that visible, but impacts are obvious, such as image resizing, background editing, basic color correction, skin adjustments, wrinkle removal, displaying facial confidence, product surface polishing, material cleanup, etc.
Do wedding photographers retouch photos?
Yes, wedding photographers retouch or outsource retouching solutions for photos mainly to make happy clients by providing a glorious look on the clients’ special day. Retouching makes images polished, as the process involves retouching techniques such as skin smoothing, facial adjustments, teeth whitening, color correction, background cleanup, etc., altogether to enhance the visual quality.
Is Lightroom or Photoshop better for photo retouching?
Adobe Photoshop is better for retouching as it offers more control and allows performing detailed retouching to highlight the subject in photos, such as skin clean up, distractions removal, or precise editing like masking or layering. Adobe Lightroom is better for photo retouching when you need to edit white balance, exposure, colors, or perform batch edits.
How much does professional photo retouching cost?
Professional photo retouching cost starts at $0.60, and differs based on the type of editing. For example, simple edits take $0.60 to $3, professional retouching costs between $3 to $, and advanced and custom level retouching goes higher than $5, depending on the image volume, complexity, types of editing, customization level, urgent delivery, etc.
