
Color correction in Photoshop refers to the process of adjusting an image’s colors to make it appear more realistic, balanced, and visually appealing. In Photoshop, color correction involves fine-tuning brightness, contrast, white balance, and saturation to enhance an image’s mood and style. Cameras and sensors sometimes fail to capture the exact colors the human eye sees. In these cases, color correction fixes these distinctions.
There are 7 color correction techniques.
- Color lookup tool
- Color Balance tool
- Color modes technique
- Curves tool
- Hue/Saturation tool
- Selective Color tool
- Auto color correction technique
What you’ll learn in this article
- 1 How to Color Correct in Photoshop Using the Color Balance Tool
- 2 How to Do Color Correction in Photoshop Using Color Modes
- 3 How to Make Color Correction in Photoshop Using The Curves Tool
- 4 How to Color Correct in Photoshop Using the Hue/Saturation Tool
- 5 How to Color Correct in Photoshop Using the Selective Color Tool
- 6 How Do You Color Correct in Photoshop Using the Color Lookup Tool?
- 7 How Do You Do Auto Color Correction in Photoshop?
- 8 What are the Benefits of Outsourcing Color Correction to a Professional Photo Editing Company?
- 9 FAQs about Color Correction in Photoshop
- 10 Final Overview
How to Color Correct in Photoshop Using the Color Balance Tool
Color correction means restoring the original color of an image. The original color of a product or subject might often change because of the lighting conditions, camera settings, or other effects. In those cases, one must have to correct the color in post-processing.
Here, we’re going to explain a very easy and quick method of correcting color in Photoshop – using Color Balance. So, to correct the color, one needs to understand where it went wrong in the first place. If you can identify the problem, your job is half done!
Step 1: Open
Go to File from the top menu and click on Open to open the file you want to work on.
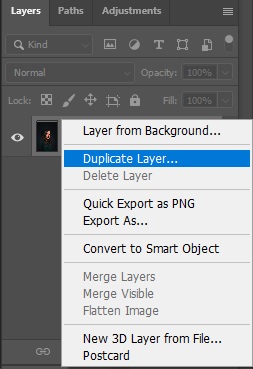
Step 2: Duplicate Layer
For safety, we’ll make a copy of the main layer. Right-click on the Background Layer and select Duplicate Layer. Or you can just press Ctrl+J (Command + J on Mac) on your keyboard.
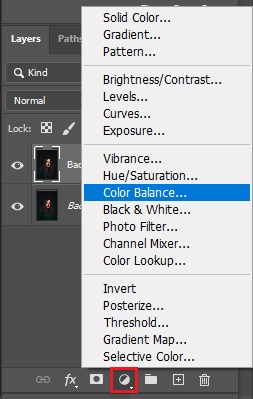
Step 3: Color Balance
Click on the Adjustment Layer menu (right beside the Layer mask icon) and select Color Balance.
Step 4: Change Slider
Now, understand the color condition of your image. In this image, it looks like there is a red color cast in this image.
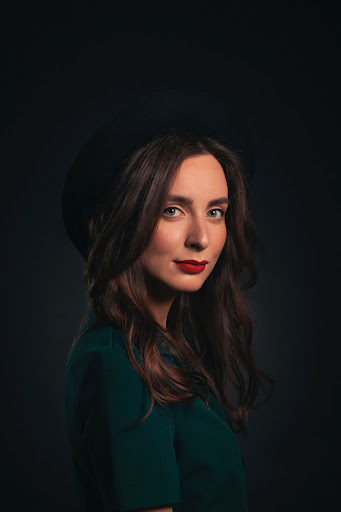
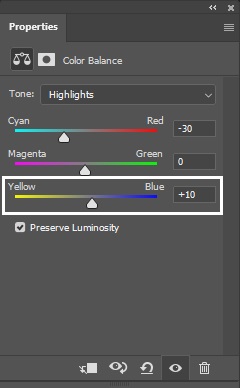
So, to correct that, we’ll have to increase the Cyan color. Now, the color cast is most visible at the face, which is the highlight area. So, we’ll first select Highlights as our working area and then shift the slider.
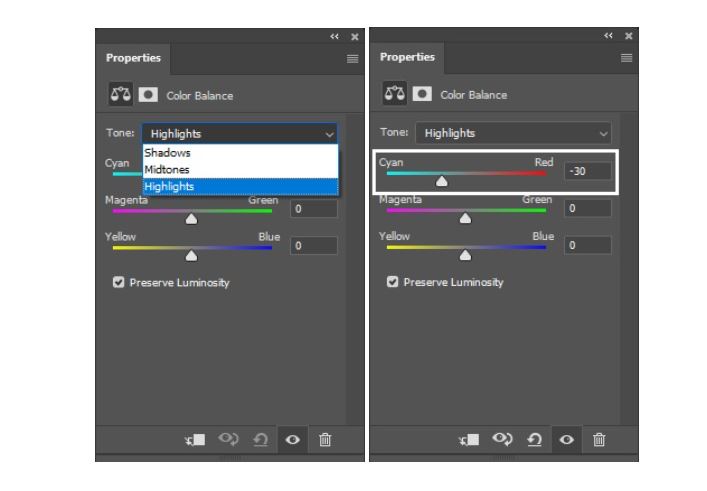
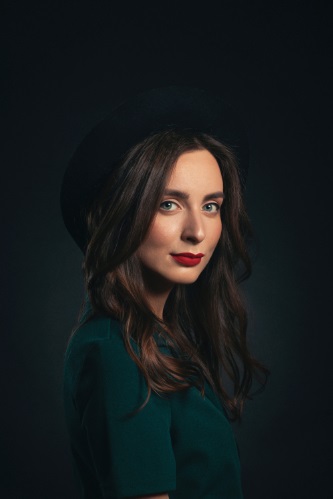
Now, it looks like there is a yellow cast. So, we’ll increase the blue color too.
After doing the color correction, you can adjust the light from the Curves menu if you need.
Step 5: Save the Photo
Go to File and select Save As to save the image.

How to Do Color Correction in Photoshop Using Color Modes
Do you want to do quick color correction in Photoshop? Change the colors in Photoshop using Color Modes easily and effectively.
Step 1: Choose Your Preferred Photoshop Color Modes
Photoshop uses different color modes to fulfill your project’s purpose, such as RGB (Red, Green, Blue) used for digital images viewed on screens, CMYK (Cyan, Magenta, Yellow, and Black) is used for printing, and grayscale is used shades of gray that is ideal for black-and-white images.
Step 2: Open Your Image and Check the Current Color Mode
In Photoshop, open your image and check its current color mode by going to Image > Mode. This shows the mode your image is currently in (e.g., RGB or CMYK).
Step 3: Convert Color Mode if Necessary
If your image needs to be prepared for print, convert it to CMYK by selecting Image > Mode > CMYK Color. Remember, for web or digital use, RGB is preferable.
Note: Converting from RGB to CMYK can alter colors because CMYK has a smaller color scale. Always save a copy of your original RGB file before converting.
Step 4: Use Color Mode to Assist Color Correction
In RGB mode, you can adjust colors using tools like Hue/Saturation, Curves, or Selective Color, individually targeting the red, green, and blue channels for precise correction. For CMYK mode adjustments, focus on cyan, magenta, yellow, and black channels, which are important for ensuring print colors look accurate.
Step 5: Adjust Color Settings for Consistency
Photoshop’s color settings dialog (Edit > Color Settings) lets you manage color profiles and working spaces to maintain color consistency across devices and media. Proper color management ensures your corrected colors look right on screens and prints.
How to Make Color Correction in Photoshop Using The Curves Tool
One of Photoshop’s most popular color correction techniques is using a curve tool. This tool allows you to adjust the image’s tonality by creating a curve. To access the Curves tool, go to the Photoshop Image option in the top bar, and choose Adjustments and Curves. Here’s a step-by-step guide below:
Step 1: Add a Curve Adjustment Layer
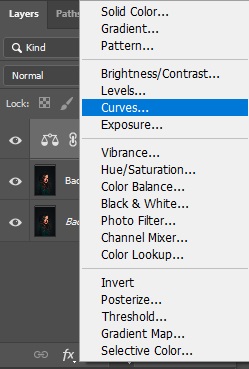
In the Photoshop Layers panel, click the “Create new fill or adjustment layer” button and select Curves from the menu.

When you select the option, the Curves panel shows a diagonal line representing the tonal range from shadows (bottom left) to highlights (top right). You can adjust this curve to brighten or darken specific tonal areas and correct color balance. Remember, the graph is divided into 3 sections: shadows, midtones, and highlights.

Step 2: Change the Value to Red, Green, or Blue to the Correct Color
From the dropdown menu in the Curves panel, select the RGB composite channel to individual Red, Green, or Blue channels. Adjust these curves to fix color casts. Suppose you want to reduce a blue cast. Select the Blue channel, and pull the curve down in the midtones. To add warmth, increase the Red channel curve slightly.
Step 3: Adjust the Curve Manually
Adjust the curve manually for tonal corrections. Click the curve to add points and drag them to adjust brightness and contrast.
- Pulling the curve upward brightens tones.
- Pulling downward darkens tones.
- Adjust shadows, midtones, and highlights separately to enhance contrast and tonal balance.


Step 4: Use the Auto Option for Quick Correction (Optional)
You can find the “Auto” option beside the RGB. Just click the button Photoshop’s algorithm automatically corrects the image color. You can then fine-tune manually if needed.
How to Color Correct in Photoshop Using the Hue/Saturation Tool
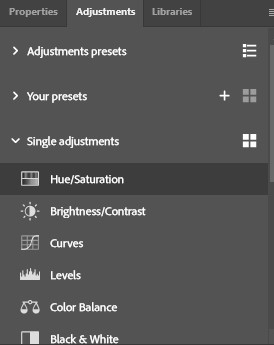
You can make photo color corrections in Photoshop using the Hue/Saturation tool. Go to Layer > New Adjustment Layer > Hue/Saturation and click OK. Hue/Saturation helps to adjust the overall color appearance of an image or video. Hue shifts the color towards a different hue on the color wheel, and saturation controls the intensity or purity of a color.
Step 1: Access the Hue/Saturation Properties
Double-click the Hue/Saturation layer in the Layers panel to open the Properties panel.

Step 2: Adjust Hue & Saturation
The hue slider shifts colors across the color spectrum, dragging the slider to the right or left to change the color. Also, adjust the Saturation slider to control the intensity or vibrancy of colors, and drag the slider to the right to increase saturation or drag it left to decrease saturation.

Step 3: Preview & Fine-tune
Toggle the adjustment layer on and off to compare before and after. Also, fine-tune sliders until the colors look natural or achieve your desired effect.
How to Color Correct in Photoshop Using the Selective Color Tool
Photoshop color correction through the Selective Color Tool is ideal for photographers, retouchers, and designers looking to fine-tune colors without affecting the entire image. The Selective Color tool allows you to adjust the intensity of Cyan, Magenta, Yellow, and Black within photography’s primary colors (white, black, red, yellow, green, blue, cyan, magenta, and neutral). Also, you can choose Relative or Absolute to make color correction photography adjustments to the original color values.
Step 1: Create a Selective Color Adjustment Layer
Go to the Layer panel, select the “New Adjustment Layer“, and choose “Selective Color“. Or, you can get access from the Layers panel’s bottom options (new fill or adjustment layer).


Step 2: Choose the Color to Adjust
Select any primary colors and adjust the CMYK values. Also, select either Relative to adjust more subtle, making changes based on the percentage of the color, or Absolute adjustments for more intense.

Suppose you can change a blue sky, select “Blues” or correct skin tones by choosing “Reds” or “Yellows“. We’ve selected Neutrals to change the watch colors.


Step 3: Use Layer Masks for Precision
If you want to apply your correction only to specific parts of the image, use the layer mask with the adjustment layer. Click the layer mask icon (white rectangle with a circle) in the Layers panel. Paint black on the mask to hide the effect in certain areas, or white to reveal it. Use Select > Color Range to target only certain hues before applying the mask for even more precision.
How Do You Color Correct in Photoshop Using the Color Lookup Tool?
To adjust Photoshop color using the Color Lookup tool, you first get access to the “Windows” option, select “Adjustment”, and click “Color Lookup”. With this color adjustment tool, you can remap the colors in an image or video to create a specific look or aesthetic. Here’s a step-by-step guide:
Step 1: Select the Color Lookup (LUT) Tool
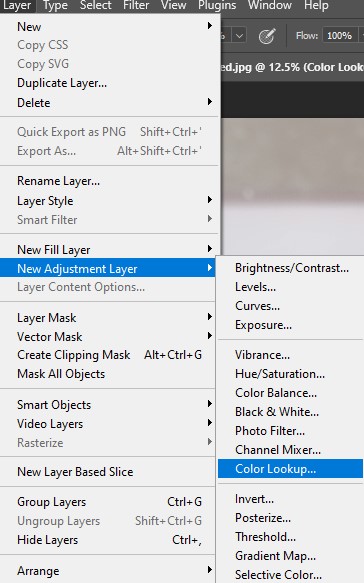
After opening the edited image in Photoshop, select the LUT tool by accessing Windows > Adjustment > Color Lookup. Another option is Layer > New Adjustment Layer > Color Lookup.

Step 2: Choose a Lookup Table
In the “Properties panel”, select one of the available Color Lookup tables. There are three categories: 3DLUT File, Abstract, and Device Link. Choose one option from the 3DLUT File.

Step 3: Fine-tune the Adjustment
We chose the “Soft_Warming.look” for color correction. After that, we use the Layer Blend Mode and Opacity options in the Layers panel to adjust the effect of the Color Lookup.

Save the image as a PSD or TIFF file to preserve the adjustment layer settings.

How Do You Do Auto Color Correction in Photoshop?
You can auto color correction photography in Photoshop using the “Auto Color” command. In Photoshop, Auto Color is an AI feature that adjusts an image’s color and contrast by identifying and adjusting shadows, midtones, and highlights. Below, we’ve highlighted a complete guide:
Step 1: Open the Edited Image in Photoshop
Open the image in Photoshop that you want to correct the colors of, and create a new layer to edit non-destructively.
Step 2: Use the “Auto Color” Command
Click the Photoshop “Image” option from the Photoshop top menu, select “Adjustments”, and then “Auto Color” as shown below. Or, you can use the Auto Color shortcut key “Shift+Ctrl+B” (Windows) or “Shift+Cmd+B” (Mac).

Step 3: Fine-tune the Image
When you use this tool, Photoshop will automatically adjust the color depending on shadows, tone, and so on.

What are the Benefits of Outsourcing Color Correction to a Professional Photo Editing Company?
There are 3 effective ways to outsource color correction service: hire freelancers, work with a professional image color correction service provider, or do it by yourself by following our step-by-step guide.
- Freelancing platforms offer a wide range of facilities, like skilled photo editors and lower costs. You can hire one, considering your budget and requirements. However, some experience potential inconsistencies, a lack of commitment, and fraudulent attempts.
- Professional photography colors changing companies offer hand-drawn, pixel-perfect, and high-resolution photo color correction services that fulfill your brand requirements. Also, you get in-house experts who deliver edited images in time with cost-effective solutions so that you can focus on your business growth.
- Color adjustments or color editing in Photoshop are time-consuming tasks and require advanced Photoshop color balance skills. If you’ve enough time, you can do it by yourself. Sometimes, you might face difficulties when dealing with complex color and tone control, especially for transparent shades, overprinting, etc.
FAQs about Color Correction in Photoshop
What is color correction mode?
Color correction mode is a feature that allows users to adjust how colors are displayed on a device’s screen, especially for those who have color vision deficiencies or difficulty distinguishing colors.
How does color theory relate to color correction in Photoshop?
The color theory impacts color correction in Photoshop, providing a framework for acknowledging how colors interact and influence mood and perception.
Can color correction in Photoshop improve product photography?
Yes, color correction in Photoshop improves product photography by ensuring accurate color representation and enhancing visual appeal.
Why do my corrected colors look unnatural?
Your corrected colors might look unnatural because of improper color grading techniques, incorrect white balance, or issues with the source footage or output settings.
Final Overview
- Color correction is all about adjusting an image’s colors to improve its overall appearance and make it professional. This includes fixing issues like incorrect exposure, white balance, or inaccurate colors.
- There are 7 color correction techniques: Color Balance tool, Color modes technique, Curves tool, Hue/Saturation tool, Selective Color tool, Auto color correction technique, and Color lookup tool.
- You can manually correct your product image color, hire freelancers, or outsource to a renowned post-processing company.
- The key benefits of outsourcing color correction services from photo editing companies are pixel-perfect results, 24/7 customer support, budget-friendly prices, and timely delivery.
