
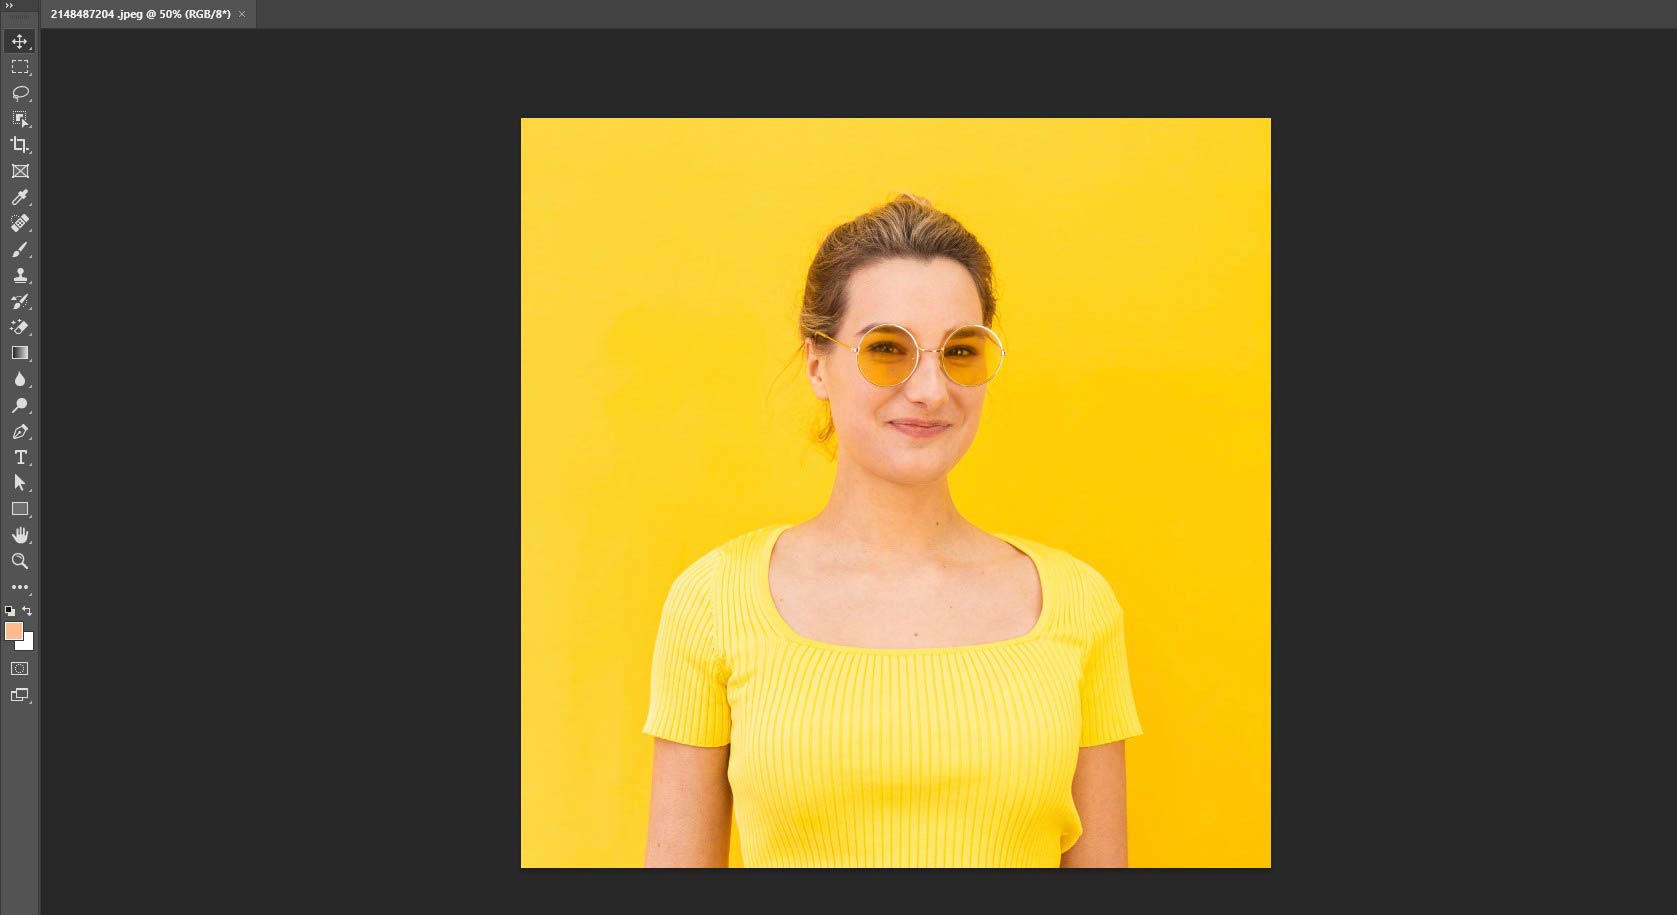
Removing glare from Glasses in Photoshop refers to the process of eliminating the reflections or spots that appear on eyeglass lenses in photos caused by sunlight or camera flash. These glares make the model’s portraiture look unprofessional and distract viewers from the key points.
The common technique to remove glare from glasses in Photoshop is to use a combination of selection tools like the Brush tool Lasso tool, and others, depending on the glare type and severity. After that, carefully sample and replace the glare with the surrounding, non-glare pixels. Zoom out to review your work and make any necessary adjustments if needed. You can also try Generative Fill for an automated approach.
There are 7 best Photoshop tools used to fix glass reflection effectively, such as –
1. Healing Brush tool/Spot Healing Brush Tool: The Healing Brush tool is used to remove imperfections and blemishes from photos by blending sampled pixels from one area to another.
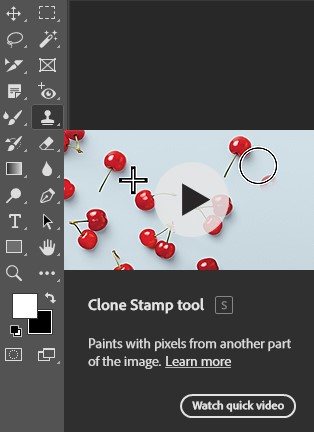
2. Clone Stamp Tool: The Clone Stamp tool in Photoshop is used to copy pixels from one part of an image and apply them to another, “painting” with the copied pixels.
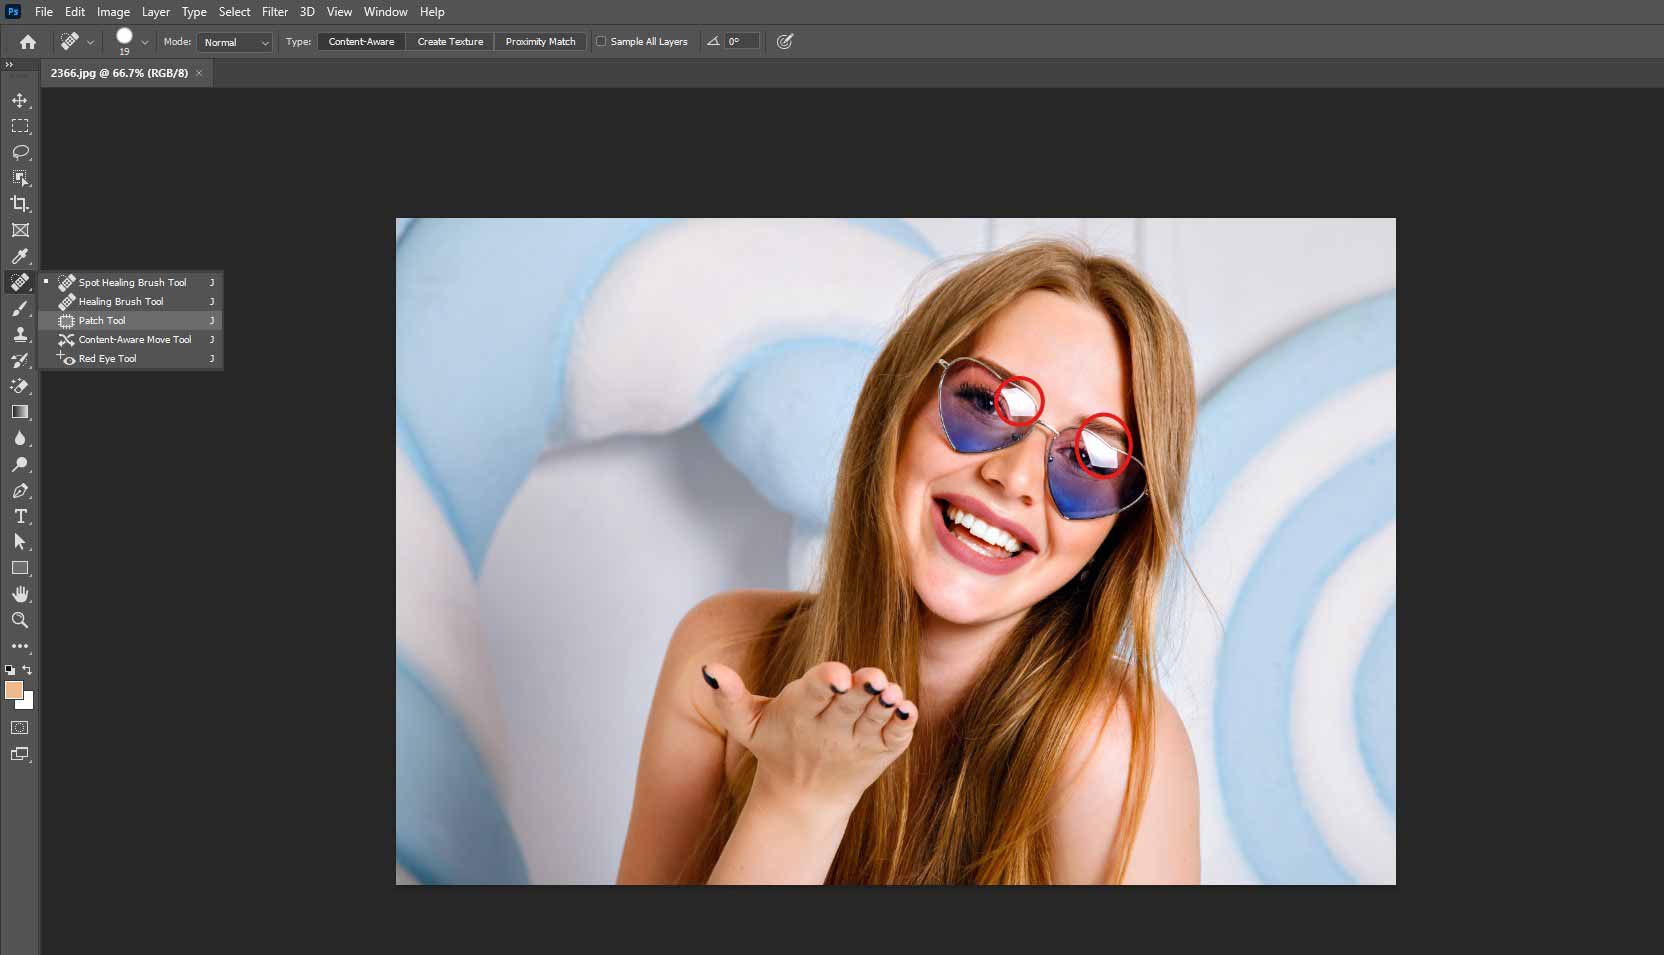
3. Patch Tool: It is a selection-based tool used to remove or replace unwanted elements in an image by blending them with surrounding pixels.
4. Lasso Tool: It is a freehand selection tool that allows users to draw a selection border around objects by dragging a freeform shape with a mouse or stylus.
5. Adjustment Layers: It is an non-destructive tools that allow you to apply color and tonal adjustments to your image without permanently altering the original pixel data.
6. Content-Aware Fill: It is a tool in Adobe Photoshop that automatically fills a selected area of an image with pixels sampled from surrounding areas, creating a seamless and natural-looking fill.
7. Camera Raw Filter: The Camera Raw filter in Photoshop is a powerful tool that provides access to the features of Adobe Camera Raw (ACR) within Photoshop’s editing workflow.
What you’ll learn in this article
- 1 How to Remove Glare from Glasses in Photoshop Using the Brush Tool
- 2 How to Remove Glare from Glasses in Photoshop Using the Clone Stamp Tool
- 3 How to Remove Glare from Glasses in Photoshop Using the Patch Tool
- 4 How to Remove Eyeglass Glare in Photoshop Using the Lasso Tool
- 5 How to Remove Flash Glare from Glasses in Photoshop Using Adjustment Layers
- 5.1 Step 1: Open the Image
- 5.2 Step 2: Select Solid Color Layer
- 5.3 Step 3: Click on Curves Adjustment Layer
- 5.4 Step 4: Invert the Curves
- 5.5 Step 5: Use the Brush Tool
- 5.6 Step 6: Add a New Layer
- 5.7 Step 7: Use the Brush Tool Again
- 5.8 Step 8: Create Another New Layer
- 5.9 Step 9: Pick the Eye Dropper Tool (I)
- 5.10 Step 10: Use the Brush to Paint Over Glare
- 5.11 Step 11: Blend and Paint the Area
- 5.12 Step 12: Spot Correction
- 5.13 Step 13: Save the Image
- 6 How to Remove Flash Glare from Glasses in Photoshop Using the Content-Aware Fill
- 7 How to Remove Flash Glare from Glasses in Photoshop Using Camera Raw Filter
- 7.1 Step 1: Open Your Image in Photoshop
- 7.2 Step 2: Select the Glare Area
- 7.3 Step 3: Open an Adjustment Layer for Fine Control
- 7.4 Step 4: Use the Camera Raw Filter Dehaze Slider
- 7.5 Step 5: Use the Spot Removal Tool in Camera Raw
- 7.6 Step 6: Apply the Changes and Return to Photoshop
- 7.7 Step 7: Refine the Image with Photoshop Tools (If Needed)
- 7.8 Step 8: Duplicate and Transform Lens Area (Optional)
- 8 What is Glass Glare in Photos?
- 9 How to Prevent Glare on Glasses Before Taking Photos
- 10 FAQs about Best Get Rid of Glare in Photos
How to Remove Glare from Glasses in Photoshop Using the Brush Tool
For eyeglass glare removal, you can use the Healing Brush tool or the Spot Healing Brush tool. The Healing Brush tool blends sampled texture and lighting, making it more efficient and natural-looking than simply cloning over the reflection. Whereas the Spot Healing Brush removes glare from glasses by automatically sampling surrounding pixels and blending them. Below, we’ve highlighted two different tools for glass glare removal techniques:
1. How to Remove Glare from Glasses Using the Healing Brush Tool
To remove glare from glasses using the Healing Brush tool, start by selecting the Healing Brush Tool and setting a sample point near the glare area. After that, brush over the glare to blend the surrounding non-glare pixels with the affected area. Ensure you adjust the brush size and sample points to achieve a natural look.
Step 1: Create a New Layer
For non-destructive editing, add a new blank layer above your original image.
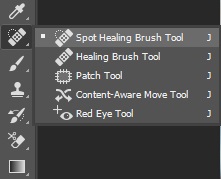
Step 2: Select the Healing Brush Tool
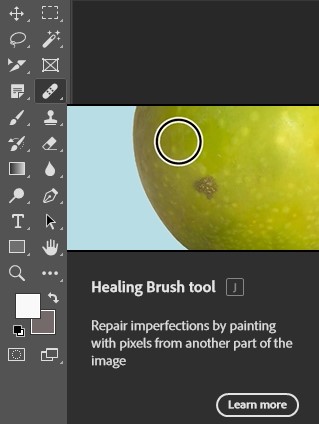
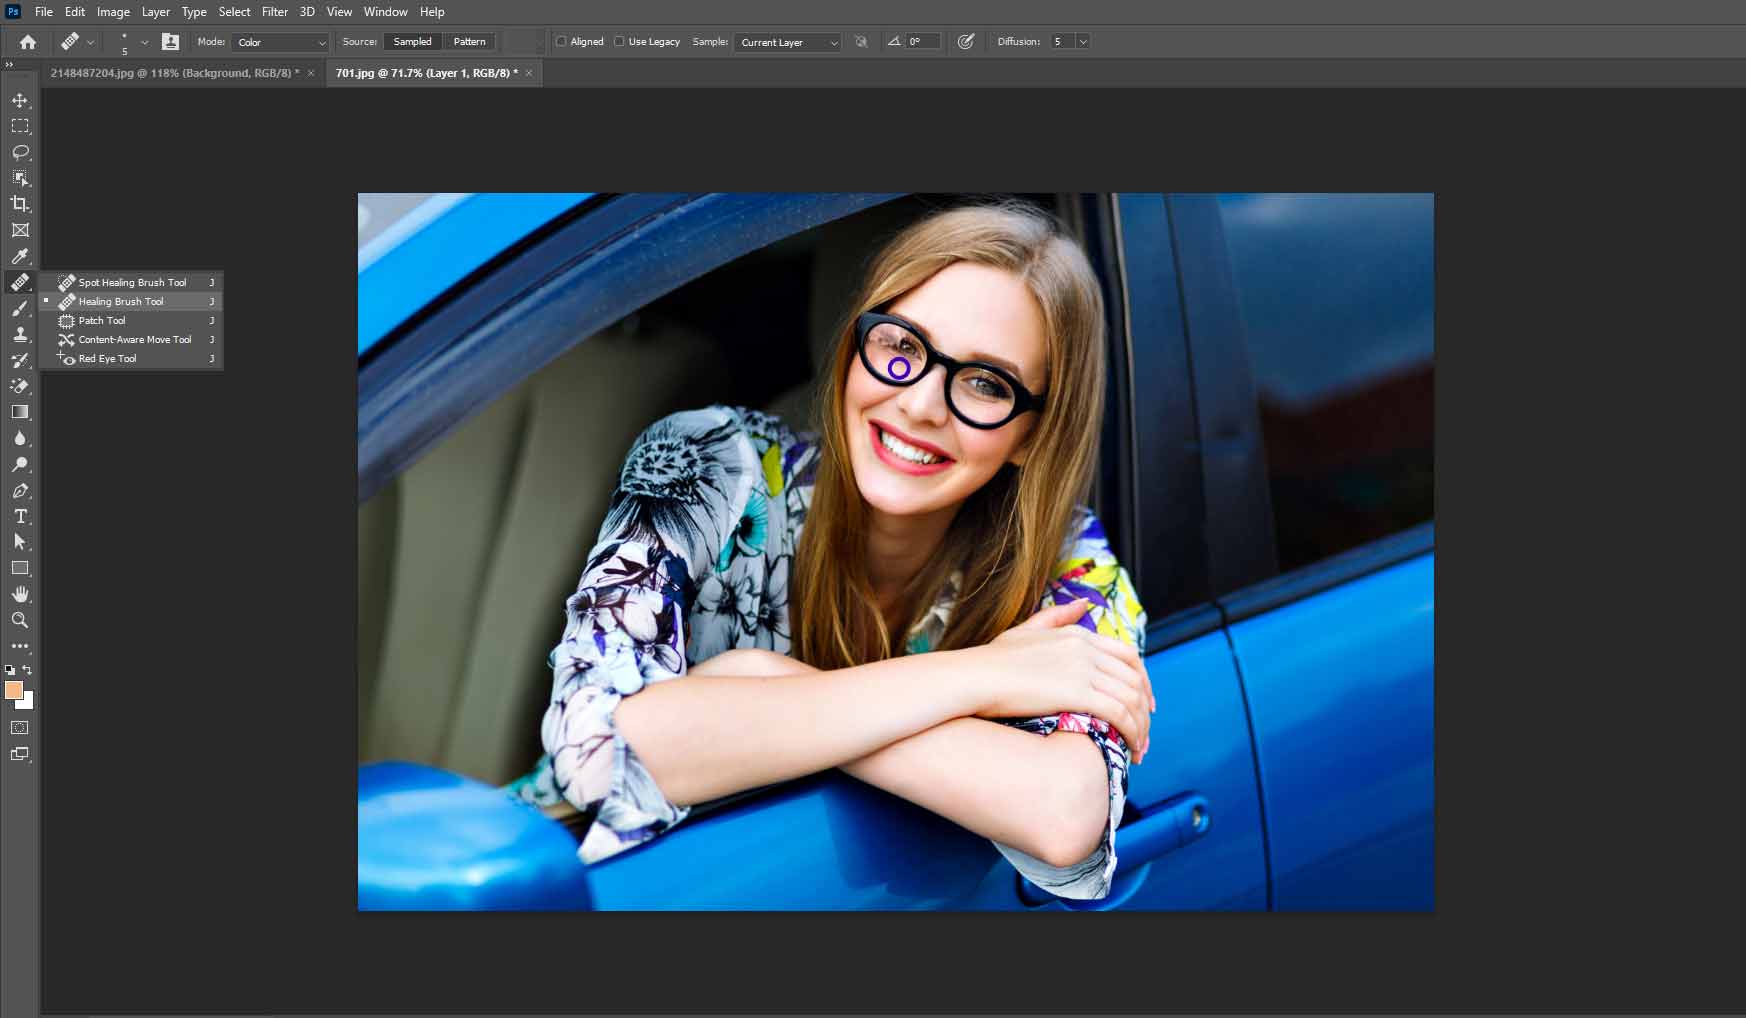
Choose the Healing Brush Tool from the toolbar (shortcut: “J”). In the tool’s Options Bar, set “Sample” to “Current & Below” so you work on your new layer but sample from the original photo underneath. This screenshot shows the Healing Brush tools from the Photoshop toolbar.
Step 3: Set Brush Size and Hardness
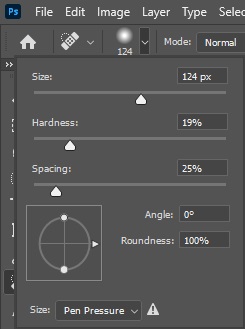
Choose an appropriate brush size (larger than the glare but not too big). Use a soft-edge brush for better blending. Adjust hardness to around 0–50%. The screenshot below shows how to set brush size and hardness in Photoshop.
Step 4: Sample a Clean Area
Press and hold the Alt (Option) key (or Ctrl for Photoshop on Windows) and click on a non-glare area near the glare you want to remove. This sets the sample point. The image below shows a sample of a clean area.
Step 5: Brush Over the Glare
Release the Alt (Option) key and carefully brush over the glare area. The Healing Brush will blend the sampled pixels with the glare, effectively removing it. The image below shows how to brush over the glare.

Step 6: Adjust and Refine
If necessary, adjust the brush size and sample points to refine the blending and ensure a seamless result. You may need to sample different areas and brush over the glare multiple times. The image below shows the final result of removing glare from glasses using the Healing Brush Tool.

2. How to Remove Glare from Glasses Using the Spot Healing Brush Tool
To remove glare from glasses using the Spot Healing Brush Tool, select the tool, adjust the brush size, sample the glare area, and use the Clone Stamp Tool or Healing Brush as needed.
Step 1: Select the Tool
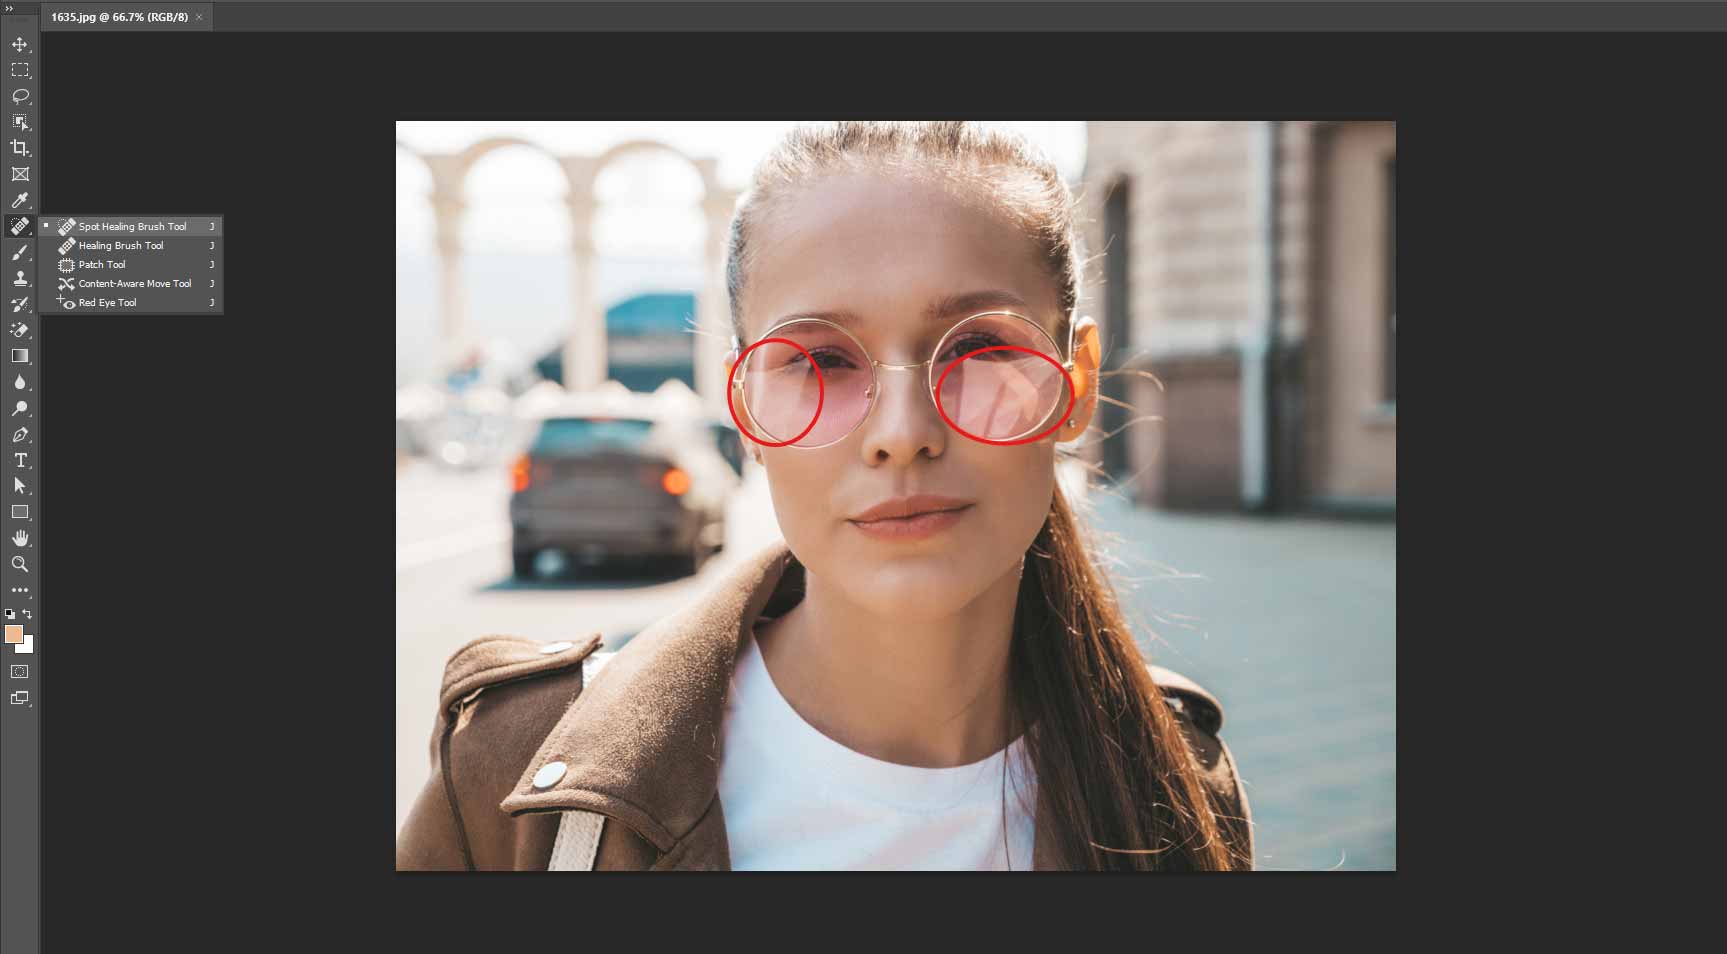
Select the Spot Healing Brush Tool from the toolbox or press “J” repeatedly until it’s active. This screenshot shows the Spot Healing Brush tools from the Photoshop toolbar.

Step 2: Adjust the Brush Size
Adjust the brush size so it’s slightly larger than the glare spot you want to fix. Use a soft brush edge for smooth blending.
Step 3: Sample the Glare Area
Paint over the glare spots directly on the glasses. The Spot Healing Brush automatically samples from surrounding pixels and blends textures, colors, and lighting to remove imperfections. Work in small sections rather than trying to remove all glare at once. This helps to keep the result natural.
Step 4: Use the Clone Stamp Tool or Healing Brush (If Needed)
If the glare is complex, combine this with other tools like Clone Stamp or Healing Brush for better control. This graphic below shows how to use the Clone Stamp Tool or Healing Brush to get rid of glare.
Step 5: Refine the Selection
Check your work by toggling the visibility of the repaired layer and refining as needed for seamless results. The graphic below shows the repaired layer and refining as needed.

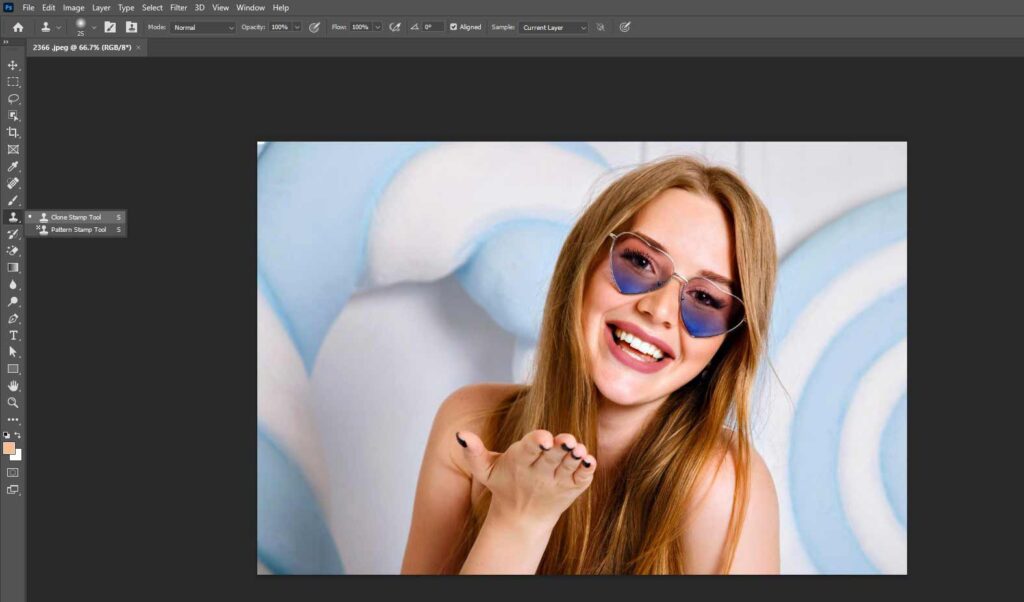
How to Remove Glare from Glasses in Photoshop Using the Clone Stamp Tool
To remove glare from glasses in Photoshop using the Clone Stamp tool, follow these steps: select the Clone Stamp tool (S), adjust hardness to 0-50% for a smooth blend, sample a non-glare area of the eye, and then paint over the glare to replace it. You can also use a layer mask to blend the cloned area and refine edges for a professional outlook.
Step 1: Select the Clone Stamp Tool (S)
Select the Clone Stamp tool from the Photoshop toolbar or press the “S” key. Ensure you duplicate the layer to work independently. On the tool’s Options Bar, set “Sample” to “Current & Below” so you can work on your new layer while sampling from the image below.
Step 2: Zoom In and Choose a Source
Zoom in closely to the area of glare. Hold down “Alt” (Option on Mac) and click a clear, glare-free area near the glare you want to remove. This sets your source point.
Step 3: Paint Over the Glare
Carefully paint over the glare by clicking and dragging your cursor. Frequently reset your sample point (Alt/Option + click) to avoid noticeable repeating patterns and to ensure the cloned area matches the local color and texture. Use a small, soft-edged brush for better blending with surrounding areas. The photo below shows the best way to paint over glare using the Clone Stamp Tool.

Step 4: Fine-tune and Blend
For large glare over an eye, you can clone from a glare-free eye (even from the opposite side), paste it on a new layer, and then use Edit > Transform > Flip Horizontal and the Warp tool to fit it perfectly in place.
Add a layer mask to the cloned area and use a soft black brush to blend edges, revealing only the parts you need for natural integration. Lower the brush flow (e.g., to 20-30%) for gradual and more realistic blending where needed. The photo below shows fine-tuning and blending.
Step 5: Check and Refine
Toggle the new layer on and off to see your progress. If needed, use the Healing Brush Tool for final touch-ups to blend any seams. The picture below displays the ‘Check and Refine’ stage and the completed image.

Pro Tips:
- For best results, always sample from areas close to the glare, matching both color and lighting.
- When cloning facial features (like eyes), use transformations and warping for an anatomical match.
- Use a layer mask to precisely reveal or hide parts of the cloned material for a seamless look.
How to Remove Glare from Glasses in Photoshop Using the Patch Tool
To remove Glare from Glasses in Photoshop using the Patch Tool, follow these steps:
- Select the Patch Tool from the toolbar
- Select the glare area
- Sample a clean area
- Release the selection
- Refine the edges
- Save your work
Step 1: Select the Patch Tool from the Toolbar
You find the Patch tool at the same of the Healing Brush tool (shortcut: press “J” and cycle through tools until you reach the Patch Tool).
Step 2: Select the Glare Area
Draw a selection around the glare on the glasses by carefully tracing the entire glare area. Ensure the selection covers the glare but avoids eyelashes or important details you want to keep. The image below shows how to select the reflection area using the Patch Tool.
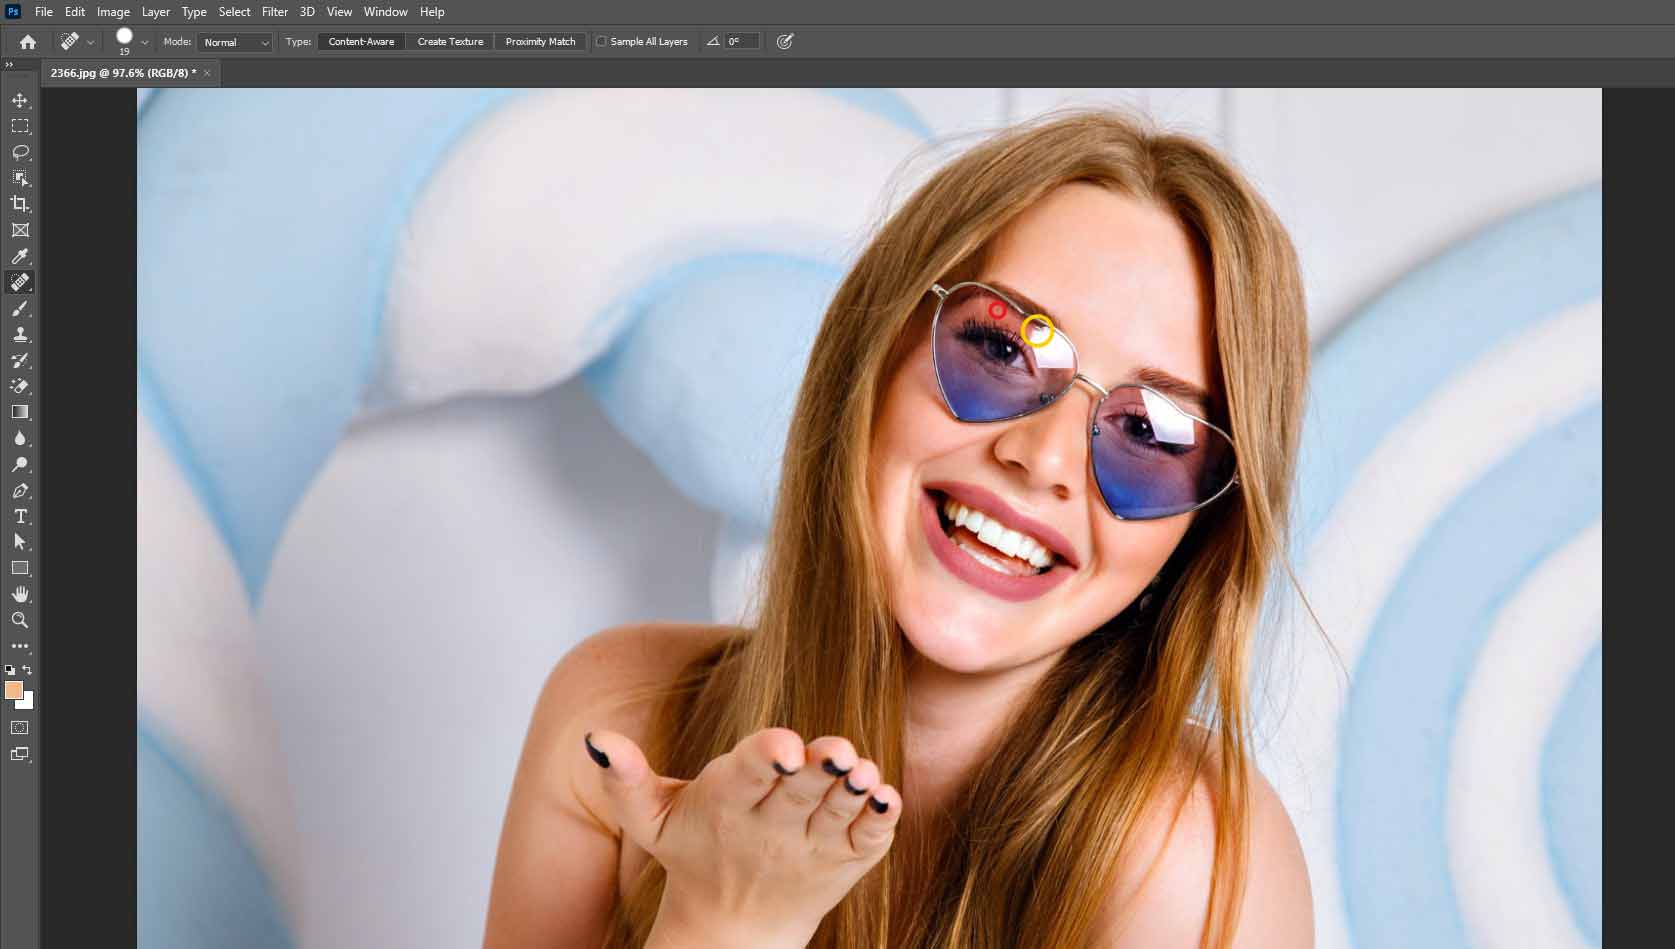
Step 3: Sample a Clean Area
Click inside the selection and drag it to a nearby area of the lens that is free of glare and has a similar texture and color. Photoshop will automatically blend the selected glare area with the clean sampled area, replacing the glare with the nearby pixels. This picture shows a sample of a clean area. This picture shows how to refine the edges using Photoshop’s Patch Tool.
Step 4: Release the Selection
Release the mouse button. Photoshop will blend the pixels smoothly to remove the glare reflection.
Step 5: Refine the Edges (If Needed)
If there are any visible edges or seams, use the Healing Brush Tool or Clone Stamp Tool to blend them further. This image shows how to refine the edges using Photoshop’s Patch Tool.
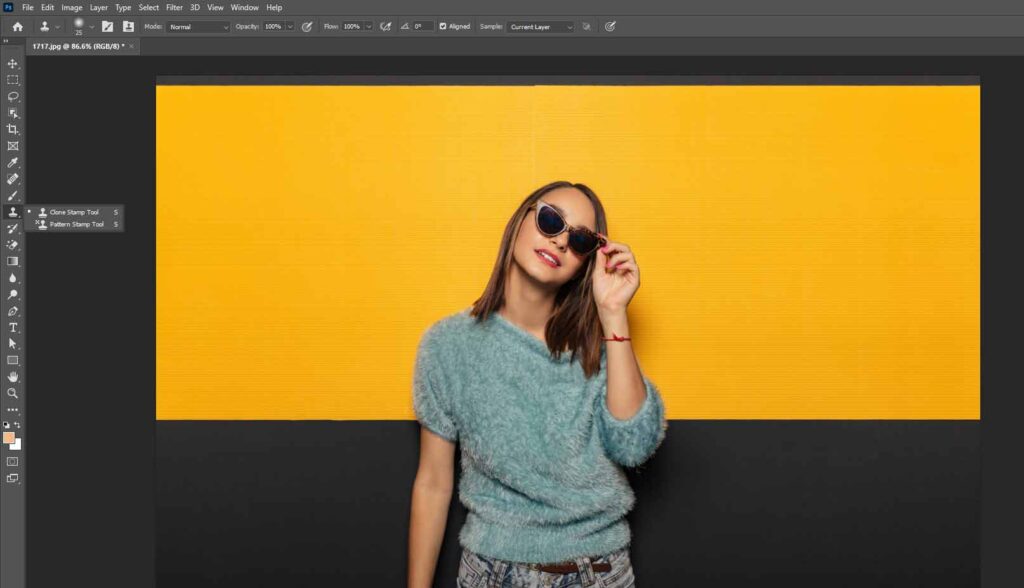
Step 6: Save Your Work
Save the edited image as per the requirements. The photo below shows the final image created using the Clone Stamp tool.
How to Remove Eyeglass Glare in Photoshop Using the Lasso Tool
To remove eyeglass glare in Photoshop using the Lasso tool, select the glare with the tool and use the Content-Aware Fill feature to replace the glare with surrounding pixels. Refine the area with the Clone Stamp tool or other retouching techniques if needed. Let’s check out the below for a more detailed process:
Step 1: Duplicate the Layer
Create a copy of your original image layer to preserve the original photo. For duplicating, use keyboard shortcut “Ctrl/Cmd+Z.”
Step 2: Choose the Lasso Tool
Select the Lasso Tool (shortcut “L”) and carefully draw a freehand selection around the glare spot on the eyeglass lens.
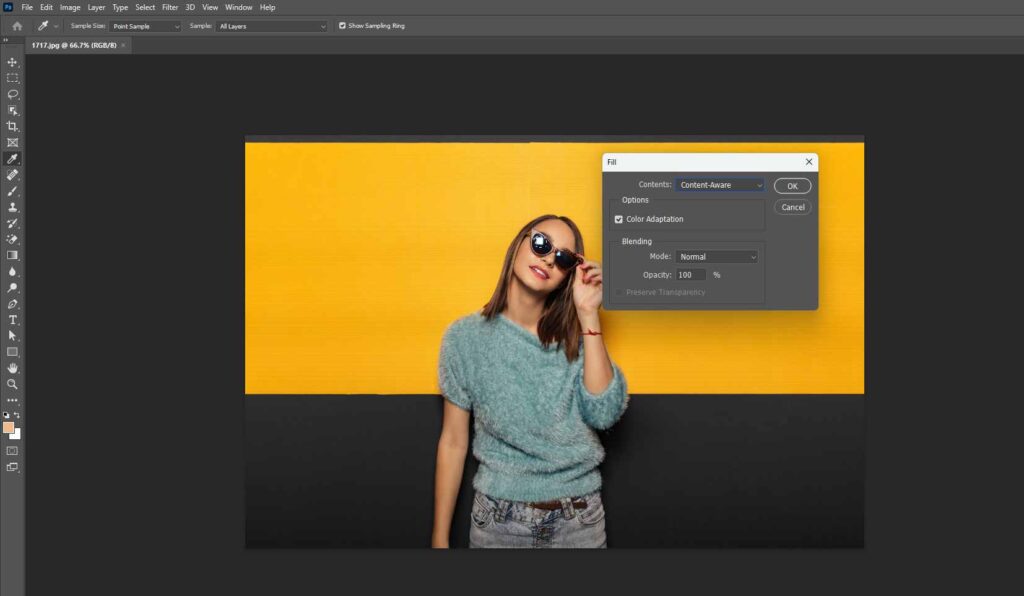
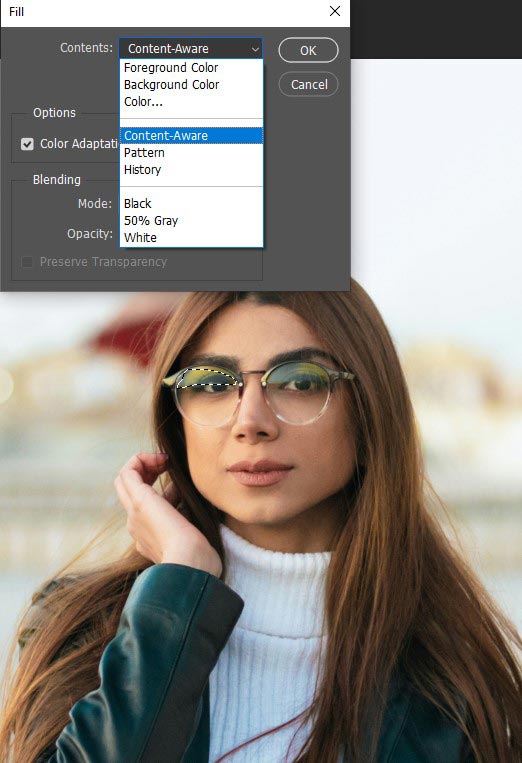
Step 3: Use Content-Aware Fill to Replace the Glare Area
Right-click the selected area and choose “Fill.” In the Fill dialog box, set “Contents” to “Content-Aware” and confirm. Photoshop will automatically fill the glare spot by sampling surrounding pixels, effectively removing the reflection. This photo shows how to use Content-Aware Fill to replace the glare area.
Step 4: Refine (If Needed)
Fine-tune with Clone Stamp or Healing Brush Tools if some glare remains or the fill isn’t perfect. Clone pixels from nearby clear areas to paint over remaining glare for a natural look.
Repeat the process for any other glare spots. You may need to adjust the selection size or use different tools for different areas. This photo shows the refined edge.
How to Remove Flash Glare from Glasses in Photoshop Using Adjustment Layers
To remove flash glare from glasses in Photoshop using adjustment layers, follow these steps.
- Open the image
- Select a Solid Color layer
- Click on the Curves Adjustment layer
- Invert the curves
- Use the Brush tool
- Add a new layer
- Use the Brush tool again
- Create another new layer
- Pick the Eyedropper tool
- Use the Brush to paint over the glare
- Blend and paint the area
- Spot correction
- Save the image
Step 1: Open the Image
Go to File and click on Open to open the file you want to work on.
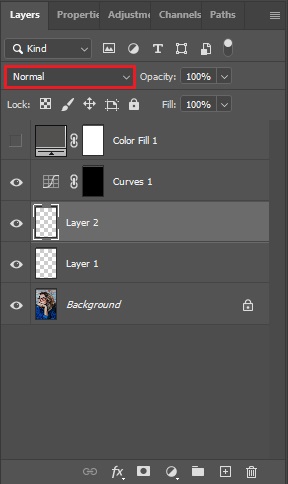
Step 2: Select Solid Color Layer
Click on New Adjustment Layer and select Solid Color.
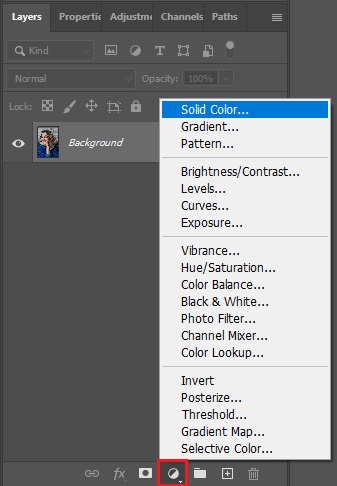
Select the Gray color. We’re doing this to work with the light of the glare area. This photo shows selecting the gray color in Photoshop.

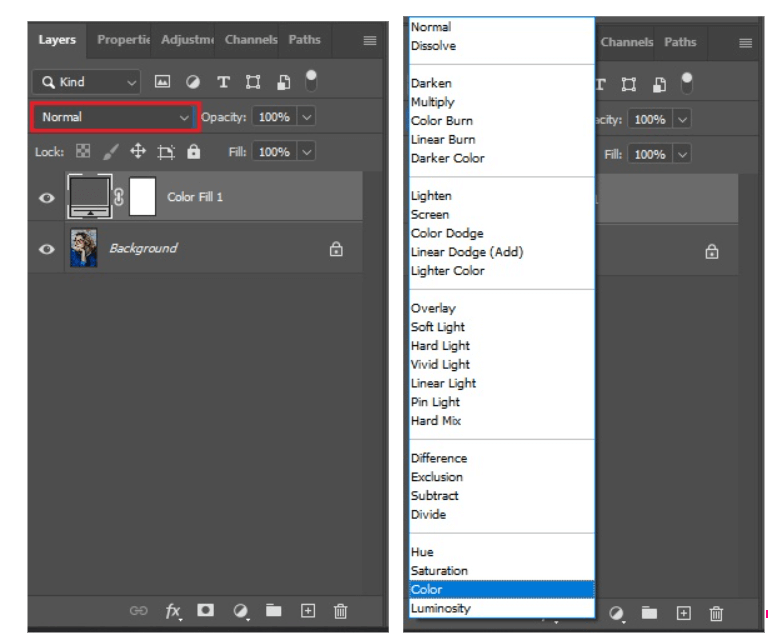
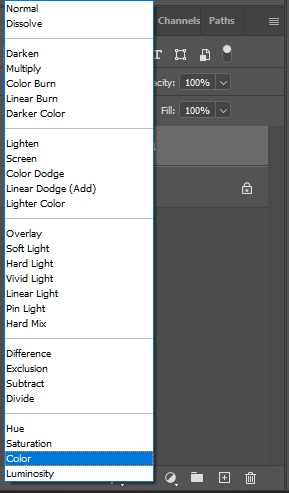
Change the Blend Mode to Color. This photo shows how to change the Blend Mode to Color.
Step 3: Click on Curves Adjustment Layer
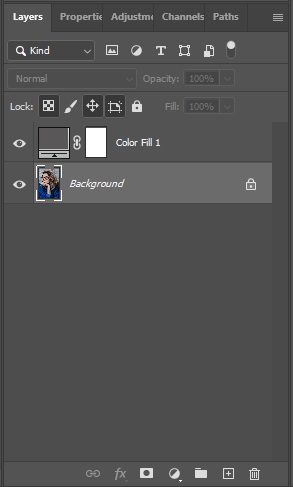
Select the Background Layer.
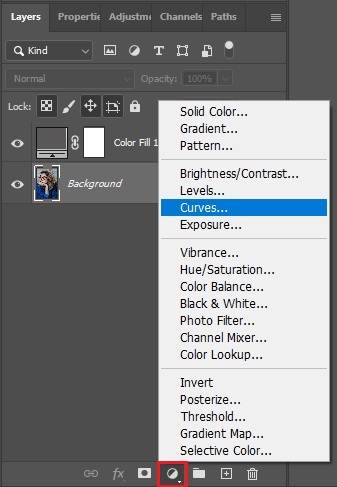
Again, from the Adjustment Layer, select Curves.
Now, drag the middle point below to make the glaring part more visible.
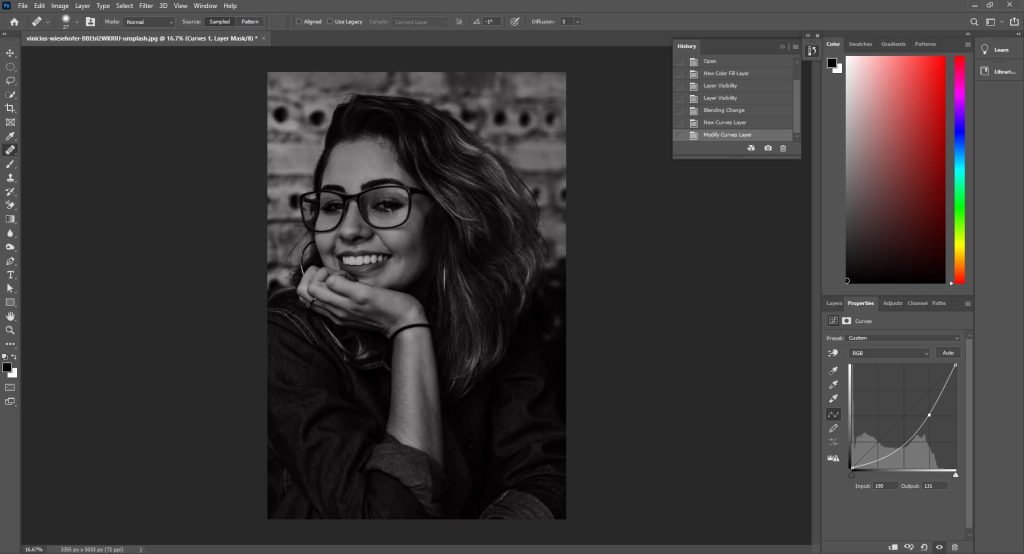
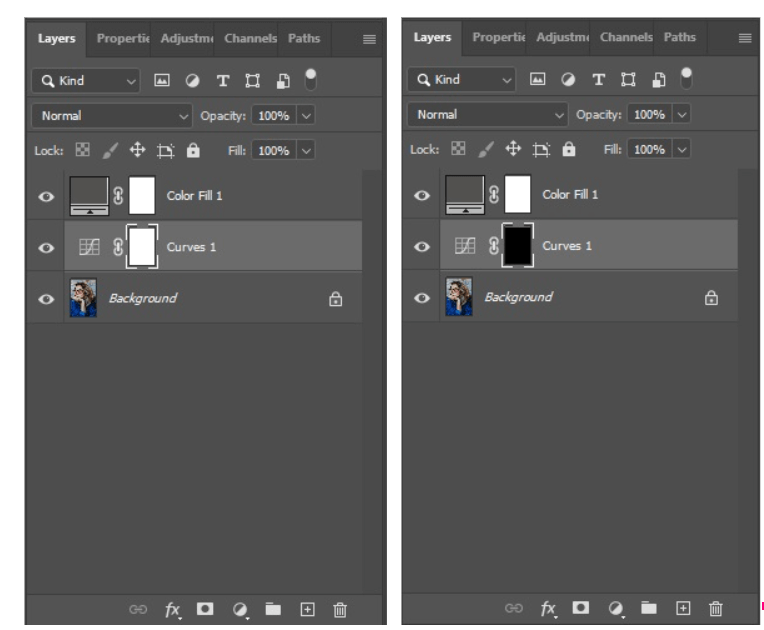
Step 4: Invert the Curves
Now, invert the Curves. To do that, make sure you’re on the Curves Layer and then press Ctrl + I. It’ll change the Layer to black. The graphic shows how to invert the curves.
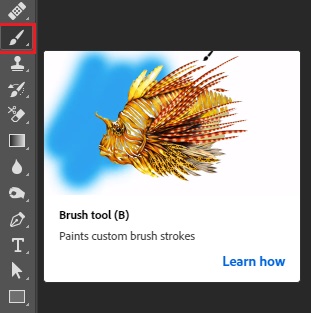
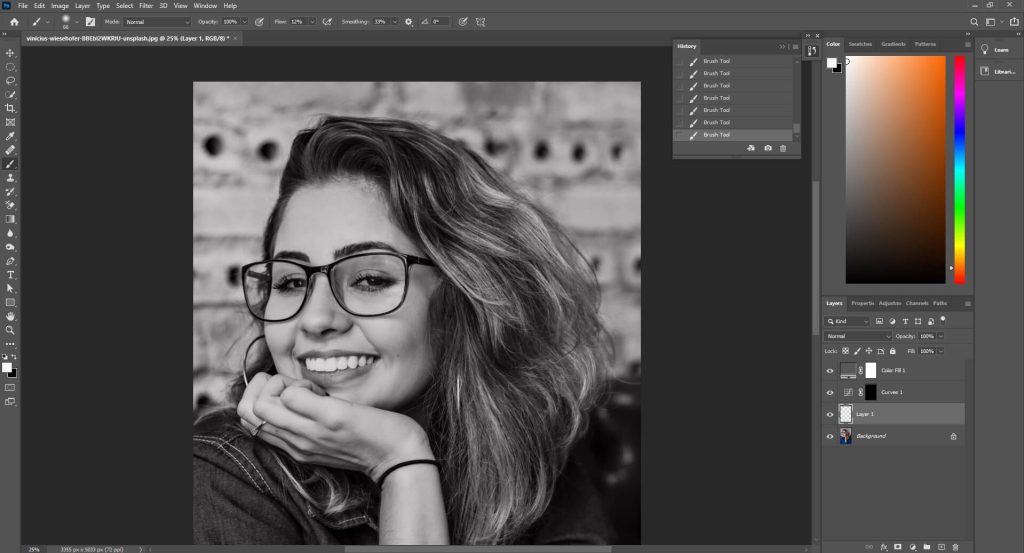
Step 5: Use the Brush Tool
From the toolbar, select the Brush Tool.
Look at the top menu, you’ll find an option called Flow. Set the flow to a lower level, like 3% or 4%.
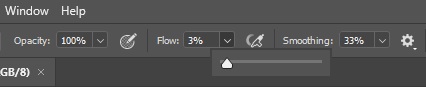
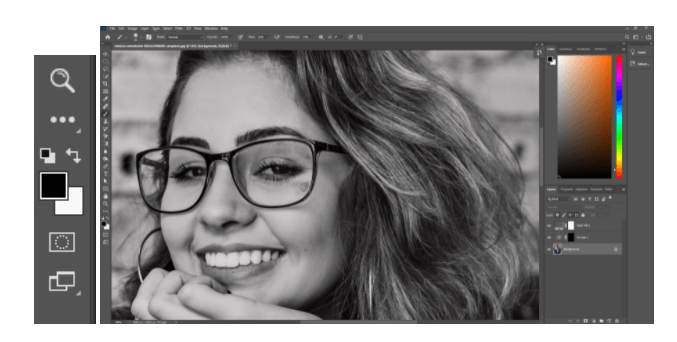
Now, brush the glare area with a black color to make it darker.
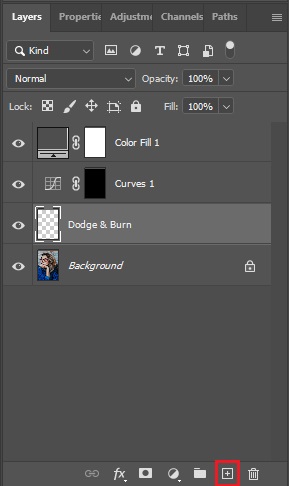
Step 6: Add a New Layer
Add a new Layer by clicking on the plus sign in the Layer menu. Name the Layer as ‘Dodge & Burn’. We’re naming the layers just to keep track of the work. The graphic shows how to add a new layer.
Step 7: Use the Brush Tool Again
From the toolbar, pick the Brush tool. Now, correct the area where it’s needed. What I mean here is, if there is any area that you feel has become more white or black, correct the area by brushing with black or white color where necessary.
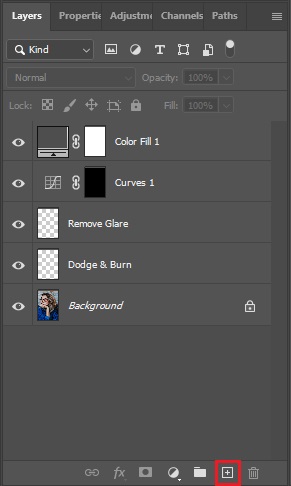
Step 8: Create Another New Layer
Add a new Layer by clicking on the Plus sign in the Layer menu. Name it as ‘Remove Glare’
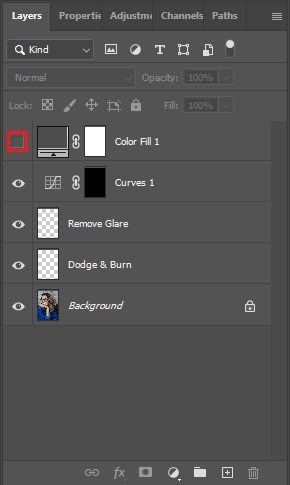
Turn off the Color Layer.
Step 9: Pick the Eye Dropper Tool (I)
Select the Eyedropper Tool from the Toolbar.
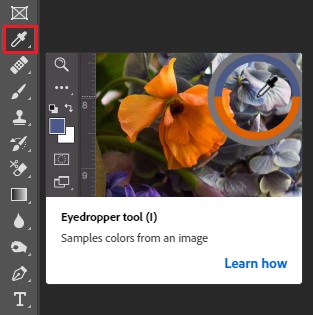
From the top menu, select sample as ‘Current & Below’ and sample size to 3 by 3 Average.

Step 10: Use the Brush to Paint Over Glare
Take the Brush Tool. Set the Blend Mode to Color.
Step 11: Blend and Paint the Area
Now, you’ll have to paint the area by giving a sample of which color you want to get. To take a sample, press the Alt button and click on the sample area. Here, keep this in mind: you should take samples from the nearest clear point of the area you’re going to brush. The graphic shows how to blend and paint the area using adjustment layers.

After taking a sample, brush on the glare area.
Step 12: Spot Correction
Now, if you still have some odd spots, you’ll have to correct them. You can do it by using either the Spot Healing Tool or the Healing Brush Tool.
Select the Background Layer. Now, take the Tool (Spot Healing Brush or Healing Brush) and brush it on the area you need to correct. To use the Healing Brush Tool, you’ll have to give a sample by pressing Alt on your keyboard.
Step 13: Save the Image

Go to File and click on Save As. Save the file in both JPEG and PSD formats.
How to Remove Flash Glare from Glasses in Photoshop Using the Content-Aware Fill
To remove flash glare from glasses in Photoshop using Content-Aware Fill, follow these steps: apply Content-Aware Fill, refine the fill settings, fine-tune with the Clone Stamp or Healing Brush, and match color and contrast. Here’s a step-by-step guide for glare remover photo using Content-Aware Fill:
Step 1: Apply Content-Aware Fill
Choose the Lasso tool (L) or other selection tool to draw around the glare spot you want to remove. After that, right-click the mouse, select the “Fill” option, and choose “Content-Aware Fill” from the “Contents” dropdown menu.
Photoshop will open a new workspace showing the fill results. On the right panel, adjust the “Sampling Area” if needed by adding or subtracting areas Photoshop uses to sample pixels from. Or, you can undo the fill (Ctrl / Cmd + Z) and try again with a different selection.
Step 2: Refine the Fill Settings
Use options like Color Adaptation, Rotation Adaptation, and Scale to improve the fill blending.
Step 3: Fine-tune with Clone Stamp or Healing Brush
If needed, use the Clone Stamp Tool (S) or Healing Brush Tool (J) on the new Content-Aware layer to blend edges smoothly and fix any remaining imperfections that Content-Aware Fill might miss.
Step 4: Match Color and Contrast
Sometimes the filled area may appear slightly off in color or brightness. Use Adjustment Layers like Curves, Levels, or Hue/Saturation clipped to the fill layer to match the surrounding areas.
How to Remove Flash Glare from Glasses in Photoshop Using Camera Raw Filter
To remove flash glare from glasses in Photoshop using Camera Raw Filter, follow these steps.
- Open your image in Photoshop
- Select the glare area
- Open an adjustment layer for fine control
- Use the Camera Raw Filter’s Dehaze slider
- Use the Spot Removal tool in Camera Raw
- Apply the changes and return to Photoshop
- Refine the image with Photoshop tools
- Duplicate and transform the lens area
Step 1: Open Your Image in Photoshop
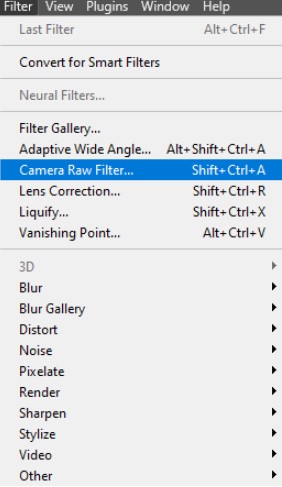
Open the glare-affected image in Photoshop. If your image is in RAW format, it will automatically open in Camera Raw. But for JPEG or other formats, navigate to “Filter > Camera Raw Filter” to open the Camera Raw interface. Below is a screenshot showing how to open your image in the Camera Raw Filter section of Photoshop.
Step 2: Select the Glare Area
Use the Lasso Tool (shortcut “L”) to draw around the glare on the glasses precisely. For perfect selection, you can zoom in.
Step 3: Open an Adjustment Layer for Fine Control
With the area selected, create a new Levels or Curves through an adjustment layer. Adjust sliders to reduce brightness and highlights in the glare area, aiming to make the glare less visible while preserving detail.
Step 4: Use the Camera Raw Filter Dehaze Slider
Inside Camera Raw, navigate to the “Effects tab” and increase the “Dehaze” slider gently over the glare area. This can reduce glare haze and restore some details.
Step 5: Use the Spot Removal Tool in Camera Raw
The “Spot Removal” tool can clone or heal areas. So, brush over bright glare spots to replace them with nearby textures and colors.
Step 6: Apply the Changes and Return to Photoshop
Click “OK” to apply the Camera Raw edits.
Step 7: Refine the Image with Photoshop Tools (If Needed)
Use the Clone Stamp or Healing Brush tool on a new layer to clean up any remaining bright spots or imperfections, cloning from glare-free areas near the glasses.
Step 8: Duplicate and Transform Lens Area (Optional)
For realistic correction, you can duplicate the glare-free lens area (using selection and Ctrl / Command + J), flip it horizontally, and overlay it on the affected lens for a perfect match.
What is Glass Glare in Photos?
Glass glare in photos, also known as reflections or glare on glasses, occurs when a light source (i.e., the sun, a flash, or studio light) bounces off the lenses of glasses and is captured by the camera. The glass glare results in bright spots, streaks, circles, or a hazy glow, creating distractions.
Portrait photography’s glass glare:
- Glare on eyeglasses can cover the eyes, distort facial features, or create distracting reflections.
- It reduces the image’s quality and can make the subject look unnatural or disengaged.
Why Does Sunglare Appear in Photos?
Sunglare appears in photos due to direct sunlight or intense reflected light that hits the camera lens, causing lens flares or loss of contrast. It happens because light rays reflect off surfaces or enter the lens at angles that scatter and overwhelm the image sensor. The 6 key reasons behind unwanted reflection from sunlight appearing in photos:
- Shooting Toward the Sun (Back Lighting): When the camera points toward a bright light source (like the sun), light rays hit the lens directly.
- Reflections from Glass or Water: Sunlight reflecting off shiny surfaces (windows, water, metal, or vehicles) can bounce into the camera and cause glare.
- Low-Quality or Uncoated Lenses: Lenses without anti-reflective coatings are more prone to internal reflections, resulting in glare or ghosting effects.
- Dirty or Scratched Lenses or Filters: Dust, fingerprints, or scratches scatter light, making glare worse, especially under bright sunlight.
- Wide Apertures & Bright Light: Shooting with a wide-open aperture (small f-number) in strong sunlight can amplify sunglare effects due to more light entering the lens.
- No Lens Hood: A lens hood helps block stray light from hitting the front of the lens. Without it, sunlight from the sides can sneak in and cause glare.
How to Prevent Glare on Glasses Before Taking Photos
To prevent glare on glasses before taking photos, adjust the camera angle or the subject’s head to avoid direct reflection, or try back lighting by placing the light source behind the subject. Also, you can suggest tilting the glasses slightly, either up or down on the nose, or adjusting the earpieces. Before heading to the detailed breakdown, let’s glance at what causes the glare:
- Direct flash.
- Overhead lights.
- Strong ambient sunlight.
- Poor angle between the subject, light source, and lens.
Here are some techniques to avoid eyeglasses glare spots during a shoot:
- Adjust Camera Angle: Rotating the camera or having the subject turn their head can change the angle of reflection and eliminate glare.
- Tilt the Subject’s Glasses Slightly: Even small movements can make a difference. Try moving to the side or having the subject slightly turn away from the light source.
- Adjust the Lighting Angle: Try to avoid direct light in front of the glasses. [Use the “angle of incidence = angle of reflection” rule: change the direction until glare disappears.] Position the side light, creating a 45-degree angle relative to the camera. If the side light creates shadows, use a fill light on the opposite side to balance the illumination.
- Use Soft, Diffused Lighting: Replace hard lights with softboxes, umbrellas, or diffusers to reduce harsh reflections and spread more evenly across the face.
- Avoid On-camera Flash: Use off-camera flash positioned at a 45-degree angle to the side and bounce the flash off a wall or ceiling for a soft effect.
- Use Non-glare Glasses: Anti-glare glasses or anti-reflective (AR) coated glasses are designed to reduce glare and reflections on your eyeglass lenses, improving vision clarity and minimizing glare.
- Use Polarizing Filters (Optional): For challenging situations, polarizing filters can be very effective in reducing glare.
Pro tips:
- Avoid backlighting if you don’t use proper fill lighting.
- Clean the glasses using a microfiber cloth or a lens cleaning solution.
- Use live view or test shots to check for glare.
Does Photo Editing Service Remove Sunglare from Product or Portrait Photos?
Yes, professional photo editing service providers effectively remove sunglare from both product and portrait photos using photo editing apps or tools (i.e., Photoshop, Lightroom, etc.) and manual editing techniques. The 5 common sun reflection photo editing experts can remove are:
- Harsh reflections from glass, plastic, or metal surfaces in product photos.
- Lens flares or bright spots are caused by direct sunlight in portraits.
- Overexposed areas or light streaks on reflective packaging.
- Eyeglass glare caused by outdoor sun during headshots or lifestyle portraits.
- Unwanted haze or loss of contrast due to backlighting or sunlight leaks.
Professional retouchers use 6 effective Photoshop tools to remove sunglare from product or portrait photos, such as:
| Tools | Purpose |
|---|---|
| Clone Stamp tool | Rebuild natural textures over glare spots |
| Healing Brush tool | Smooth and blend overexposed areas |
| Frequency Separation | Separate and fix texture and color independently |
| Dodge & Burn | Even out the lighting or remove light streaks |
| Adjustment Layers | Fix brightness/contrast, shadows, and highlights |
| Color Correction | Neutralize color shifts caused by sunglare |
Where to Get Perfectly Removed Lens Glare from Your Photo?
To perfectly remove lens glare from your photo, you’ve two different options: outsource photo editing services or use several online photo editing tools. Outsourcing photo editing not only ensures quality and consistency but also fulfills your photo-related custom requirements, saves time, eliminates backlogs, and so on.
On the other hand, online photo editing software is helpful to remove glass glare, and you might not need photo editing skills. But for complex photo editing, you might not get a polished and professional touch.
When to Outsource Photo Editing Service Providers:
- You need professional-level results, and expert-level work demands precision and industry-expert photo editors.
- You deal with complex glare, like reflections that cover the eyes or distort facial features, and removing them requires layering, cloning, color matching, and reconstructive editing.
- Outsourcing is the best choice when you work with large batches of photos (i.e., events or shoots).
- Professionals delivered bulk images within the estimated time, maintaining image quality.
- Your images require advanced editing solutions besides glare removal, like background cleanup, skin retouching, shadow removal, and so on.
- You’re expanding to more commerce channels and must follow each channel’s guidelines when uploading product photos, like spectacles.
Get Perfectly Removed Glare With an Affordable Price.
Get Free Trial
When to Use Online Image Editing Tools:
- The glare is minimal and easy to fix, not covering the eyes or facial features. For this, you can use online tools or apps, like Snapseed, RetouchMe, or others, for basic edits.
- You need to handle small projects (like fixing 1-3 personal photos).
- You’re working on casual or social media photos for non-commercial use (i.e., Instagram posts, casual portraits, etc.).
- Your budget is limited to investing in photo editing software or outsourcing photo editing services.
FAQs about Best Get Rid of Glare in Photos
Can I use frequency separation to fix glare on glasses?
Yes, you can use frequency separation to fix glare on glasses, allowing you to separate the image into different frequency layers (texture and color/tone). This separation enables you to edit the texture (high-frequency layer) and color/tone (low-frequency layer) to reduce or remove the glare without affecting other areas of the image.
What’s the difference between the Clone Stamp and Healing Brush when removing glare?
The difference between the Clone Stamp and Healing Brush lies in the working process when removing glare from glasses. The Clone Stamp Photoshop tool copies pixels from a source area, creating hard edges. On the contrary, the Healing Brush tool blends the copied pixels with the surrounding area, resulting in a more natural look.
Does Adobe Photoshop have a one-click glare removal feature?
Yes, Adobe Photoshop has a new AI-powered “Remove Reflections” one-click glare removal feature. To access this feature, choose the “filter” option from Photoshop’s top menus and click the “Camera Raw Filter,” or you can use the keyboard shortcut (shift + ctrl + A).
