Photo resizing is not a lengthy work, but if the number of images is too high, then it is actually time-consuming. How to batch resize images in photoshop is one of the most asked questions by photographers and photo editors. And to solve this issue, photoshop has more than one feature to offer.
Instead of working with each image separately, photoshop gives access to an easier way of resizing images. This way, you can resize all your images at once and save time for editing. You just need to understand the whole process and implement that whenever you need it.
What you’ll learn in this article
Can I Resize Multiple Images at Once in Photoshop?
This is possible to resize multiple images at once in Photoshop. Not just that, this can be done in multiple ways. Here, we will describe two ways to batch-resize bulk images at once while keeping the original quality of the images. These are –
- Photoshop’s built-in Image Processor
- Creating batch resizing action
How to Batch Resize Images in Photoshop?
In photoshop, there is a built-in feature that enables you to batch resize images without any hassle. You just need to open the image processor of photoshop, then put the required settings, and then apply. Here is the process in detail –
Step 1: Open Image Processor
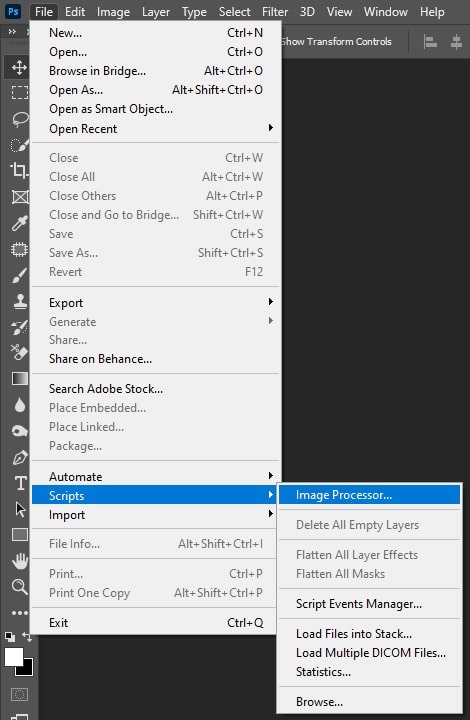
Launch Photoshop and go to File from the top menu. From there, click on Script and select Image Processor.
A new window will pop up.
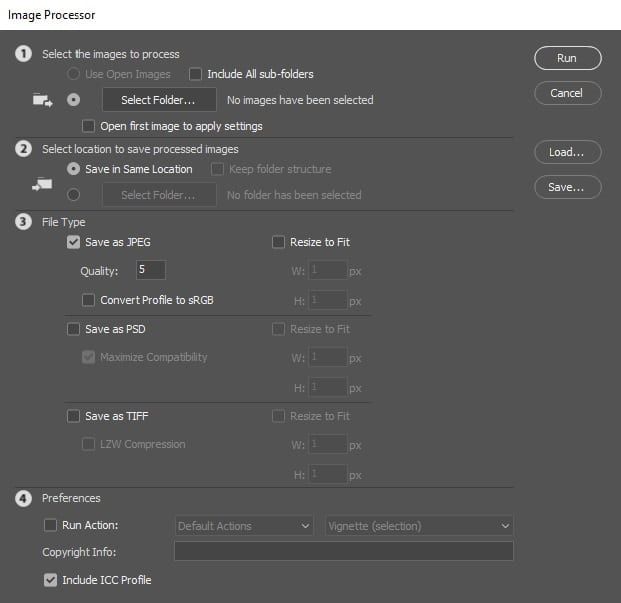
Step 2: Select Folder
Select the folder of the images that you want to resize.
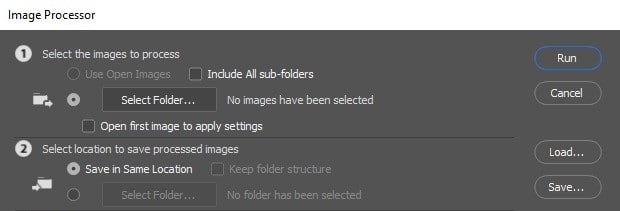
And then select the location you want to save the files.
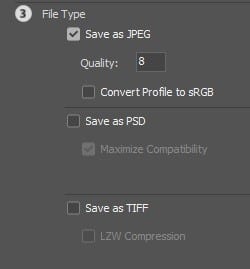
Step 3: File Type
Select the file type you want to save your images.
Step 4: Resize Your Image
Give the resize measurement to resize your images.
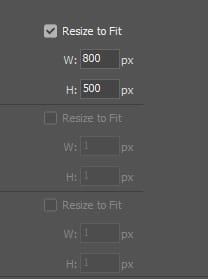
Step 5: Click on Run
Click on Run once you’re done with all the parameters. This will apply the changes to your images.
You May Also Like: How to Make Clipping Path in Photoshop
Batch Resizing Images in Photoshop Using Custom Photoshop Actions
Custom Photoshop action allows you to apply the same editing as many times as you want. You can create and save an action and apply it on images again and again. So if there is any resizing requirement that you need frequently, you can just save that to use multiple times.
How to Create Action in Photoshop to Resize Multiple Images?
In this process first, you need to create an action by opening the action panel, creating a new action, input the settings and save it for later. You can also edit the action anytime.
Here’s how you can create an action in Photoshop –
Step 1: Open Image
Launch Photoshop and open an image in Photoshop.
Step 2: Open Action Panel
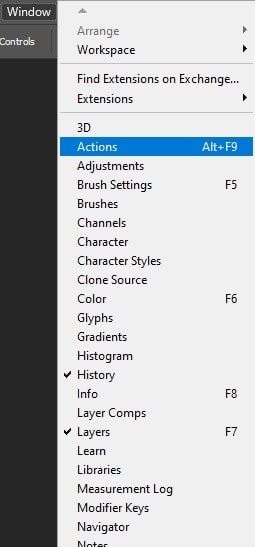
If you can’t see the Action Panel by default, go to the Window menu from the top bar. Select Actions from there.
Step 3: Create Action
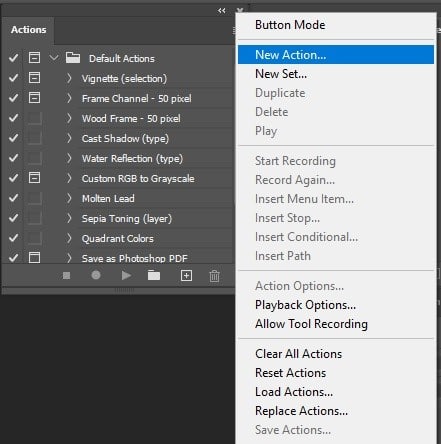
Click on the Menu option from the top right corner of the Action Panel.
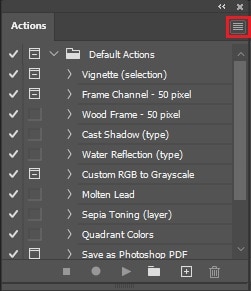
Now, select New Action from the menu.
A window will pop up. Set the name. You can also set the Function Key to create a shortcut.
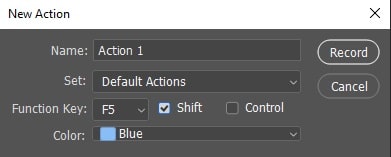
Click on Record and start the editing.
Step 4: Record Button
The round button will become red to show that the recording has started.
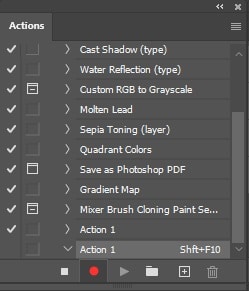
Step 5: Image Resize
Now whatever edit you will do, that will be recorded under the Action you’ve created. Resize the image according to your need.
Go to Image > Image Size.
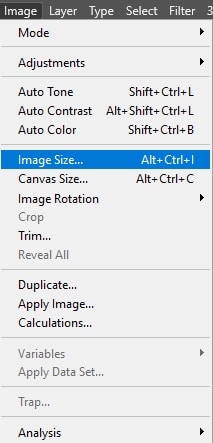
A window will pop up. Set the measurements you want.
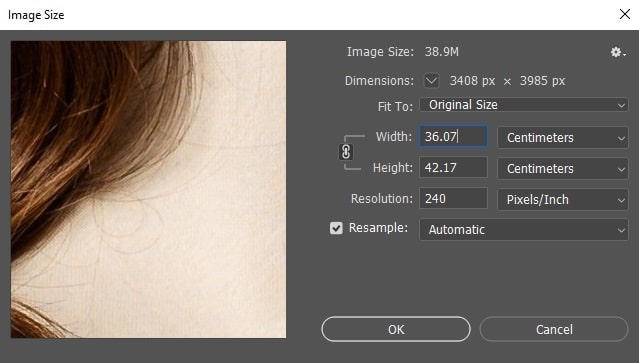
Step 6: Save the Action
Once you’re done with the necessary editing, click on the Stop button to end the recording.
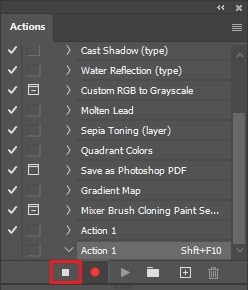
Your Action Creation is done!
You May Also Like: How to Quickly Cut Out an Image in Photoshop
How To Use Actions to Resize Batch Images In Photoshop?
After creating an Action, you can apply that on any image or on multiple images at once. Here’s how to use the Action you’ve created to batch-resize images –
Step 1: Automate
Go to File and select Automate>Batch.
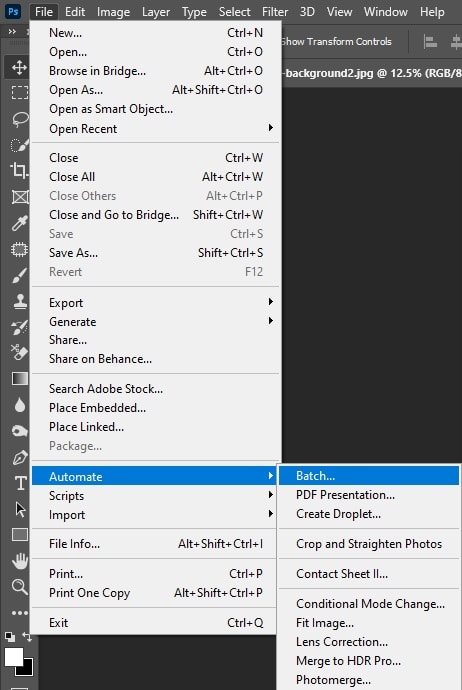
Step 2: Select Options
Now, select the Folder and Action Name.
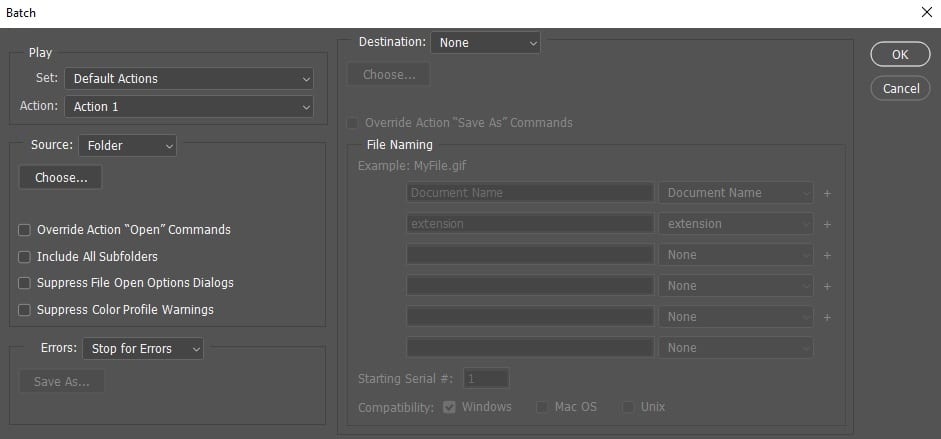
The changes will be applied to all the images.
Final Thought
So, resizing multiple images at once even without losing the quality doesn’t take hours anymore. Batch image resize is a huge time-saving work that can be done easily in Photoshop. Photographers and editors often have to deal with bulk images and for that, batch image resize can be a great solution.

