
Background color in product images creates a visual hierarchy, separates content sections, and provides a contrasting backdrop to make a strong first impression on your customers. A clean white background is the most common product background color in different e-commerce platforms. But for social media or creating lifestyle or Amazon product infographics, you should change the background.
How about changing the background color in Photoshop? You can change product background by utilizing 9 different methods, such as Pen tool, Photoshop Layer Mask, Solid Color Fill, Background Eraser tool, Brush tool, Subject Select tool, Quick Selection tool, Object Selection tool, and Magic Wand tool.
Each method is easy to apply, but be mindful of some common mistakes when changing background colors.
What you’ll learn in this article
- 1 How to Change Background Color in Photoshop – 9 Easy & Fast Ways
- 1.1 How to Change Background Color in Photoshop Using the Subject Select Tool
- 1.2 How to Change Background Color Using the Quick Selection Tool
- 1.3 How to Change Background Color in Photoshop Using the Object Selection Tool
- 1.4 How to Change Background Color in Photoshop Using the Magic Wand Tool
- 1.5 How Do You Change the Background Color in Photoshop Using the Pen Tool
- 1.6 How to Change Background Color Using Photoshop’s Layer Masks
- 1.7 How to Change Background Color with a Solid Color Fill
- 1.8 How to Change a Background Color with the Background Eraser Tool
- 1.9 How to Change the Color of the Background in Photoshop with the Brush Tool
- 2 What are the Different Ways to Refine Selection Edges
- 3 What are the Common Mistakes to Avoid When Changing Background Colors in Photoshop?
- 4 What Role Does Background Color Play in Increasing E-commerce Sales?
- 5 Why Changing Background Color in Photoshop Can Help in E-commerce?
- 6 FAQs about Changing the Background Color of an Image in Photoshop
- 7 Final Overview
How to Change Background Color in Photoshop – 9 Easy & Fast Ways
You can change background color in Photoshop utilizing 9 different methods, such as the Pen tool, Photoshop Layer Mask, Solid Color Fill, Background Eraser tool, Brush tool, Subject Select tool, Quick Selection tool, Object Selection tool, and Magic Wand tool.
How to Change Background Color in Photoshop Using the Subject Select Tool
Changing the background of an image in Photoshop using the Select Subject tool is one of the easiest and most efficient methods. This tool uses advanced AI technology to find the main subject in an image automatically. This makes the process of selecting and masking much faster and more accurate.
Step 1: Open the Image and Duplicate the Background Layer
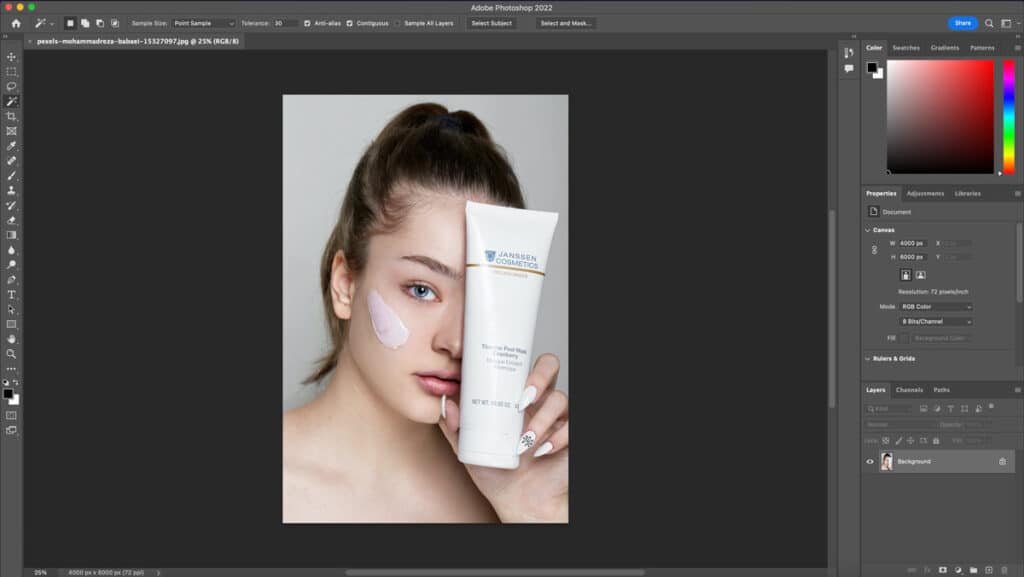
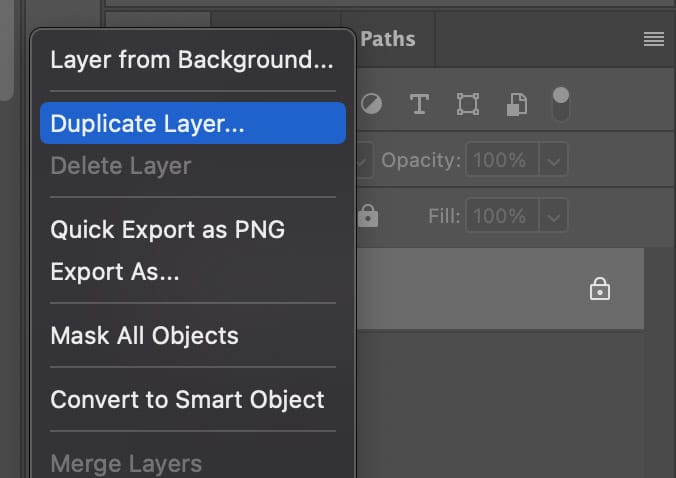
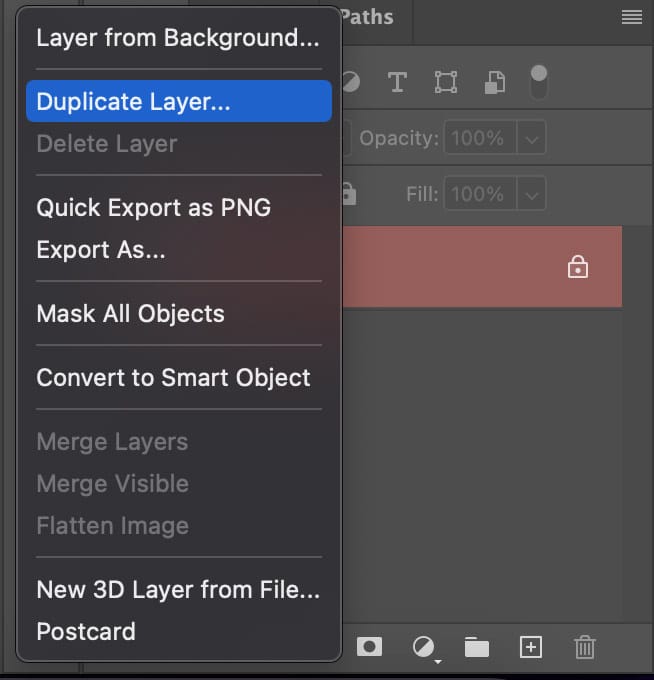
To change the background of an image using the Select Subject tool, the first step is to open the image in Photoshop and duplicate the background layer. This ensures the original image remains intact and any changes are made on a separate layer. To duplicate the background layer, right-click on the layer and select “Duplicate Layer.”
Step 2: Select the Subject Using the Select Subject Tool
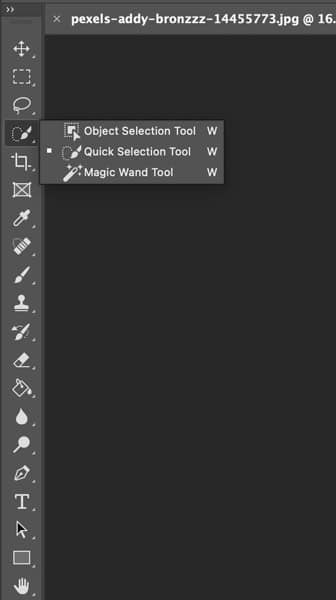
Next, select the Select Subject tool from the toolbar on the left side of the screen. Advanced AI technology is used by the Select Subject tool to find and select an image’s main subject automatically. Click on the object you want to select, and Photoshop will automatically create a selection around it.

Step 3: Remove the Background
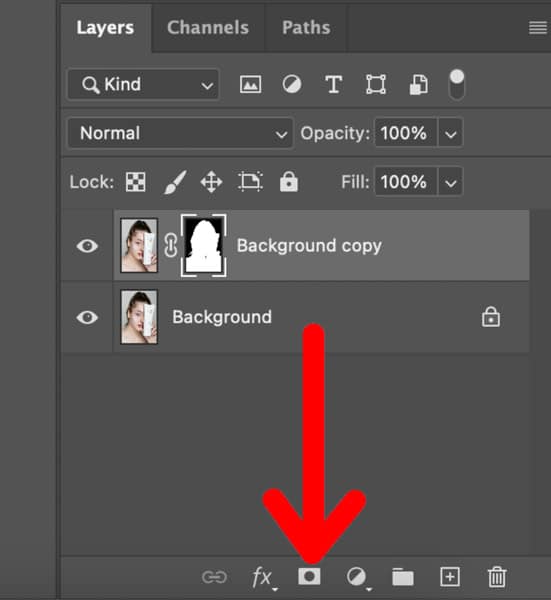
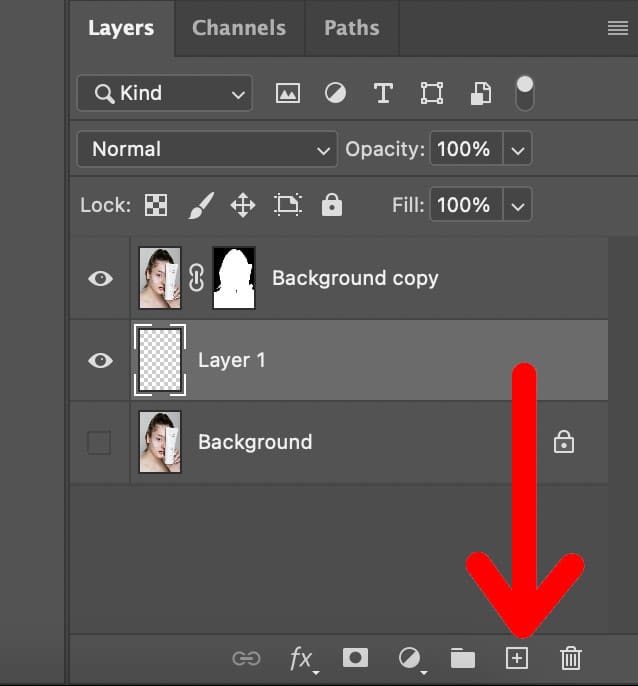
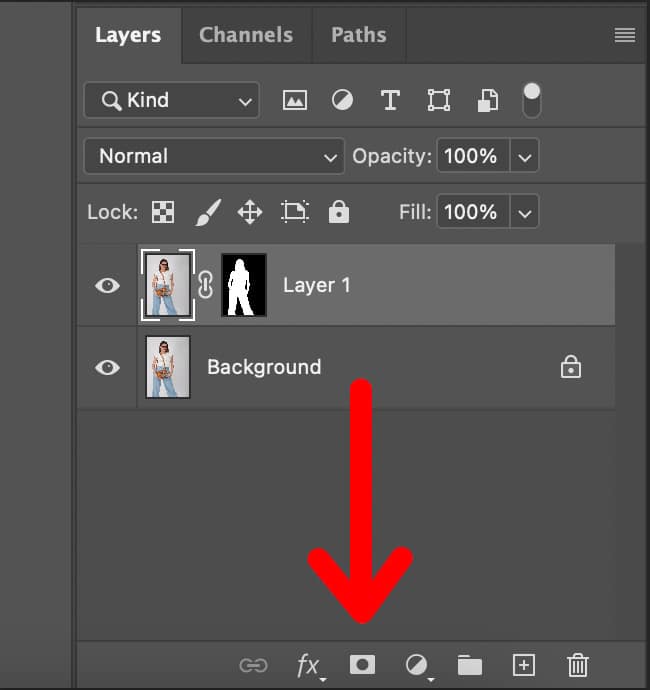
With the subject selected and the edges refined, remove the background by creating a layer mask. Click on the Layer Mask icon at the bottom of the Layers panel to create a mask that hides the background.
Step 4: Add a New Background
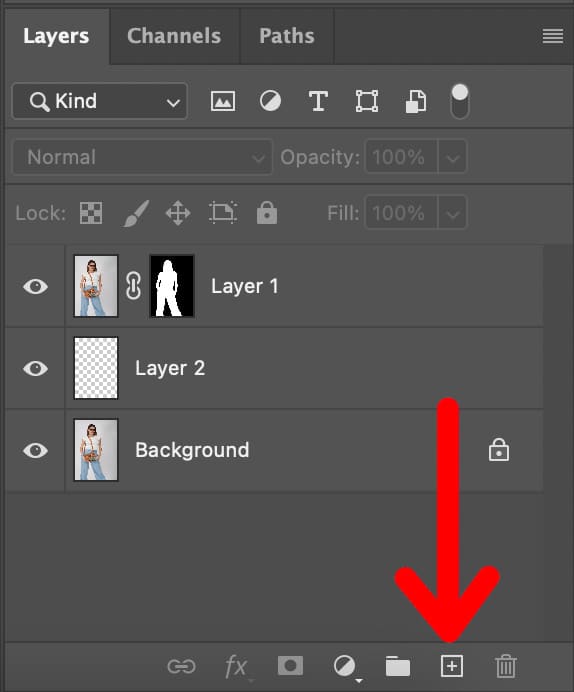
Create a new layer underneath the subject layer and choose a new background color or image.
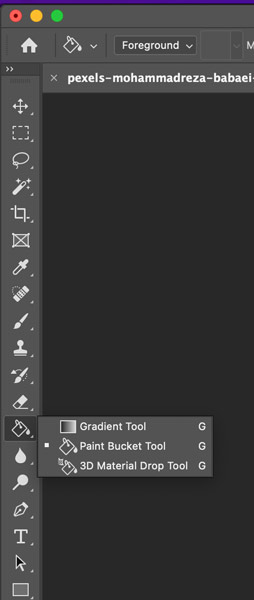
With the new layer selected, use the Paint Bucket tool to fill the layer with the chosen color or drag and drop a new background image onto the layer.
Step 5: Refine the Object
Finally, refine the subject’s edges by using a layer mask to hide any unwanted areas of the subject that may have been selected during the process. This ensures that the subject appears seamlessly blended into the new background.
How to Change Background Color Using the Quick Selection Tool
Step 1: Open the Image and Duplicate the Background Layer
To replace the background of an image in Photoshop, the first step is to open the image and duplicate the background layer. This will allow you to work on a separate layer without permanently changing the original image. To duplicate the background layer, right-click on the layer and select “Duplicate Layer“.
Step 2: Select the Object Using Selection Tools
Once the duplicate layer is created, the next step is to select the object using either the Quick Selection tool or the Object Selection tool. The Quick Selection tool is ideal for making quick selections around the subject, while the Object Selection tool is useful for selecting the entire object within the image.


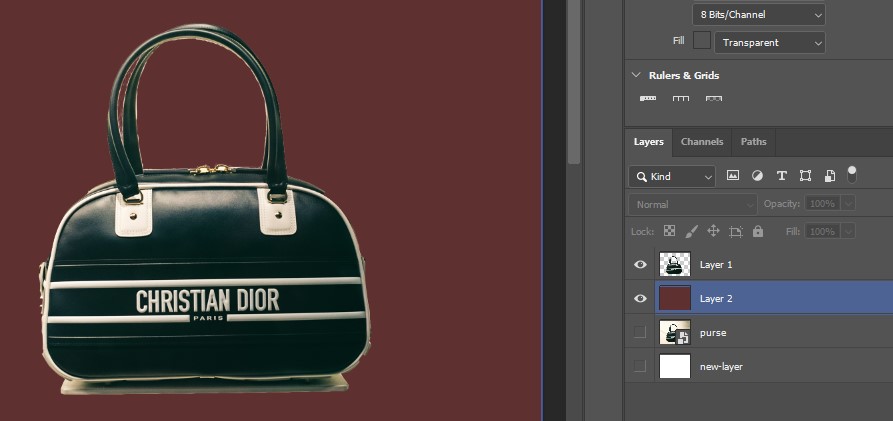
Step 3: Replace the Background
With the object selected, it’s time to replace the background. Create a New Layer and place it underneath the object layer. Then, choose the desired color for the new background by selecting the Paint Bucket tool and clicking on the New Layer.
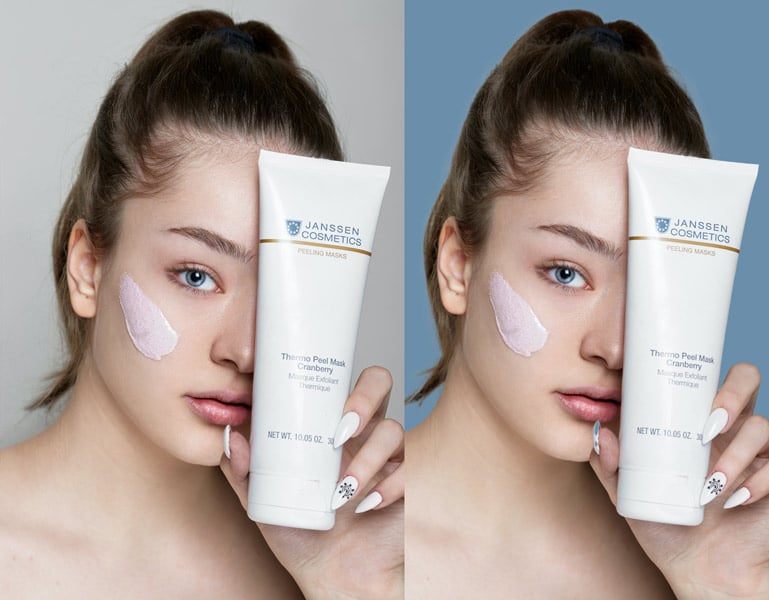
Background Color Change – Before and After

How to Change Background Color in Photoshop Using the Object Selection Tool
The Object Selection tool utilizes AI to select objects or regions in an image automatically. Here’s a step-by-step guide:
Step 1: Open the Image and Duplicate the Background Layer
To remove and replace the background of an image in Photoshop using the Object Selection tool, the first step is to open the image and duplicate the background layer. This ensures that the original image remains intact and any changes are made on a separate layer. To duplicate the background layer, right-click on the layer and select “Duplicate Layer“.
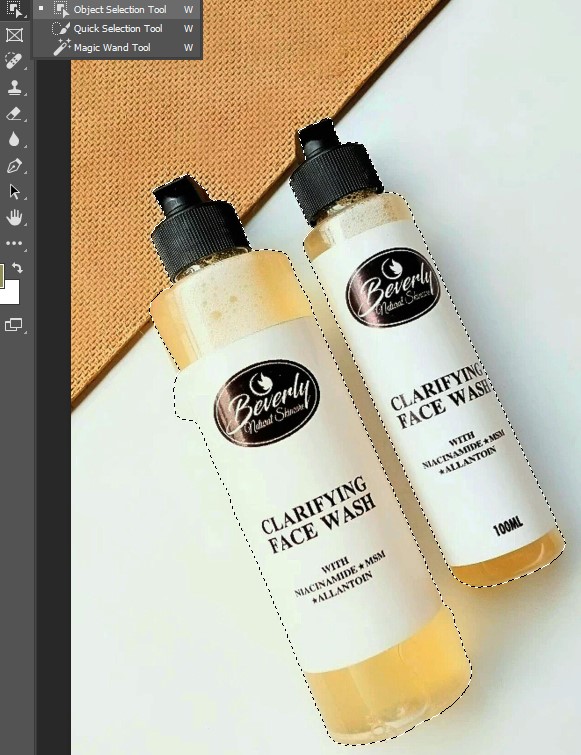
Step 2: Select the Object Using the Object Selection Tool
Next, choose the Object Selection tool from the toolbar on the left side of the screen. Click and drag the tool around the object you want to select. The Object Selection tool automatically detects the object and creates a selection around it.
Step 3: Refine the Selection
Once the object is selected, refine the edges by going to Select > Select and Mask. Adjust the settings to smooth out the edges and make any necessary refinements.
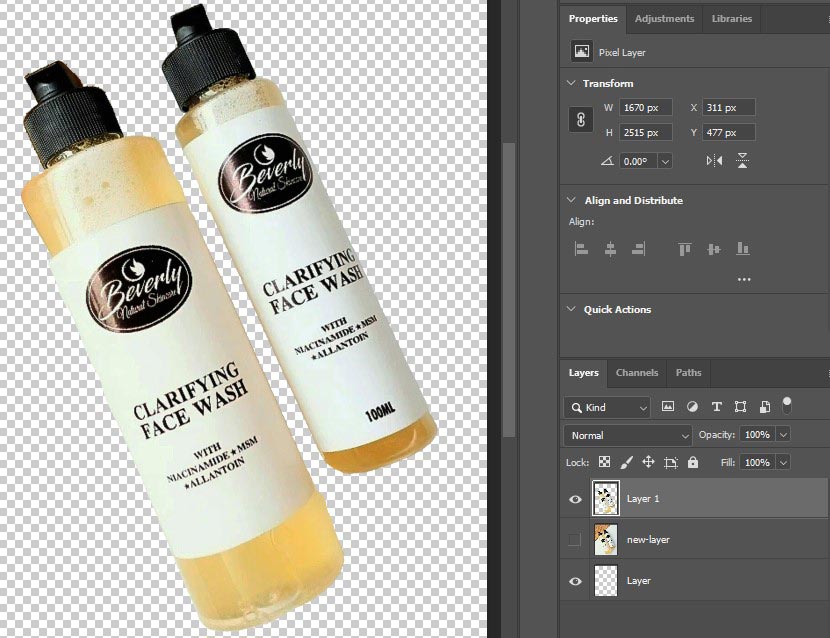
Step 4: Remove the Background
With the object selected and the edges refined, remove the background by creating a layer mask. Click on the Layer Mask icon at the bottom of the Layers panel to create a mask that hides the background.
Step 5: Add a New Background
Create a new layer underneath the object layer and choose a new background color or image. With the new layer selected, use the Paint Bucket tool to fill the layer with the chosen color or drag and drop a new background image onto the layer.

How to Change Background Color in Photoshop Using the Magic Wand Tool
Step 1: Open the Image in Photoshop and Duplicate the Background Layer
To replace the background of an image in Photoshop using the Magic Wand tool, the first step is to open the image and duplicate the background layer. This ensures the original image remains intact and any changes are made on a separate layer. To duplicate the background layer, right-click on the layer and select “Duplicate Layer“.
Step 2: Select the Magic Wand Tool
Once the duplicate layer is created, select the Magic Wand tool from the toolbar on the left side of the screen. The Magic Wand tool allows users to select areas based on color and tone.
Step 3: Make the Selection
Click on the background area you want to remove. The Magic Wand tool will select all areas of the same color and tone. If the selection is not precise enough, adjust the Tolerance setting in the Options bar until the desired area is selected.

Step 4: Refine the Selection
Once the object is selected, refine the edges by going to Select > Select and Mask. Adjust the settings to smooth out the edges and make any necessary refinements.
Step 5: Remove the Background
With the object selected and the edges refined, remove the background by creating a layer mask. Click on the Layer Mask icon at the bottom of the Layers panel to create a mask that hides the image background.
Step 6: Add a New Background
Create a new layer underneath the object layer and choose a new background color or image. With the new layer selected, use the Paint Bucket tool to fill the layer with the chosen color or drag and drop a new background image onto the layer.

How Do You Change the Background Color in Photoshop Using the Pen Tool
You can change the background color in Photoshop using the Photoshop Pen tool (shortcut key: P) as follows:
Step 1: Create a Path Around Your Subject
After selecting the Pen tool from the toolbar or using the shortcut key, carefully trace around the object you want to isolate. Complete the path by closing the shape from where you started, as shown in the picture below.

Step 2: Convert Path to Selection
Right-click inside the path and choose “Make Selection.” This will turn your path into a selection.
Step 3: Duplicate the Background Layer
Press “Ctrl + J” to duplicate your selection onto a new layer. Hide the original background layer, and you will get a transparent background like the picture.

Step 4: Add a New Layer for the Background
Create a new layer and move it underneath the subject layer in the Layers panel. After that, select the new layer and use the Brush tool to change the subject’s background.
This easy and simple method allows you to cut out the subject edge by edge. However, you can always change the background color by editing the color fill layer.
How to Change Background Color Using Photoshop’s Layer Masks
You can change the image background color using Photoshop’s Layer masks by isolating the subject’s background with the Selection tools and applying a Layer Mask. Below, we’ve showcased a step-by-step guide:
Step 1: Select Your Subject
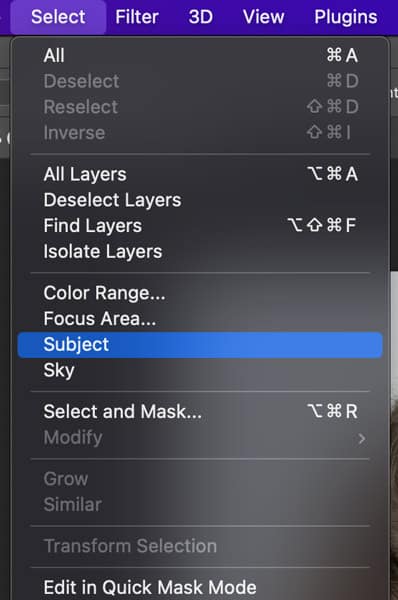
Start with the Select Subject option (Select > Subject or press Ctrl/Cmd + F and type Select Subject). You can also use the selection tools, including Quick Selection, the Magic Wand, or others.

If you click the Select Subject button, Photoshop AI will automatically find and select the edges of the most prominent subject in your image, like the image below.
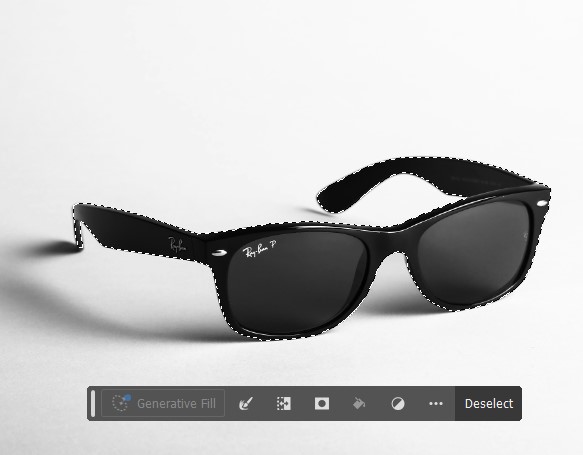
If the selection requires adjustment, you can deselect it manually using different Photoshop selection tools. However, these tools effectively select people, cars, furniture, pets, clothes, and other products. Select the tool and hover your cursor over the element you want to highlight.
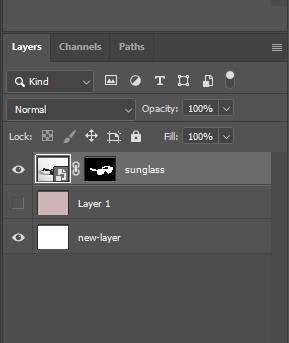
Step 2: Add a Layer Mask
After selecting the subject, click the Add Layer Mask button at the bottom of the Layers panel. This will create a mask that hides the subject’s background and reveals your subject. You’ll notice white areas are visible (subject) and black areas (background) are hidden on the mask thumbnail, like the picture below.
Step 3: Add a New Background Color
Create a new layer underneath the Layer Mask panel and fill this with your desired color using the Paint Bucket tool or by adding a Solid Color Fill Layer as we do.

If any adjustment is required, zoom in and use a smaller, softer brush to refine the edges where the subject meets the background for a seamless look.
How to Change Background Color with a Solid Color Fill
Here’s a step-by-step guide to changing the background color with a Solid Color Fill:
Step 1: Select and Isolate the Subject
You can use the Select Subject feature (Select > Subject) or the Selection tool to isolate your subject.

Below, we’ve used the Quick Selection tool to cut out the product from its background.

Step 2: Create a Solid Color Fill Layer
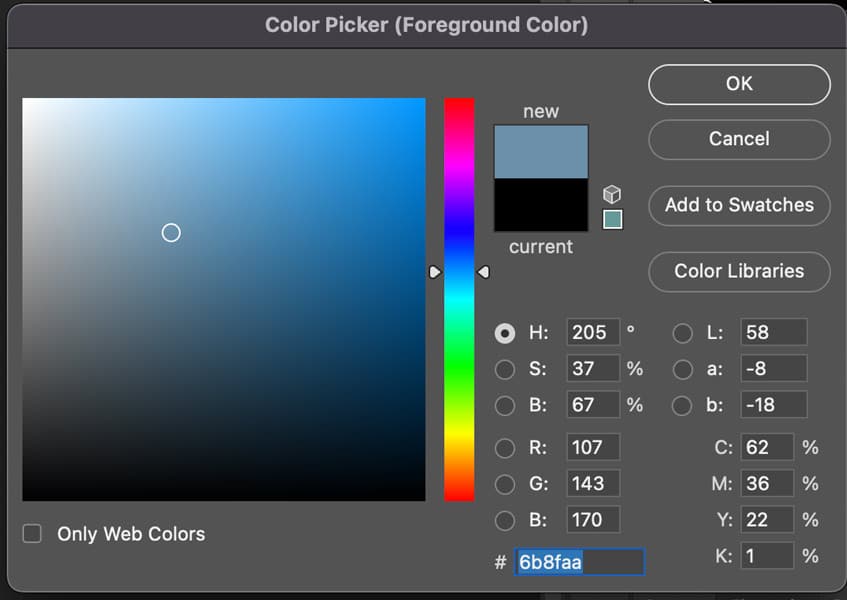
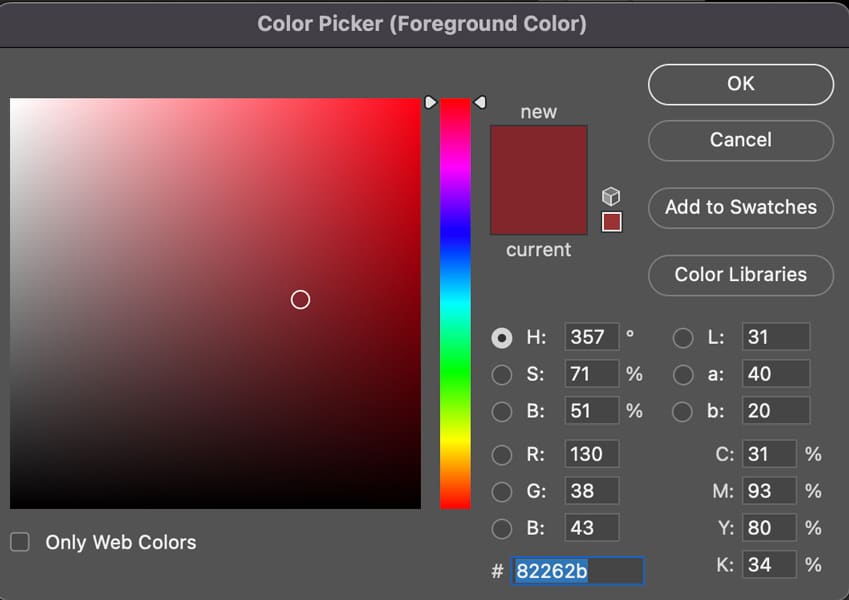
Go to the Layers Panel and click the Create New Fill or Adjustment Layer icon (the half-filled circle at the bottom). After that, choose the Solid Color option from the menu, and you will notice that a Color Picker will appear. Select the desired color that you want as the product background color.
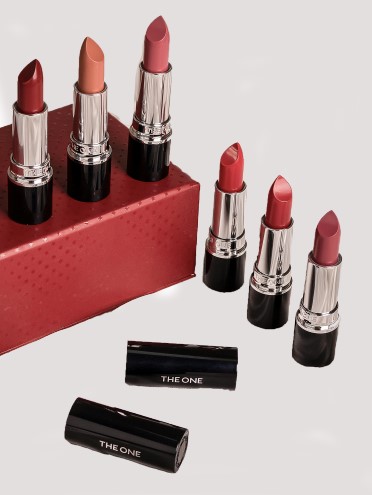
The final image background will appear like that. Remember, the new Solid Color Fill layer will be below your subject layer in the Layers panel.
Step 3: Refine the Mask (If Needed)
If you used a selection to create a mask, the Solid Color Fill layer will have a layer mask attached. You can refine this mask with the Brush tool to clean up edges or reveal/hide parts of the background.
How to Change a Background Color with the Background Eraser Tool
To change the background color with the Background Eraser tool, you’ll first erase the unwanted background using the tool, create a transparent area, and then add a new layer below the subject’s layer and fill it with your desired color. Below, we’ve highlighted a step-by-step guide that eases the process:
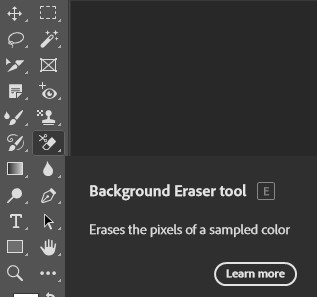
Step 1: Select the Background Eraser tool
After opening the edited image and duplicating the background layer (Ctrl/Cmd + J), select the Photoshop Background Eraser tool (shortcut key: E).
Step 2: Adjust the Settings

Adjust tool settings from the options bar:
- Brush size (use [ or ] to adjust).
- Sampling mode (set “Continuous” for dynamic backgrounds, Once for sampling the color of the crosshair when you first click and only erase that color, and Background Swatch to erase only the color that matches the current background swatch color.
- Set the Limits (Continuous erase only adjacent pixels of the sampled color, and Discontiguous erase sampled color wherever it appears under the brush).
- Adjust the Tolerance (a lower value allows you to erase colors very similar to your sample and a higher value allows a broader range).
- Set the Tolerance value (higher for varied backgrounds, lower if the subject and background are similar in color).
- Check the “Protect Foreground Color” option if your subject shares colors with the background.
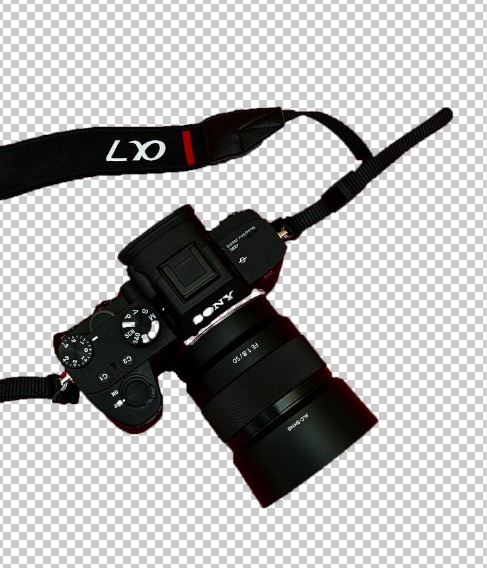
Step 3: Erase the Background
Drag the Background Eraser tool over the background area, and the tool will erase pixels matching the sampled color white leaving your subject intact. Remember to Zoom in for a detailed area view and adjust brush size as needed.


Step 4: Add a New Background Color
When the background is erased (you might notice a transparency) perfectly, create a new layer and move it below your subject layer in the Layers Panel. Then, fill this new layer with your desired color by using the Paint Bucket Tool (shortcut key “G”) or Edit > Fill (select the background color option). However, you can also use the Brush tool if needed.

How to Change the Color of the Background in Photoshop with the Brush Tool
You can change the background color with the Brush tool by creating a new layer for your background, selecting your desired color, and painting over the background area. Here’s a step-by-step guide to changing background color with the Photoshop Brush tool.
Step 1: Select the Subject
Open your edited image in Photoshop, duplicate the background layer, and use a selection tool like the Quick Selection tool, Polygonal Lasso, or Magnetic Lasso to select your subject. Here, we’ve used the Quick Selection tool to select the subject.

Step 2: Isolate the Subject into a New Layer
Simply, press Ctrl+J to copy the subject onto a new layer, isolating it from the background. Use the Background Eraser tool to refine edges if there are any flaws left behind.
Step 3: Paint the Background
With the new background layer active, you can use the Brush tool to paint over the background area. Choose a large, soft brush for smooth coverage, or experiment with different brush styles for creative effects.
Step 4: Use Layer Masks
You can add a layer mask to your subject layer and use the Brush tool to hide or reveal parts of the subject or background for precise edge refinement.

Watch Photoshop expert Joshua Malik’s tutorial on changing image background color.
What are the Different Ways to Refine Selection Edges
The 3 different ways to refine the selection edges are the Refine Edge Brush tool, the Select & Mask Workspace, the Brush tool, the Quick Selection & Object Selection tool, and the Lasso tools. These tools help to highlight fine details like hair, fur, or intricate texture, and provide clean and realistic results when cutting objects out or isolating parts of an image.
Refine Edge Brush Tool
The Refine Edge Brush tool in Photoshop is a useful tool for refining selection edges, especially for complex or detailed edges, like hair, fur, or fine details. With this automatic edge detection tool, you can select objects and adjust the radius, edge detection, and other fine-tuning parameters to improve the transition between subject and background.
Select and Mask Workspace
The Select & Mask Workspace brings together all the edge-refining tools and controls. It offers global refinement options, including Radius, Shift Edge, and Edge Feather which can be used to make general adjustments to all edges of the selection. Also, you can remove unwanted tones or colors.
Global Refinement Sliders
The mentioned sliders affect the entire selection edge:
- Radius: Controls the width of the edge refinement area.
- Smart Radius: Photoshop automatically varies the radius along the selection edge (soft and hard edges). A smaller radius for sharp edges and a larger radius for softer ones.
- Smooth: Smooth out irregular edges in your selection.
- Feather: Create a gradual transition between selection and background, and soften the selection edge.
- Contrast: Increases the sharpness of the selection edge.
What are the Common Mistakes to Avoid When Changing Background Colors in Photoshop?
Incorrect layering, ignoring blending modes, neglecting realistic shadows and highlights, poor selection and masking, and inconsistent color balance are common mistakes you must avoid when changing background colors in Photoshop. Below, we’ve highlighted the most common mistakes and how you can avoid them:
1. Incorrect Layering
This mistake happens if you directly paint over the background layer or use the “fill” tool on it.
Solution: Create a new layer (using “Layer > New > Layer” or Ctrl+J/Cmd+J) above the background layer and apply the new background color to this new layer.
2. Ignoring Blending Modes
Applying a solid color fill without adjusting the blending mode results in a flat, artificial background.
Solution: Experiment with different blending modes, like “Multiply” or “Overlay,” to blend the new color with the original background.
3. Neglecting Shadows and Highlights
When you apply a new color, you might avoid the shadows and highlights in the original background.
Solution: Use adjustment layers (Hue/Saturation or Color Balance) or subtle brush strokes to blend the new color with the original background’s shadows and highlights.
4. Inconsistent Color Balance
Inconsistent color balance happens when you avoid the color temperature and saturation of the new background color.
Solution: Match the white balance, color temperature, and saturation of the new background color to match the rest of the image better.
5. Overusing Filters and Effects
Applying too many filters or relying on heavy effects can degrade image quality and introduce artifacts or banding, particularly in areas with subtle gradients like skies or backgrounds.
Solution: Use filters wisely and review the image at 100% zoom to check for unwanted side effects.
6. Poor Masking or Selection
Inaccurate or harsh selections can leave halos, jagged edges, or abrupt transitions between the subject and the new background.
Solution: Use soft brushes, feathered edges, or refined mask tools to create seamless transitions around hair or complex edges.
7. Inverting Color
You may not get accurate results if you use the Photoshop Invert color technique to change the background color. Basically, it flips the color values of an image, making each color a complement to the color wheel.
Solution: Change the background color manually through the selection tool.
What Role Does Background Color Play in Increasing E-commerce Sales?
A product-relevant and clean background color influences customer perception, reinforces brand identity, and increases conversion rates. Below, we’ve represented a clear breakdown of its impact:
Draws Consumers Attention
Neutral backgrounds, like white or light gray, help to showcase product details without distractions, ensuring they remain in the best possible light. So, to create a clean, modern, or sophisticated look, choose a background that improves the overall shopping experience and makes your product listings more appealing.
Psychological Impact
Each color represents specific emotional and psychological responses. For example, white offers a clean, minimalist, and professional appearance; black is for premium & sophisticated, green is for eco-friendly, and so on. Kissmetrics notes that 85% of shoppers say color is the primary reason to buy a product.
Brand Identity & Recognition
Every brand has its unique color combination that boosts brand identity. For example, Nike uses a combination of black, white, and red in its branding. Gucci uses the iconic red and green stripes. Consistent use of background color increases brand recognition by up to 80%, making your business more memorable and fostering customer loyalty.
Why Changing Background Color in Photoshop Can Help in E-commerce?
Changing the background color in Photoshop and replacing it with a relevant one gives a cleaner, more professional look to your e-commerce product photos. You can change the product background color all by yourself if you have enough time for editing. Another option is to outsource to a background color correction company from where you get a 24/7 customer support team, photo editing expert, pixel-perfect edited images, and other facilities.
However, before outsourcing, let’s check out the core benefits below:
- Increased Visual Appeal: Changing the background of an e-commerce photo can make the product stand out more in a crowded marketplace. By selecting an eye-catching background, businesses can attract more attention to their product and increase the chances of making a sale.
- Consistency: By using the same background for all product photos, businesses can create a sense of consistency and cohesiveness throughout their online store. This helps to reinforce brand identity and build trust with customers.
- Versatility: By replacing the background of a product photo, businesses can repurpose that image for different marketing materials, such as social media posts, email campaigns, or print materials.
Image clipping path expert at Clipping Path Studio knows how important it is for e-commerce businesses to have photos of their products that look good and are consistent. We’ve been changing the backgrounds of e-commerce photos for years, and we’ve helped many businesses stand out.
Our team is skilled at selecting the perfect background to highlight the product and help it sell. With our background replacement services, businesses can take their e-commerce game to the next level and boost sales and customer satisfaction.
FAQs about Changing the Background Color of an Image in Photoshop
Can I change the background color of a transparent image in Photoshop?
Yes, you can change the background color of a transparent image in Photoshop by adding a new layer below your image, filling it with your desired color, and then positioning it behind your image to create a colored background.
Can I change the background color without removing the subject in Photoshop?
Yes, you can change the background color without removing the subject in Photoshop using layer masks, selection tools, or by creating a separate background layer.
How do I replace a complex background with a solid color in Photoshop?
You can replace a complex background with a solid color in Photoshop using different selection tools and masks to isolate the subject and apply the new background. First of all, create a new solid color layer, then isolate the subject, adjust the background, and save your work.
Is it possible to change multiple background colors at once in Photoshop?
Yes, it’s possible to change multiple background colors at once in Photoshop by creating a new color fill layer, using selection tools to isolate specific areas, and employing adjustment layers like hue/saturation or color balance.
Is there a shortcut key for changing a background color in Photoshop?
Yes, there are shortcut keys in Photoshop for changing background color in Photoshop, such as –
- Press Alt + Backspace on Windows or Option + Delete on Mac to fill with the current foreground color.
- If you want to fill with the background color, press Ctrl + Backspace for Windows or Cmd + Delete on Mac.
Can I change the background color of a 3D object in Photoshop?
Yes, of course. You can change the background color of a 3D object in Photoshop by manipulating the scene settings within the 3D panel and customizing the background color.
How do I maintain shadows while changing the background color in Photoshop?
You can maintain shadows while changing the background color in Photoshop by using blending modes or creating a shadow layer. To do this, you can use tools, like the Quick Selection tool, Magic Wand tool, or Lasso tool to select the subject and shadow separately from the background. After that, you can effectively change the background color without affecting the shadow.
What’s the difference between using Solid Color Fill and Replace Color in Photoshop?
The key differences between using Solid Color Fill and Replace Color in Photoshop are as follows:
- Solid Color Fill creates a new fill layer that overlays a solid color on top of existing layers. On the contrary, changing the background color refers to modifying the background layer or area color.
- The solid color fill creates a separate adjustment/fill layer above the background without altering the original background. Whereas, background color change alters the background layer, resulting in a single layer with the new color.
- A solid color fill is highly flexible; you can change it easily by double-clicking the color thumbnail in the Layers panel. On the other hand, changing the background color is less flexible; once changed the color is fixed unless you undo or use history states.
Final Overview
- A simple or clutter-free background reinforces brand identity, builds buyer trust, and increases conversion rates.
- There are 9 easy & quick methods to change the background: Pen tool, Photoshop Layer Mask, Solid Color Fill, Background Eraser tool, Brush tool, Subject Select tool, Quick Selection tool, Object Selection tool, and Magic Wand tool.
- You can refine the selection edges in 3 different ways: Refine Edge Brush tool, Select and Mask Workspace, and Global Refinement Sliders.
- Ensure to avoid 6 common mistakes when changing background colors in Photoshop: Incorrect layering, Ignoring blending modes, Neglecting shadows & highlights, Inconsistent color balance, overusing filters & effects, and Poor masking or selection.
