
The Extended Background in Photoshop refers to the process of increasing the canvas area size where an image is placed. This photo editing technique is useful for adapting different image formats, achieving a desired aspect ratio, or adding more negative space to incorporate elements like text and graphics, which is essential for visual storytelling. You can extend the image background in Photoshop with four key methods: Crop tool with Content-Aware option, Marquee tool, Clone Stamp tool, and Photoshop’s AI features (Content-Aware Scale, Content-Aware Fill tool, Generative Fill, and Generative Extend).
1. Photoshop Crop Tool: The Crop tool is a fundamental photo editing tool in Photoshop used to resize, trim, or adjust the canvas space of an image. With this tool, you can define new boundaries by cropping out unwanted parts or extending backgrounds.
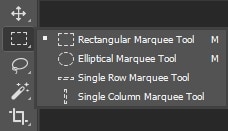
2. Photoshop Marquee Tool: The Marquee tool in Photoshop is a primary selection tool that allows you to create precise selections in simple geometric shapes, i.e., rectangles, squares, ellipses, and circles. There are four main types of Marquee tools:
- Rectangular Marquee Tool: Selects rectangular or square areas.
- Elliptical Marquee Tool: Selects circular or oval areas.
- Single Row Marquee Tool: Selects a single horizontal line of pixels.
- Single Column Marquee Tool: Selects a single vertical line of pixels.
3. Clone Stamp Tool: The Clone Stamp tool is a popular retouching tool in Photoshop that lets you copy pixels from one part of the image and paint them onto another (the target). From fixing imperfections to extending the background, this tool plays a significant role.
4. Photoshop AI Image Extender:
- Generative Extend: Generative Extend (also known as Generative Expand) is an AI-powered feature in Photoshop that allows users to enlarge their images beyond the original canvas boundaries seamlessly.
- Content-Aware Scale: This tool helps to resize an image by preserving important visual elements (i.e., people, buildings, or key subjects) while stretching or compressing less important parts automatically.
- Content-Aware Fill: Content-Aware Fill is a powerful Photoshop AI feature that fills a selected area of an image by sampling and blending pixels from the surrounding parts of the photo.
- Generative Fill: Generative Fill in Photoshop is an AI-powered tool that allows users to add, remove, extend, or modify image content and background using simple text prompts or by selecting areas to fill.
What you’ll learn in this article
- 1 How to Extend Background in Photoshop Using the Crop Tool
- 2 How to Extend Background in Photoshop Using the Marquee Tool
- 3 How to Extend Background in Photoshop Using the Clone Stamp Tool
- 4 How to Extend Background Using Photoshop’s AI
- 5 What is an Extended Background in Photoshop?
- 6 When Should You Consider Extending an Image Background?
- 7 How Does Extending Background Create Visual Balance in Photography?
How to Extend Background in Photoshop Using the Crop Tool
The steps to extend the Background in Photoshop using the Crop Tool include opening the Edited Image, selecting the Crop Tool & extending the Canvas, choosing a Fill Method, and fine-tuning. Here’s how to extend the background in Photoshop using the Crop tool.
Step 1: Open the Edited Image
Simply drag and drop the image on Photoshop or go to File > Open to select the desired image. Ensure you unlock the background layer by double-clicking it in the Layers Panel and renaming it: “new-layer”.
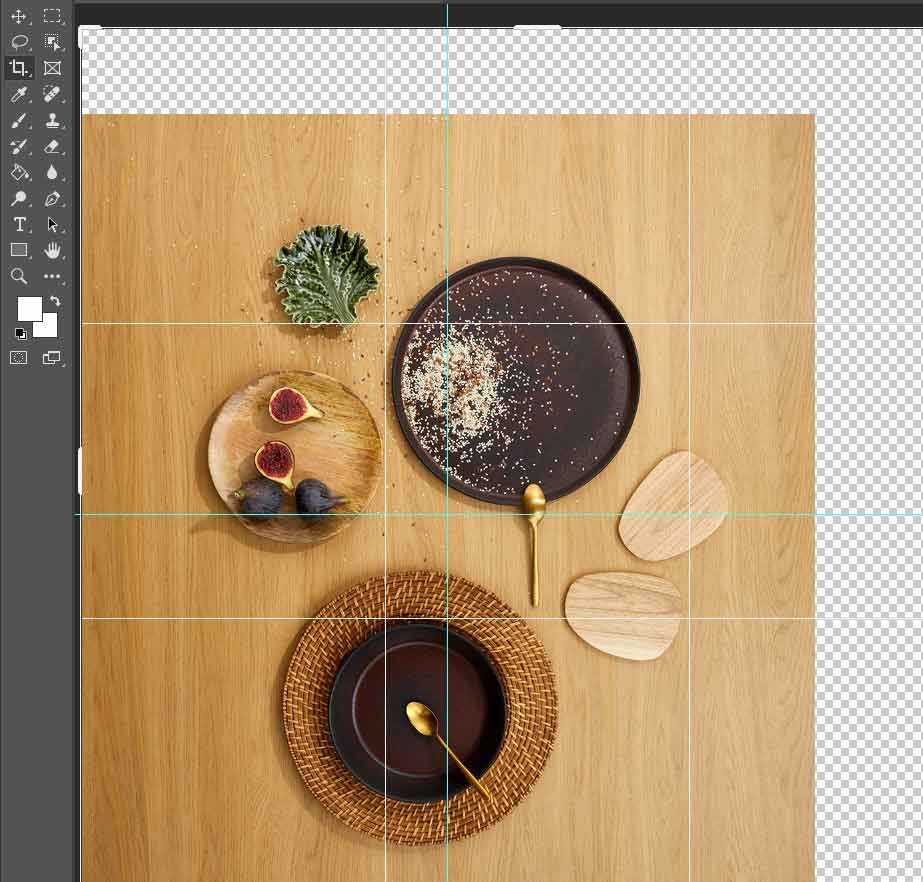
Step 2: Select the Crop Tool & Extend the Canvas
Press “C” on your keyboard to open the Crop tool or select it from the left side toolbar. Now, click and drag the tool handles to extend the canvas size (top, bottom, left, or right) and reveal transparent areas or a fill preview as per your settings. Click “Apply” to confirm the canvas size.
Step 3: Choose a Fill Method (Photoshop 2024+ Updates)
In the top menu bar, click the ”Edit” and select:
- Content-Aware (automatically fills extended areas based on nearby pixels).
- Generative Expand (AI-generated new background content).
Drag the tool to fill the extended area and repeat this process until you’re satisfied with the final results.
Step 3: Fine-tune (If Required)
Press “Ctrl + J” to use the Spot Healing Brush, or select it from the left menu bar to get a polished result. You can also use Healing Brush (J), Clone Stamp tool (S), or Patch tool to refine edges and blend patterns.
How to Extend Background in Photoshop Using the Marquee Tool
The steps to extend the Background in Photoshop using the Crop Tool include duplicating the Layer, selecting the Crop tool, marking the area, choosing Content-Aware Scale, and saving the Image. Here’s the process of extending the background in Photoshop using the Marquee tool in detail.
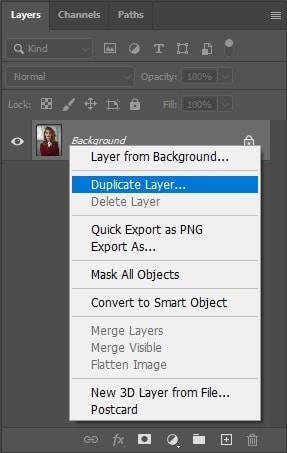
Step 1: Duplicate the Layer
Go to File and click on Open. After opening the file, right-click on the Background Layer. Select Duplicate Layer to make a copy of the Background Layer so that we can use it in case we make a mistake.
Step 2: Select the Crop Tool
From the toolbar, take the Crop Tool. You’ll find it in the upper portion of the toolbar.

Now, extend the image according to your needs.
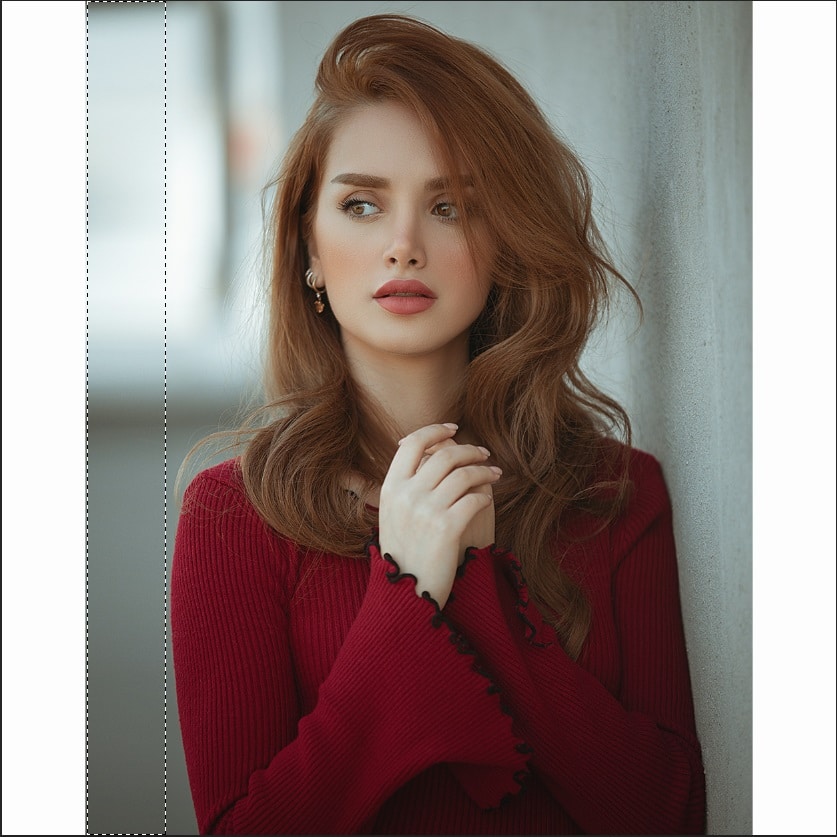
Step 3: Mark the Area
From the toolbar, select the Marquee Tool. This tool is positioned in second place from the top. There are several options. You can take any of those depending on your image.
Now, select the area that will replace the extended area.
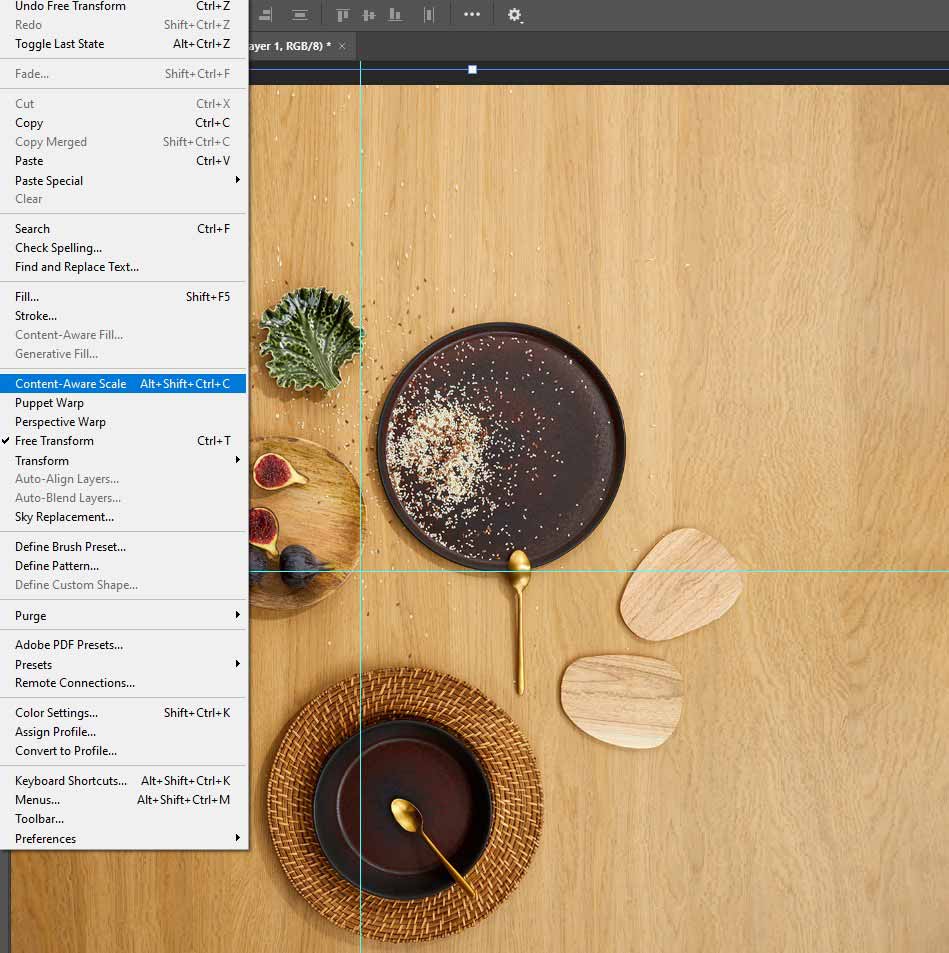
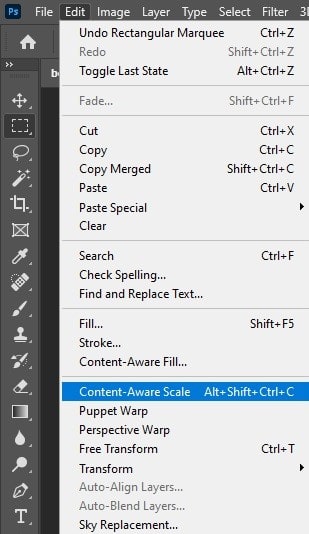
Step 4: Choose Content-Aware Scale
From the top menu, go to Edit and select Content-Aware Scale.
Now, drag the selected area to the extended area.

Do the same to the other part.
Step 5: Save the Image
Go to File and save the file in both JPEG and PSD formats for future use.

Pro Tips:
- Don’t drag a large area at a time. Take small cuts so that the texture looks natural.
- While selecting a background, make sure the subject is out of the selection.
How to Extend Background in Photoshop Using the Clone Stamp Tool
- Select the Clone Stamp Tool
- Choose Your Source Point
- Paint Over the Area
- Adjust Brush Settings
- Refine and Repeat
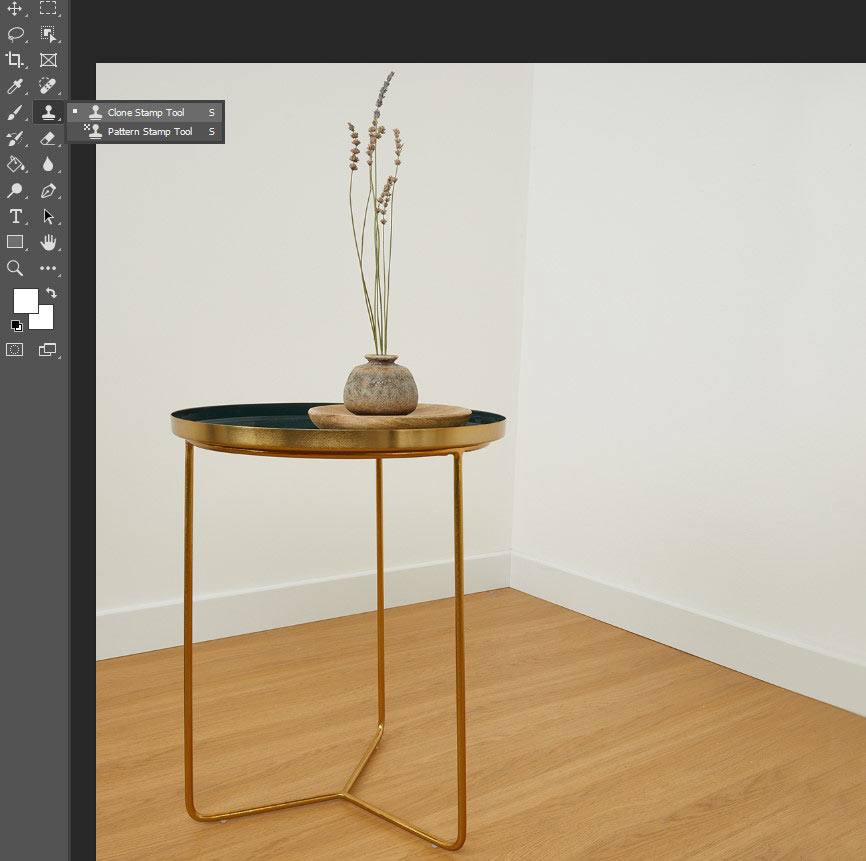
Step 1: Select the Clone Stamp Tool
After extending the background using the Crop tool (C) or increasing the Canvas size (Image > Canvas Size), press (S) or select the Clone Stamp tool from the toolbar.
Step 2: Choose Your Source Point
Hold the “Alt key (or Option key on Mac)” and click on the part of the image where you want to sample/duplicate the background.
Step 3: Paint Over the Area
Release the Alt key and “paint” over the empty space where you want to extend the background. The tool will help to copy the sampled area and paint it over the new space.
Step 4: Adjust Brush Settings
Use the Options bar to customize the Clone Stamp tool’s settings. Adjust the brush size, hardness, and opacity for the best results.
Step 5: Refine and Repeat
You may need to adjust the source point and brush settings multiple times to achieve a seamless and natural-looking extension.
How to Extend Background Using Photoshop’s AI
You can easily and effectively extend picture backgrounds using Adobe Photoshop’s AI Image Extender features: Content-Aware Scale, Content-Aware Fill, Generative Fill, and Generative Expand. Let’s go through each tool for more details:
How to Extend Background in Photoshop Using Generative Expand
- Expand the Canvas
- Select Generative Expand
- Generate Variations
Step 1: Expand the Canvas
Click and drag the handles on the crop border to expand the canvas beyond the original image. You can drag the handles in any direction to extend the image.
Step 2: Select Generative Expand
If prompted, choose what you’d like to generate in the extended area, or leave it blank to allow Photoshop to fill it in seamlessly.
Step 3: Generate Variations
Photoshop will generate different variations of the extended area. Explore the variations and select the one that best matches your desired outcome.
How to Extend Background Using Content-Aware Scale in Photoshop
The steps to extend the Background in Photoshop using Content-Aware Scale include selecting Content-Aware Scale, scaling the Background, and Refine. Here’s the step-by-step process of extending the background using Content-Aware Scale in Photoshop.
Step 1: Select Content-Aware Scale
Extending the canvas size using the Crop tool, choose the Content-Aware Scale tool by selecting the current layer (Edit > Content-Aware Scale). Photoshop will automatically identify and highlight the background area. (Same as the Crop tool technique)
Step 2: Scale the Background
Drag the side or top/bottom handles outward to extend the image. After that, press “Enter” to finalize. (Same as the Crop tool technique)
Step 3: Refine (If Needed)
Use the Clone Stamp Tool (S) or Healing Brush (J) to fix any slight warping or visual repetition.
How to Extend Background Using Content-Aware Fill in Photoshop
The steps to extend the Background in Photoshop using Content-Aware Scale include selecting the area to be extended, accessing Content-Aware Fill, configuring settings, and applying the Fill.
Content-Aware Fill works by analyzing nearby pixels and filling in empty space with matching content. Here’s a step-by-step guide:
Step 1: Select the Area to be Extended
Use a selection tool (like the Lasso tool or Rectangular Marquee tool) to define the area of the background you want to expand.
Step 2: Access Content-Aware Fill
Go to “Edit” in the Photoshop menu and select “Content-Aware Fill”.
Step 3: Configure Settings (optional)
You can adjust settings in the Content-Aware Fill dialog box, such as the “Extend” option, to customize how the background is extended.
Step 4: Apply the Fill
Click “OK” or press Enter to apply the changes and extend the background.

Note: Avoid using this tool, when you deal with highly detailed backgrounds or contain multiple overlapping elements.
How to Extend Background in Photoshop Using Generative Fill
- Extend the Canvas
- Use the Rectangular Marquee
- Use the Generative Fill Option
- Refine
Step 1: Extend the Canvas
Select the Crop Tool (C) from the toolbar to drag the edges of the image outward in the direction you want to expand (top, sides, or corners).
Step 2: Use the Rectangular Marquee
After cropping, choose the “Rectangular Marquee” tool present on the left toolbar and select the newly extended area.
Step 3: Use the Generative Fill Option
Click “Generative Fill” in the “Contextual Task Bar” below and enter your prompts. Photoshop will automatically fill the extended background based on your input.
Step 4: Refine if Necessary
Use the Clone Stamp Tool (S) or Spot Healing Brush (J) to clean up small areas. Or mask out portions and regenerate just the flawed part.
Note: You need to install Photoshop 2024 or later to get access to Generative Fill.
What is an Extended Background in Photoshop?
An extended background refers to expanding the canvas or image area beyond the original dimensions. The key reasons behind extending the image background are to adjust composition, create a new background, add space, and adjust ratios. There are four different methods to extend backgrounds: Crop tool, Marquee tool, Clone Stamp tool, and Photoshop AI Image Extender (Content-Aware Scale, Content-Aware Fill, Generative Fill, and Generative Extend).
When Should You Consider Extending an Image Background?
1. Desire to Express a Story
2. Create a Specific Background
3. Adapt to Different Aspect Ratios
- Desire to Express a Story: You might have a wow shot for a fashion brand or product, but they’re off-center or miss some important background details. So, to get back those details and create attention-grabbing visuals, you must try to extend the background.
- Create a Specific Background: Do you want to create a background with fireflies or need an expanded city background to highlight the beauty of empty space? This photo editing technique helps you to fulfill your desire.
- Adapt to Different Aspect Ratios: Different aspect ratios are used to adapt visual content to specific platforms, devices, and narrative purposes. For example, a 16:9 wider aspect ratio is common for widescreen television and movies, while a vertical or square is used for social media or mobile devices. You can achieve it by using the Crop tool and Generative Expand.
Other Benefits of Extending an Image Background
- Remove Background
Sometimes, you need to remove the image background to maintain a cohesive and professional look. When removed, it provides a transparent area – extending the background fills this transparency, providing a solid color or image.
- Image with Transparent Background
A transparent image background can be a reason to extend the background. If you desire to adjust a specific background color, extending the background can create a more polished and integrated look.
- Make a Pure White Background
As you know, a pure white background is a popular choice in product photography, e-commerce, and visual media. By extending the background, you can create a pure white background and eliminate distractions from product visuals.
How Do You Match Colors When Extending a Gradient or Complex Background?
Use the Eyedropper tool to sample colors, extend the gradient with the Gradient tool, and utilize Adjustment Layers for fine-tuning to match colors when extending a gradient or creating a complex background.
How Does Extending Background Create Visual Balance in Photography?
Extending the background in photography can contribute to visual balance by creating space around a subject to highlight a story, empowering users to adapt and reformat visuals for various platforms, layouts, and clients’ needs. From photographers, fashion brands, marketing teams, and e-commerce sellers, struggling with how to add space without making it look fake or stretched. The best solution is to utilize this top-notch photo editing service, where you can effectively –
- Creates negative space: Extending the image background provides negative space, which improves minimalism and elegance in the shot, makes the subject less cramped, and so on. For example, a fashion portrait with an extended sky above the model gives an airy and balanced outlook.
- Enhances rule of thirds & composition: You can effectively reposition your model or subject off-center, and align with the rule of thirds or utilize dynamic tension for a professional visual.
- Supports visual flow: Lines, gradients, or repeated textures guide buyers’ attention to your focal point. When you extend image backgrounds or directional textures, it adds movement without clutter.
- Balances asymmetrical elements: Imagine a person looking left can be placed on the right side of the frame, with an extended background, you can create balance with a directional gaze. This means highlighting a unique story, editorial, branding, or environmental portrait using this photo editing technique.
How Do You Stretch a Pattern in Photoshop?
To stretch or scale a pattern in Photoshop, use the Free Transform tool (Edit > Free Transform or Ctrl / Cmd + T) and drag the handles to resize the pattern.
How Do You Match Colors When Extending a Gradient or Complex Background?
Use the Eyedropper tool to sample colors, extend the gradient with the Gradient tool, and utilize Adjustment Layers for fine-tuning to match colors when extending a gradient or creating a complex background.
What’s the Difference Between Extending a Background and Adding a New Background?
The key difference between extending a background and adding a new background lies in how the existing image is treated and integrated into a new visual space. The differences are highlighted below:
- Extending the background involves enlarging and continuing the existing background. On the other hand, adding a new background refers to replacing the original background entirely.
- Content-Aware Fill, Content-Aware Scale, Crop tool, Generative AI, Patch tool, and Clone Stamp tools are used to extend a background. On the other hand, Selection/Masking and placing the subject on a new layer method is applied to add a new background.
- Use cases of extending a background are adjusting the aspect ratio and adding space for design elements. Whereas, you can add a new background when you want to change the scene and create composites.
What’s the Difference Between Generative Expand and Content-Aware Scale?
The Generative Expand AI-powered tool is better at generating realistic and detailed backgrounds, while Content-Aware Scale excels at matching textures, better with repetitive patterns.
