
Considering the competition and overall commercialization in the era of e-commerce business, online retailing has been serving the best making more customers rely on this service. As a crucial part of the advertising strategy, businesses are relying on product photography as their best bet for e-marketing.
The same goes for clothing photography. The only variation is; that clothes need a more lively appearance which is not the case for other products of online businesses. Clothes need to provide a practical view.
One of the best ways is to learn how to take pictures of clothes without a mannequin. The purpose is to display them at their finest.
What you’ll learn in this article
- 1 How to Take Pictures of Clothes Without Mannequin to Sell Online?
- 2 Conventional Flat Lay Clothing Photography Process
- 3 How to Take Pictures of Clothes Without a Mannequin?
- 4 Tips on Taking Pictures Without Mannequin
- 5 Which Products Can You Shoot in This Process?
- 6 How to Take Pictures of Clothes at Home?
- 7 Why Should You Post-process After Flat Lay Photography?
- 8 Final Verdicts
How to Take Pictures of Clothes Without Mannequin to Sell Online?
Generally, clients tend to check if the fabric is good enough to sustain long, to assume how this particular dress or garment would look when he/she wears it, whether it would fit or not, whether is it fashionable enough regarding current trends, etc.
As for online, they neither can touch nor verify directly. The only option left for them to depend on is your product photos, right? Your photograph should reduce the confusion that pops up in their mind.
Apparel presentation is an essential part of fashion photography, therefore, photographers follow their instincts, fashion, trends, and clients’ preferences while taking clothing photos.
When you have to take your product’s picture, there are 2 widely used options available. Those are –
1. Ghost Mannequin Photography
The apparel industry largely depends on mannequins for their attire to showcase. The main purpose is to animate the object. This process helps prospective customers visualize how they will look when they wear that piece of garment.
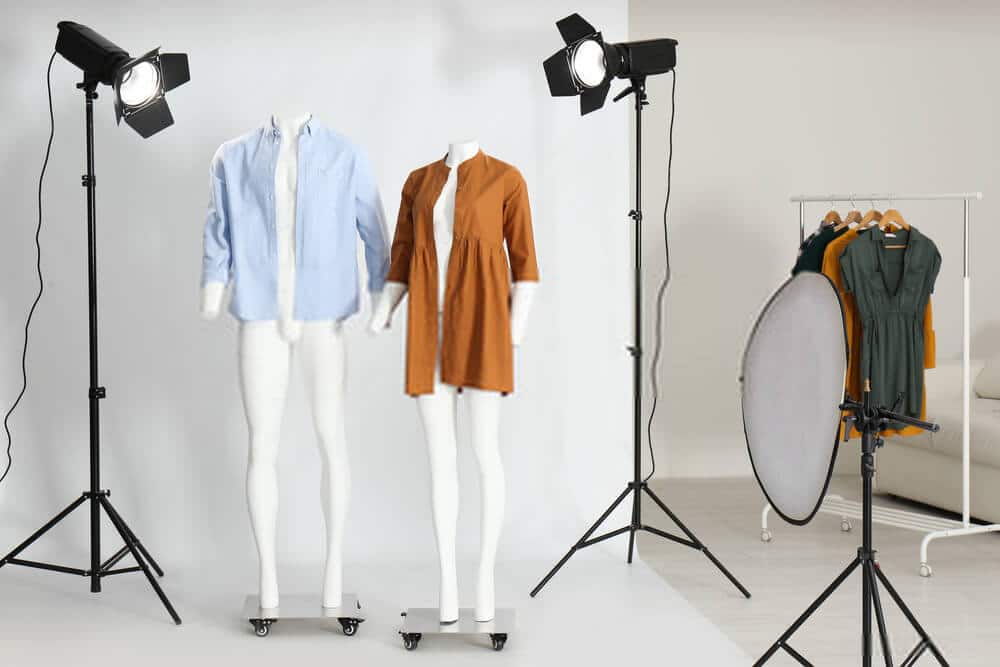
Normally apparel businesses have/rely upon either models which cost a pretty penny or mannequins which seem more artificial considering the human figure. Therefore, being the only credible solution left, ghost mannequins have gained much popularity.
People also call it a 3D mannequin, invisible mannequin, or hollow man. Ghost mannequin photography is a unique yet effective method of taking photos of clothes, dresses, or attire. It is like a 3D image where an invisible human figure is seen wearing a particular dress. In other words, the display image shows an invisible figure wearing that attire.
This way prospective buyers can easily see the inner and outer parts of that apparel, assume an overall measurement, and understand if that will fit in his/her body.
2. Flat Lay Clothing Photography
Flat-lay photography is exactly how it sounds. Generally, photographers take photos from directly above the product or apparel which is kept on a flat surface. The flat surface here works as a background and some other props may be placed there to help focus the main product more prominently.
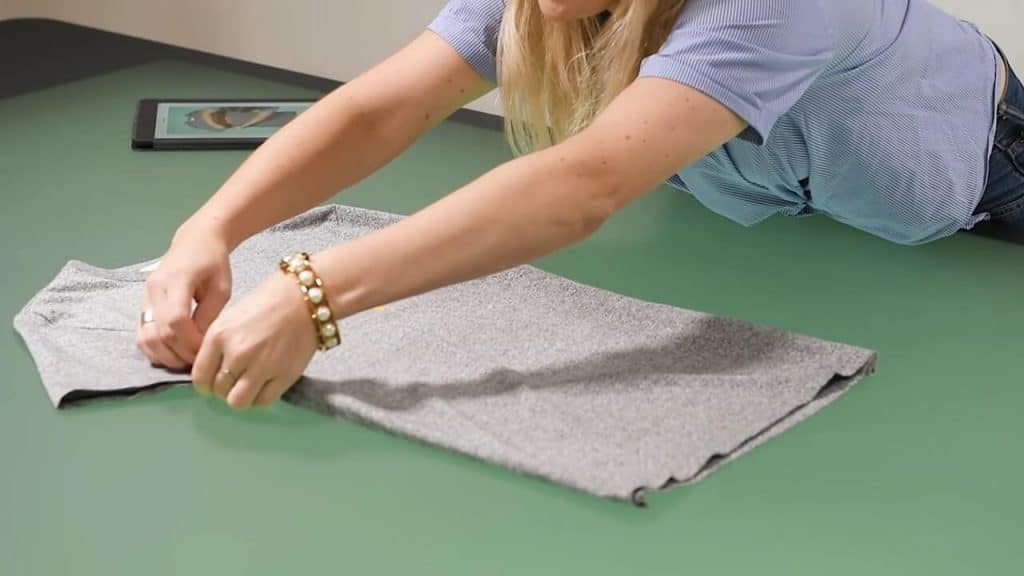
Having minimalist staging, flat-lay clothing photography has captured viewers’ attention as one of the effective means instead of a mannequin.
This trend in photography has become a good option instead of mannequins. It is also called bird’s eye view or overhead shots as this image permits a detailed view of the product that has been shot from overhead.
In simple terms, flat-lay photography means to lay or place the product for the photoshoot on any surface that is flat. It can be a table, floor, or board anything flat. However, most of the photographers prefer working on the tabletop.
By attributing elegance with simple complementing props, a flat lay provides a detailed display of the product from a top view. Adopting minimalism doesn’t distract the focus product but rather adds more attraction to it.
Conventional Flat Lay Clothing Photography Process
Under the conventional flat-lay photography setup, the camera is kept in a position facing the clothes. All other pieces of equipment like lights, diffusers, and delicate boxes are positioned alongside the camera to confront the clothes. On the other hand, the clothes are kept lying on the top of the table.
How to Take Pictures of Clothes Without a Mannequin?
How do you shoot your clothes Without a Mannequin under the flat lay process? Go through the following steps at a glance-
Step 1: Flat Surface
Keep your product lying on the top of the table or flat surface. Make sure the surface is wide enough to surround your product properly.
As for the backdrop, you can use anything plain and simple. You know, simplicity is the smartest. However, by using sheets or paper, poster boards, rugs, fabric, or similar items, you can create your own version of the backdrop as well.
Step 2: Place Your Product
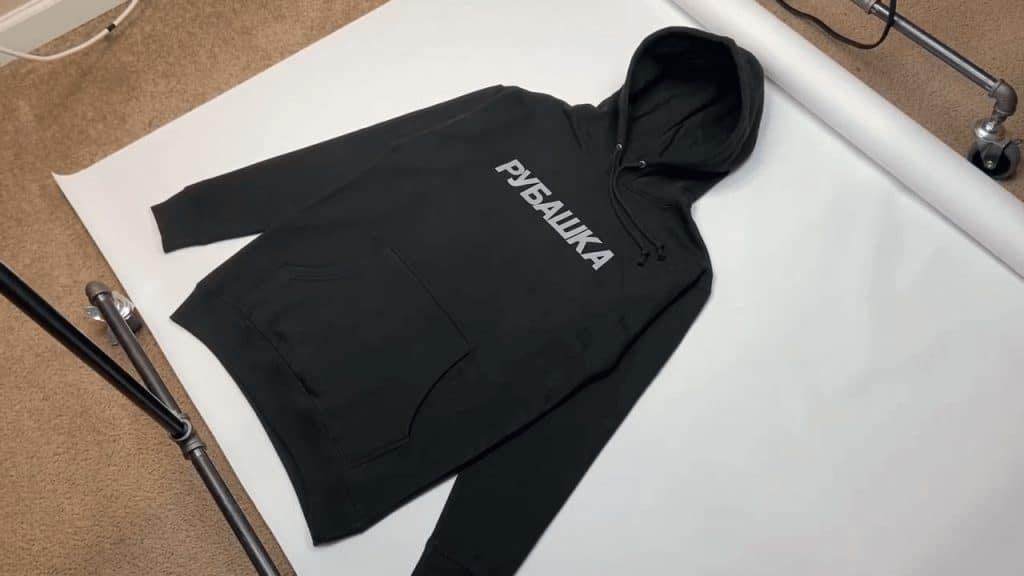
Shape it a way it will be completely visible from each part. You can create more accuracy in the figure by using support from tape, hangers, sticks, or clasps.
Step 3: Give a Realistic Look
If you want to add a bit of volume and a lively look, use tissue or paper as stuffing materials. Use those inside hands of the dress/attire, or legs of jeans or pants, and inside the bottom part of frocks and simulate those parts to look natural.
By working as fillers, these materials add natural depth and lift the product from its plain flat format. Thus, you get a mini version of the 3D effect.
Step 4: Tuck the Distracting Portion
Tuck up both sides and underarm clothes inside to create a natural look that resembles a human body. Repeat this process for the bottom of the backside as well, and tuck it behind the front part. So that the front edges are thoroughly shown.
Step 5: Light Setup
Natural light is the best option to get clear and glowing images for a flat-lay clothing photoshoot. So, if possible try shooting your product images near an open and large window. It is a cost-saving option as well.
However, depending on circumstances you may have to work using artificial light like a lamp or studio light. In those situations, you can use 1 light keeping it on a similar side of the surface. Use a diffuser in front of the light to make sure the light spreads across the product. You will find your product is illuminating.
If this process creates a shadow on the opposite side of the light, use a bounce card to take the shadow away.
If you use 2 lights, place them on both sides of the surface, and make them face each other 45-degree down. If you use 4 lights, place them at 4 intersections of the surface.
Step 6: Use Props if Required
If you feel the necessity to place props around the clothes, feel free to do it. However, take notes to harmonize those properly. The whole picture you are decorating has to tell a short story.
For example, if you are photographing for a tank top, you may put folded jeans, a water bottle, and a pair of sneakers. Thus it depicts 2 pictures, one a casual look, another is those are required items for physical exercise.
Step 7: Camera Placement
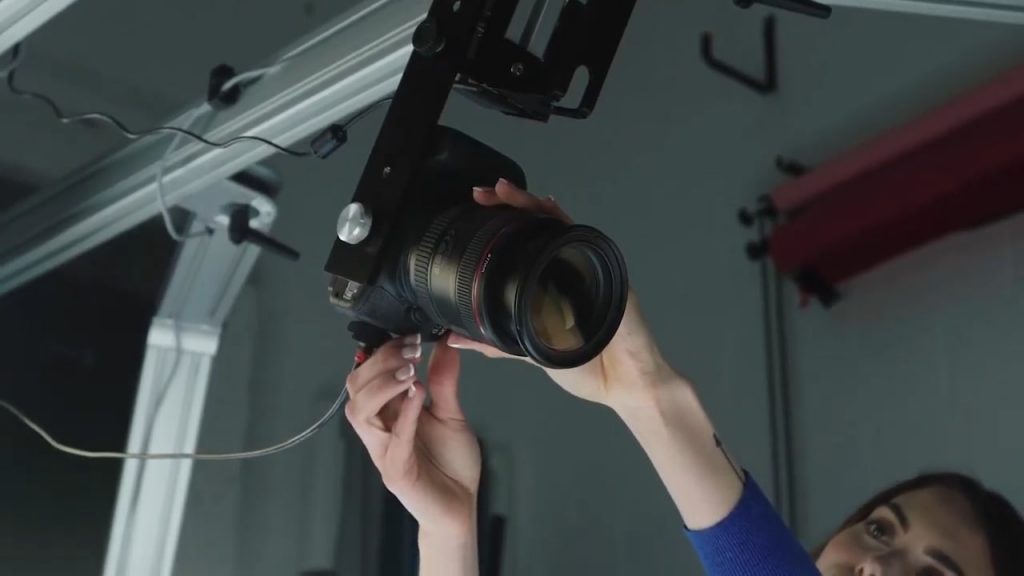
Mount your camera directly overhead of the surface that is displaying the product. To position it firmly, use a tripod for flat lays. Make sure the camera is kept leveled not tilted.
You can start taking photos by bending down though there is a risk of tremors which may ultimately affect your image.
Step 8: Ready, Steady, Click!
And that’s it; now your product is good to go for the photoshoot. You get a good finish and a desirable look.
Tips on Taking Pictures Without Mannequin
- Pick up clean, ironed clothes. Dirt or wrinkles can hamper its appeal to attract potential customers.
- Remove any price tags or hem tags that draw attention away.
- Take multiple shots.
- Try expanding your camera view. It means, extending your frame to tell the story more clearly. Sometimes this acts as an imperative coup.
Which Products Can You Shoot in This Process?
Flat-lay clothing photography is not suitable for all types of dress or attire. There are certain clothes, which are not a good match for such a process. So, you can shoot the following products in the flat lay process – Kidswear, T-shirts, Shirts, Jumper, Blazers and coats, Jeans, Trousers, Socks, Swimwear, Scarf, Towel and more.
How to Take Pictures of Clothes at Home?
Following those exact steps described earlier, you can shoot the clothes in a flat lay process at your home.
You can use natural light. It is wise not to use external light unless you are a professional. As for the backdrop, pick anything that seems cool to you.
Then place the cloth the way it will look good. For example, if it is a shirt, jumper, or jeans, you can fold it; if it is a frock, spread the bottom part.
As for the props, use whatever you find in your surroundings. For example, start from your teacup, your accessories to flowers in the vase or shoes anything that seems linked to your main product.
Get your decoration done. Not necessarily do you have to use a camera, you can use your phone. Then click!
Why Should You Post-process After Flat Lay Photography?
The most vital part of having a minimalist stage is everything becomes conspicuous, even if it is a slight mistake, a misplace of props, or a dull background.
Let’s say, your images contain no problem, a better result may come from having final editing, you never know. That is why a lot of flat-lay photographers are taking the following services like image background removal, product photo retouching, color correction, and clipping path services.
Let’s say, you took photos on an off-white surface though it looked good while decorating but the images don’t appeal much. Hence, changing the background is the shortest possible solution, don’t you think?
You have finished taking shots. A slight change in color correction can be required to ensure whether the dress/attire needs to be shown brightly or not. Having such minor changes may create a great impact on your bigger picture.
Need a shadow? Go for editing, post-production photography have shadow-making processes ready to fulfill your requirements.
You got an unintended wrinkle; how do you remove that? Use reliable photo editing services to let professionals do their magic.
It is undeniable that editing does enhance appearance. By taking such services you allow yourself to increase your product visibility to a lot of potential clients way more perfectly.
Outsource Apparel Photo Editing Services.
Get Free Trial
Final Verdicts
Clothing is one of the basic needs. Everyone will buy them as per their need.
But your one is the right fit to satisfy their needs, you have to make it clear by showing when you are selling online.
Try relating trends and needs in a shoot in your flat-lay. Apply what creative thoughts pop up in your mind. You will find excellent results.
