
In ancient Rome, people’s status was epitomized by being bejewelled. Over time, the purpose of wearing jewelry has dramatically changed and become more widespread.
The jewelry market is growing bigger, and so is the competition. This has led jewelry companies either to modernize their strategies or to adopt a new one.
A craving for jewelry is an instinct for people. More or less, everyone checks it out to buy either for themselves or their loved ones. And this is where images play their significant role.
How to photograph Jewelry that will lure your potential clients into reaching out? By now, you have noticed the influence of good photography to fulfill marketing purposes as well as the client’s desires.
Photography of jewelry has always been one of the effective measures to lure prospective clients. If your images are eye-catching enough, your future clients are bound to check them out and love them.
After thoroughly analyzing jewelry marketers and the intent of jewelry clients, we completely understand how you should take jewelry photos, what ideas you need to implement, and the tips you require to follow.
How to Photograph Jewelry
For e-commerce product photography, jewelry is one product of intricacy. So, while shooting each piece of jewelry, every subtle design needs to be precisely displayed, and make sure the product needs to look its best.
Typically, every product photography has its own distinctive set with a style for shooting, and so does jewelry. With its minimalist staging, jewelry photography setup has reached the level of commercial demand.
Let’s look into how you can take stunning photos of your piece of jewelry.
Step 1: Clean the Jewelry Piece
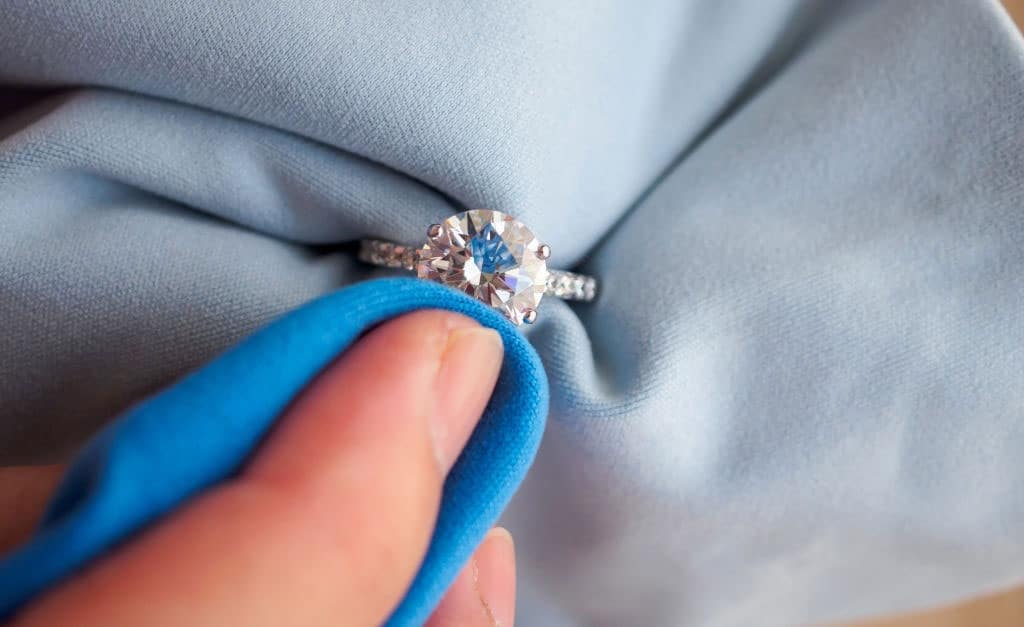
Clean the piece of jewelry cautiously and neatly, and use a microfiber cloth to wipe it off. Avoid touching it with bare fingers; it may leave marks. You can use gloves instead. However, cloth gloves will be better.
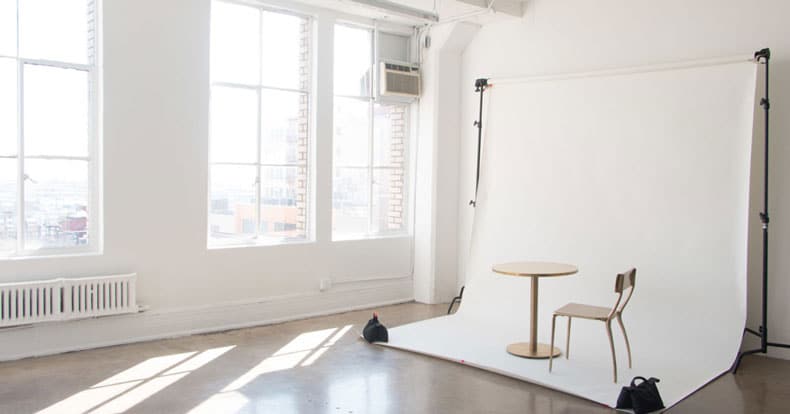
Step 2: Light Set-Up
In the image, jewelry needs to be shown sharply so that every design becomes obvious. That’s why lightning plays a vital role while taking photos. The pieces of jewelry glow most under a soft and pleasant light.
Not only jewelry but also for any type of photoshoot, 2 types of lighting sources can be used.
- Natural light
Like other products, natural light is an excellent source for jewelry photography as well. So, you can choose any time you find suitable for the jewelry to look good and shiny.
Many people find the best time for taking such photos is in the morning and throughout the afternoon. Move your subject to the sides where it illuminates the most.
- Artificial light
If you work with artificial lighting, place the light as close to the jewelry as possible. On-camera flash is not the right choice for jewelry; it is way harsher than usual lights.
For many jewelry items, 2 lights work well enough. Generally, they are positioned on both sides of the jewelry piece, keeping it in the middle. Side lighting is a great way to emphasize texture.
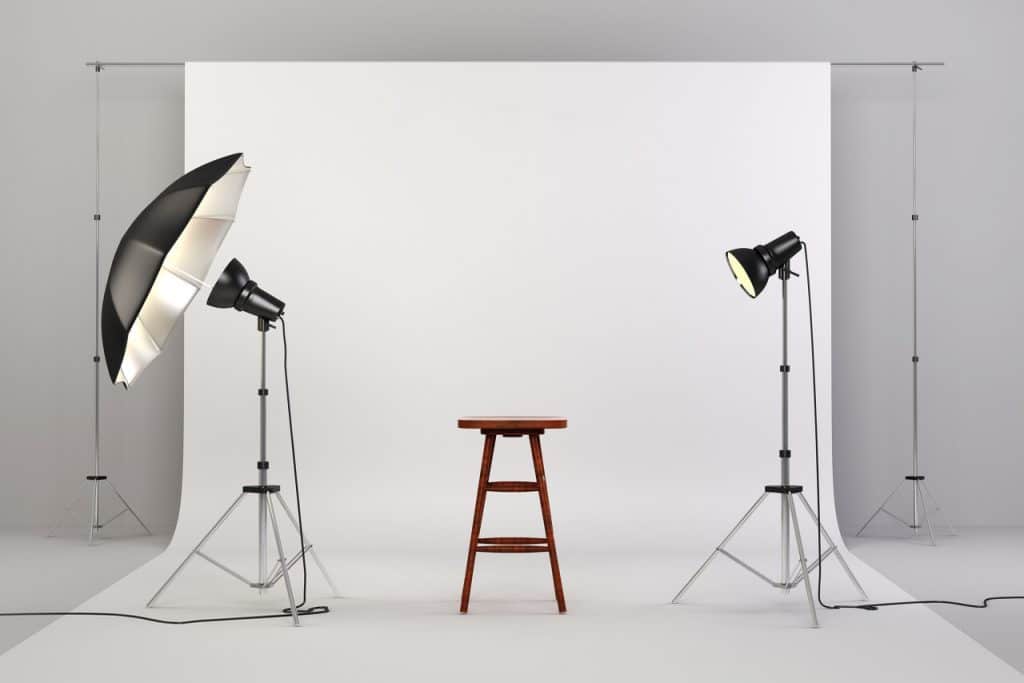
Try moving the light around to find the sweet spot to enlighten the piece, especially the gemstones. If it is a faceted one, move the light towards it. If the light reflects too much, use a bounce card to make the reflection even.
Light-box, or light tent, for such photography is indeed one of the great options.
What is the Best Lighting for Jewelry Photography?
It is said that soft and warm light is the best for photographing jewelry. If you are to illuminate your jewelry with artificial lights, use fluorescent light.
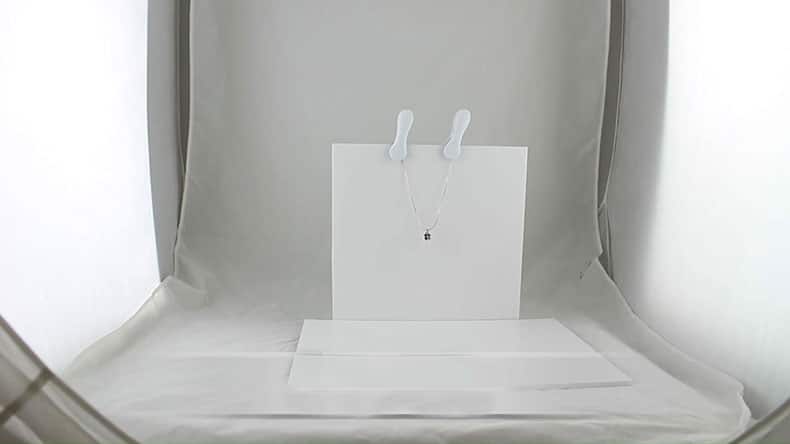
Step 3: Background for Jewelry Photography
As for the background, anything is appreciated that suits your taste. Try using backdrops from your customized one to plain, simple ones or clothes that beautify that jewelry piece. You can use any reflective surface that makes that piece way shinier.
For a number of reasons, light color, especially the white background, is mostly preferable for any e-commerce shooting. The fact is no less important in the photography of jewelry. A light color background brightens up the jewelry piece, making it look professional as well.
The dark color background for shooting jewelry pieces has been dominating the market as well. For jewelry with white gemstones, a dark, especially black, color reflective background creates a luxurious vibe.
You’d better test it out to see which one helps shine your piece of jewelry better.
What is the Best Background for Jewelry Photography?
Depending on your platform, choose your background. For example, if you are shooting for e-commerce sites like Amazon, eBay, ETSY, etc., follow their product image requirements. Such sites have their specifications, which you can not deny.
If your images are for social media, you can use any props or background you find suitable.
Step 4: Jewelry Placement
Product placement is an important aspect of grabbing potential customers’ attention. When you are placing your jewelry for shooting, you have to make sure that the complicated designs, gemstones, and tiny details are manifested properly.
Jewelry Props and Materials
To prepare your pieces of jewelry for the photoshoot, there are some common props and materials to use. For instance-
- Jewelry stands (Necklace stand, Pendant Stand)
- Mannequin busts
- Acrylic stand
- Cardboard
- Glue dots or dental wax
- String or Thread
- Hand holder
- Freeze Frame for jewelry
- Anything that holds the jewelry well
How Should Your Jewelry Pieces be Placed?
Do you have your own way of decorating the jewelry pieces? Go for it. If you don’t, follow this as we have described below.
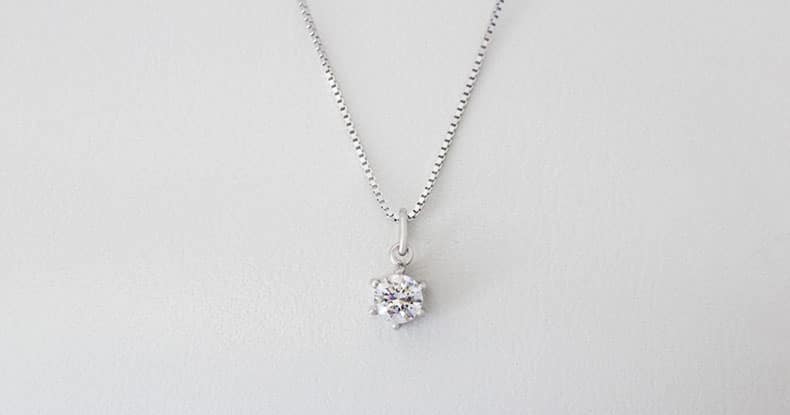
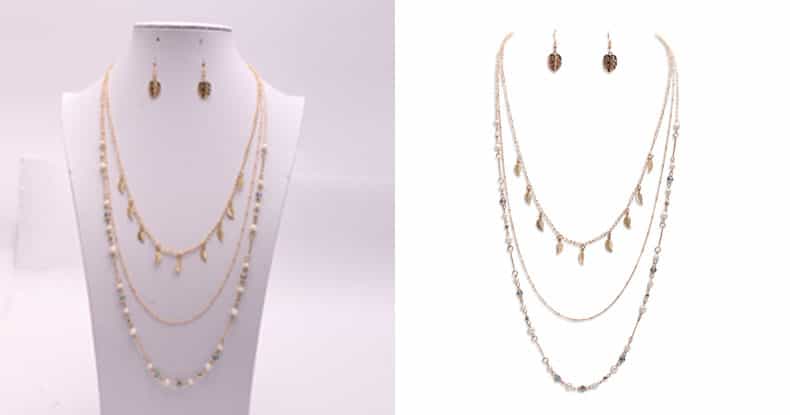
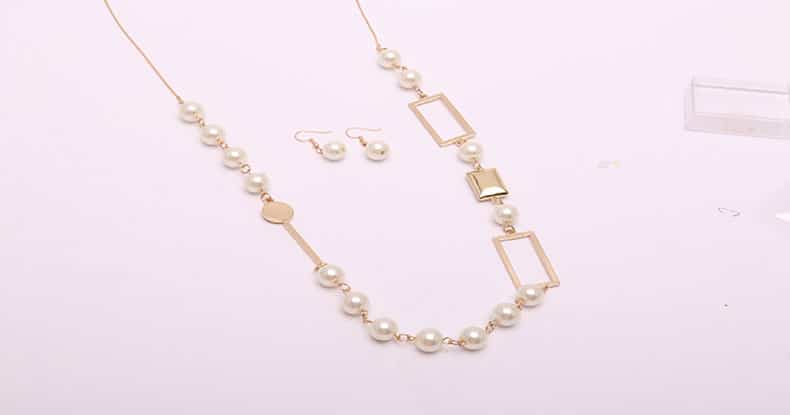
- Necklace
For showcasing necklaces, most people use mannequin busts. It stays as it should be around a human neck.
You can use cardboards and hang the necklace or pendant, it will stay even.
You can simply put it on a flat surface. Then use something round like a glass or a can to lay out your chain.
- Earrings
You can use a string or thread to hang it, other than keeping it on the surface.
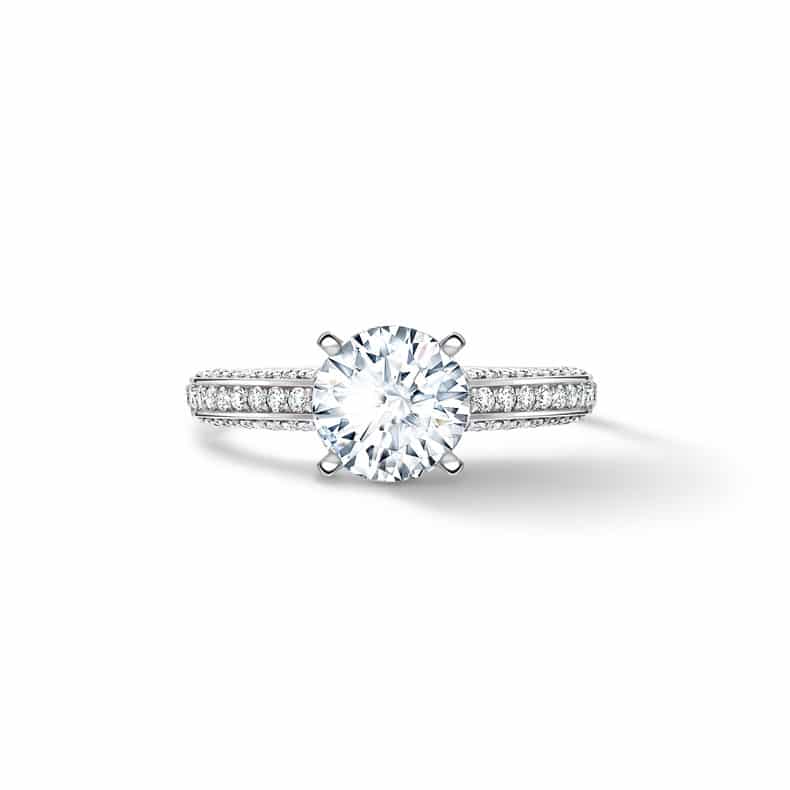
- Rings
Usually, you can shoot a ring while keeping it on the surface you choose. However, use dental wax, glue dots, or blue-tack while shooting the ring in a stand-up position.
- Bracelets and Wristwatches
Simply put it on the surface or use hand holders.
Step 5: Camera Position
For having intricate patterns and designs, gold and silver jewelry shooting is included in macro photography. So, pay heed to how you position your camera. Your piece of jewelry needs to be shown as close and large as possible in the photo.
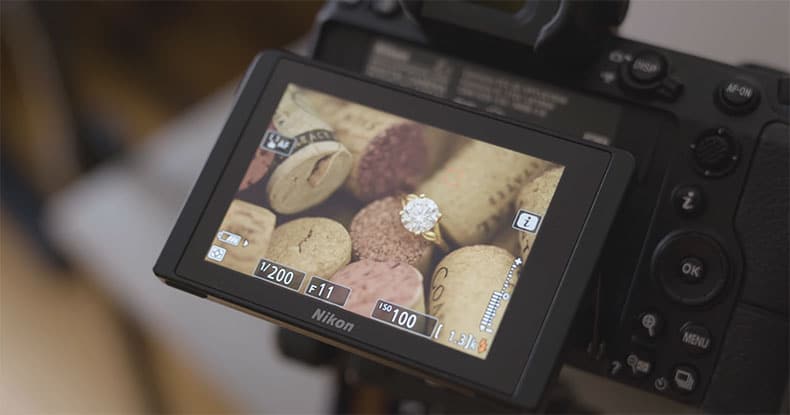
Camera Settings:
- Aperture– For covering full pieces like bracelets, earrings, rings, use a small aperture. If you need to focus on a certain portion, like a pendant or necklace, use a big aperture.
- ISO– Set your ISO around 100-200 and adjust it whenever you need.
- Shutter speed– For product photography, it is recommended to use a slow shutter speed. Hence, you can set the settings around 1/13 and then adjust according to your needs.
For taking shots up-close position, you can use the following camera accessories-
Macro Lens
A macro lens is one of the widely considered predominant options for capturing jewelry photos. Such lenses are a bit pricey. However, these have great efficacy in producing satisfying quality photos by making the jewelry look way bigger.
One of the best features of such a lens is that users can take close shots from wherever they stand. While buying a macro lens, choosing a lens of 18-55 mm focal length is suggested as it carries a minimum distance, which is appropriate for jewelry.
What Lens is the Best for Jewelry Photography?
Jewelry photography is considered macro photography: the precise, the better. Macro lenses are the best for shooting jewelry photos.
Extension Tube
Apart from macro lenses, there are some other options left for you to get closer to your subject. The extension tube is an inexpensive alternative and a brilliant solution for taking close shots with greater magnification.
It is a hollow tube attached between the camera body and the lens. There is no glass involved, given that it isn’t an optical element.
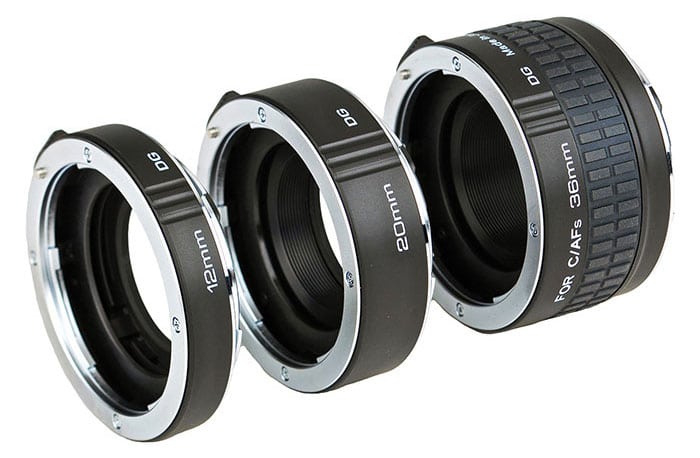
It allows you to closely focus on your subject that stays in front of the camera. So, you don’t have to be concerned about the minimum focusing distance at all. Moreover, its flexibility allows you to use any lens you possess, and thus, you can take as many shots as you want.
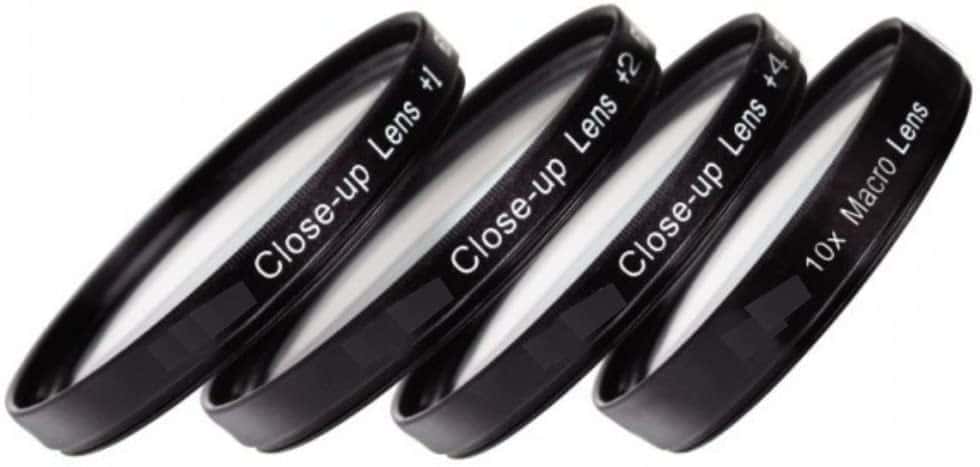
Close-up Filter/ Macro Filter
A close-up filter is another cost-effective option. This is basically a magnifying glass that sits in front of a camera and alters the light to make the photoshoot subject look bigger.
Place your camera as close as possible. Better use a tripod to have multiple images from an equal distance and position. Move your camera to take images from different angles, including horizontal, vertical, etc.
Step 5: Start Shooting
Now that you have your light, camera, and subject all set, start shooting without delay.
Step 6: Jewelry Photography Post-Production
If you have gotten your photos, take editing or outsource post-processing to have some great outcome, which is only possible in photo editing software.
And that’s it. You get your photos done perfectly!
Why Do You Need Photography Post-Production Services for Jewelry?
Post-production services are one mandatory step you must follow to make your jewelry pieces jaw-dropping and sparkling. Being sensitive, having intricate designs, and containing precious stones or gems, a jewelry piece’s photoshoot is tricky.
Therefore, when you have to take photos, aside from being prepared in every aspect, make sure you leave no stone unturned. If you prevent yourself from taking photo editing services for your jewelry photoshoot, you will end up losing the race in the first place.
Why would that happen, you ask?
Let us clarify for you.
Your competitors won’t stay still when you refrain from being competitive. If you pay close attention, you will see they are continuously upgrading their ways of showcasing jewelry and editing their images.
Thus, they are making the images more charming and desirable for their customers.
Jewelry is not something people randomly try and buy. It is an adornment of beautification. People will buy it only if they are assured that those will protect them or their loved ones.
You have the raw images of jewelry pieces in your hand. In the photo, your jewelry may,
- contains a mannequin bust and a flashy background that steals the show
- Smudges, dust inside the designs or patterns
- Shadow, reflection, and lightning create an unwanted distraction.
- Have no flaws, still, those seem dull.
How Do You Edit Jewelry Photos?
Editing photos is regarded as the 2nd phase of photography and is no less important than taking pictures. Hence, it would be wise to hand over the job to the respective agencies that are well-versed and experienced in this field.
What would you do?
The most convenient, time-efficient solution is to edit those out. Moreover, a slight touch from color correction, retouch, or editing can significantly enhance the image to entice the viewers.
Benefits of Having Post-production Services for Jewelry Photos
When it comes to jewelry, clients tend to be meticulous about precision and clarity. So, it is wise not to take a gamble with unedited images. When you edit your photos, you save yourself from uncertainties that may occur from having raw photos.
These are the advantages you can get by having your images edited.
1. Jewelry Shines
Post-production services have some advanced and tremendous features to enhance the jewelry in the images. Such services help the jewelry shine and make it evident that you care for your business value and your client’s desires.
2. Attract More Clients
High-quality images are going to get you access to more clients. They will recognize you and show professionalism as a business brand. If you do it for a long time, you are bound to get respectability and credibility from your potential buyers.
3. Save Yourself from Uncertainties
With well-edited images, you can resonate quite well with your customers’ demand, and thus, you form an indirect bond. You impart a lot with your photos, so you make interactions to convey what they will get in return.
4. Stay Competitive
Your competitors are vying to step ahead with all they’ve got. So why won’t you throw down the gauntlet?
When you take post-production services for your images, you make a good impression. Regardless of a platform like a social media campaign, websites, or e-commerce sites, you play your cards right.
6 Common Jewelry Photography Mistakes to Avoid
Jewelry photography is a bit more complicated than other product photography. Such photography is sensitive as well as challenging. Because such photography depends completely on showing details. The better your visual description is, the more you connect with your customers.
Aside from learning all the curves and being cautious, 6 unintentional mistakes should not hamper your artistic creativity. What are those you should be aware of?
1. Uncleaned Jewelry Pieces
Naturally, we tend to show the best to someone, regardless of purpose, don’t we?
If the purpose involves you getting more customers, you won’t risk any less. No doubt you will show them what is unique about your products and why it is the best.
Being one product of delicacy, Jewelry requires much more attention. So, check if your jewelry piece contains any smudges, fingerprints, or remains uncleaned before shooting. Otherwise, you may end up having photos that your potential customers reject.
So, make sure you are shooting properly cleaned jewelry pieces.
2. Excess Decoration
Using unnecessary accessories to decorate jewelry is not a good idea at all. You have to have your marketing platform and promotional purpose for your jewelry to reach more people.
When you are advertising or marketing through social media, the purpose is different from that of e-commerce sites. Here, you may make a sale, but your ultimate targets include engaging more people, promoting your brand, and making it recognizable.
Keep your props as minimal as possible and make it look professional. The same goes for the background, don’t overload it with items that take the attention away from the main jewel piece. If you find something goes along well, only then suit yourself.
Then again, if you follow sites of jewelry like Blue Nile, Jared, and REEDS, you probably noticed how plain and simple yet elegant their setups are. If you are a seller of any e-commerce site, you already know that those sites have their own set of image specifications. They even specified the background color as well.
3. Reflective Gemstones
Jewelry pieces are shiny, may contain gemstones and all these will make it hard to get images without reflection. You have to make sure to remove it.
In that case, you can either move your jewelry piece where it won’t reflect or take photos and then edit the reflection out.
4. Heed Camera Functionality
If you do not focus on your jewelry piece properly, of course, you won’t get the result you expected. As said earlier, camera settings play a vital role while taking jewelry photographs. So, take steps to focus accurately on your product.
In addition to that, pay heed to taking consistent images. If you take images that users cannot connect to the dot, then you won’t get the usual response.
Moreover, make sure your images are not out of white balance. Lack of such settings will create confusion among the viewers.
5. Not Providing Enough Images
One of the blunders is not providing ample images for the jewelry. Many people think only one or two images will do the job.
No!
Your potential clients are going to pay a great sum of money for a piece of jewelry after being assured that it will look good on them. You have to consider their mindset as well. Provide images that manifest the piece of jewelry overall without leaving any vague conception.
6. Not Having an Editing Service
Jewelry pieces are so sensitive. To make it as lucrative as possible, you have to take post-production services for your photos.
By allowing editing, every subtle flaw will be removed, and your images will receive a more attractive appeal. If you don’t take this service, chances are you will miss some vital points that need to be enhanced in the image.
Tips for Photographing Jewelry
There are some other tips you need to watch out for. These will help you have some great photos in your hands.
Emphasis on Details
Highlight the precision. While shooting a jewelry piece, your focal point is likely to be fixated on the gems, diamonds, or pendant. However, make sure to focus on the entire jewelry piece properly.
Lighting Set
Do not combine light color variations while shooting jewelry. As different color lights have different wavelengths and temperatures, it won’t help your shooting at all.
Use a light with warm and soft rays (like a fluorescent light), comfortable and convenient. Use a lightbox or light tent to have even lighting.
Background Matters
For social media, you have the liberty to use your background. You can use contrasting colors; if it is highly reflective, you can use a black or dark background.
Many e-commerce sites have flexible guidelines for their product image optimization. Even Amazon permits any variations in the rest of the images other than the hero or main image.
Enable Zoom Feature
Zoom-enabled image receives high reciprocity from its potential clients. It allows them to observe every precise design. In a nutshell, an online shopper experiences better. He/she can check as he/she would do for real. So, allow the advantage of zoom in/out for your customers’ benefit.
Multiple Images
- Don’t just put a single image of a jewelry piece.
- Let your clients see the product from every point.
- Take photos from different angles.
Add 3D/360-Degree Images
360-degree/3d image plays a crucial role when it comes to influencing customers’ buying decisions. A survey showed that 360-degree images help boost conversion rates. It allows users to relate easily to the product to fulfill their needs. Therefore, give it a try if you haven’t yet.
