
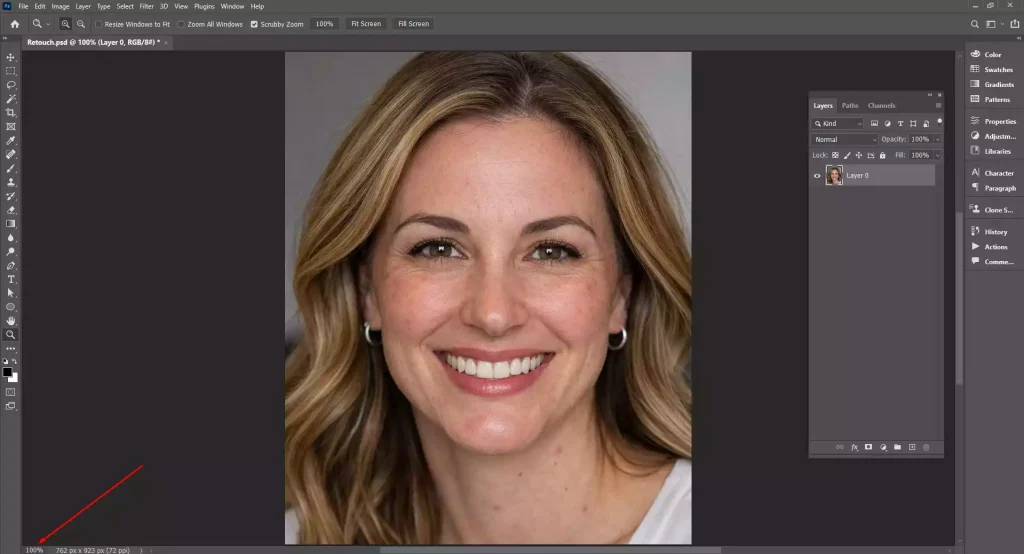
To do Photoshop face retouching, the most common tools include the spot healing brush, healing brush, clone stamp, patch, dodge and burn, frequency separation, liquify, and blur. Other than that, professional photo editors also use adjustment layers, or layer masks, for precise editing.
Face retouching is important to improve portrait quality and acceptability among the target audience, depending on the photo’s purpose. To choose the best Photoshop face retouchers, check their experience, tools expertise, portfolio quality, free trial, client reviews, turnaround, customer service, customization, and price.
What you’ll learn in this article
- 1 How Do You Use the Spot Healing Brush Tool to Retouch a Face Photo?
- 2 How to Retouch a Face Photo Using the Healing Brush Tool?
- 3 How is the Clone Stamp Tool Used to Retouch Face Photos?
- 4 How to Use the Patch Tool to Retouch a Face Photo?
- 5 How Do You Use the Dodge and Burn Tool to Retouch a Face Photo?
- 6 How to Retouch a Face Photo Using the Frequency Separation Technique?
- 7 How is the Liquify Tool Used to Retouch Face Photos?
- 8 How to Use the Blur Tool to Retouch a Face Photo?
- 9 How Do You Use the Adjustment Layers to Retouch a Face Photo?
- 10 How to Retouch a Face Photo Using a Layer Mask?
- 11 Why is Photoshop Face Retouching Important in Photography?
- 12 How Do You Choose the Best Photoshop Face Retouching Service?
- 13 FAQ’s
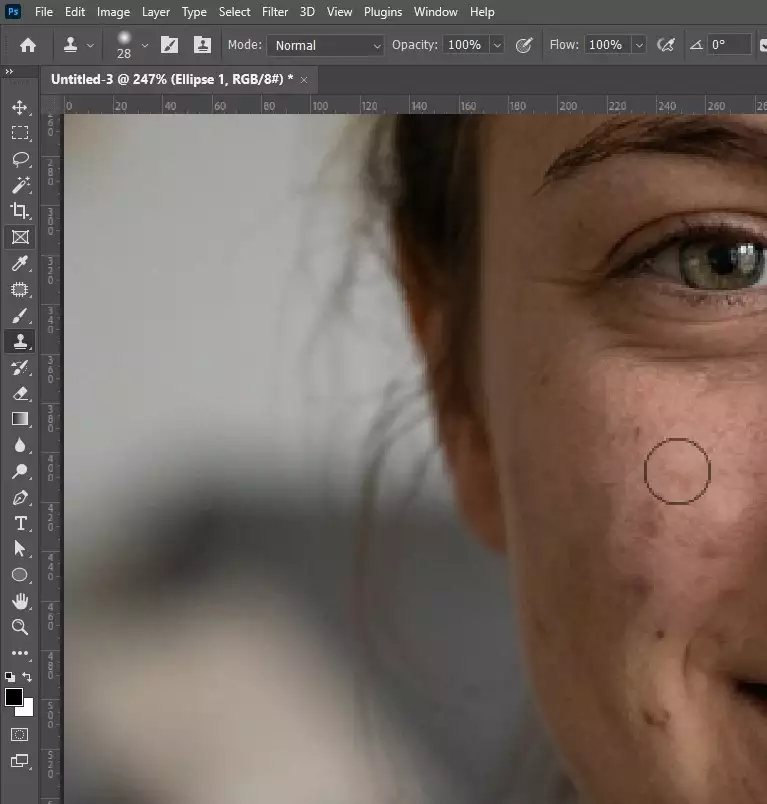
How Do You Use the Spot Healing Brush Tool to Retouch a Face Photo?
The steps to use a Spot Healing Brush Tool to retouch a face photo are as follows.
Step 1: Open the Photo and Zoom In
- Go to Photoshop.
- Click File.
- Then click Open and select your portrait photo.
- Press Ctrl/Cmd + + to zoom in to about 100–200%.
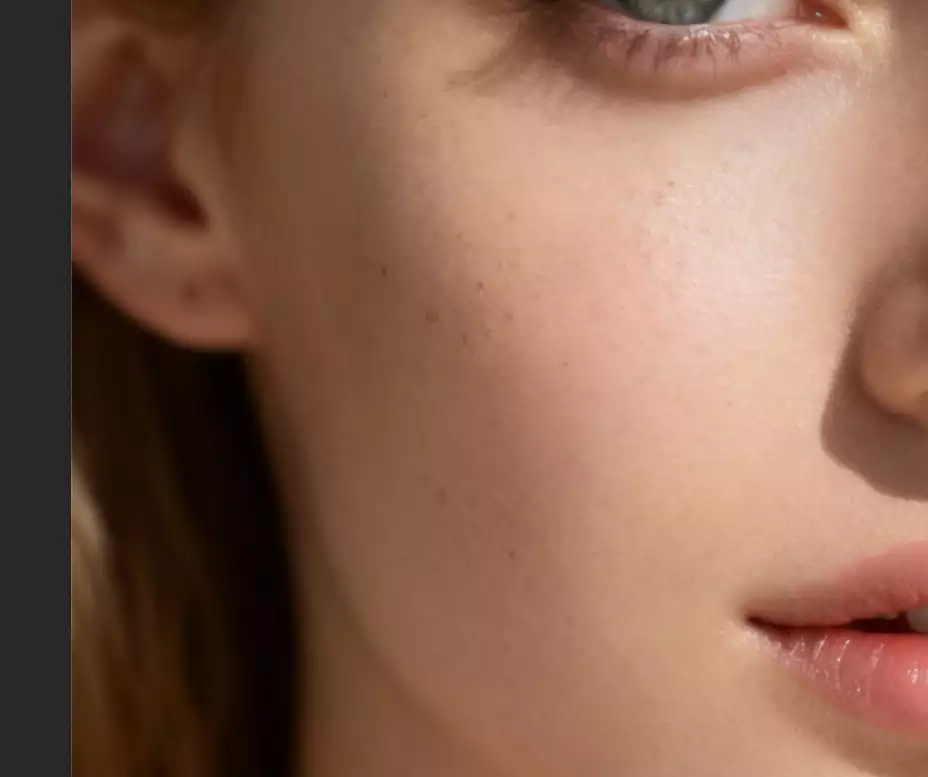
Now, you can clearly see blemishes like pimples, dust, or small skin spots. Create a copy for safer editing, go to Layer > Duplicate Layer.
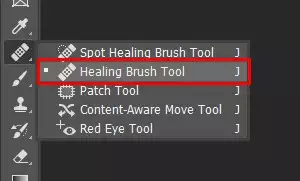
Step 2: Select the Spot Healing Brush Tool
Choose the Spot Healing Brush Tool (J) from the Photoshop Toolbar.
- Go to the top options bar.
- Set Type to Content-Aware.
- Then, enable Sample All Layers if you are working on a separate empty layer.
This process allows Photoshop to automatically replace the blemish using nearby skin texture.
Step 3: Adjust the Brush Size
- Move the cursor over the blemish.
- Press the [ or ] keys to resize the brush.
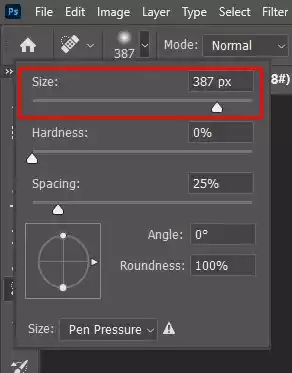
The brush should be slightly larger than the spot you will work on, as it will help Photoshop analyze surrounding pixels and blend the correction smoothly.
Step 4: Click or Drag Over the Blemish
Place the brush over any temporary blemish, such as acne or a pimple, and click once.
If the marks are large, click and drag over the area. Photoshop will automatically sample the skin near it and replace the flaws with a matching skin tone.
Step 5: Check and Refine the Retouch
Keep clicking on other small and temporary marks across the face. Refrain from retouching birthmarks or moles like natural facial features.
If the result looks unnatural, change the brush size to a small one and start by undoing the edits by pressing Ctrl/Cmd + Z. Edit only the selected spots to keep natural skin texture intact.
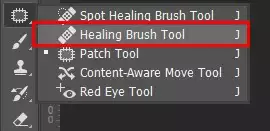
How to Retouch a Face Photo Using the Healing Brush Tool?
Here is the step guide to retouch a face photo using the Healing Brush Tool.
Step 1: Open the Image and Create a Retouch Layer
- Go to Photoshop.
- Click File.
- Again, click Open and select the portrait photo.
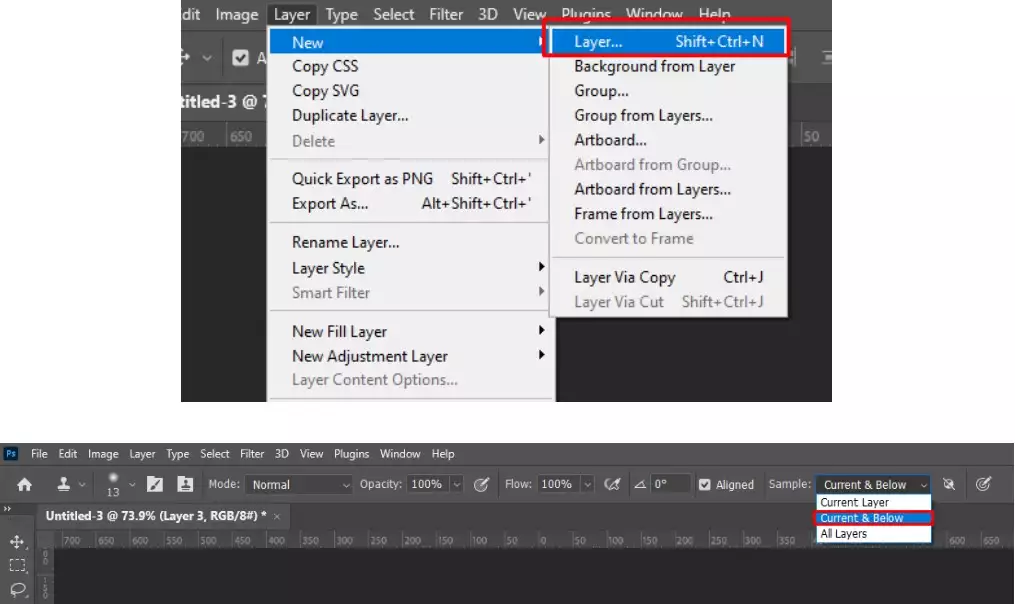
- Then, go to the Layers panel.
- Click New Layer to create a blank retouch layer.
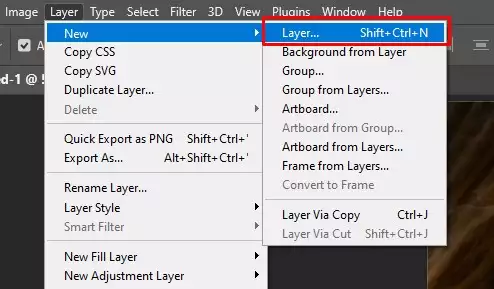
With this process, you can make changes in photos without harming the original ones.
Step 2: Select the Healing Brush Tool
Select the Healing Brush Tool (J) from the Photoshop toolbar. From the top options bar, Enable Sample: Current & Below, allowing the tool to sample pixels from the original layer while editing on the new layer.
Step 3: Sample a Clean Skin Area
To take a sample, move the cursor to a clean skin area close to the blemish.
- Hold Alt (Windows) / Option (Mac).
- Click once to sample the skin texture.
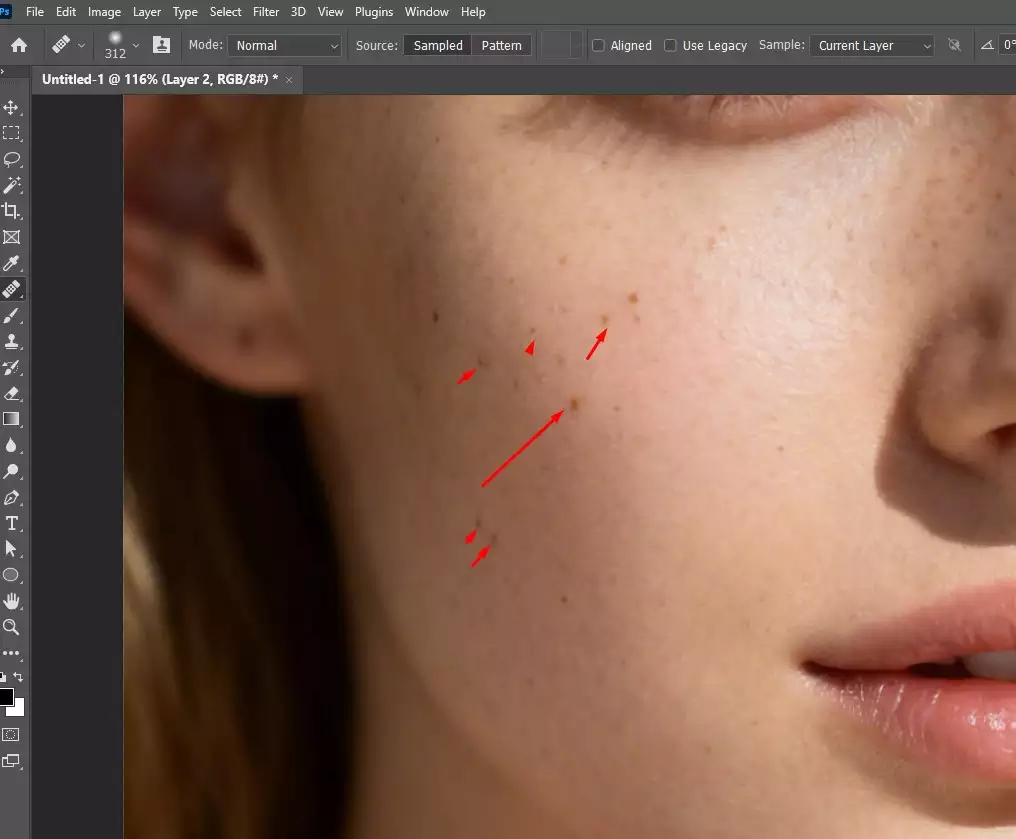
With these steps, you are telling Photoshop which texture to copy.
Step 4: Paint Over the Blemish
Move the brush over the imperfection, such as pimples, acne marks, small scars, or uneven spots, then click or gently drag over the area.
Photoshop automatically blends the sampled parts with the surrounding skin tone, creating a natural look.
Step 5: Repeat and Blend the Retouch
Continue sampling new clean areas by pressing Alt/Option + click and painting over other blemishes.
Make sure to resample over again when working on different parts of the face so the skin texture and lighting don’t look different.
How is the Clone Stamp Tool Used to Retouch Face Photos?
Follow these steps to retouch the face photos with the Clone Stamp tool
Step 1: Open the Photo and Add a Retouch Layer
- Go to Photoshop.
- Click File.
- Click Open and select the portrait image.
- In the Layers panel, click New Layer to create a blank retouch layer.
- In the options bar later, set sample, Current & Below so cloning happens non-destructively.
Step 2: Select the Clone Stamp Tool
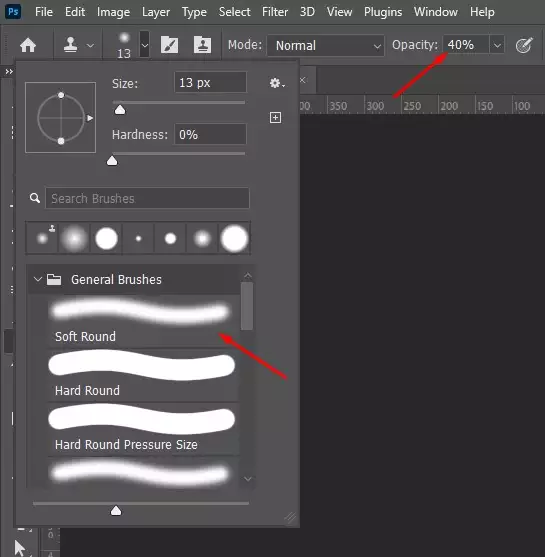
Select the Clone Stamp Tool (S) from the toolbar. Then go to the top options bar and set a soft brush (low hardness) with low opacity (around 20–40%) to help blend the skin naturally during face retouching.
Step 3: Sample a Clean Skin Area
Move the cursor to a clean skin area near the blemish.
- Hold Alt (Windows) / Option (Mac).
- Click once to sample that texture. Photoshop now stores this area as the source for cloning.
Step 4: Paint and Blend the Retouch
Move the brush over the blemish, wrinkle, or uneven skin area, then click or gently drag to paint over it. The Clone Stamp copies pixels from the sampled area and places them on the imperfection.
While editing different areas of the face, continue pressing Alt/Option + click again to sample new clean skin areas. Make sure to use short strokes and low opacity. This process will gradually blend the retouch and prevent repeating patterns or unnatural patches.
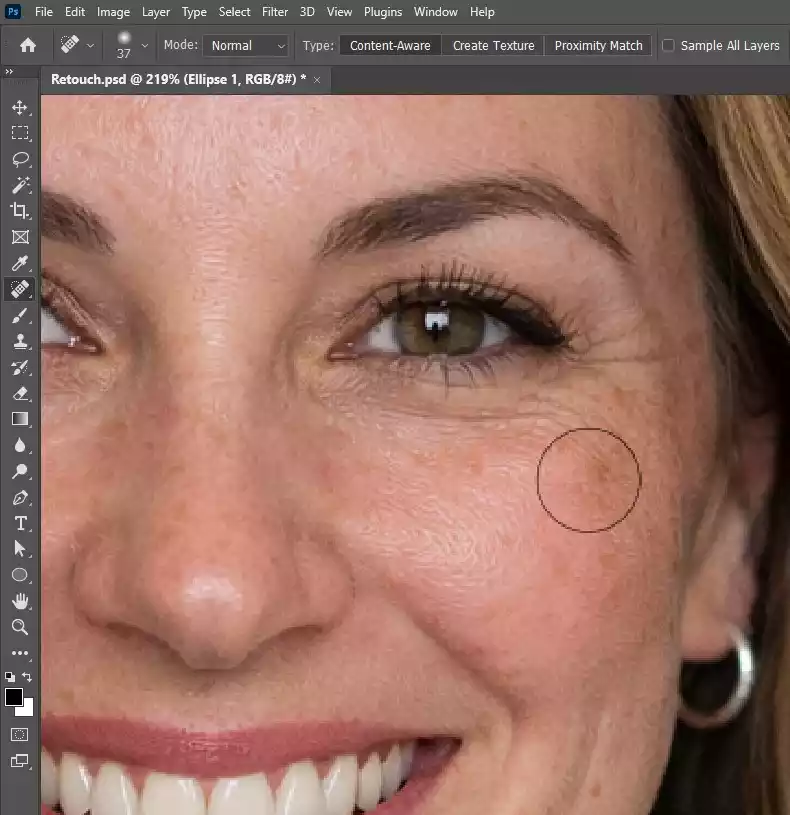
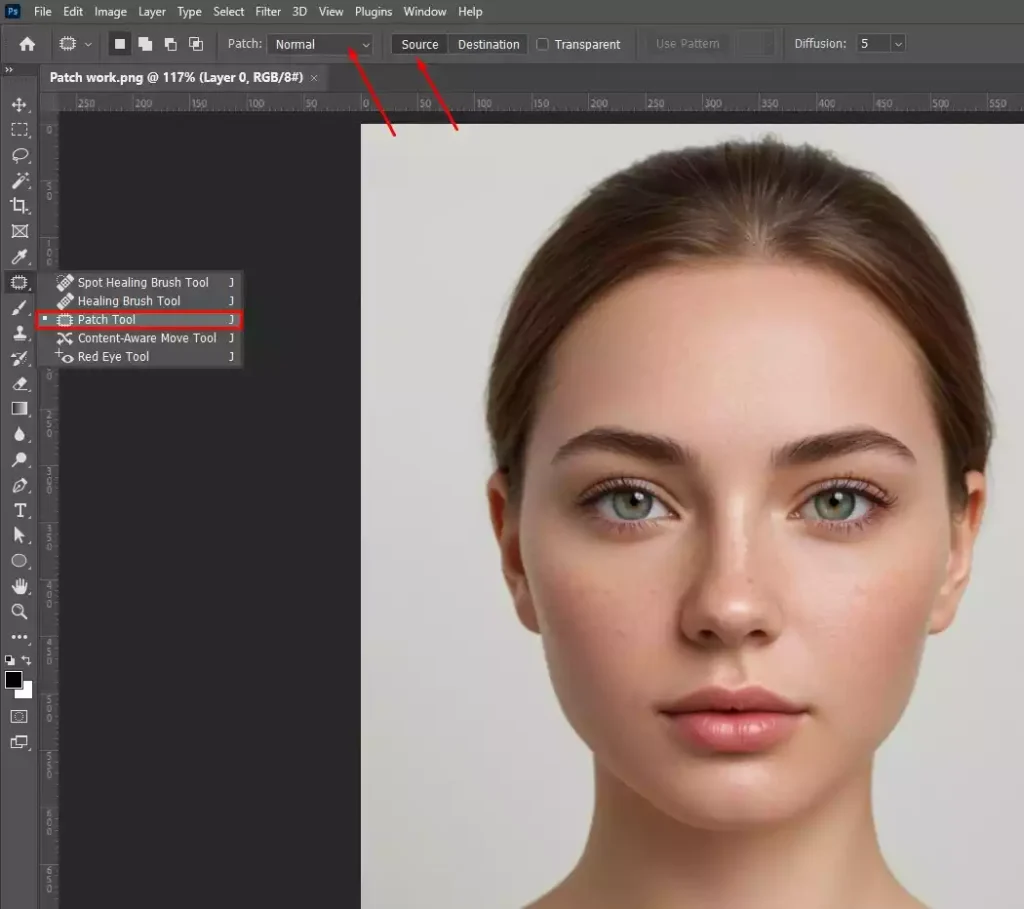
How to Use the Patch Tool to Retouch a Face Photo?
Steps to use the patch tool to retouch a face photo are as follows.
Step 1: Open the Image and Activate the Patch Tool
Go to Photoshop, click File, Open to load the face photo. Then go to the toolbar.
- Click and hold the Spot Healing Brush Tool.
- Choose the Patch Tool from the tool group.
- In the top options bar, set Patch, Normal and choose Source.
Step 2: Draw a Selection Around the Imperfection
Move the cursor over the blemish or wrinkle. Click and drag to draw a selection around the flawed area. Make the selection slightly larger than the imperfection, so Photoshop has surrounding pixels to blend with.
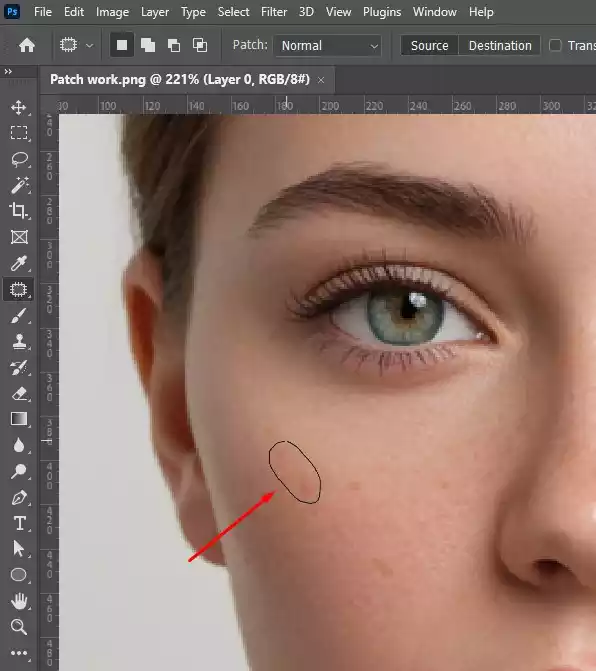
Step 3: Drag the Selection to Clean Skin
Place the cursor inside the selection, then click and drag it to a nearby clean skin area with similar texture and lighting. When you release the mouse, Photoshop replaces the selected blemish with the sampled skin.
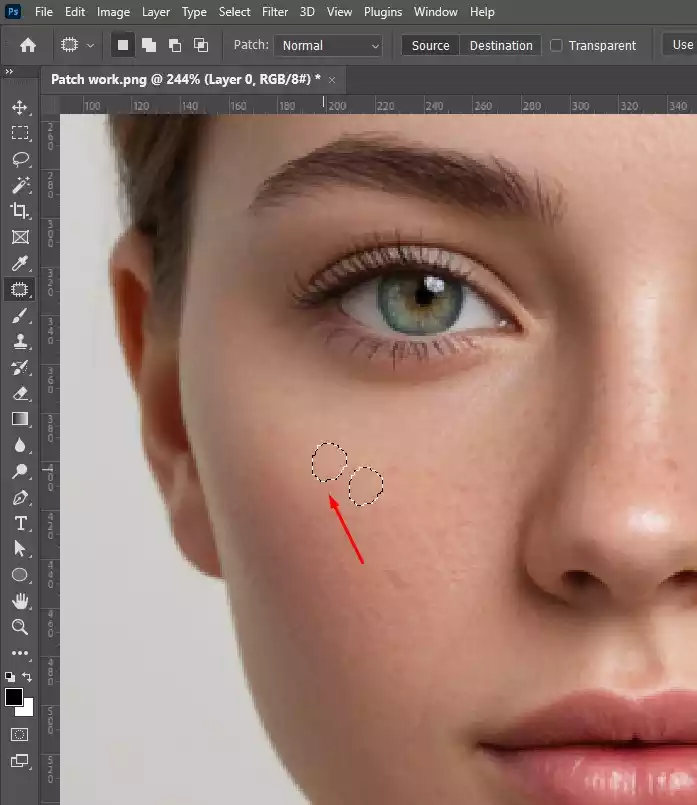
Step 4: Deselect and Repeat for Other Areas
- Press Ctrl/Cmd + D to remove the selection.
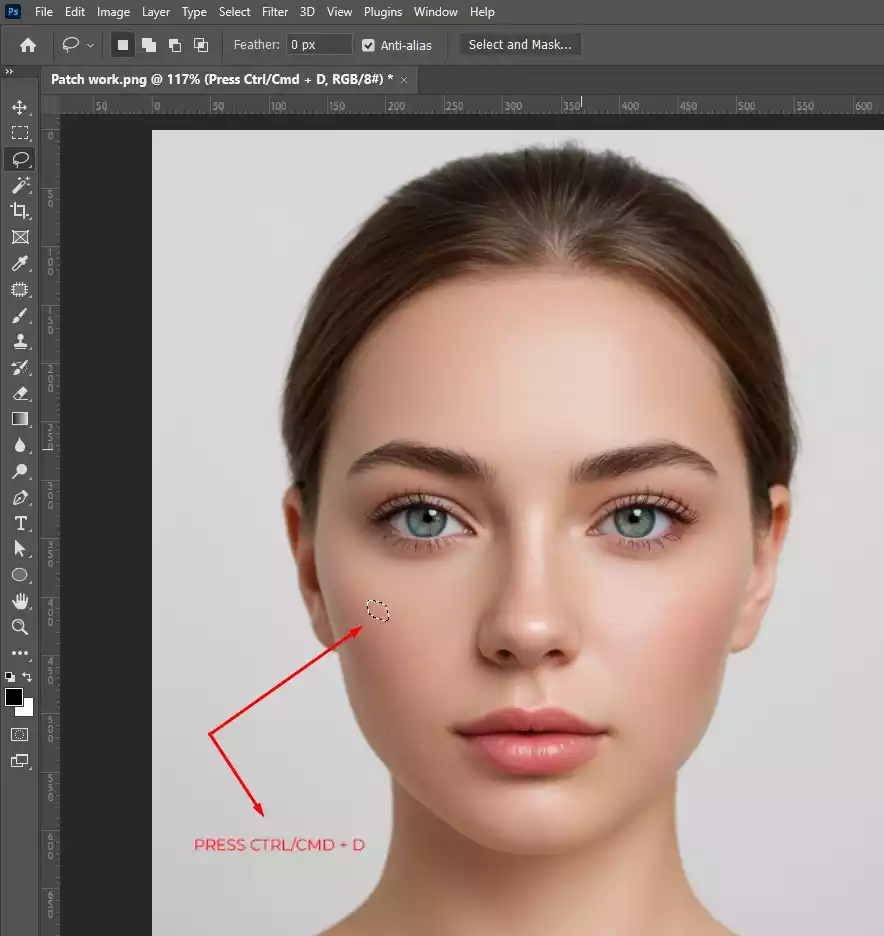
Repeat the same process, draw a selection, drag it to clean skin, release for other wrinkles or blemishes across the face.
How Do You Use the Dodge and Burn Tool to Retouch a Face Photo?
Follow this guide to use the Dodge and Burn Tool to retouch a face photo.
Step 1: Open the Photo and Create a Dodge & Burn Layer
Go to Photoshop → File > Open and load the portrait.
- In the Layers panel, click New Layer.
- Go to Edit → Fill → 50% Gray and set the layer Blend Mode to Soft Light.

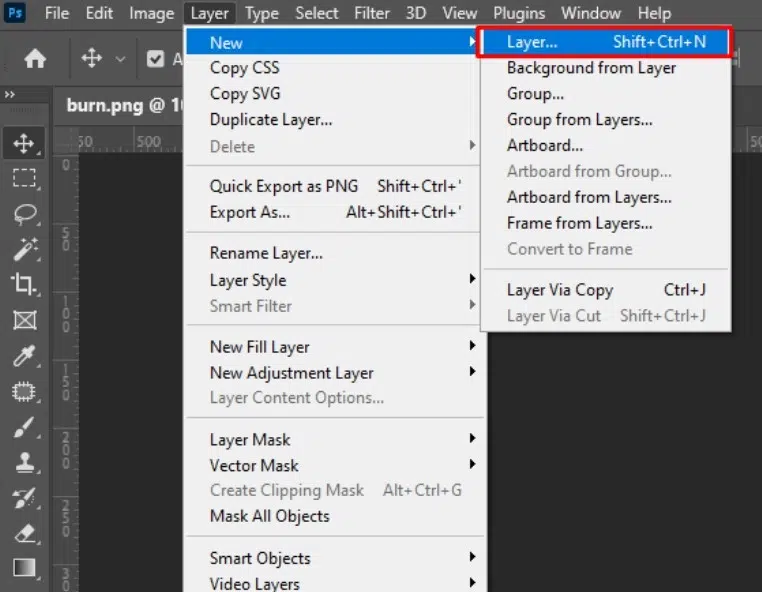
This process creates a non-destructive layer for lightening and darkening.
Step 2: Select the Dodge or Burn Tool
- Go to the toolbar, choose Dodge Tool (O) to lighten or Burn Tool (O) to darken.
- In the top options bar, set Range to Midtones and keep Exposure around 5–10% for controlled adjustments.
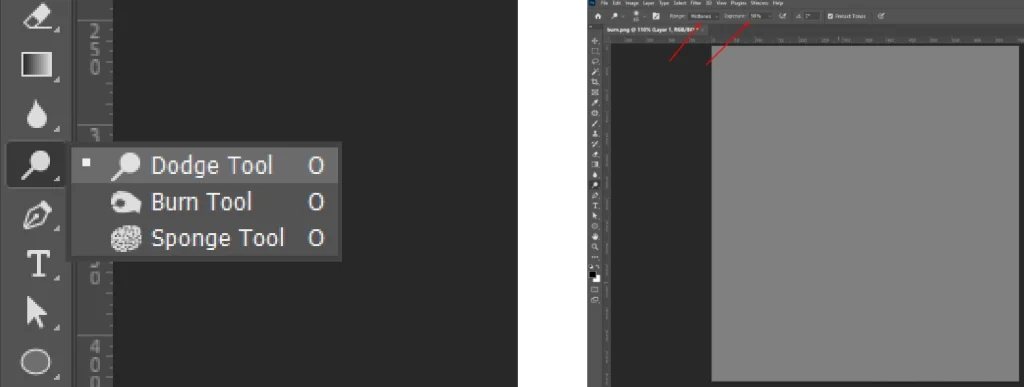
Step 3: Paint to Adjust Light and Shadow
Use the Dodge Tool to paint over dark spots or under-eye shadows to lighten them. Switch to the Burn Tool and paint over overly bright areas to deepen shadows.
Exposure should be 5–10% and use soft, short strokes to gradually build the effect for a smooth, uneven lighting while preserving natural skin texture.
How to Retouch a Face Photo Using the Frequency Separation Technique?
To retouch a face photo using the frequency separation technique is as follows.
Step 1: Create Low and High Frequency Layers
- Open the portrait photo
- Press Ctrl/Cmd + J and duplicate the image layer
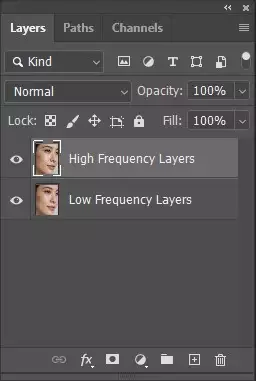
Rename the bottom duplicate Low Frequency and the top one High Frequency.
Step 2: Blur the Low Frequency Layer
- Select the Low Frequency layer
- Go to Filter → Click Blur → Then, Gaussian Blur
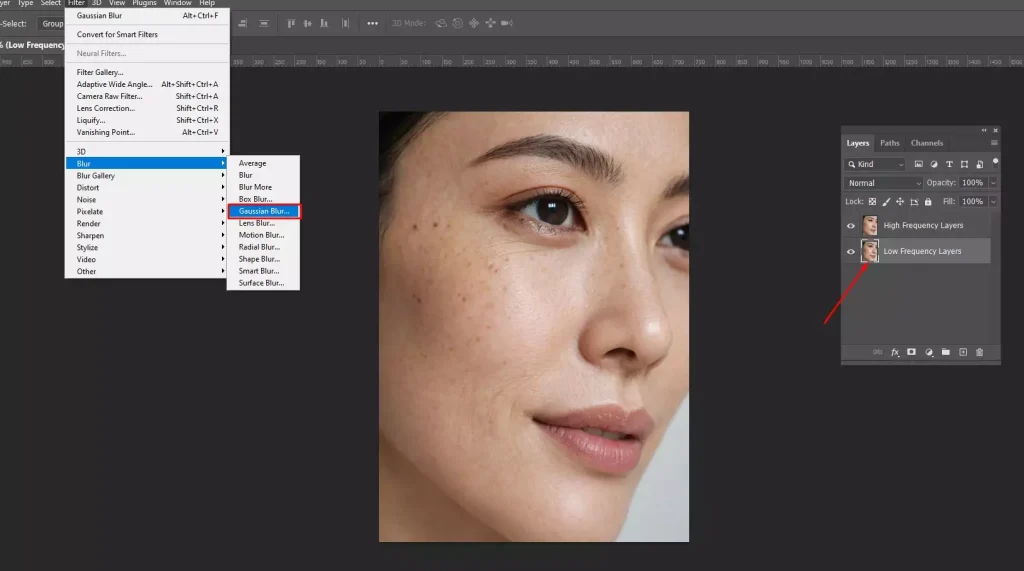
Increase the blur until skin texture disappears, but color and tone remain visible.
Step 3: Extract Texture to the High Frequency Layer
- Select the High Frequency layer
- Go to Image and then click Apply Image
- Set Layer: Low Frequency, Blend: Subtract (or Add depending on bit depth)
- Then, set the layer blend mode to Linear Light.
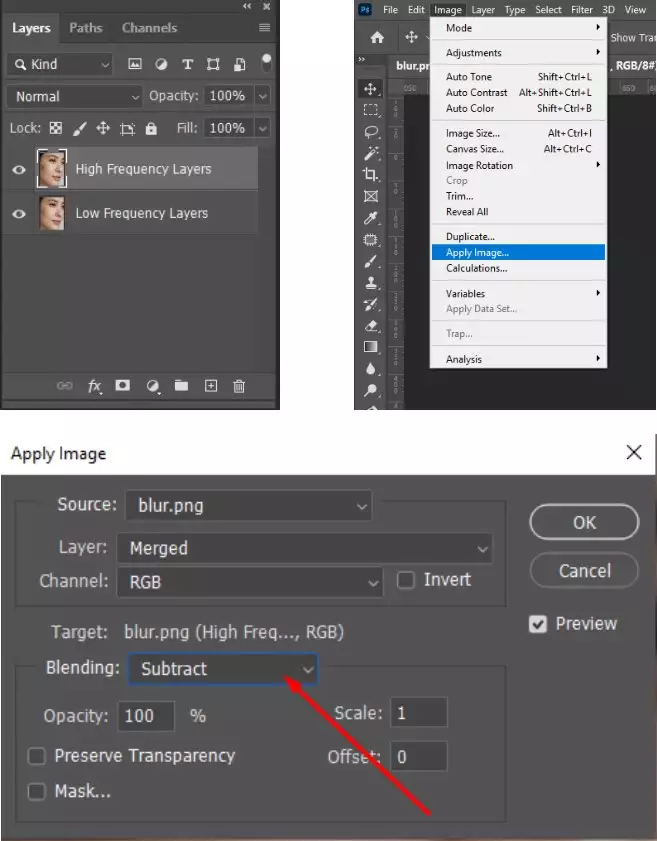
This process will separate texture from color.
Step 4: Retouch Color and Texture Separately
Select the Low Frequency layer and use tools like the Lasso Tool + Gaussian Blur to smooth uneven skin tones. Then select the High Frequency layer and use the Healing Brush or Clone Stamp to fix skin texture without affecting color.
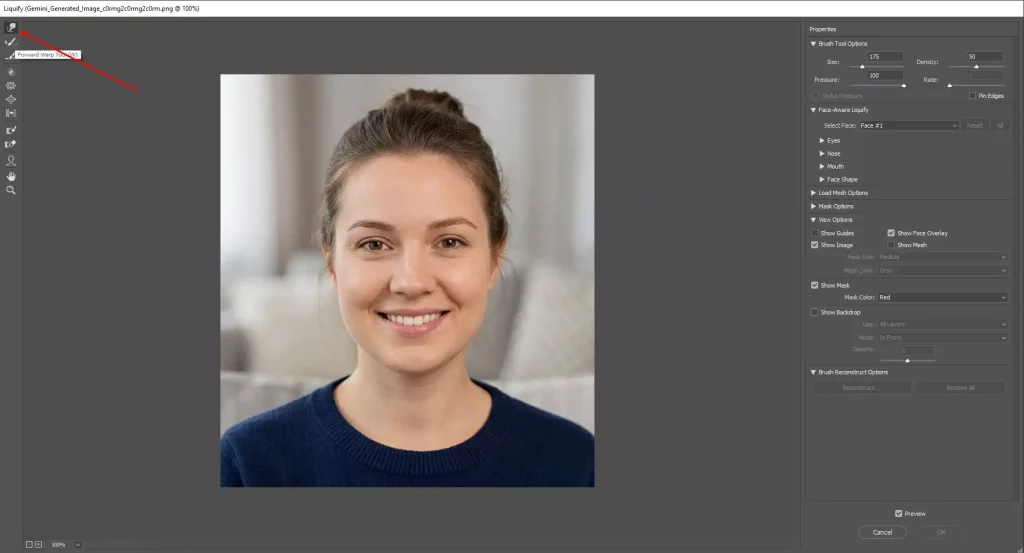
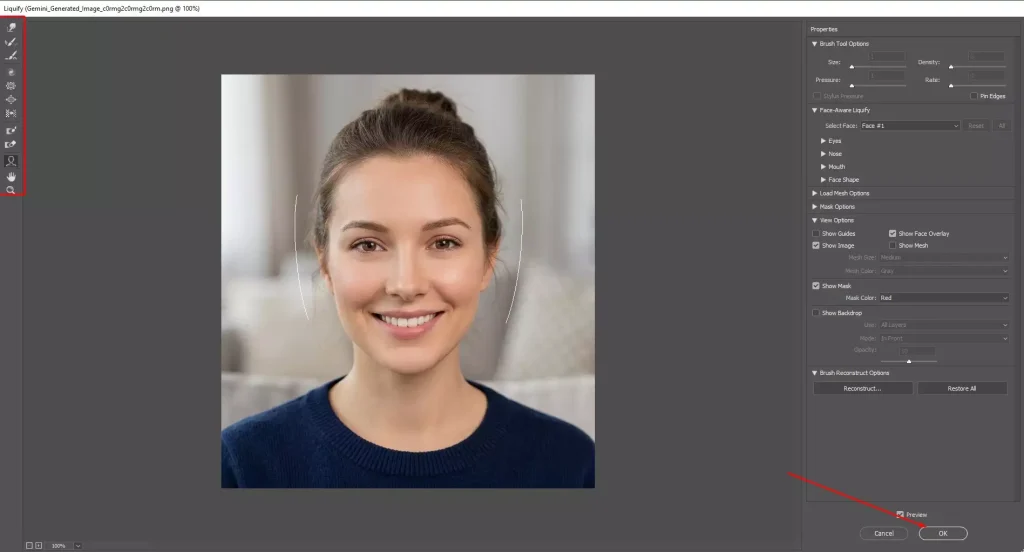
How is the Liquify Tool Used to Retouch Face Photos?
The process of the Liquify tool used to retouch face photos is as follows.
Step 1: Open the Photo and Launch Liquify
- Open the portrait in Photoshop
- Go to Filter
- Click Liquify
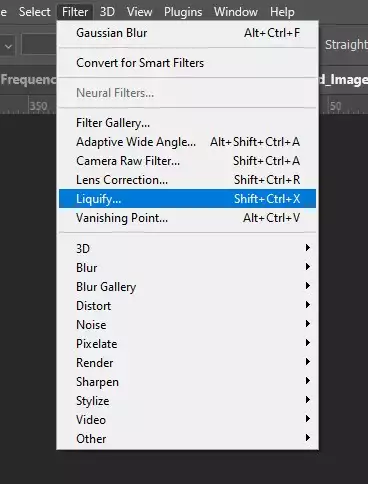
The Liquify workspace will open with multiple facial adjustment tools.
Step 2: Select the Forward Warp Tool
Choose the Forward Warp Tool (W) from the Liquify toolbar. Adjust the brush size and pressure in the right panel for a controlled editing application.
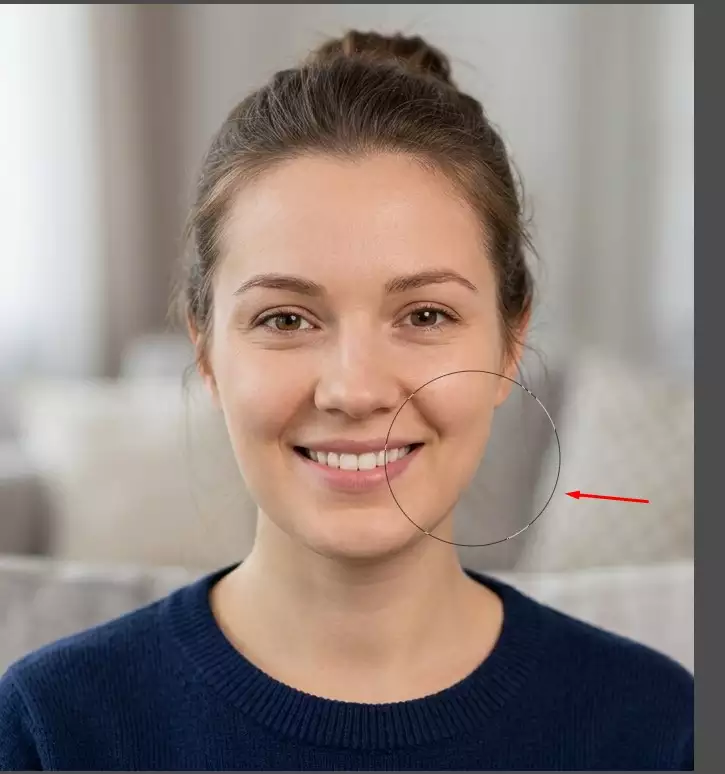
Step 3: Gently Push Facial Areas
Click and drag slightly to adjust facial features, such as smoothing jawlines, adjusting cheeks, or refining hair edges. Make small pushes instead of large drags to avoid distortion.
Step 4: Use Face-Aware Controls for Precision
In the Face-Aware Liquify panel, adjust sliders for eyes, nose, mouth, and face shape. This allows subtle symmetry and proportion adjustments while maintaining natural facial structure.
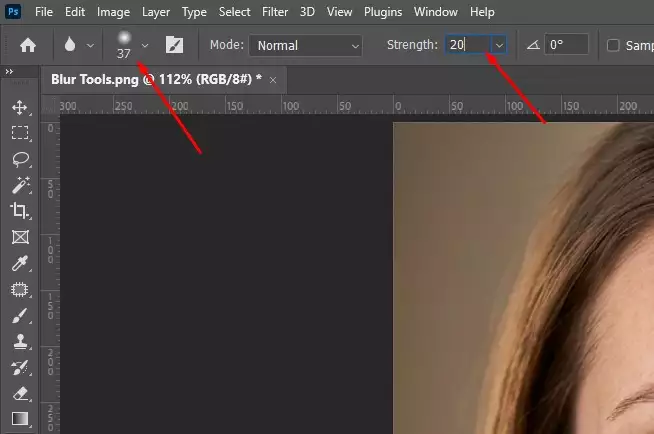
How to Use the Blur Tool to Retouch a Face Photo?
Follow these steps to use the Blur tool to retouch a face photo.
Step 1: Open the Image and Select the Blur Tool
- Go to Photoshop.
- Click File.
- Again, click Open and load the face image.
- In the toolbar, select the Blur Tool.

Step 2: Adjust Brush Strength
In the top options bar, set the Strength between 10–20% and choose a soft brush for gradual smoothing.
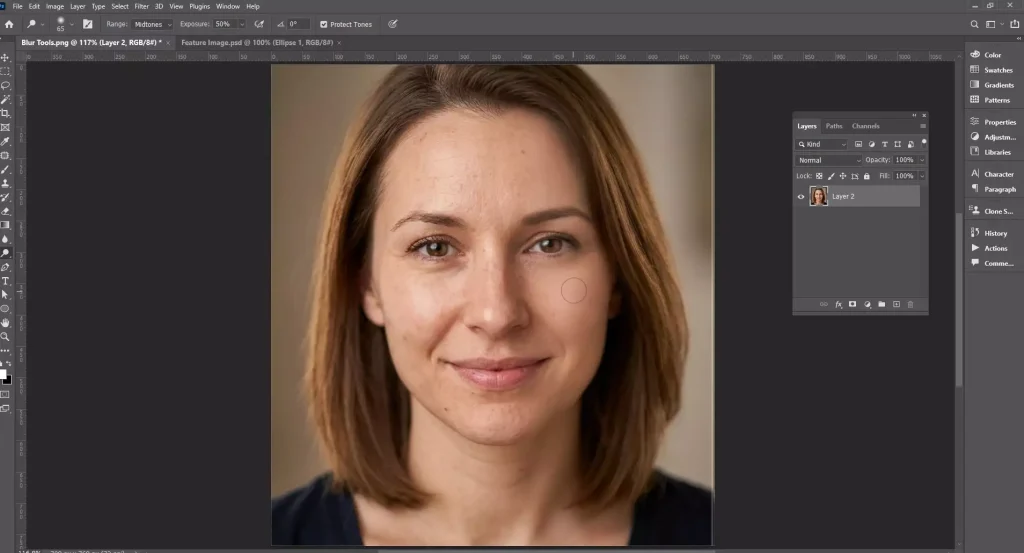
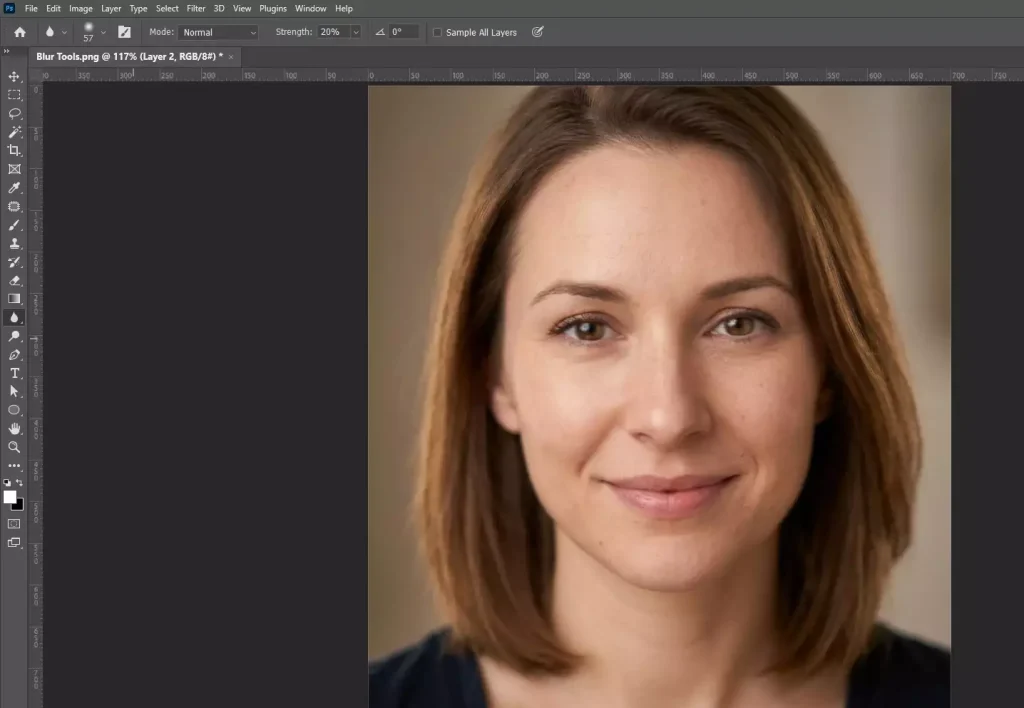
Step 3: Paint Over Rough Skin Areas
Move the brush over areas with harsh texture or small skin noise, then click and gently drag across the area. The Blur Tool softens pixel detail. Use short strokes and low strength. Avoid brushing across large areas to prevent the skin from looking overly smooth or artificial.
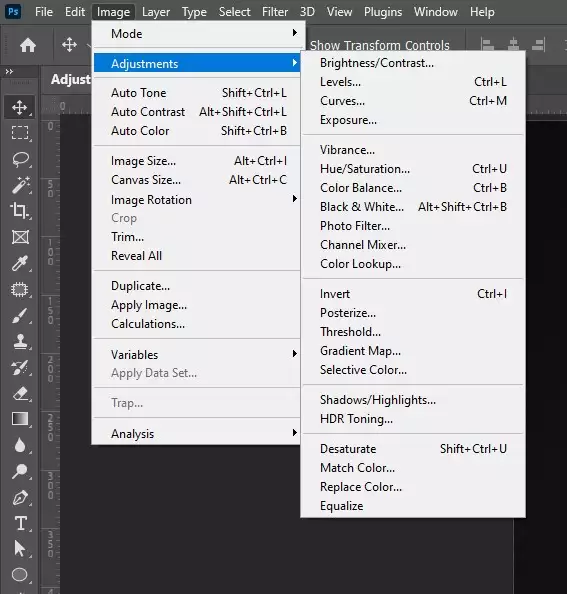
How Do You Use the Adjustment Layers to Retouch a Face Photo?
To retouch a face photo, the steps to use the Adjustment layers are as follows.
Step 1: Open the Photo and Add an Adjustment Layer
- Open the portrait.
- Then go to the Layers panel.
- Click the Adjustment Layer icon.
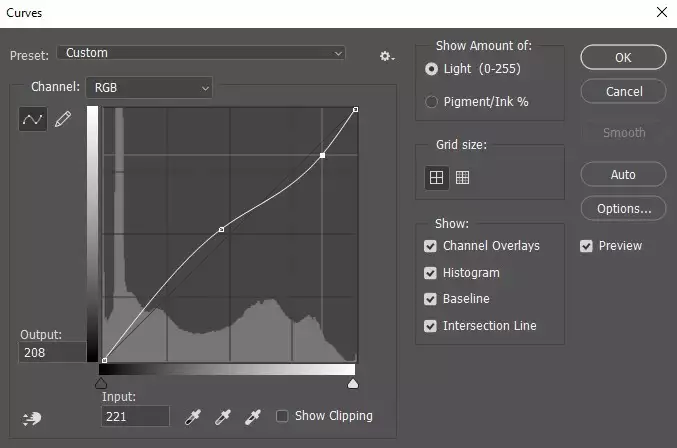
- Select an adjustment like Curves, Levels, or Color Balance.
Step 2: Edit Skin Tone, Color, and Exposure
Use the Curves or Levels sliders to slightly brighten the photos and balance shadows and highlights across the face. Add Color Balance or Hue/Saturation adjustment layers and tweak the reds and yellows to correct uneven skin tones.
Step 3: Control the Effect with Layer Masks
Use the layer mask attached to the adjustment layer. Select a soft brush, then paint with black on areas where the adjustment should not apply, keeping corrections limited to the face.
How to Retouch a Face Photo Using a Layer Mask?
Here is a tutorial guide to retouch a face photo using a layer mask.
Step 1: Open the Image and Add a Layer Mask
Open the portrait photo and select the layer you will edit.
- Go to the Layers panel.
- Click the Add Layer Mask icon to attach a mask to the layer.
Step 2: Select the Brush Tool
- Go to the toolbar.
- Select the Brush Tool (B).
To smoothly mask the photo, set a soft, round brush with low opacity.
Step 3: Paint to Hide or Reveal Adjustments
Select the mask thumbnail. Paint with black to hide or paint with white to reveal parts of the adjustment. It lets you control exactly where the retouch effect appears.
Step 4: Refine the Mask for Natural Retouching
Use low-opacity brush strokes while painting on the mask to gradually blend adjustments into the face, ensuring the retouch looks natural and controlled.
Why is Photoshop Face Retouching Important in Photography?
Photoshop face retouching is important for photography (portrait, headshot, e-commerce, lifestyle, etc.) as it improves portrait quality and acceptability with trust and comfort. The process involves adjusting skin tone, balancing lighting and colors, enhancing natural facial features by removing blemishes, and creating smooth skin in Photoshop while preserving natural texture. Photographers get clean, professional portraits meeting commercial standards and enhance viewer engagement.
- Improves Portrait Quality
Face retouching enhances image quality by eliminating temporary skin issues like blemishes, acne marks, pimples, or dust while maintaining natural skin texture. This helps create refined portraits without altering the people’s real facial features.
- Creates Smooth Skin in Photoshop
Retouching techniques like Spot Healing, Dodge and Burn, and Frequency Separation help smooth uneven skin tones while preserving natural skin detail, preventing the over-smoothed or artificial look.
- Meets Professional and Commercial Standards
Images used in ad campaigns, advertisements, corporate headshots, and social media marketing require polished visuals. Professional retouching produces an attractive and approachable look on the face to make it publication-ready.
- Boosts Viewers’ Engagement and Marketing Value
Removing small distractions from the skin directs the viewer’s attention to the subject’s expression, emotion, and personality. It increases viewer interaction, trust, and conversion potential in advertising and promotional campaigns.
- Strengthens Branding and Presentation
High-quality portraits help photographers, brands, and professionals present a consistent, credible image across portfolios, websites, and marketing materials.
Why is Photoshop Face Retouching Important in Portrait Photos?
Photoshop face retouching is important for portrait photography because it improves image quality while keeping facial features natural. Retouching faces removes facial flaws, developing an acceptable and amicable look on models’ images, which creates polished, distraction-free images suitable for portfolios, marketing materials, editorial publications, and social media use.
How Do You Choose the Best Photoshop Face Retouching Service?
Choose the best Photoshop face retouching service provider through experience, expertise in tools, portfolio quality, free trial, client review, turnaround time, customer service, customization, and price. By analyzing these factors, you can find a reliable photo retouching partner that delivers consistent, refined, and professional results.
1. Experience: Check the company to learn about their experience in their background and history of working in photo retouching. Professional retouching service providers handle complex issues like uneven skin tones, wrinkles, lighting challenges, and high-resolution images.
2. Expertise in Tools: Learn about their software and tools knowledge, used techniques, etc. Updated expertise ensures precise, professional-quality retouching.
3. Portfolio Quality: Check the retouching company’s gallery or portfolio for their demonstration of skill, style, and consistency. A strong portfolio indicates the quality of finished images and ensures the retoucher’s style matches your expectations.
4. Free Trial: Use the free-trial options to test the works firsthand before committing. You can evaluate the workflow, communication, and quality of retouching, reducing the risk of unsatisfactory results.
5. Client Reviews: Check Google Review or Trustpilot-like platforms for real clients’ insights into the retouchers’ reliability, professionalism, and communication. Consider the company a red flag if it has too many negative reviews.
6. Turnaround Time: Know about their regular and fastest turnaround time to deliver completed images to understand if they are capable enough to keep up with crucial deadlines in e-commerce or marketing campaigns.
7. Customer Service: Communicate through their ‘Contact us’ page information to understand their responsiveness and willingness to address queries or revisions. As morning shows the day, good communication will tell you a lot about the retouchers.
8. Customization: Ask about the customized services, whether the service adapts and edits to fit your intended purpose. Also, ask about the time, cost for custom services, and the revisions.
9. Price: Check the pricing page, ask about the bulk discount, seasonal cut-price, and repeat customers’ benefit to ensure smooth onboarding and project delivery with quality and your budget.
Why Should You Outsource Photoshop Face Retouching Services?
You should outsource Photoshop face retouching services to acquire professional and high-end results, simplify and reduce workload, and save time and energy for your core work. Outsourcing especially helps photographers and e-commerce brands with bulk images, complex skin and lighting corrections, and commercial-quality finishes. As a result, your visuals improve, brand trust boosts, and marketing impact is enhanced.
How Much Does Photoshop Face Retouching Cost?
Photoshop Face retouching price starts around $0.60 for basic retouching with 24 hours turnaround in NYC, and can go higher than $100+ per photo (editorial work). This pricing greatly varies depending on project complexity, volume, image resolution, service type, and editing level.
FAQ’s
What is Photoshop face retouching?
Photoshop face retouching is a process in Photoshop to improve and enhance a portrait photo by adjusting temporary facial blemishes, colors, and lights, correcting skin tone, adjusting lighting, and refining facial details for professional or commercial usage. By using Photoshop tools Spot Healing Brush Tool, the Healing Brush Tool, and the Clone Stamp Tool, retouchers clean imperfections, bringing out the natural skin texture and realistic facial features.
What Photoshop tools are used for face retouching?
Common Photoshop tools used for face retouching include the Spot Healing Brush Tool, Healing Brush Tool, Clone Stamp Tool, Patch Tool, Dodge and Burn Tools, Liquify Tool, Blur Tool, Adjustment Layers, and Layer Masks used for removing blemishes, smoothing skin tones, fixing lighting, and refining facial structure.
What types of photos require professional Photoshop face retouching?
Photos that are used for commercial or high-impact purposes require professional Photoshop face retouching, such as fashion and beauty portraits, model portfolios, wedding photos, corporate headshots, magazine covers, product lifestyle images, and social media portraits. These images are designed to attract attention, build trust, and drive specific actions like product purchases, brand recognition, bookings, or subscriptions.
Who needs Photoshop face retouching services?
Those who needs photoshop face retouching services include portrait photographers, portrait photography studios, e-commerce sellers, online magazines, fashion agencies, boutique houses, advertising and marketing agencies, and beauty & cosmetics brands for product promotion, professional branding, and editorial publishing with high-end retouched photos.
Is manual Photoshop face retouching better than AI retouching?
Yes, manual Photoshop face retouching is better than AI retouching due to more natural and precise results. An expert image retouchher make situational judgement, considers perspective, and controls each correction. As a result, each edit enhances portraits along with the photo concept.
AI retouching tools work well for simple and faster retouching, but they often remove texture or distort details. Manual retouching is best used when dealing with images for commercial or corporate purposes.
