
Candle is one of those mesmerizing products that can change a mood, create a calming effect, as well as serve an important purpose, that is enlightening.
You probably want to capture each of those if you are going to shoot candle products. But wondering how?
In this article, I will describe candle product photography, tips, techniques, and 10 ideas to assist you pull the task off.
What you’ll learn in this article
- 1 Importance of High-Quality Candle Product Photography
- 2 How to Shoot Candle Product Photography
- 3 The 10 Best Candle Product Photography Ideas
- 3.1 Idea 1: Simply Take Photos Flat-Lay
- 3.2 Idea 2: Use Your Hands to Show the Candle
- 3.3 Idea 3. A Fragment Image of Candle Light Dinner
- 3.4 Idea 4: Candle in the Window
- 3.5 Idea 5: Use Books to Activate Coziness
- 3.6 Idea 6: Candle on a White Background
- 3.7 Idea 7: Create a Candle Light Trail
- 3.8 Idea 8. Put Candle to Reflect
- 3.9 Idea 9. Take Shots of the Smoke
- 3.10 Idea 10. Try as Many Shots as You Can
- 4 FAQ’s Regarding Candle Product Photography
- 5 Final Thought
Importance of High-Quality Candle Product Photography
Like any other product, the candle has an exquisite level of charm and demand. Therefore, it is crucial to capture top-notch candle product photos, here is why.
Making a Good First Impression
First impressions last longer, positive or negative. It takes long to get rid of that feeling. So, how does this work for digital products?
Well, it’s about visuals, based on the image or the video online shoppers see first. If the image is well-lit, rightly captured, and fairly edited with software, for the products to capture attention, this would do a brilliant job.
Ensure Brand Image
Based on the image, people assume a lot about a brand. If your candle products have good images, people will think of you as a premium quality brand and will stay tuned with you. Even if they don’t buy right away, they will eventually, because, that’s what the image does for you.
Contrary to that, low-quality images do a poor job of impressing people, they will leave, feeling like your product image isn’t good, maybe you aren’t very attentive in the business, and even worse, you lose the trust as soon as they see such an image.
Shows the Use Appropriately
High-quality candle product pictures can deliver the right message to the audience. Is it a Tea light candle, or Votive, or just a simple birthday candle? Good images help people differentiate the item and thus conspicuously tell the use as well. So that people can click the ‘Order Now’ button with assurance.
Tells a Story in a Convincing Manner
Good candle photos always seem like, they have a story to tell. That’s the charismatic way high-quality photos convey. Making people believe it aligns with their story as well, setting the right mood, reason, or ceremonies.
Helps Boost Traffic and Conversion
Quality images always work as magnets, bringing traffic like a chain. It helps not only elevate your brand image and authenticity but also increase trustworthiness and authority among the viewers, resulting in increased traffic and sales.
How to Shoot Candle Product Photography
I hope you are ready to take the aesthetic of creative candle photography. Candle products are like any e-commerce products, so the settings, lighting, and setup would be the same, right? But, no.
Even being an e-commerce product, it needs a slight tweak in thought, and arrangements so that the purpose of the product, delicacy, and aestheticism the product offers and the output a photo should convey. So, here are our tips and techniques for you so that you can prepare better with your candle photoshoot settings.
Decide the Set
When I tell you about the set, it’s your call where you want to shoot. It can be outdoors, placing the products simply on the grass, stone, or anything that suits; or it can be inside the studio, in a well-equipped and prepared environment. Considering the candle is a small product, outdoor photos may not be necessary, but a change for a shoot would be worth it.
Camera
For taking photos of candles, you can choose a high-end DSLR or mirrorless camera. However, depending on the location, type of shot, purpose, etc, you may choose the camera or pick the one you are using. Some best cameras for product photography are the Nikon D750 FX, Canon EOS Rebel T6, Fujifilm X100F 24.3 MP APS-C, etc.
Lens
The type of lens depends on the type of products you are shooting. As your product is candles, you can choose any product photography lens such as a Macro lens, Tilt-shift lens, Prime lens, or Zoom lens.
Light
There are 2 sources for photography lighting, a. Natural and b. Artificial.
a. Natural lighting
Sunlight offers an astonishing effect on photos, so if you want to take advantage of it, take shots during golden hour.
Golden hour is when the sun’s rays are golden, usually the time before sunset and after sunrise.
You don’t necessarily need to stay out to take shots, when the sunlight is comfortable, place your candle near a window and you can take marvelous shots as well. Avoid taking pictures when the sun is casting harsh rays, for example during mid-noon or after lunch hour.
b. Artificial lighting
This is a more convenient way of lighting as they are available, controllable, and portable. Some popular artificial photography lighting are Fluorescent lights, Tungsten bulbs, Strobe lights, LED spotlights, Ring lights, etc.
Diffuser
The diffuser helps even out the light to its surroundings and reduces reflection or glare in the process. By using a diffuser, you can make the light source softer yet brighter so that you get natural product photos. For that, you can use Softbox, Umbrella diffuser, White bounce card, etc.
Background and Surface
The background and surface on what the the candle you will place and its surroundings, should be one of the concerns. It affects a lot on the subject on how it gets displayed. If those are something very dazzling more than the candle, then the focus will be shifted away.
So, choose something that accentuates the subject not camouflages it. It can be a solid color, reflective, or any type of photography backdrop that you find suitable, such as Paper Backdrops, Ceramic Flooring tiles, Vinyl, Fabric, etc. But don’t choose something that is too much decorative or distracting.
Necessary Props
Have prepared the necessary props that will make the subject appear better, and highlight the purpose or the charm of the candle.
Visualize this setting—an illuminated candle, a cup of coffee, and a flower vase with a few roses on top of a table. What does this feel like? Someone is relaxing, maybe in the evening or at night, and doesn’t want to have more light, candlelight is the exact comfort.
Shot Selection
Experiment with different angles, and take various shots to find which one captures the beauty of the candle products the most and makes you feel satisfied. Remember, the shots that make you skeptical won’t please the viewers either.
Here are my recommendations when I take shots of small-size products.
- Eye-level shots: Take shots of the products at your eye level. You may need to squat a bit or put the candle on something high that reaches your height.
- Medium shots: You can take shots of the subject with a moderate inclusion of its surroundings. As this is the candle we are talking about, avoid long shots.
- Close shots: Zoom in to take this shot. You can show the subject details through this shot. You can show the full candle, or point out any specific detail or a part in the frame.
- Low and high-angle shots: These are the shots that make it look like the subject is either below you or above you, as the camera angle is not on the eye line.
- Bird’s eye or overhead shots: Take shots directly from above, the frame would be like the candle is directly below you.
- 360-photography shots: Take shots of the products from different angles, left, right, front, back, etc, and then join them together to make a mini video-like image.
- Dutch angle or tilt shots: This is a stylish shot, tilting the camera angle in a way that makes the subject placed at a 30-degree angle. This interesting angle helps create mystery and suspense.
Post-Production
Take time to edit your captured shots. A slight touch of editing helps bring out the lucrative look of the images that aren’t captured through the camera. Also, editing your candle photos will ensure the images are of high quality, and there are no blemishes, flaws, unwanted objects distracting elements, etc.
If the products are going to get uploaded for an online store, then commercial-grade photo editing is a must. For that, you can always rely on professional photo editing solutions for competency, reliance, quality, and security.
Bring your product ideas to life with stunning 3D modeling! Showcase every detail with precision and realism. Elevate your brand with photorealistic product visuals- get a custom 3D model today!
The 10 Best Candle Product Photography Ideas
Looking to capture the perfect shot? Every shot that comes from a photographer’s lens is perfect. So, it is you who make the final perfect shot. But To take that shot, you need the styling and product photography ideas, right? We are on it, to assist you with some candle picture ideas ideas, and aid in your photography skills.
Idea 1: Simply Take Photos Flat-Lay
Flat-lay photography is suitable for any type of product. Before digging into the complexity, start taking shots with flat-lay shots. Put the candle on a complementary surface, and use some props like flowers, fabric, or stitching items to make the scene purposeful.
Idea 2: Use Your Hands to Show the Candle
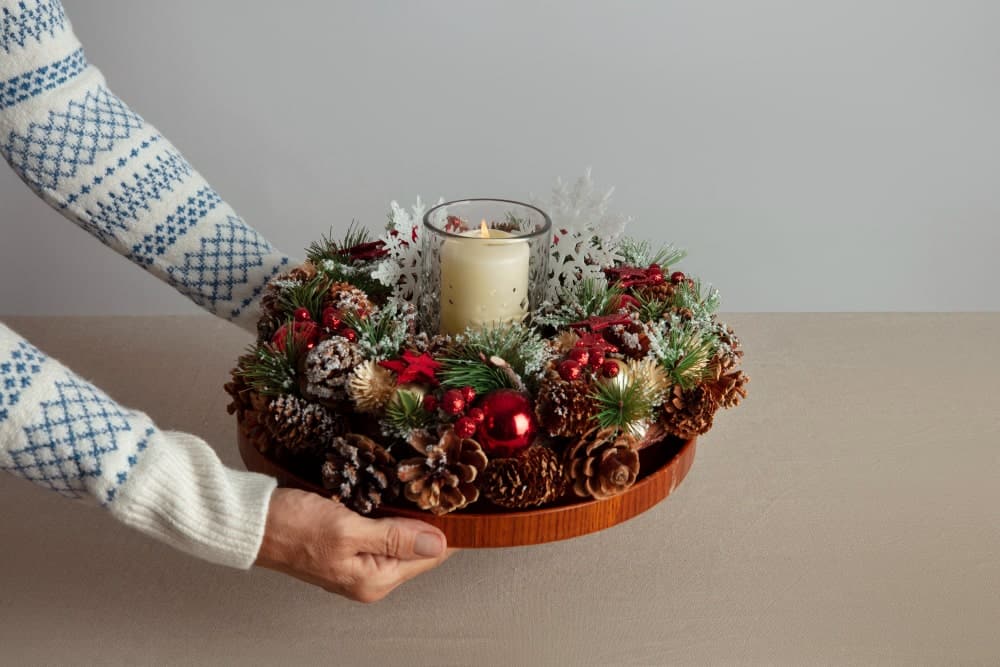
Want to take an enlivened candle picture? Use hands. There are different ways how you can use your hands to accentuate the candle. Ask a model to simply put the model on top of his/her palms, or hold tightly. Or the model can simply show the process of lighting the candle with a matchlight. This type of picture shows a sense of purpose the candle has.
Idea 3. A Fragment Image of Candle Light Dinner
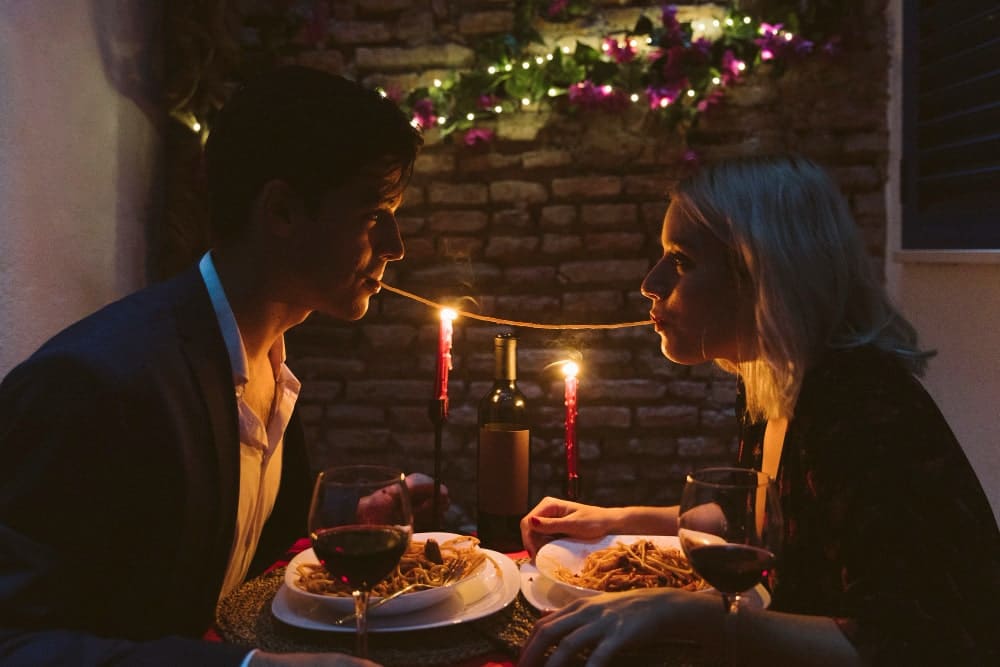
Who doesn’t want to have some family time after a hectic day? Or a personal moment with their loved ones? A candlelight dinner is the perfect moment. You can set a table, with some food, and place a few candles to create the perfect, cozy, and relaxing feeling by focusing on the candle.
Idea 4: Candle in the Window
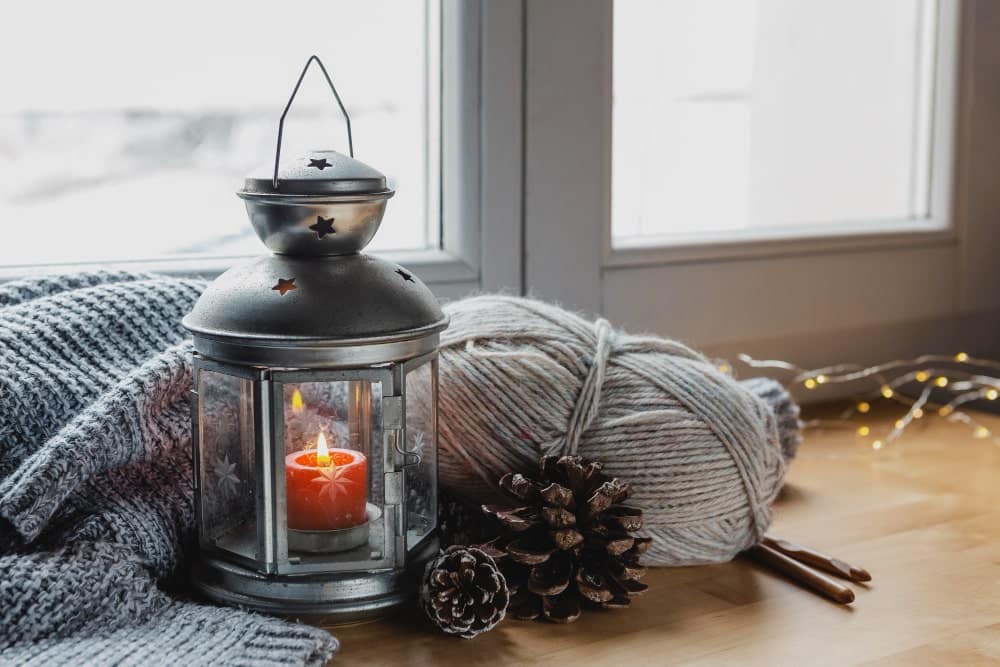
Place the candle in front of the snowy closed window along with a flower vase. You have created the perfect, simple homie and comfy scene. It also symbolizes cozy holiday or festival decorations. Either way, the setting is worth capturing a shot.
Idea 5: Use Books to Activate Coziness
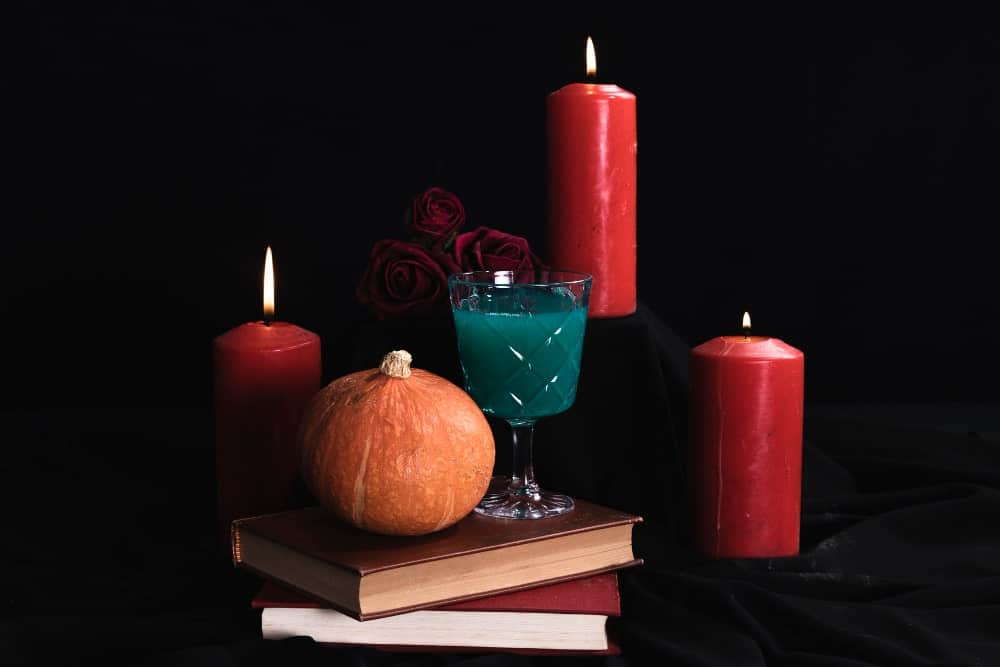
There are many props that you can use for candle product photography, but books suit the best for the scene. Use open books or place the candle on top of closed books. The scene with books and candles alone is enough to declare a positive, warm, and home atmosphere in the frame.
Idea 6: Candle on a White Background
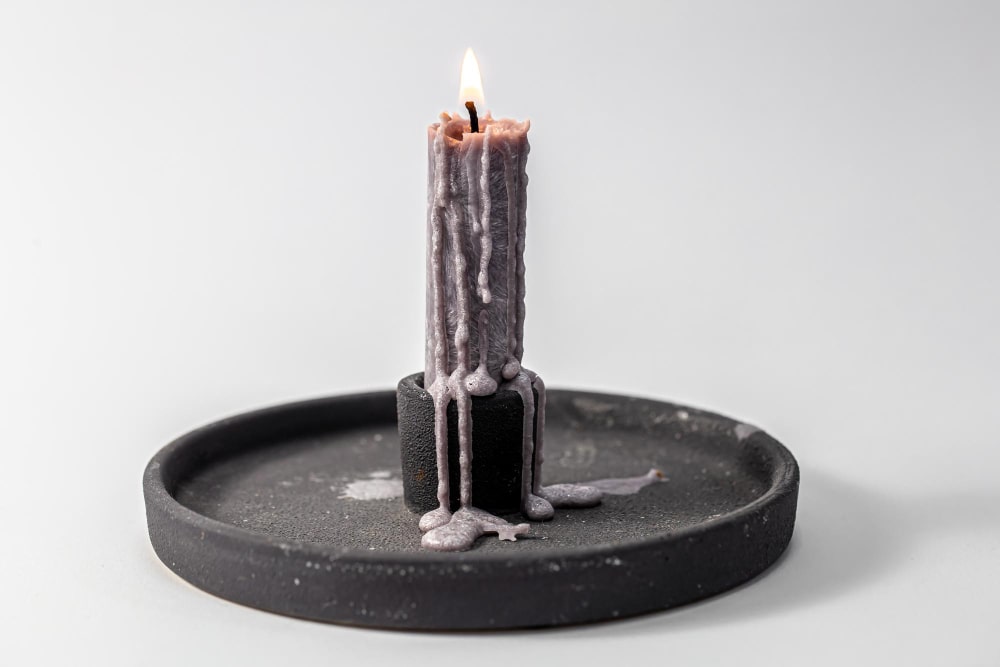
Candle blooms the best on a white background, have you noticed? It may seem the candle won’t be noticeable against a white background, but believe me, it does— quite astonishingly and magnanimously. It rather shows how delicate yet elegant the product is. You can create variation by putting it on different backgrounds such as silk or velvet background.
Idea 7: Create a Candle Light Trail
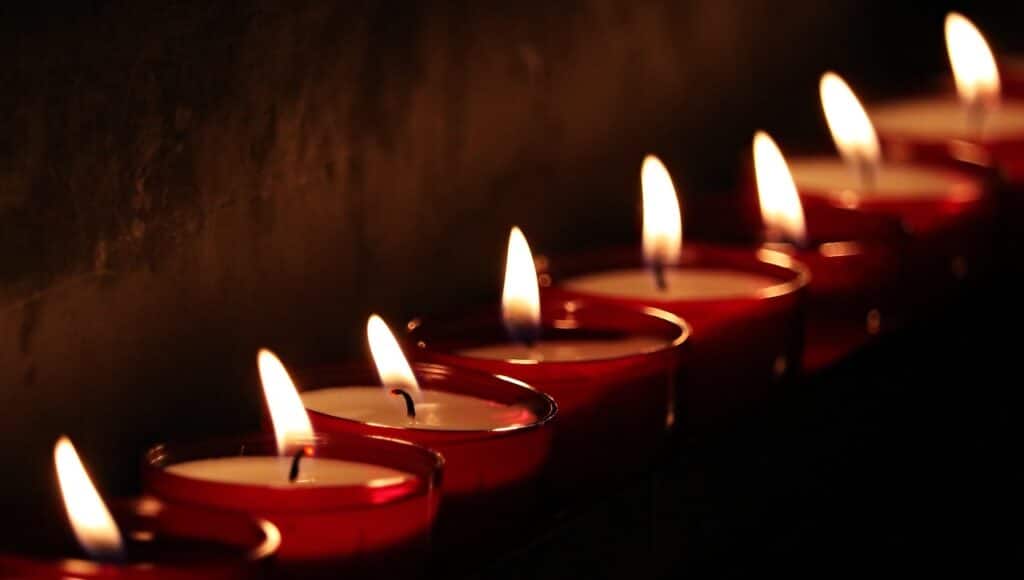
Okay, that’s an interesting way to take shots of candles. The most important setting here is to pick a spacious location, either indoor or outdoor, where you can show the trail well. For example, it can be the road, or several trees standing side by side, or just the simple floor. Place several candles, in parallel, in or zig-zag way, or the way you see fit. Then take a shot from a different angle.
Idea 8. Put Candle to Reflect
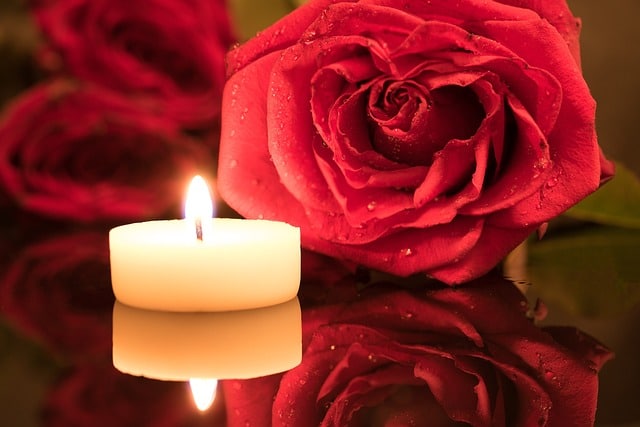
Place the candle on top of a mirror or on any reflective surface, that seems like an exact or blurry copy of the subject you are shooting. You can either take a full shot or cropped shot for this scene, just to capture the essence.
Idea 9. Take Shots of the Smoke
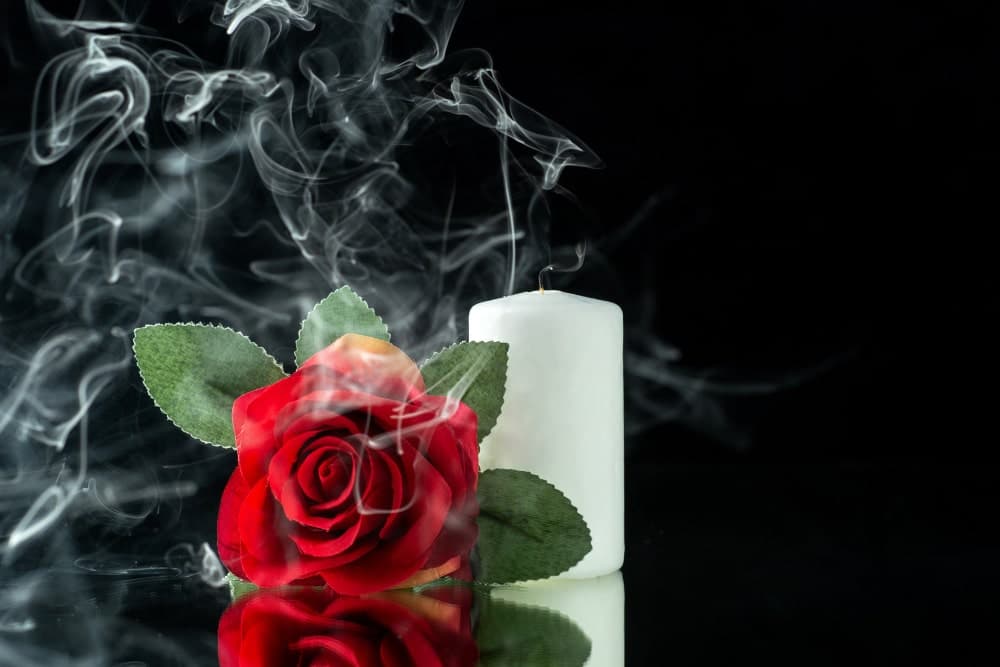
How about creating a mysterious scene with the candle? Put your camera in position and then put out the well-lit candle. Within a few seconds, you will see the smoke coming out of the candle thread. You can capture it as it is. Or if you put your candle creating a shadow behind, you can capture the smoke along with the shadow as well.
Idea 10. Try as Many Shots as You Can
Your ideas will thrive when you experiment more. On that note, you should take as many shots as you can and however you can, on different settings, backgrounds, colors, scenarios, styles, etc. For example
- Packshot photos: Take photos of the candle with its package, or the box, to show an elaborate scene.
- Bird’s eye view: Take your candle shot above.
- Bokeh effect: These types of shots attract attention. You can do that in the photography post-production area as well. Close-shots: You want the viewers to take note of certain sections or attributes of the candle, such as the element of the candle or the decoration.
- Lifestyle shots: Show real-life use of candles on different occasions, such as birthday parties, or Christmas.
- Dark background: Lit candles always thrive in the dark background, making the subject more apparent.
- Rustic: Show a rural vibe, and it suits well with candles.
FAQ’s Regarding Candle Product Photography
What equipment do I need for candle product photography?
To take candle product shots, you need a camera, lens, light, backdrops, and necessary props.
How can I achieve good lighting for candle product photography?
To achieve good lighting you need even rays around the candle. For that, you can take advantage of sunlight and bounce cards to even the light. Or you can always use 2-3 artificial lighting positioned in a way that enlightens the candle evenly.
What backgrounds work well for candle product photography?
Almost any type of background works well for candle products, you can use fabric, solid, wooden, or tiles even creased papers. Just avoid too much designed or distracted background.
What are some common mistakes to avoid in candle product photography?
Some common candle product photography includes: not paying heed to the lighting, setup mismatch, choosing a distracting background, blurry focus or out of focus, etc.
Should I use props in my candle product photos?
Yes, you can, but it’s not mandatory. Choosing relevant props points to the purpose of the candle. However, taking solo candle shots does a good job as well.
What post-processing techniques can I use to enhance my candle product photos?
You can adjust brightness, and colors, remove distractions and flows, sharpen the photos and minimize noise, etc to make the image attention-grabbing.
Final Thought
This article is about to end. I hope now you understand the gist of how you can prepare and the shared ideas will help you get the best shots you are looking for.
Photography is a skill that you master through practice and experiment. There are no bound rules this way you get the best shot. So, my recommendation is to play with your lens. You will come across the good shots in your own way. Good luck with your candle shots!
