
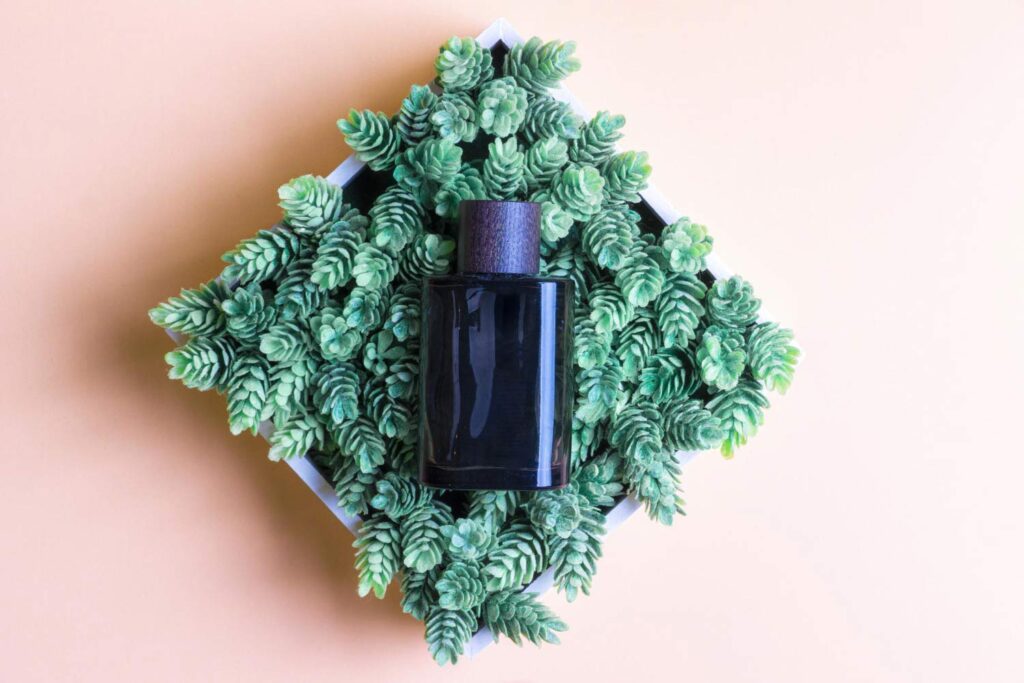
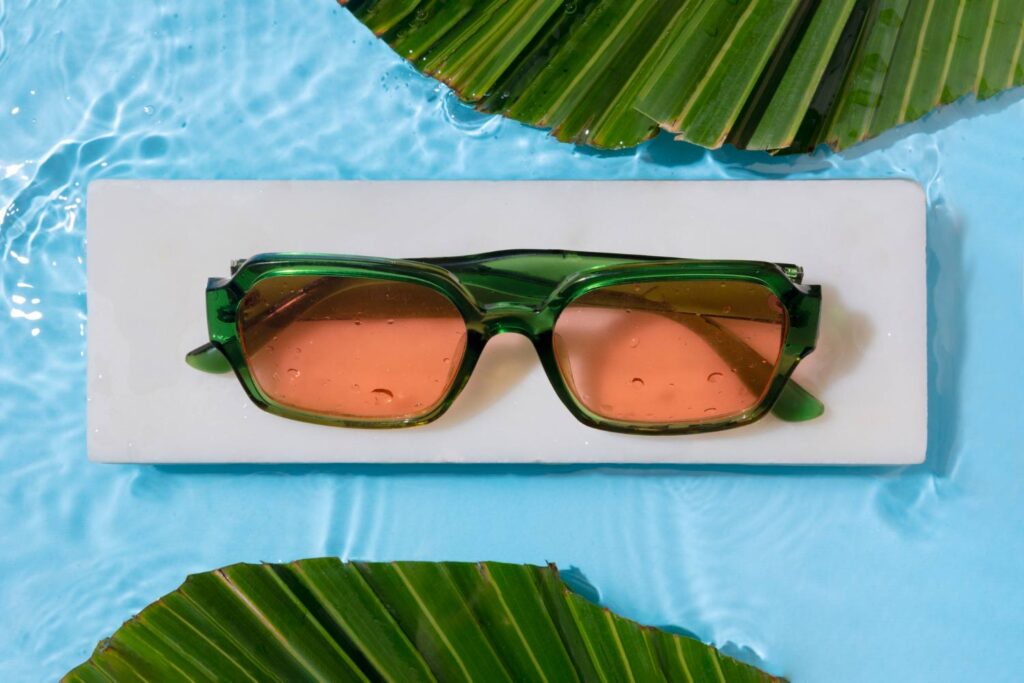
Top-down photography is a technique where subjects are captured from directly above on a flat surface. This photograph offers a clean and unique perspective on the subject.
Professional photographers use lightweight cameras for easy mounting to take top-down shots. A tripod or C-stand can hold a steady position for the equipment. Depending on the subject, camera setting, composition, product background, and lighting for top-down photographs vary. Top-down photography comes with certain challenges, which can be avoided by following tips and regular practicing.
The pricing for top-down photography varies in 4 ways- expense & profit calculation, effort-based calculation, following the competitors, and market penetration. Top-down photos provide clean, impactful, and engaging images for business.
What you’ll learn in this article
- 1 What is Top-Down Photography?
- 2 How is Top-Down Photography Different from Flat-Lay and Overhead Photography?
- 3 What are the Common Uses and Purposes of Top-Down Photography?
- 4 What Equipment is Essential for Top-Down Photography?
- 5 How to Shoot Top-Down Photography?
- 6 The 9 Best Top-Down Photography Ideas
- 6.1 Idea 1: Capture Reflection in the Top-Down Way
- 6.2 Idea 2: Show Process, Ingredients, or Related Items
- 6.3 Idea 3: Utilize the 60-30-10 Rule in Color
- 6.4 Idea 4: Pertinent Props to Propel a Visual Story
- 6.5 Idea 5: Add Lifestyle for Authenticity
- 6.6 Idea 6: Take Advantage of the Composition
- 6.7 Idea 7: Capture Shots That Comfort
- 6.8 Idea 8: Add a Creative Angle for the Subject
- 6.9 Idea 9: Display Less to Convey More
- 7 What are the Common Challenges of Top-Down Photography?
- 8 How Does a Photographer Calculate Top-Down Photography Charges?
- 9 What Industries Benefit Most from Top-Down Photography?
- 10 How Does Top-Down Photography Enhance the Presentation of E-commerce Products?
What is Top-Down Photography?
Top-down photography is a way to shoot a top-down view with a camera mounted at a 90-degree angle above, and the subject is placed on a flat surface. In the top-down photography, the position between the camera and the subject is perpendicular.
Top-down photography is often interchangeably called overhead photography, tabletop photography, bird’s eye view, and flat-lay photography. The Top-down shots or top shots display the subjects’ top surface, allowing viewers to have a bird’s eye view of the subject. Such photos are especially effective for products. The detailed features and benefits display of products increase viewers’ satisfaction. For this reason, e-commerce, fashion, food and beverage, advertisement, and real-estate agencies use top-down photography the most.
To capture a subject in a top-down way, a photographer follows 3 vital factors: the purpose of the shots, the camera angle, and the publishing platform.
- Purpose of the shot: Clients’ requirements on the photos: They may need a close and detailed view, overall shot, or lifestyle shot- which determines the types of shots.
- Camera angle: The camera is placed straight above the subject. However, photographers may change camera positions.
- Publishing platform: The image framing and composition will vary depending on the publishing platform. An e-commerce hero image will need a clutter-free white background, whereas a social media post will need a storytelling concept.
How is Top-Down Photography Different from Flat-Lay and Overhead Photography?
Top-down photography differs from flat lay and overhead photography by the nature of photoshoots. In top-down photography, taking shots from above is the priority. In the flat lay, organizing the subject and elements matters most to take the right shot. Meanwhile, overhead photography prioritizes how elements are shot in the frame. Other differences among top-down photography, flat lay photography, and overhead photography are as follows.
| Criteria | Top-Down Photography | Flat-Lay Photography | Overhead Photography |
|---|---|---|---|
| Definition | Top-down photography refers to photography’s way of taking shots from the top. | Flat-lay photography is the process of organizing the subject to take a shot. | Overhead photography refers to the wide way of shooting elements in the camera frame. |
| Categorization | Top-down photography is a vast term. | Flat-lay photography is a branch of top-down photography. | Overhead photography is also a branch of top-down photography. |
| Camera Frame Priority | Top-down mostly focuses on the camera angle. | Flat-lay photography focuses on the subject’s placement & composition. | Overhead photography focuses on the story in the frame. |
| Subject Placement | The subject stays at the bottom and may face any direction or straight to the camera. | The subject is laid on a flat surface to face the camera for a clear view of the camera frame. | Subjects come in all forms to fulfill the goal of developing a visual story. |
| Output | Top-down photos are conspicuous, and purposeful to look at. | Flat-lay shows clean and engaging photos. | Overhead shots deliver thoughtful and overview-like photos. |
What are the Common Uses and Purposes of Top-Down Photography?
Top-down photography’s common uses and purposes are to offer clarity, versatility, and consistent photos. Professional photographers, businesses, and brands use top-down photographs to establish familiarity and build a brand. The uses and purposes of top-down photos have extended to diverse sectors as follows.
Top-Down Product Photography
Top-down photos display products in organized and pristine condition. Daily soap, apparel, wristwatches, shoes, and many similar products are shot in top-down photography. Professional product photographers, e-commerce sellers, and online store owners use top-down for the following reasons.
- Product advertising across social media, Google, e-commerce websites, etc.
- E-commerce product listing for comprehensive product view.
- Social media marketing to increase product engagement.
- Brand-uniformity building with consistent product catalogs.
- Assisting blog writing, how-to guides, DIY, tutorials with top-down photos.
Top-Down Food Photography
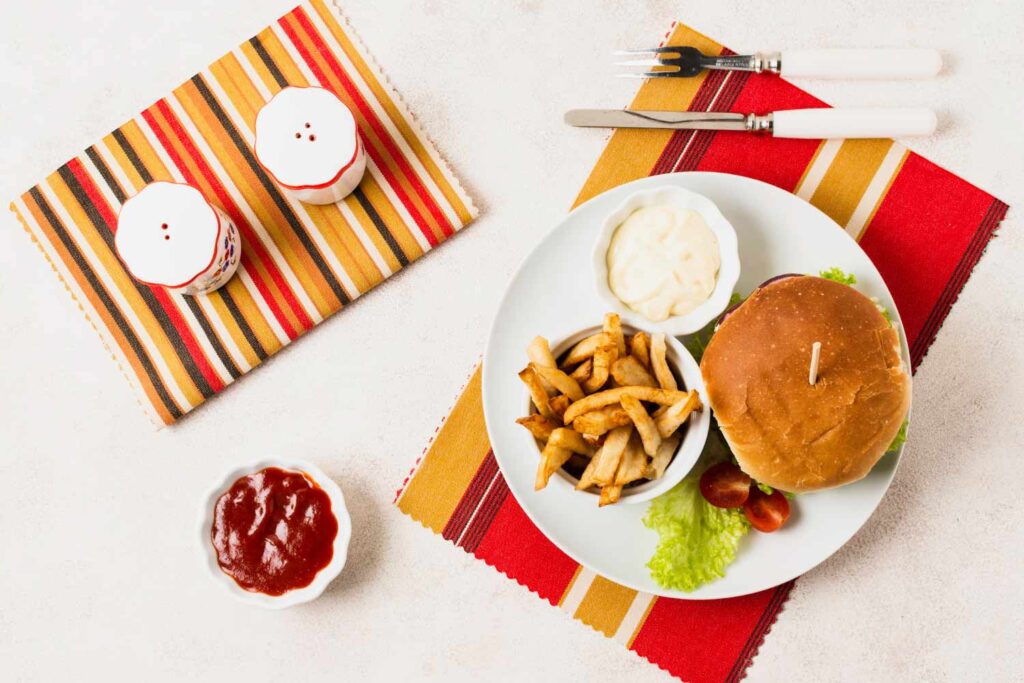
Top-down food photography refers to taking shots of food items in a top-down style. Top-down photo photos show ingredients, food plating, and table settings. It enhances viewers’ appetite. Food photographers, food manufacturers, cooks, and restaurant owners use top-down food photography for many purposes as follows.
- Display dining experience through recipes, menus, cookbooks, food blogs, etc.
- Exhibiting culinary skills along with compositional presentation and precision.
- Marketing restaurants, and websites to showcase signature dishes, and promotional & seasonal offers.
- Stand out of the competition by engaging the target audiences with the food-making process.
Top-Down Lifestyle Photography
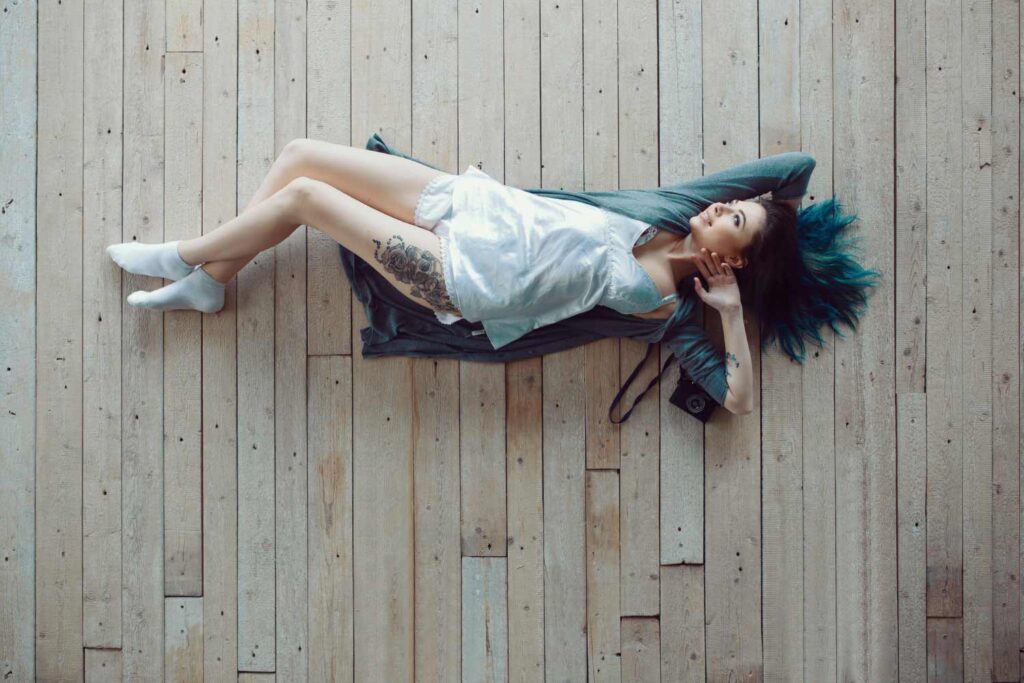
Top-down lifestyle photography aims to create an artistic and creative scene by displaying products/services in real-life settings. In lifestyle top-down photos, photographers use different props and perceptions to develop a story. Such photos help a brand connect emotionally with the target audience. The purpose of top-down lifestyle photography is as follows.
- Displaying use cases, how it feels, how to use, how it looks etc.
- Lifestyle branding to familiarize items, features, and functionalities.
- Enhance visualization so customers can decide faster to buy.
- Launching campaigns to show items faster in relevant search results.
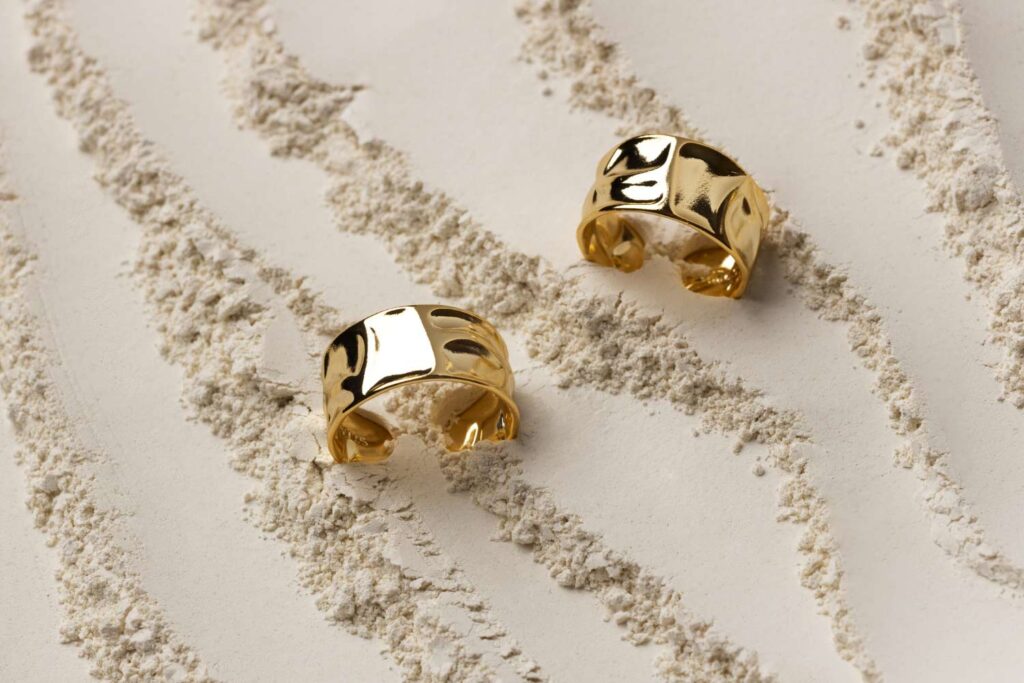
Top-Down Still Life Photography

Top-down still life photography is the overhead shots that capture inanimate objects. The top-down still photos focus on design, pattern, and relationship among elements. Combining negative space and minimal composition allows the scene’s development in still-life photography. The purposes and uses of still life top-down photography include the following.
- Creates aspirational lifestyle scenes for small products such as books, stationary items, etc.
- Developing context around the products by complementing with others.
- Showing behind-the-scenes process to meet viewers’ curiosity.
- Creating engagement, and driving traffic to business websites.
Top-Down Photography for Tech and Gadgets

Top-down tech and gadget photography aids viewers to find required products. Technical products and gadgets- smartphones, computers, laptops, cameras, and earbuds are essential to daily life. Design, specifications, colors, and functionalities all matter to the users. The tech industry uses top-down photos for its products to fulfill the following purposes.
- Optimal product presentation with guidelines.
- Demonstrating tech setups, workspace arrangement, configuration, and ergonomic layouts.
- Informing about accessory compatibility and size comparison.
- Building trust by highlighting product details and accurate visual representation.
What Equipment is Essential for Top-Down Photography?
The camera is the essential equipment for top-down photography. Camera angle, type of shots, and composition—determine the camera perspective. A well-prepared and organized setup aids in creating good photographs. Other essential equipment includes a camera lens, tripod, lighting, and background to make the well-organized top-down photography setup.
Camera
Cameras that are best for top-down photography are lightweight, portable, and versatile to use. That’s why mirrorless cameras are the best choice for top-down photography. Mirrorless cameras are slim, lightweight, and easy to operate- the ideal choice for top-down photoshoots.
Professional photographers have different opinions about the camera’s weight, saying it’s an advantage for stability. Occasionally, the camera needs to be handheld, carry outside shots, and shoot at any angle. So, DSLR cameras serve as an alternative camera option for top-down photography. DSLR cameras capture high-quality images in detail.
The 5 best mirrorless and DSLR cameras for top-down photography are Fujifilm X-T2 Mirrorless Digital, Camera F2.8-4.0 Lens, Canon EOS R5, Fujifilm X-T5, Nikon D850, and Canon EOS 90D.
- Fujifilm X-T2 Mirrorless Digital Camera F2.8-4.0 Lens: Mirrorless camera, high-quality image with APSC sensor. It has a tilting LCD screen, adjustable in any orientation.
- Canon EOS R5: Mirrorless camera, high-resolution photos with a full-frame sensor. Best for shooting intricating details.
- Fujifilm X-T5: Mirroless camera. Ideal for shooting subjects in detail and with sharp focus. This camera has an intelligent autofocus system.
- Nikon D850: DSLR camera. High-resolution full-frame sensors ensure outstanding clarity of images. The camera has robust weather sealing, suitable for shooting in any weather.
- Canon EOS 90D: DSLR camera. It offers an interchangeable lens, a sturdy build, and is easy to handle. Photographers have control over the aperture and shutter speed for accurate depth of field.
What are the Best Cameras for Top-Down Product Photography?
The 4 best cameras for top-down product photography are as follows.
- Panasonic Lumix FZ80 4K Digital Camera: Allows shooting high-resolution and intricating details.
- Nikon D750 FX-Format Digital SLR Camera: Offers excellent dynamic range images and higher image quality.
- Canon EOS Rebel T6 Digital SLR Camera: Best for sharp, clear, and professional-looking product images.
- Sony Alpha a6000 Mirrorless Digital Camera: Captures accurate and vibrant colors of product with details.
Note: The best camera settings for top-down product photography are f/11, 1-125, and ISO 400.
What are the Best Cameras for Top-Down Food Photography?
The 5 best cameras for top-down food photography are as follows.
- Sony α7R IV: Best for capturing details of food photos.
- Canon EOS 5D Mark IV: Delivers sharp and detailed images and video.
- Panasonic Lumix S1R: Ideal for capturing fine details of food.
- Fujifilm X-T30: Best for shooting different types of shots.
- Nikon Z7 II: Offers high-megapixel count for detailed images.
Note: The best camera settings for top-down food photography are f/2.8, 1/60, and ISO 100.
What are the Best Cameras for Top-Down Lifestyle Photography?
The 5 best cameras for top-down lifestyle photography are as follows.
- Canon EOS R6/R6 Mark II: Captures stunning shots even in low light.
- Nikon Z6 II/Z6 III: Ideal for candid lifestyle shots.
- Fujifilm X100V: Suited for capturing spontaneous lifestyle images.
- Sony a6000 series: Offers high-quality images with low noise.
- Canon EOS 5D Mark IV: Captures highly detailed images.
Note: The best camera settings for top-down lifestyle photography are f/2.8, 1/1000, and ISO 200.
What are the Best Cameras for Top-Down Still Life Photography?
The 4 best cameras for still-life photography are as follows.
- Fujifilm GFX 100S II: Best for high-resolution and wide-dynamic range pictures.
- Nikon Z7 II: Captures image with excellent details.
- Sony α7R IV: Offers real-time tracking feature to subject movement.
- Fujifilm X-T5: Produces shots with excellent colors and tonality.
What are the Best Cameras for Top-Down Photography for Tech and Gadgets?
The 4 cameras most suited to take technology equipment and gadget shots are noted below.
- Sony α7R IV: Captures incredible detail of tech products.
- Canon EOS R7: Best for shooting subjects from different angles.
- Nikon Z7 II: Best for offering images with dynamic range.
- Olympus OM-D E-M1 Mark III: Offers versatile shooting due to robust build.
Note: The best camera settings for top-down photography for tech and gadgets are f/11, 1-125, and ISO 400.
Camera Lens
To capture high-quality top-down images, choosing the right camera lens is essential. To choose the right camera lens, make sure to consider the following factors.
Focal Length
Focal length refers to the distance from a camera lens’ point of convergence to the camera’s image sensor. Focal length is measured in millimeters. The lens’ focal length impacts the field of view, perspective, and magnification.
The Exposure Triangle
Aperture, ISO, and Shutterspeed are called the exposure triangle. They are interconnected, so changing settings for one will require adjusting the others to capture the right frame.
- Aperture: Aperture is the opening of a camera lens to let light pass through and enter the camera. Aperture is measured in f-stop number. A small f-stop indicates a wide opening, allowing more light to pass. A large f-stop indicates a narrow opening, permitting less light to pass. Aperture impacts on brightness and depth of field for an image. The best aperture for top-down photography is a narrow aperture (higher f-stop) for depth of field.
- ISO: ISO is a lens setting that illuminates or darkens an image. A lower ISO sensor results in a clean image with minimum noise. A higher ISO means a bright and grainy image, but effective to shoot in low-light situations. The best ISO setting for top-down photography is around 100-200.
- Shutter speed: Shutter speed refers to the time frame of a camera’s shutter staying open. It is measured in a fraction of a second. A fast shutter speed opens and closes quickly, whereas a slower shutter speed keeps the shutter open longer. A faster shutter speed is used for taking shots of moving subjects. For top-down photography, the best shutter speed is 1/60.
Lens Type
The best lens for top-down photography is the one that offers a close-to-human-eye perspective. The 4 most used camera lenses for top-down photography are prime lens, macro lens, wide-angle lens, and zoom Lens.
- Prime lens: A prime lens has a fixed focal length.
- Macro lens: Macro lens captures the subject up close.
- Wide-angle lens: Wide lenses have short focal lengths to capture a wide field of view.
- Zoom Lens: Zoom lenses have different focal lengths to change the magnification as needed for the photography.
Lens Portability
For easy managing and handling, a portable and lightweight camera lens is preferable to shooting top-down photography.
Which Camera Lens Should You Choose for Top-Down Product Photography?
The best camera lenses for top-down product photography are as follows.
- 50mm Prime lens: Gives a perspective similar to a human.
- 24-77mm zoom lens: Offers a wide range of focal lengths.
- Macro lens: Offers close shots of products.
Want to find the best Nikon Camera Lens for product photography? Check This Out!
Which Camera Lens Should You Choose for Top-Down Food Photography?
The most recommended camera lenses to shoot top-down food photography are as follows.
- 85mm prime lens: Offers versatility for close and wide shots.
- Macro lens: Captures details of the subject in focus.
Which Camera Lens Should You Choose for Top-Down Lifestyle and Still Life Photography?
Choose a 35mm prime lens or a 24-70mm zoom lens to shoot top-down lifestyle photography.
- The 35mm lens gives wide space to capture.
- The zoom lens offers different focal lengths for flexible shooting.
Which Camera Lens Should You Choose for Top-Down Photography for Tech and Gadgets?
To shoot top-down photography of tech and gadget products, use a 50mm prime lens, 24-77mm zoom lens, and macro lens.
- 50mm prime lens offers genuine and undistorted perspective.
- 24-77mm zoom lens offers flexibility in shooting by adjusting the frame.
- A macro lens is best for showing quality images with craftsmanship.
Tripod
A tripod is a powerful piece of equipment for top-down photography to maintain stable mounting of the camera. When choosing a tripod for top-down photography, consider its sturdy build for stable standing, adjustable central columns, and angle control without distortion.
What are the Best Tripods for Top-Down Photography?
The 4 best tripods for top-down photography are as follows.
- Vanguard Alta Pro 263AT Aluminum Tripod Legs: 360° rotatable and adjustable up to 180°.
- Manfrotto MT190XPRO4: Offers horizontal mounting without the column dissembling.
- Sirui W-1004K10 Tripod Kit River Runner: Offers stable setup for uneven surfaces.
- Vanguard Alta Pro 2+: Provides precise positioning and extra stability.
Lighting
Sunlight is the greatest source of consistent light for top-down photography. Take shots during golden hour (after sunrise and before sunset) for soft and artistic light effects in your top shot photos. However, the timing for natural soft light is limited. The soft light appears for a certain period, and sunlight isn’t available at night.
Natura Light
Sunlight is the greatest source of consistent light for top-down photography. Take shots during golden hour (after sunrise and before sunset) for soft and artistic light effects in your top shot photos. However, the timing for natural soft light is limited. The soft light appears for a certain period and sunlight isn’t available at night.
Note: Refrain from shooting under harsh sunlight, during midday.
Artificial Light
Artificial lighting is an alternative source of light. Due to ease of use, portability, and availability, artificial lights are heavily used in commercial photography. The 6 best artificial lights used in top-down product photography are as follows.
- Flat light: Flat light that is placed directly above the subject to light the upper surface.
- Soft light: Soft light is dim and less intense than flat light.
- Hard light: Hard light offers harsh light and often requires a diffuser to balance the light.
- LED light: Energy-efficient light with adjustable color temperature.
- Tungsten lights: Generates warm and yellowish light continuously.
- HMI (Hydrargyrum Medium-arc Iodide) lights: Offers bright light, best for large-scale top-down product photography setup.
Note: For a well-lit lighting environment, combine natural and artificial light in your photography setup.
Harsh light isn’t suitable for commercial product photography. However, diffusion can be achieved artificially. To even out the light use the following equipment in your top-down product photography.
- Softbox: Used for spreading the lights.
- Reflectors/Diffusers: Placed to reflect lights to prevent dark or shadow areas.
- Bounce cards: Bounce lights toward less-lit areas.
- Photography umbrellas: Reflects light off a curved surface.
- Diffusion gels: Color and translucent sheets are used to cover lights and soften the harsh light.
What Type of Light Setup is Best for Top-Down Product Photography?
The best light setup for top-down product photography is a 2-light setup. A key light stays on top of the product, illuminating the product. Another fill light balances the light in darker and dark areas.
What Type of Light is Best for Top-Down Food Photography?
One-light setup is best for top-down food photography. Keeping the main light alongside the camera so the focus and light solely falls on the food. Later, you can edit out the darker parts by using photo editing software.
What Type of Light is Best for Top-Down Lifestyle Photography?
The three-point light setup is best for shooting lifestyle photography. The key light is in a straight top position. The other 2 fill lights are positioned to complement each other so the whole setup has no visible dark area.
What Type of Light is Best for Top-Down Still Life Photography?
A two-light setup is best suited for top-down still-life photography. The key light stays aligned with the camera, and a side light is positioned at a 45-degree angle to smooth out the light.
What Type of Light is Best for Top-Down Tech and Gadgets Product Photography?
A two-light and a three-light setup are best for top-down photography of tech and gadget products. Such light setup helps tech and gadget products display features and functionality.
Background
Analyze the subject and understand the purpose for deciding the background for top-down photos. The backdrop/ background should highlight the subject. The most common top-down photography backdrops are canvas, vinyl, muslin, paper, chromakey, tiles, foam, collapsible backdrop, and fabric, available online. Visually compare background color that highlights the subject for top-down photography.
The main difference between a backdrop and a background is their nature and purpose. A backdrop is a type of background that is made of artificial material and is purchasable. A background is a natural or artificial scene that stays behind a photography subject.
What is the Best Background for Top-Down Product Photography?
The best background for top-down product photography is white, off-white, gray, and black. E-commerce products follow shooting on the white background. Other than that, you can use wood, marble, or tile background.
What is the Best Background for Top-Down Food Photography?
The best background for top-down food photography is cloth, natural wood, dark background, and texture background. You can also use DIY backgrounds such as painted fabric, board, etc.
What is the Best Background for Top-Down Lifestyle & Still Life Photography?
The best background for top-down lifestyle photography is to use a natural background. Depending on the model, storytelling, and photography theme the background can be an existing environment or paper, clothing, board, etc.
What is the Best Background for Top-Down Photography for Tech and Gadgets?
The best background for shooting top-down photography for tech and gadget products is a neutral color, glass acrylic, or natural background.
Accessories
A top-down photography setup needs many other accessories to complete the visual story. Some necessary accessories include the following ones.
- Remote shutter release
- Tethering cable
- Clamps & clips
- Styling objects &
- Relevant props
How to Shoot Top-Down Photography?
To shoot top-down photography, have a thorough plan on where to shoot, what equipment to use, what type of shot you need, and types of photo editing. Once you have organized your thoughts and equipment, follow the step-by-step guide to shoot your subject as mentioned below.
Step 1: Plan Your Setup for Top-Down Photography
Planning for top-down photography starts with the subject. It includes shooting indoors or outdoors, the type of gear and equipment, types of shots, clients’ requirements, and the post-production photography section. A professional photographer visualizes the whole process before the photo session starts.
Step 2: Decide Location
Shooting indoors or outdoors depends on what clients ask for. Indoor and studio photography is used for professional shots. An indoor top-down photography setting offers control, & privacy. It is also easy to make any changes during indoor photoshoots. Outdoor shots make the subject relatable to the viewers. Apart from the weather concerns and lighting inconsistencies, outdoor shooting offers creative freedom to the photos.
Step 3: Prepare the Setup
You have all the necessary equipment in your hands. It’s time to position them right.
Product
Clean the item thoroughly. Use hand gloves to prevent fingerprints. Make sure to shoot products in pristine condition.
- Make a solution of water with dirt removing detergent. Soak a piece of microfiber clothing and use it to remove marks or other dirt.
- Use cotton swabs, and a soft brush to remove dust and loose specks.
- For hard stains or marks, apply a magic eraser. Gently remove the marks or dirt so as not to harm the items.
- Use a clothing steamer to remove creases from apparel products.
Background
Choose a neutral or solid color background. The background should highlight the subject. Place it on a table or the floor. Now keep the subject on top of the background.

Placement of Equipment
Place the subject on a flat surface. Mount the camera directly above it with a tripod for a steady position. For natural lighting sources, use reflectors and bounce cards to balance the light across the setup. While settling the artificial light, choose a similar position to the camera. Stable lighting makes the top surface well-lit and you can avoid tremors with a remote shutter. Look through the camera frame for any dark or dark parts. Place a fill light there or use a bounce card/reflector to even out the light all over the subject. Also, adjust the height of the subject so that it aligns well with the frame.
Setup
Make a creative setup for your photography style. Minimalist setup is a trending top-down photograph setup. You can try any theme-based setup, abstract setup, or lifestyle setup for your subject.
Step 4: Shoot the Subject from Different Angles
Place the subject on top of the flat background and start shooting. Take photos from different angles. Understand each element’s position, framing, and lighting condition. Take primary, alternative, and complementary shots to capture the subject in focus.
Focus on the Camera Angle
The camera is stationed in a 90-degree perpendicular position in top-down, flatlay, table-top, or overhead photography. This position gives a bird’s eye view of the subject.
Tip: Use a remote shutter or timer to avoid camera shake.
Apply all Relevant Photography Shots
Different types of photography shots serve various purposes for professionals and brands. That’s why shooting the subject at the right moment and from the right angle is important. The most used 11 top-down photography shots are as follows.
- Straight shot: Positioning directly above the subject.
- Slightly angled shot: Place the camera from its straight to a slightly angular position.
- Macro/Close shot: Captures details or any specific part of the subject.
- Storytelling shot: Arranging multiple elements in the frame to design a concept.
- Orientation-based shot: Consider square, rectangular, portrait, or landscape photo orientation based on your storytelling needs.
- Group shot: Collecting products under one theme to deliver the brand’s message.
- Packshot photos: Take shots of items with their packaging.
- Lifestyle shot: Using real-life scenes and human models to reinforce the necessity of the subject.
- Detail shot: Highlighting a specific item’s feature, benefits, or brand information details.
- Long/Wide shot: Capturing shot in a large environment.
- Bird’s-Eye View: Bird’s eye view is to take a shot from a high angle. It is mostly used for shooting real estate, and property.
Apply Different Composition Techniques
Composition techniques for top-down refer to that composition that emphasizes the subject in the frame. Well-composition pictures give aesthetic appeal and attract viewers. Common composition techniques for top-down photography include the following ones.
- Centered composition: Centered composition is the technique of placing the subject in an exact middle position. Taking shots of the subject in the center position helps you maintain a structured look.
- Symmetry: Symmetry is the photography composition of balancing the element’s equality on both sides of a photo. By placing identical items in a mirror opposite, you can create a harmonious and aesthetic look.
- Rule of thirds: The rule of thirds is dividing the frame into 3*3 and placing the subject suitably on the lines or the intersection points. By applying this composition technique, you can create dynamic and creative techniques.
- Negative space: Negative space is the unused space in the frame. It is an intentional element organizing technique for leaving clear space around in the frame. So, it creates a minimalist view and the viewers have room for thought.
- Leading lines: Leading lines are the natural lines/paths to guide viewers’ eyes. By arranging elements inside the frame, you can retain viewers’ attention and develop the visual story.
Note: Use the tethered technique for real-time preview.
Step 5: Review the Shots and Adjust
Adjust the camera angle. The camera angle should be at a 90-degree angle above the subject. Consider taking shots of eye level. It will make the subject appear natural. Change the angle if necessary to bring out a dramatic look. Evaluate the overall composition of the frame. Use props to develop an aesthetic concept. Note the elements’ alignment so the subject visual isn’t disrupted. Assign human models to shoot the subject. Choose models who resemble the target audience so that they can naturally interact with the subject and display necessity.
Step 6: Edit Your Raw Photos
Edit your raw photos before handing them over. Professional photography editing software is Adobe Photoshop, Adobe Lightroom, GIMP, CorelDRAW, ACDSEE, etc. Editing raw footage includes cropping, straightening, adjusting brightness and exposure, and removing flaws in down product shots by quality and resolutions. High-quality images boost business traffic and conversion.
The 9 Best Top-Down Photography Ideas
Top-down photography encompasses every idea of shooting photos from the top. The subject can be close to the camera or far from it. Placing on any flat surface, you can make your top shots aesthetic by applying creative techniques. 9 creative top-down photography ideas are as follows.
Idea 1: Capture Reflection in the Top-Down Way
Add a twist to your top-down photos. Put a mirror instead of the subject on a flat surface. Now hang the subject on top of the mirror. Or allow a human model to make a natural reflection. You will achieve a different angle and perspective.
Idea 2: Show Process, Ingredients, or Related Items
Involve viewers with the photo concept. Include elements, ingredients, or items that show a way, method, journey, or finished version. Such photos create viewers’ minds with anticipation and fulfillment of what to expect.
Idea 3: Utilize the 60-30-10 Rule in Color
Make full use of colors in the top-down photography. Use the dominant color 60% to set the right ambiance, the secondary color 30% to add depth, and the rest accent color to draw attention to the vital parts.
Idea 4: Pertinent Props to Propel a Visual Story

Props develop visual story. Use appropriate props and elements that match your top-down photo concept. Organize the props to craft a convincing story for people. You can be creative, and use any items that aid the story development.
Idea 5: Add Lifestyle for Authenticity
Demonstrating real-life examples is the greatest inspiration. Use any scenery that happens in life. Using real-life settings, people’s interactions & facial expressions—every factor contributes to creating lifestyle top-down photos. As a result, you create top-down photos people relate to.
Idea 6: Take Advantage of the Composition
Photography composition is bountiful. With every composition trial, you will find a new perspective. Explore whatever you have around, and create photography composition for your top-down photographs.
Idea 7: Capture Shots That Comfort

Take photographs of the subject that give off a soothing feeling, for example, a comforting journey, a hassle-free booking system, or a Venetian cuisine. Realtors, property dealers, real estate agents, and hospitality sectors benefit from top-down shots the most.
Idea 8: Add a Creative Angle for the Subject
The camera position is generally directly above the subject. Use creative perception for your subject. You can hang the subject with a thread, and shoot the subject in angular point, close shot, and distant shot to have a clear and purposeful image.
Idea 9: Display Less to Convey More
Brainstorm for any ideas that seem interesting. It’s not always revealing that captures viewers’ attention. Sometimes, you can show less to reveal more. Take advantage of cropping your images. Intentionally omit some parts in the frame. Let viewers assume what you intend for.
What are the Common Challenges of Top-Down Photography?
There are 7 common challenges of top-down photography: inconsistent lighting, use of props, camera angle, lack of alignment, background, and raw file editing. Overcoming photography challenges requires frequent practice and tips to follow.
1. Inconsistent Lighting
Uneven light, challenging weather, shadows, and glare—cause overexposure and underexposure issues in photos. Photos are too white or dark portion, which harms the actual purpose. Also, photos may face inconsistent color costs, harsh shadows, and loss of data in the images.
Solution: Shoot during warm light if you are using sunlight. For artificial lighting, adjust it during the photoshoot. Use a bounce card or reflector card to balance out the illumination. Edit your raw photos to adjust the exposure and white balance.
2. Use of Props
Assessing the right props for top-down photography is challenging. Overcrowding the frame would create confusion among viewers. Props can be distracting if they are too big, bright, or many.
Solution: Prepare your photo session based on a theme. In this way, you will easily find the relevant props. Instead of using all the props, capture the most relevant ones for the frame.
3. Maintaining Camera Angle
Positioning the camera exactly at 90 degrees above is challenging. In top-down images, precise composition is a necessity. A slight change of angle can drastically affect the image’s look.
Solution: Adjust the camera angle as you see fit. Professional photographers use til-shift lenses to achieve the perfect angles. Also, use tripods with geared heads. Such tripods have tilt controls for pan and rotation, allowing users flexibility.
4. Balancing Space in the Frame
Sometimes, the props around the subject take up too much space. It causes distraction. Asymmetry between positive space and negative space causes visual imbalance.
Solution: Limit the number of props while shooting. Use compositional technique for well arrangement of elements in the frame. During the photo editing session, eliminate any objects that take away viewers’ attention from the subject.
5. Images Lacking Alignment
Maintaining exact alignment is challenging during handheld photoshoots. Tremor causes blur, shaky images, misaligned horizontally & vertically, and out-of-focus images.
Solution: Use a tripod for camera stability. Also, take advantage of the Image Stabilization function of the camera to compensate for camera shakes in photos.
6. Selecting Background
The subject focus depends largely on the background of the photography. Excess design, pattern, and vibrant background divert viewers’ attention. E-commerce platforms have a specific background requirement.
Solution: Stick to a simple and neutral color background to accentuate the subject. Also, place the chroma key as the background for your subject. So you can omit the background and replace it with a desired one during the photo post-production segment.
7. Raw Files Need a Finishing Touch
Raw photos may come with minor issues, such as color imbalance, distracting elements, shake and blur, etc. Reshooting is a costly process.
Solution: Edit your raw photos to make them professional, high-quality, and high-resolution.
How Does a Photographer Calculate Top-Down Photography Charges?
Photographers calculate top-down photography charges in 4 different ways.
- Expense and profit-based calculation
- Effort-based cost calculation
- Following the competitors
- Market penetration
To make the right price to charge, photographers consider location, their experience and expertise, niche, types of shots, equipment, and profit margin.
1. Expense and Profit-Based Calculation
Most photographers price their photography charges based on this formula: total cost+profit=total revenue. Cost includes studio rent, equipment price, premium software, location, and operational cost. Profit covers the photographer’s livelihood and different essentials.
2. Effort-Based Cost Calculation
Photographers invest their skills, time, and effort into a client’s project and calculate the pricing on different structures as follows.
- Per hour: Photographers apply charges in a fixed amount.
- Per image: Photographers either charge per image or a fixed number of images on a certain amount.
- Per session: A flat price rate for a session is offered.
- Per day: Photographers offer a fixed price per day.
- Value-based: Determined based on the perceived value of the client’s project.
3. Following the Competitors
Photographers in the same area and same niche have pricing ranges. After calculating personal investment expenses, photographers take note of the competitors to adjust their prices.
4. Market Penetration
The market penetrating price is a lower rate than the competitors’ price to enter the market and attract the clients. It is a beginner photographer’s strategy to start a photography business.
What Industries Benefit Most from Top-Down Photography?
The e-commerce industry, fashion industry, food industry, advertisement agency, and real estate agency benefit most from top-down photography. Top-down photos display subjects in a wider view and provide a clean look. As a result, viewers feel convinced and take the next step.
E-commerce Industry
The e-commerce industry benefits from top-shot photos. Top-down photography offers a comprehensive and clear view of products. Home, office, professional platforms personal space- every product can be shot in this way. So, viewers, get a detailed view of the item and evaluate it.
Want to know the best way to shoot product photography? Check out this photography guide!
Fashion Industry
Top-down photography displays fashion products and effectively captures the product’s essence. Apparel products, cosmetics, shoes, jewelry, and fashion accessories are shown in pristine condition, a lifestyle way that connects fashionistas. Also, top-down photos are used in social media, online stores, and lookbooks to capture viewers’ attention.
Food and Beverage Industry
Top-down photos make dishes and drinks look delicious. It captures food, and beverage items highlighting the presentation, and color evoking foodie instinct. Top-down food photography is a must-choice for food brands for social media marketing.
Advertisement Agencies
Advertisement agencies use top-down shots to promote and marketize the client’s offering. From daily life to unique experiences- marketing marketing agencies create relatable scenes with top-down photography. Thus, they connect to the target audience’s interest.
Real Estate and Architecture
Top-down photography is used in real estate, interior design, and architecture. Top-down property shots give viewers a proper look at the floor plan, room layout, design, & surroundings to make purchasing decisions.
- Other industries that benefit from top-down photography include the following.
- The automotive industry mostly relies on top-down photos to showcase car design, color, layout, and roof features to attract prospective buyers.
- The tech industry uses top-down photography to display features and highlight the benefits of smartphones, electronic gadgets, laptops, etc.
- Artists, painters, handmade items, and crafters use top-down photos to preserve their creation details.
- Entrepreneurs widely use top-down photos to display DIY products.
- Event planners and event photographers use top-down photography to display preparation and arrangement scenarios for future reference.
How Does Top-Down Photography Enhance the Presentation of E-commerce Products?
Top-down photography enhances the presentation of e-commerce products by delivering clear and detailed images. Professional photographers create a unique perspective for products taken on an organized layout. Then they collaborate with professional product photo editing platforms to make adjustments and ensure high-quality top-down photos as follows.
- Remove flaws and distractions from the product image.
- Balance color & light to put the subject in focus.
- Maintain product’s texture, and design for a real-life look.
- Highlight product features and advantages to prospective buyers.
- Retain the brand’s authenticity & trustworthiness by posting uniform product images online.
Once published online, edited product images contribute to enhancing buyers’ shopping experience. Viewers get a better view of their desired products. It increases social share, viewers’ interaction, and number of sales.
