
Changing object colors can give it a whole new feel. Luckily, Photoshop makes image color changing easy with several techniques, including Hue/Saturation adjustment, Replace color Dialog, Color Replacement tool, Layer Masks, Brush tool, Blending Modes, Color Fill Layer, and Color Range tool. Whether you’re looking to tweak a small detail or transform an entire scene, you can change in a polished and professional way.
What you’ll learn in this article
- 1 Where are Photoshop’s Color Settings?
- 2 Changing Colors in Photoshop: 8 Best Ways
- 2.1 How to Change Color in Photoshop Using Hue/Saturation Adjustment?
- 2.2 How to Replace the Color Dialog?
- 2.3 How to Use the Color Replacement Tool to Change Colors in Photoshop?
- 2.4 How to Change the Color of Something in Photoshop Using the Brush Tool?
- 2.5 How to Change Object Color with the Color Range Tool in Photoshop?
- 2.6 How to Change an Object’s Color in Photoshop Using Blending Modes?
- 2.7 How to Change Color in Photoshop Using a Color Fill Layer?
- 2.8 How to Create a Partial Replacement With Layer Masks to Change Object Color?
- 3 Where to Get Photoshop Color Change Services?
- 4 FAQs About How to Change Color in Photoshop
- 5 Final Overview
Where are Photoshop’s Color Settings?
In Adobe Photoshop, the Color Settings control how colors are managed, displayed, and converted across different devices and workflows. To access Photoshop’s color settings, click the Edit menu and select Color Settings. You can also use the shortcut key: Shift+Ctrl+K (Windows) or Shift+Cmd+K (macOS).
Key Sections of Photoshop Color Settings
1. Working spaces:
Defines default color profiles for different color modes:
- RGB: The default RGB color space (e.g., sRGB, Adobe RGB, ProPhoto RGB).
- CMYK: Used primarily for print workflows (U.S. Web Coated, ISO Coated, etc.)
- Gray, Spot: For grayscale and spot color workflows.
2. Color management policies:
- RGB/CMYK/Gray: Off (ignore embedded profiles), Preserve Embedded profiles, and Convert to Working Space (Auto-convert).
- Determines what Photoshop does when you open a file with a different color profile.
- Options include Preserve, Convert, or Off for each color space.
3. Conversion options:
- Engine: Typically Adobe (ACE) or system-level color engine
- Intent: Controls how colors are mapped between profiles (Relative Colorimetric, Perceptual, Saturation, and Absolute Colorimetric)
- Use black point compensation (Better shadow detail)
- Use Dither (8-bit/channel images) (Smoother gradients)
4. Profile mismatches/missing profiles:
Options to prompt or automatically handle images without profiles or with mismatched profiles.
5. Advanced controls:
Blend Text Colors Using Gamma (controls blending behaviors of text layers). Desaturate monitor colors & blend RGB Colors Using Gamma (1.00 for web, 2.2 for print).
Changing Colors in Photoshop: 8 Best Ways
There are 8 different ways to change color in Photoshop, such as Hue/Saturation Adjustment, Replace Color Dialog, Color Replacement, Brush tool, Color Range tool, Blending Modes, Color Fill Layer, and Partial Replacement with Layer Masks.
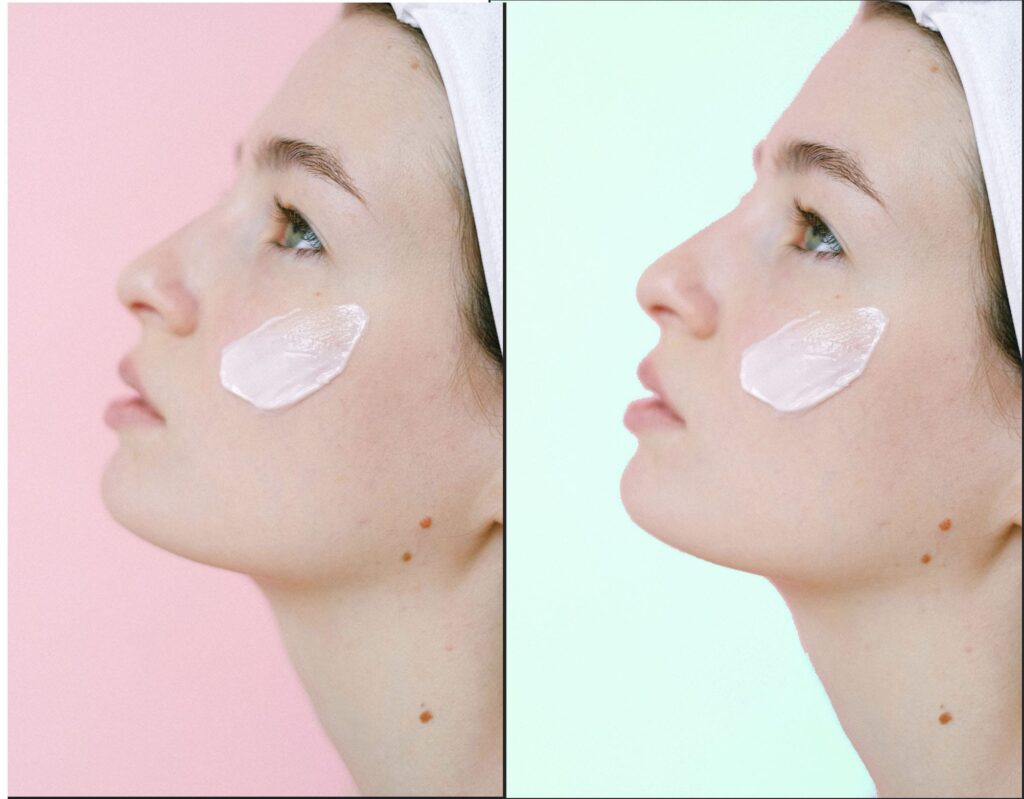
How to Change Color in Photoshop Using Hue/Saturation Adjustment?
The Hue/Saturation tool in Photoshop is a versatile tool for altering the colors within your image. Whether you need to make subtle adjustments to match tones or you’re looking to transform the appearance of an element completely, this tool provides the flexibility for both simple and complex edits.
Steps to Use Hue/Saturation
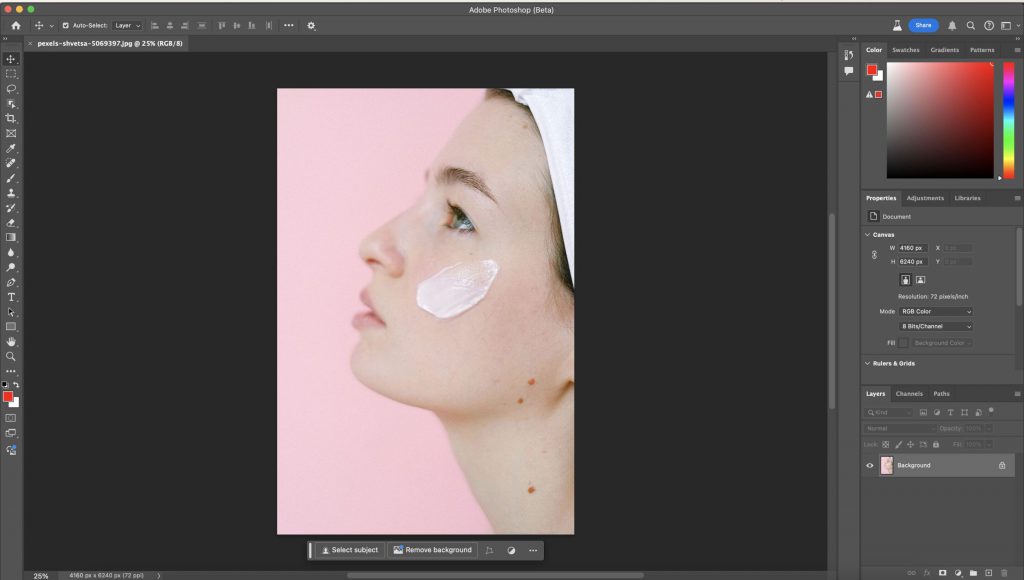
1. Open your image
Start Photoshop and open the image where you want to change the color of an object.
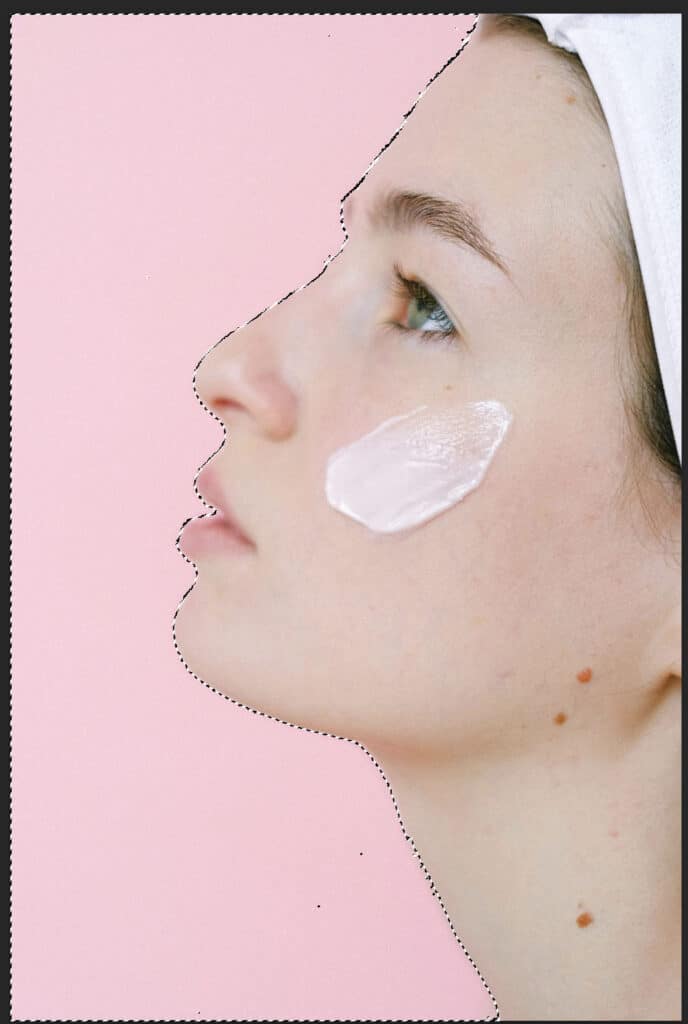
2. Select the object
Use one of Photoshop’s Selection tools, such as the Quick Selection tool, Lasso tool, or Magic Wand to select the area of the image you wish to alter. Precision in your selection ensures that the color change applies only where you want it.

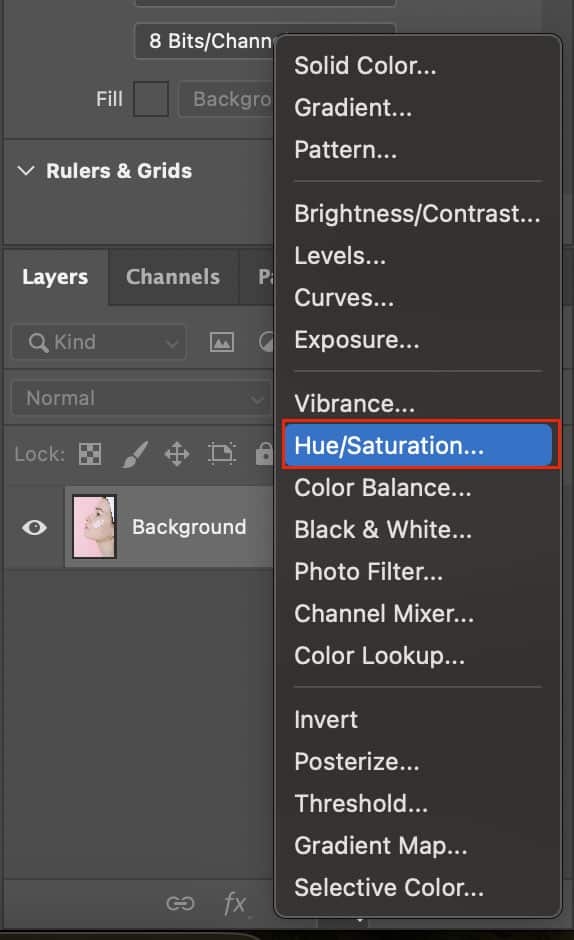
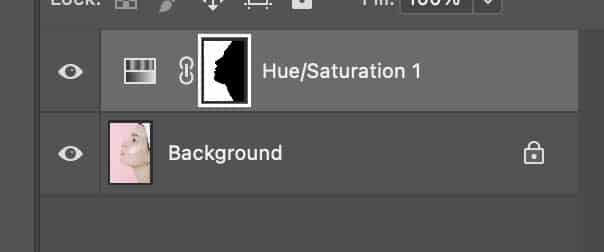
3. Create a Hue/Saturation adjustment layer
Go to the top menu and select Layer > New Adjustment Layer > Hue/Saturation. Click OK. This places your hue and saturation adjustments on a separate layer, protecting your original image.
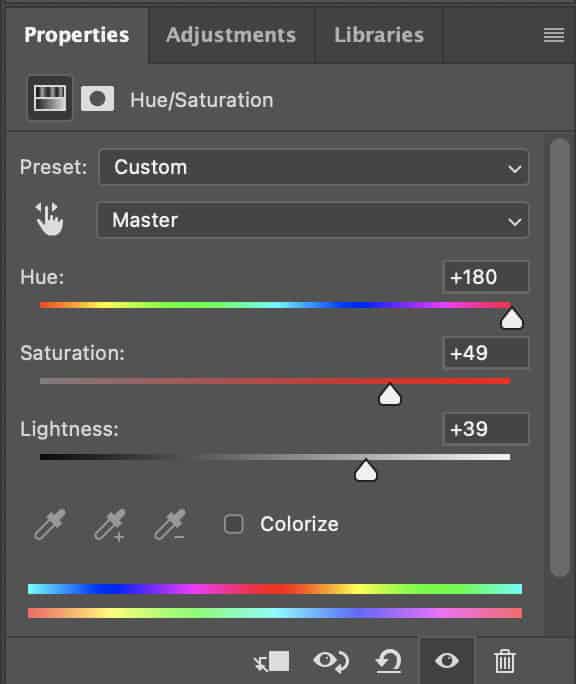
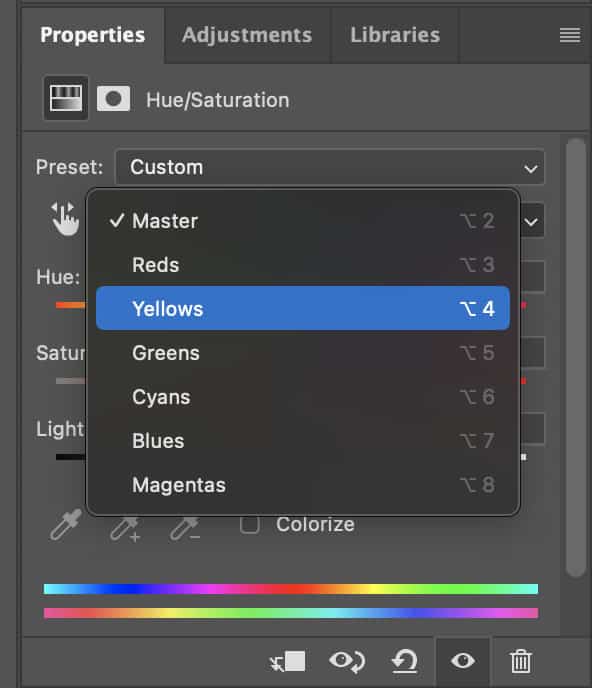
4. Adjust Hue, Saturation, and Lightness
A properties panel will appear with the adjustment layer selected. Here you can:
- Hue: Move the slider left or right to shift all the selected colors to different hues. This is how you change the basic color.
- Saturation: Increase or decrease this to make the colors more vibrant or muted.
- Lightness: Adjust this slider to make the selected area darker or lighter.
5. Fine-tune the adjustment
If the color change affects areas outside your intended selection, refine the adjustment layer’s mask. You can paint the mask with black to hide the adjustment from parts of the image or white to apply it. This refinement step is crucial for achieving a natural look.
Tips for Success with the Hue and Saturation Tool
- Use the colorize option: If you’re aiming to add a completely new color to a grayscale image or a specific area, click the ‘Colorize’ checkbox in the Hue/Saturation dialog box. This will apply a uniform color based on your hue and saturation settings, which is perfect for creating dramatic effects or for uniformly tinting an image.
- Layer masking: Mastering layer masks can greatly enhance your ability to change colors seamlessly, especially when working with complex images.
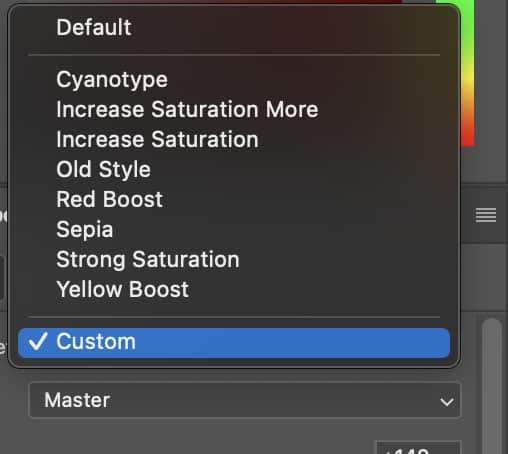
- Adjustment presets: The Hue/Saturation tool offers preset options for quick adjustments that can be fine-tuned as needed.
When to Use Hue/Saturation?
This tool is best used when you need to change the color of an object in Photoshop without affecting the rest of the image, when correcting colors, or when creatively altering the mood of your image. It’s suitable for both beginners and advanced users due to its straightforward interface.
How to Replace the Color Dialog?
The Replace Color command in Photoshop is an incredibly efficient tool for global color adjustments, particularly useful when you need to target and modify colors that appear across different sections of an image.
Steps to Use the Replace Color Tool
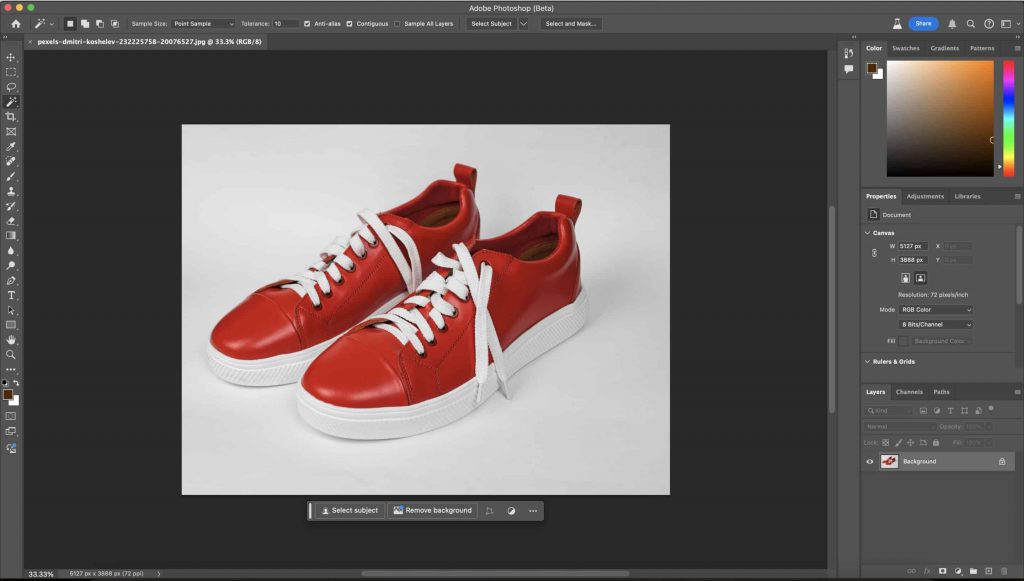
1. Open your image
Begin by opening the image you wish to edit in Photoshop.
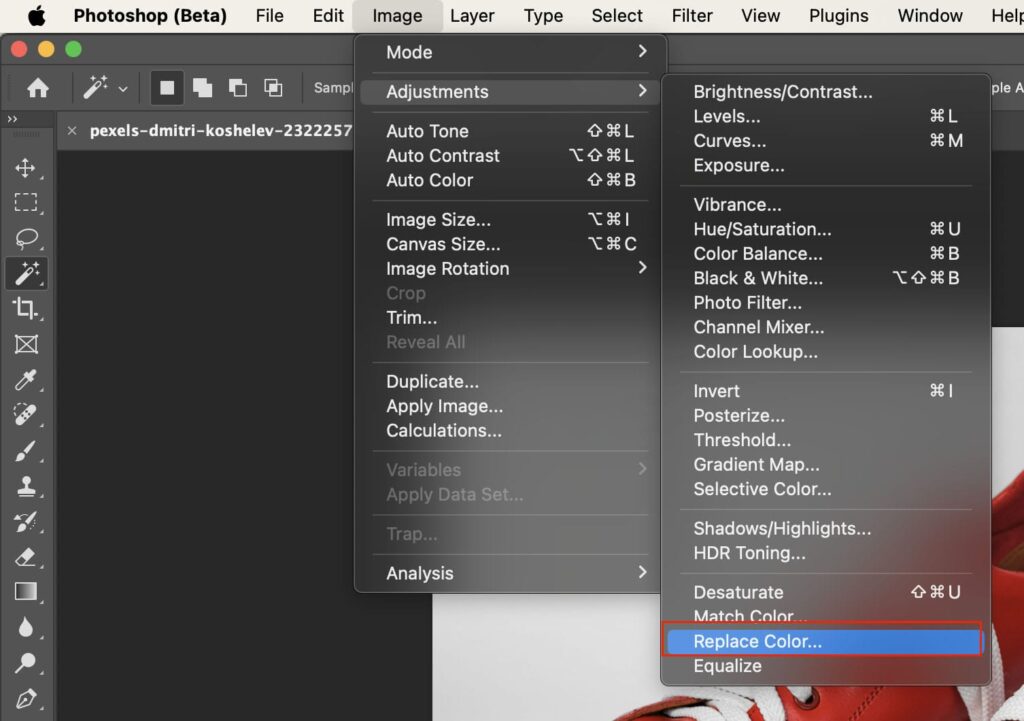
2. Access replace color
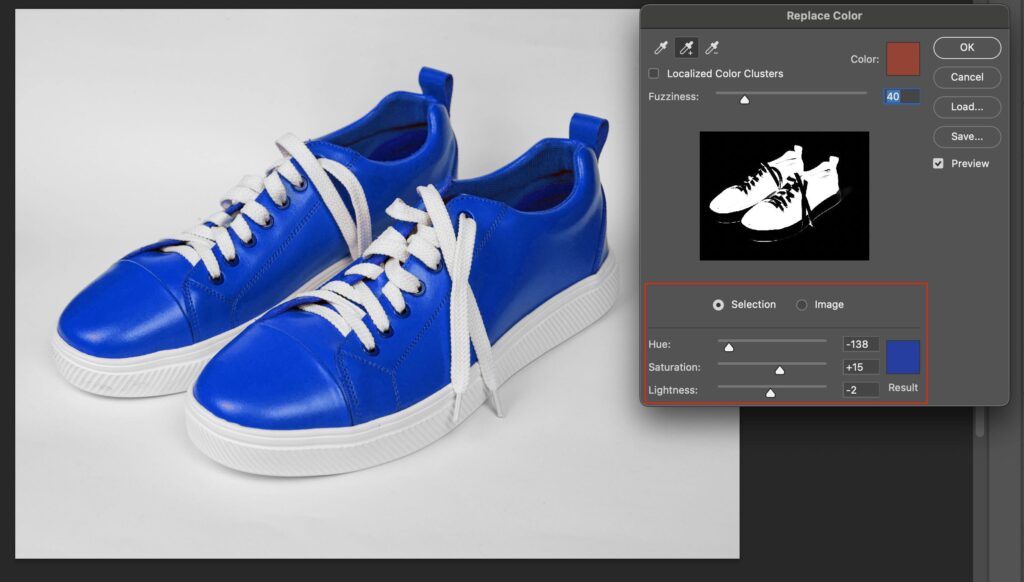
Navigate the menu by choosing Image > Adjustments > Replace Color. This opens the Replace Color dialog box.
3. Select the color
Use the Eyedropper tool in the dialog box to click on the color in the image that you want to replace. To add to your selection and include additional shades or areas, click the ‘Add to Sample‘ Eyedropper Tool and click on other areas of the image.
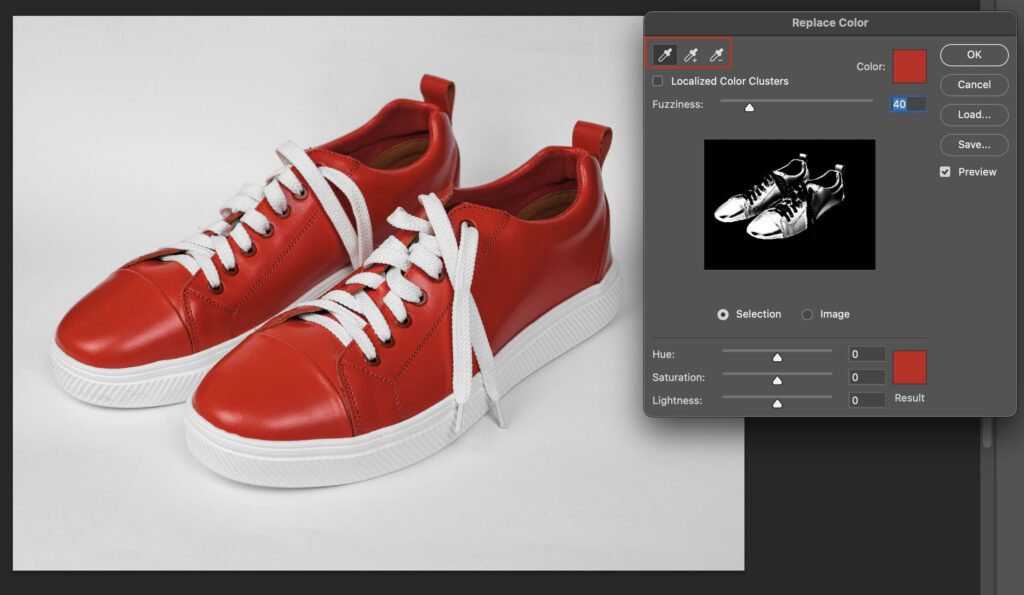
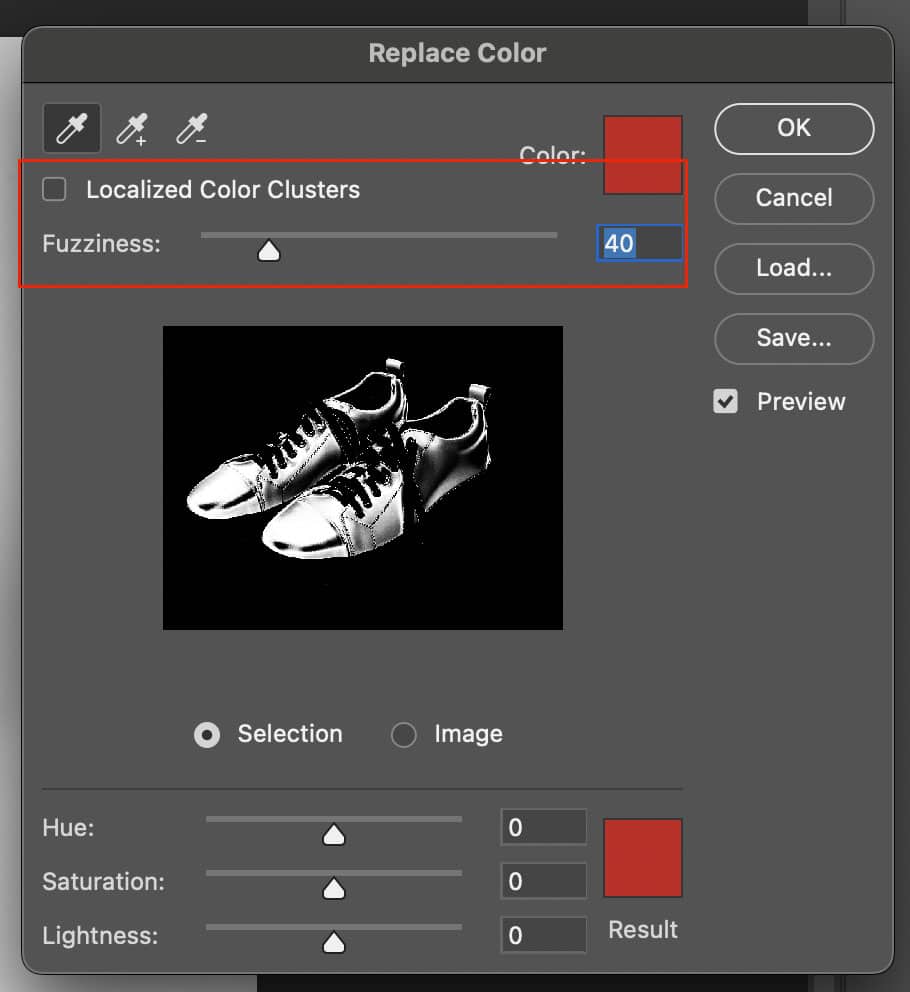
4. Adjust fuzziness
Use the fuzziness slider to control how many similar colors to the selected color are affected by the change. Increasing fuzziness broadens your selection to include a wider range of similar colors, while decreasing it narrows down the selection.
5. Choose the new color
Adjust the hue, saturation, and lightness sliders to select the new color. As you adjust these sliders, the colors in the image will change in real-time, allowing for precise control over the end result.
6. Fine-tune the selection
If the initial selection isn’t perfect, you can continue to adjust the fuzziness and use the ‘Add to Sample‘ tool to refine which colors are affected.

Tips for Success with the Replace Color Tool
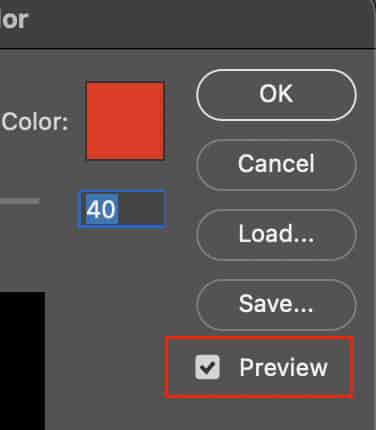
- Preview options: Use the ‘Selection’ preview mode to see which colors are selected and adjusted. This can help in more accurately refining which colors to replace.
- Limitations: Be mindful that Replace Color works best with distinct colors and may not be ideal for highly detailed or textured images where colors blend subtly.
- Combine with other tools: For areas not adequately covered by the Replace Color tool, consider using other Photoshop tools like the Brush tool with a matching color to manually adjust small areas.
When to Use Replace Color?
This tool is particularly effective in situations where you need to change the color of multiple objects simultaneously or when the objects share similar colors, such as adjusting the colors of flowers in a field or changing the color of clothing in a fashion photo.
How to Use the Color Replacement Tool to Change Colors in Photoshop?
The Color Replacement tool in Photoshop is a highly efficient and targeted method for quickly changing colors in specific areas of an image without altering the surrounding pixels. This tool is particularly useful for quick touch-ups where precise color manipulation is needed but the surrounding details must remain unchanged.
Steps to Use the Color Replacement Tool
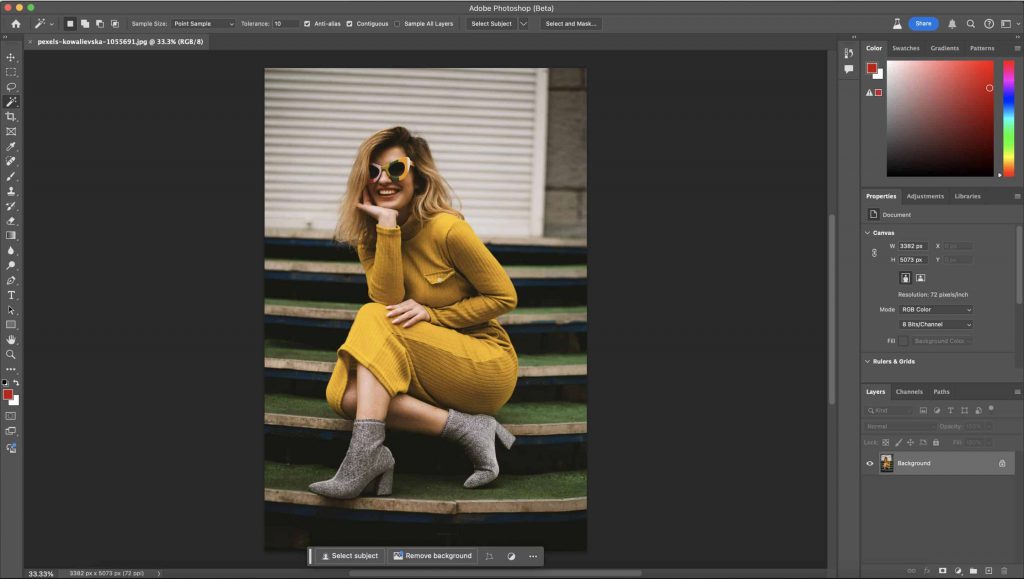
1. Open your image
Load the image that needs color modification in Photoshop.
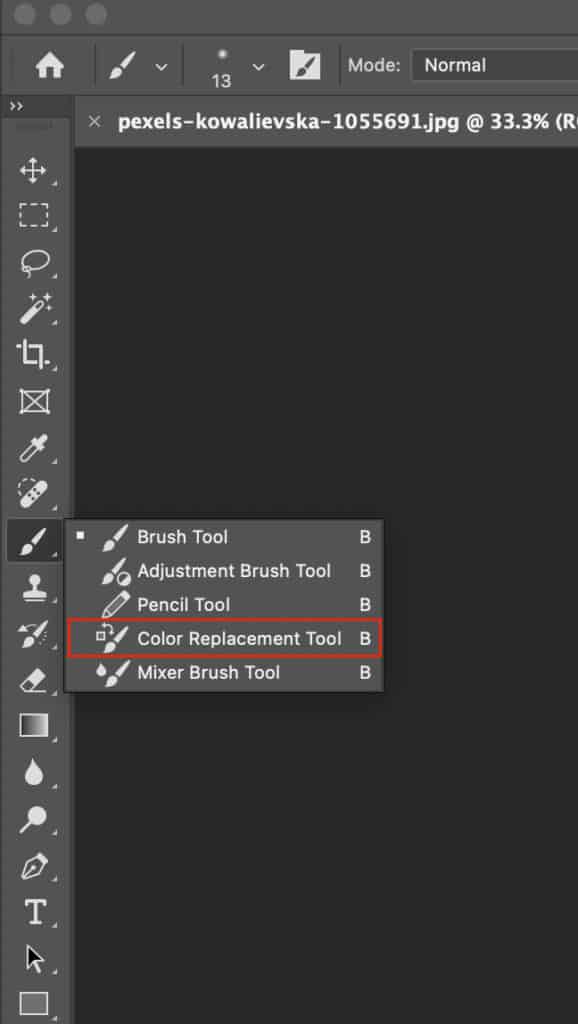
2. Select the color replacement tool
Find this tool in the Brush tool group in the toolbar. If you don’t see it immediately, click and hold on the Brush tool to reveal it.
3. Configure tool settings
- Mode: Set the mode to ‘Color’ to replace only the color, while keeping the luminosity and saturation of the original image.

- Brush size: Adjust the brush size according to the area you need to work on. This can be done from the toolbar options at the top or using the bracket keys ([ ]) for quick adjustments.
- Tolerance: Set the tolerance level to control the range of colors that will be replaced. A higher tolerance affects a wider range of similar colors, while a lower tolerance limits the effect to colors very close to the sampled one.
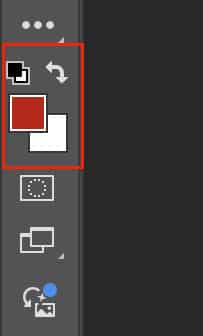
4. Choose the foreground color
Set the new color you want to apply by selecting it as the foreground color in the tools panel.
5. Paint over the desired area
Simply brush over the area where you want to change the color. The tool automatically replaces the original color with the new one while preserving the underlying patterns and details.

Tips for Success
- Sampling options: Right-click on the image to adjust the sampling options. Choose ‘Continuous’ to keep sampling colors as you paint, or ‘Once’ to only sample the color under the initial click point.
- Protect foreground color: Enable ‘Protect Foreground Color’ to prevent the tool from replacing colors that match the foreground color, useful for avoiding overpainting on non-target areas.
- Layer duplication: Work on a duplicated layer to ensure that your original image remains unaffected. This way, you can easily revert any changes without damage to the base image.

When to Use the Color Replacement Tool?
This tool is ideal when you need to make quick and precise color changes without the need for complex masking or selections. It’s particularly effective for small, detailed areas where other color adjustment tools might affect surrounding pixels.
How to Change the Color of Something in Photoshop Using the Brush Tool?
You can change color of something in Photoshop using the Brush Tool in two different ways: paint with a new color on a new layer using blend modes, or use the specialized Color Replacement tool while preserving texture and shadow.
Steps to Use the Brush Tool
Step 1: Open your edited image in Photoshop
Upload your image and create a new layer before editing the image non-destructively.
Step 2: Select the Photoshop Brush tool
Press B or select the Brush tool from the advanced Photoshop tools.
Step 3: Choose your Brush color
Double-click the foreground color swatch in the toolbar to open the Color Picker and select your desired color.
Step 4: Paint over the area
Use the brush tool to paint the area you want to change the color. At first, the image might look unnatural. But by changing the blend mode in the Layers panel from Normal to Hue, you’ll see that the color you just painted blended in naturally with the original image.
Step 5: Retouch the image
Use the brush tool to retouch until you’re satisfied, then save it.
How to Change Object Color with the Color Range Tool in Photoshop?
The Color Range tool in Photoshop is a selection tool that allows you to select a range of colors within an image based on a sample color. This tool is useful for isolating specific objects or areas when there’s a clear color difference between the target and the background.
Steps to Use the Color Range Tool
Step 1: Open the Color Range Dialog
Go to the top Photoshop menu and choose Select > Color Range to pick colors based on their Hue and tone.

Step 2: Select the color to change
In the Color Range dialog, ensure Select is set to Sampled Colors. Use the eyedropper tool inside the dialog to click on the color in your image that you want to change (e.g., the object’s current color). Adjust the Fuzziness inside the dialog (Higher Fuzziness selects a broader range of similar hues, while lower Fuzziness tightens the selection).
Note: Hold Shift and click additional colors with the eyedropper tool if you want to add multiple colors to your selection.
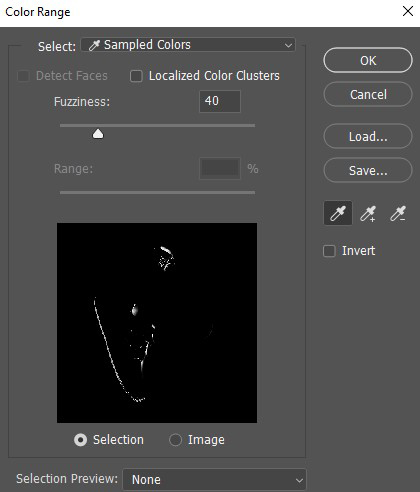
Step 3: Preview and refine your selection
A preview window in the dialog shows white areas as selected pixels and black as unselected. Check the Localized Color Clusters and the Range slider to limit the selection to colors within a specific area if required. Click OK to confirm the selection.
Step 4: Apply a Hue/Saturation adjustment layer
With the selection active, click the Adjustment Layer icon at the bottom of the Layers panel and choose Hue/Saturation.
Step 5: Change the Object’s Color
In the Hue/Saturation properties panel, check Colorize to apply a uniform hue shift. Adjust the Hue slider to change the color and use the Saturation and Lightness sliders to fine-tune the intensity and brightness of the new color.
Tips for Effective Use
- Start with a lower Fuzziness value and increase it gradually to fine-tune your selection.
- Use the “Invert” option when you want to select everything except the area based on color.
- Ensure to preview the dialog box before confirming the selection.
When to Use the Color Range Tool?
You can use the Color Range tool to isolate specific colors or objects for adjustments, editing, or manipulation. This tool is effective for different photo editing tasks, like color correction, enhancing specific tones, and creating visually striking effects by isolating and adjusting individual colors.
How to Change an Object’s Color in Photoshop Using Blending Modes?
Blending modes determine how the colors of different layers or objects interact and allow you to change an object’s overall hue, saturation, or brightness. There are different Blending modes, like inter-layer interaction (determining how the pixels of different layers interact with each other), impact on color, and specific effects (hue, saturation, color, etc.) that allow you to achieve various effects, from subtle color adjustments to dramatic color transformations.
Common Blending modes for color changes:
- Normal (No blending, default mode)
- Dissolve (Edits or paints each pixel to make it the result color)
- Color (changes hue & saturation, keeps brightness)
- Hue (subtle color shifts)
- Overlay (boosts contrast & color intensity)
- Multiply (darkens underlying colors)
- Soft light (gentle contrast & color blending)
- Screen (lightens underlying colors)
- Luminosity (affects the brightness or lightness of colors), and others.
Steps to Use Blending Modes
Step 1: Create a new layer
After opening the image in Photoshop, click on the New Layer button at the bottom of the Layers Panel.
Step 2: Change blending mode
Change the blending mode of the new layer to Hue. You can also use the color blend mode. However, if you wish to keep both the saturation level and the luminosity values of the object, then use the Hue blending mode. Also, you can choose different blending modes to see how they affect the color of the target object, including multiply, screen, overlay, and color.
Step 3: Choose your desired color
Click the foreground color swatch in the Photoshop toolbar and pick your new color from the Color Picker.
Step 4: Select the Brush tool
Press “B” to activate the Brush tool to choose a soft, round brush, and adjust the brush size ( [ or ] keys).
Step 5: Paint over the object
Paint over the object you want to recolor.
Tips for Effective Use
- Adjust the opacity of a layer to make the blending effect more or less subtle.
- Create multiple layers with different blending modes to achieve complex and nuanced color effects.
- Experiment with different modes before selecting one.
- Combine blending modes with other techniques, like gradients, textures, and adjustment layers.
When to Use Blending Modes?
Blending modes combine layers by defining how one layer interacts with the layers beneath it. This mode can be used to create shadows and highlights, add textures and patterns, make color adjustments, composites, and create special effects.
How to Change Color in Photoshop Using a Color Fill Layer?
To change the shirt color in Photoshop or other objects’ colors, you can use a color fill layer by following a step-by-step guide:
Step 1: Create the fill layer
Click the Fill/Adjustment Layer icon (a half-filled circle) at the bottom of the Layers panel. Select “Solid Color” (i.e., blue, green, etc.) from the menu. You can take advantage of the Color Picker dialog that will appear. Choose your desired color and click OK. This will create a new Color Fill Layer that covers the canvas or selected area.
Step 2: Adjust the color fill layer
To change the color, you can simply double-click the color thumbnail of the Color Fill Layer in the Layers panel. Or, you can use the eyedropper tool in the Color Picker to sample a color from your image.
Step 3: Change the blend mode
Next, change the blend mode to color. This will color your entire image.
Step 4: Create a black layer mask
Hold down the Option/Alt key by using the left mouse button to click on the Add Layer Mask button. This will add a black layer mask and hide all of the color-fill layers.
Step 5: Paint in the color
Use the brush on the mask (painting with your desired color) to paint with the new color in your image.
Tips for Effective Use
- Combine Multiple Fill Layers
- Use Opacity for Subtle Effects
- Maintain a flexible workflow
- Use Fill Layers for Backgrounds and Design Elements
When to Use a Color Fill Layer?
You can use a Color Fill Layer to add a solid color, pattern, or gradient to a layer, offering flexible control over color and effects. It’s useful for adding flat colors in illustrations, recoloring images, or experimenting with color combinations.
How to Create a Partial Replacement With Layer Masks to Change Object Color?
Do you want to change or match object colors in Photoshop with more subtle color replacement techniques? Layer masks can help you achieve it.
Step 1: Add a layer mask to your layer
Select the Layer you want to partially replace or edit and click the “Add Layer Mask” button at the bottom of the Photoshop Layers panel.
Step 2: Know the mask basics
White on the mask indicates the Layer is fully visible in that area, black indicates the Layer hides in that area but reveals layers beneath, and gray tones create partial transparency.
Step 3: Choose a selection tool
Use any selection tool to isolate the specific area you want to change.
Step 4: Add the adjustment layer
Apply an adjustment layer (e.g., Hue/Saturation) to the selected area.
Step 5: Add your layer mask and gradient
To change the color of clothes in Photoshop, fine-tune the replacement by adding a layer mask and applying a gradient to blend the colors seamlessly.
Tips for Effective Use
- Use soft-edged brushes with adjustable opacity and flow to create smooth and natural transitions.
- Invert masks (Ctrl.Cmd + I) when needed.
- Adjust mask display settings.
- Save files in PSD or TIFF formats to preserve masks for future editing.
When to Use a Partial Replacement with Layer Masks?
Partial Replacement with Layer Masks is useful for adjusting color or lighting and making complex edits without permanently altering the original content.
However, there are different types of tools Photoshop experts suggest to utilize, such as the Paint Bucket tool, Lasso tool & adjustment layers, and Color range selection. Feel free to apply techniques from our lists to change the background color or object.
Where to Get Photoshop Color Change Services?
Clipping Path Studio is the best photo editing agency in New York, USA, where you get precise color correction services, background removal, clipping path, blending & retouching, and others. From product photographers to e-commerce managers, outsource post-processing services from CPS for high-quality images, cost-effective editing services, fast turnaround time, and 24/7 customer support. Their expertise lies in:
1. Expert-level color replacement
CPS photo editing experts utilize advanced Photoshop techniques, including masking, blending modes, and color range selections to:
- Change product colors for e-commerce catalogs,
- Fashion items in multiple colors,
- Match brand-specific color standards,
- Eye/Hair color change,
- Background color adjustment,
- Automotive/vehicle recoloring, etc.
2. Non-destructive editing workflow
Their hand-drawn & pixel-perfect editing ensures image quality and preserves shadows, textures, and lighting while changing the desired color portions.
3. Other Photo editing services include
- Object color change
- Color correction & enhancement
- Multi-color variants
- Background and lighting consistency, and
- Clipping paths and masking for precise color area selection.
FAQs About How to Change Color in Photoshop
What is replacing color in Photoshop?
Replacing color in Photoshop refers to changing one color in an image or object to another color while preserving the original’s texture, shading, and details.
How do you change color in Photoshop shortcuts?
In Photoshop, the primary keyboard shortcuts for changing colors are:
- X (swap foreground and background colors)
- D (reset to default black and white)
- K (foreground color picker) or
- N (background color picker).
Can I adjust the tolerance of the Color Replacement Tool?
Yes, you can adjust the tolerance of the Color Replacement Tool. This setting determines how selectively the tool replaces colors. A higher tolerance affects a broader range of similar colors, while a lower tolerance restricts changes to colors very close to the sampled one.
What is the difference between the Color Replacement Tool and the Brush Tool?
The main difference lies in their functionality. The Brush Tool is used primarily for painting and drawing with color on the image layer. In contrast, the Color Replacement Tool changes the color of existing pixels while preserving the textures and shadows of the areas it is applied to.
Can I use the Color Replacement Tool to create realistic color replacements?
Yes, the Color Replacement Tool can be used to create realistic color changes. It is especially effective for small, targeted adjustments where maintaining the natural lighting and texture of the original image is crucial. However, achieving realism may require careful adjustments of the tool’s settings and fine-tuning with other tools.
How to invert color in Photoshop?
You can invert color in Photoshop by navigating to Photoshop’s top menu option, Image > Adjustments > Invert. Also, you can use the keyboard shortcut: Ctrl+I (Windows) or Cmd+I (Mac).
Can I change multiple colors at once in Photoshop?
Yes, you can change multiple colors at once in Photoshop using techniques like adjustment layers, layer masks, or the batch processing feature.
Where is the color mode in Photoshop?
You can find the color mode in Photoshop by navigating to Image > Mode and selecting the desired color mode from the menu. You can choose options like RGB, CMYK, Grayscale, and more.
How do I change the color mode in Photoshop?
Go to Image > Mode and select the desired color mode, such as RGB, CMYK, or Grayscale, to change the color mode in Photoshop.
Where is the Color Replacement tool in Photoshop?
The Color Replacement tool in Photoshop can be found within the Brush tool (shortcut key: “B”). To access it, click on the Brush tool icon and select “Color Replacement Tool” from the drop-down menu.
How do you change eye color in Photoshop?
You can use a selection tool, like the Lasso tool, Elliptical Marquee tool, Brush tool, or the Select and Mask feature for a precise selection to change eye color in Photoshop.
Final Overview
- Changing Object Colors in Photoshop refers to altering the color of a specific object or area within an image without affecting the overall background or other elements.
- There are 8 easy and simple Photoshop techniques, such as Hue/Saturation adjustment, Replace color Dialog, Color Replacement tool, Layer Masks, Brush tool, Blending Modes, Color Fill Layer, and Color Range tool.
- You can change object colors all by yourself by following our step-by-step guide or outsourcing to a renowned photo editing agency.
- For more precision and professional outlook, outsource Object Color Changing services from Clipping Path Studio and get high-quality photo editing services, such as background removal, clipping path, retouching, and more.
