
Wrinkles on clothing can make the best outfits or luxurious apparel look unnatural. Clients or potential consumers desire high-quality, clear, and well-lit images with fabric texture, stitching, accurate color, and unique design features. When shooting for fashion, e-commerce, or branding campaigns. If the wrinkles are visible in the photos, you can remove them using 4 different Photoshop retouching techniques:
- Spot Healing Brush Tool: The tool is useful for removing fabric wrinkles, especially small and isolated ones. It samples surrounding pixels and blends them to erase wrinkles automatically.
- Healing Brush Tool: The Healing Brush tool removes smaller wrinkles, provides precise control, and subtle blending. It samples pixels from one area of an image and blends them with the color and tone of another area.
- Patch Tool: The Patch tool is effective for complex or larger wrinkles or creases. It makes a selection around the area you want to fix.
- Frequency Separation: The tool separates the color and texture information of an image into different layers, allowing for targeted adjustments to the color and texture of the fabric.
What you’ll learn in this article
- 1 How to Remove Clothing Creases & Wrinkles Using Spot Healing Brush Tool?
- 2 How to Remove Wrinkles from Clothes Using Healing Brush Tool
- 3 How to Remove Clothes Wrinkles With Patch Tool
- 4 How to Remove Wrinkles on Fabric in Photoshop With the Frequency Separation Tool
- 5 What are the Common Mistakes When Removing Clothing Wrinkles in Photoshop?
- 6 Do You Need Professional Help to Remove Clothing Wrinkles in Photoshop?
How to Remove Clothing Creases & Wrinkles Using Spot Healing Brush Tool?
You can remove clothes creases and wrinkles using the Spot Healing brush tool in Photoshop by selecting the tool (shortcut key: J), adjusting the brush size, and then simply painting over the wrinkles. The tool automatically samples surrounding pixels to blend and eliminate the creases.
Step 1: Open the File
Open the file in Photoshop by clicking on File > Open. Now select the file you want to open.

Step 2: Take the Tool
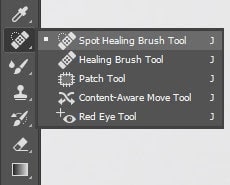
Select the Spot Healing Brush Tool from the toolbar menu.
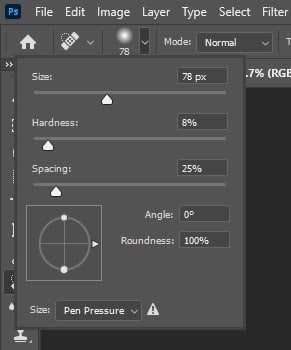
On the top menu, you’ll get the option to adjust the brush size and intensity. Click there to adjust the brush.
You May Also Like: How to Change Color of Clothes in Photoshop
Step 3: Start Brushing
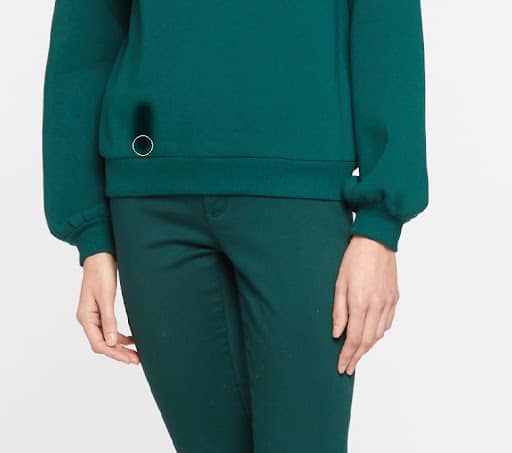
Now, zoom in on your image so that you can see the details clearly. After zooming the image, start brushing the area where you see wrinkles. You will see the change immediately. This way, brush all the areas where you see wrinkles. When you’re done with brushing, zoom out and check if you’ve touched all the areas.
Step 4: Save the Image
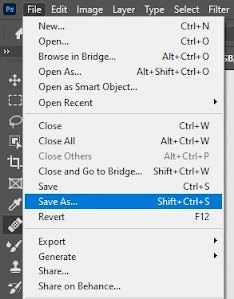
When you’re satisfied with your work, save the file in your desired folder.
How to Remove Wrinkles from Clothes Using Healing Brush Tool
To remove wrinkles from clothes using the Healing Brush tool, you should first select the tool (shortcut key: J) from the Photoshop toolbar, sample a nearby area of good texture, and then brush over the wrinkles. This tool is effective in blending the sampled texture with the wrinkled area and smoothing it out.
Step 1: Open the File
Go to File from the top menu and click on Open to open the file you want to work with.
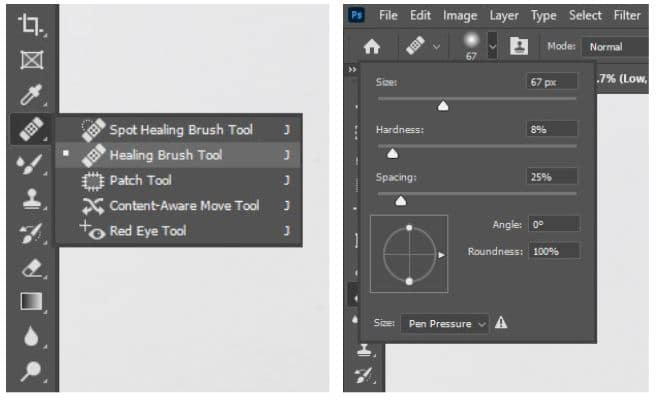
Step 2: Take the Tool
Take the Healing Brush Tool from the toolbar. It is right below the Spot Healing Brush Tool. Like the previous tool, you’ll get the same options to adjust the brush size and hardness. Adjust these options before starting brushing.
Step 3: Take a Reference and Brush
Now, click on an area that is plain and has no wrinkles. This will be your reference.
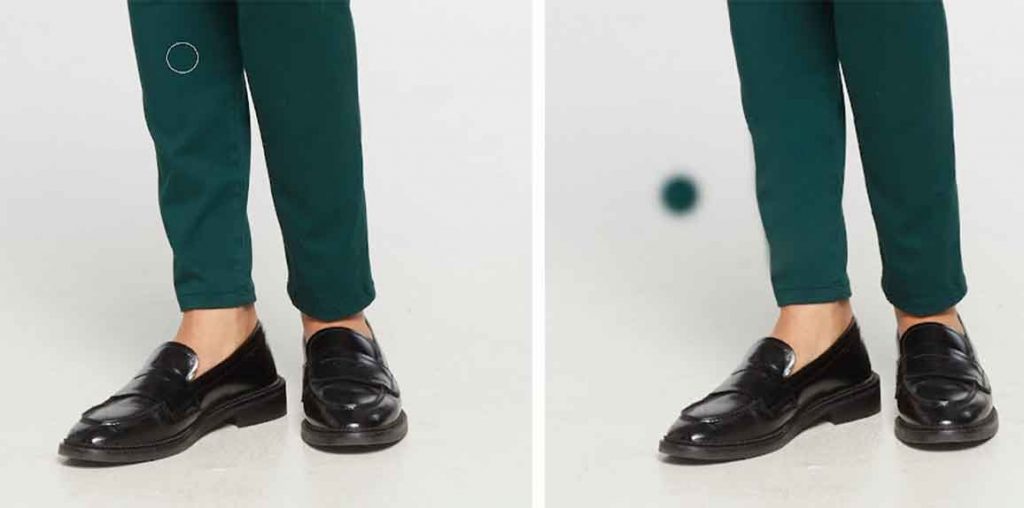
Now, apply the reference to the area where there is a wrinkle. You’ll see that the wrinkles are replaced by the area you selected as a reference.
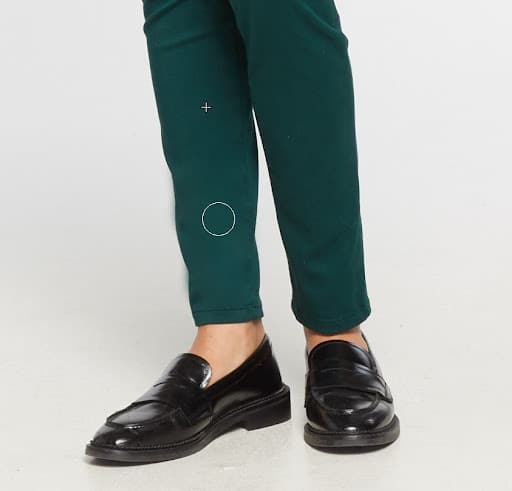
Be careful about one thing; while taking reference, pick the area that goes with the area that you’ll paint. For example, in this image, while working on pants, take reference from the pants and while working on a shirt, take reference from the shirt.
Though the color is the same for both, the texture of the pants and shirt is different here. So, don’t mix them up.
Step 4: Save the Image File
Save the file in your desired folder.
How to Remove Clothes Wrinkles With Patch Tool
To remove clothes wrinkles with the Patch tool, you first select the tool (shortcut key: J), take reference to the area where there is a wrinkle, then drag the selected area to a smooth, wrinkle-free section of the fabric and release the mouse button.
Here’s a detailed process to remove apparel wrinkles through the Patch tool:
Step 1: Open the File
Open the file by clicking on File from the top menu.
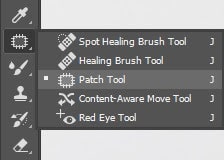
Step 2: Take the Patch tool
Select the Patch Tool from the toolbar. You’ll find it right below the Healing Brush Tool.
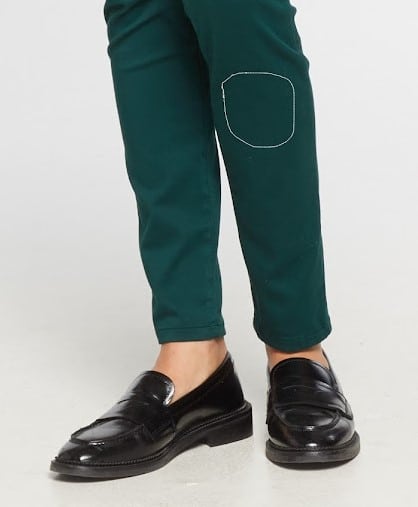
Step 3: Mark an Area
Mark an area from the image that is clear and has no wrinkles. To be straight, pick a plain surface.
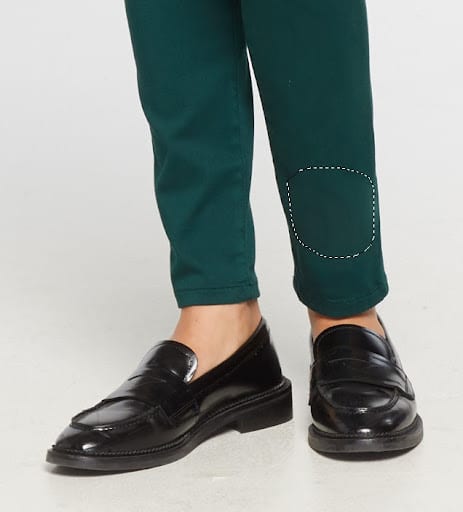
Step 4: Drag the Area
Now, drag the selected area by clicking your mouse and place it on the area where you need to change. Now, this will replace the area with your reference.
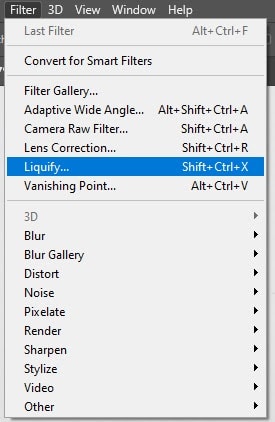
Step 5: Liquify Tool
Click on Filter from the top menu and then click on Liquify. A new window will pop up after clicking that.
This step is necessary to merge the newly placed area with the old one.
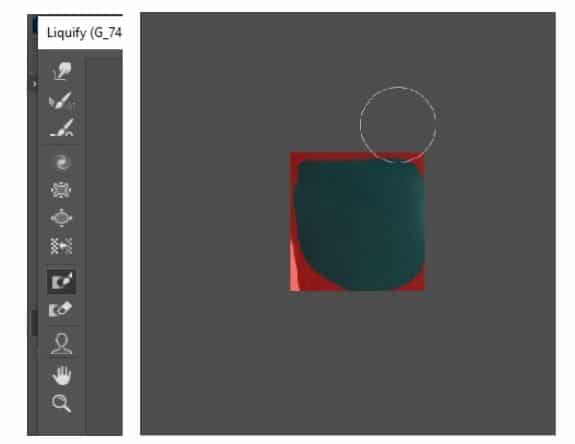
Step 6: Freeze Mask
Now, click on the Freeze Mask Tool from the left menu and brush up the edge of the clothing.
Step 7: Save the Image
Now, your image is ready to save. Click on File and save your file in whichever format you want.
How to Remove Wrinkles on Fabric in Photoshop With the Frequency Separation Tool
When you use the Frequency Separation tool to remove clothes wrinkles, you should separate the image into texture (high frequency) and color (low frequency) layers. Then, smooth out the wrinkles on the color layer using blur, and retouch them on the texture layer with the clone stamp or mixer brush. Also, you can add a filter, change the layer mode to Linear Light, and take advantage of the Mixer brush tool (shortcut key: B) if required.
Step 1: Open the Image
Open Photoshop and go to File > Open and select the image from your computer. Or you can do it by clicking Ctrl + O.
Step 2: Unlock the Layer
Press the Alt button on your keyboard and click on the lock button beside the Background Layer.
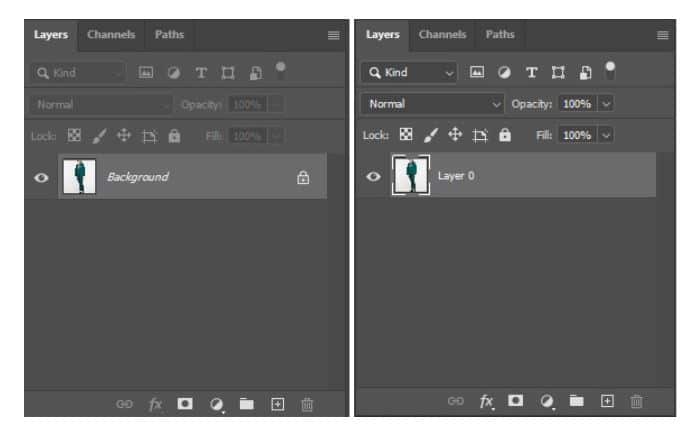
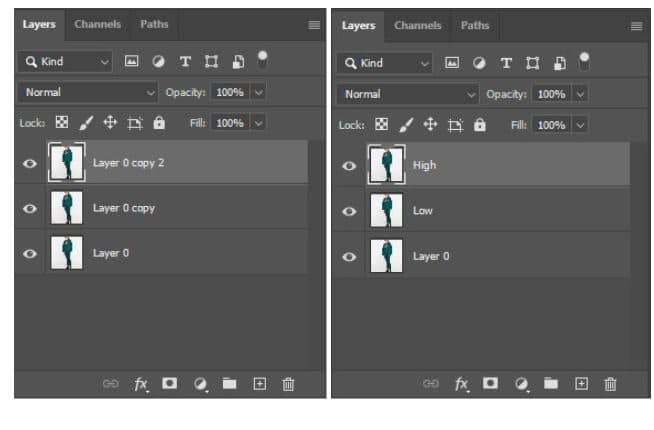
Step 3: Copy and Rename Layer
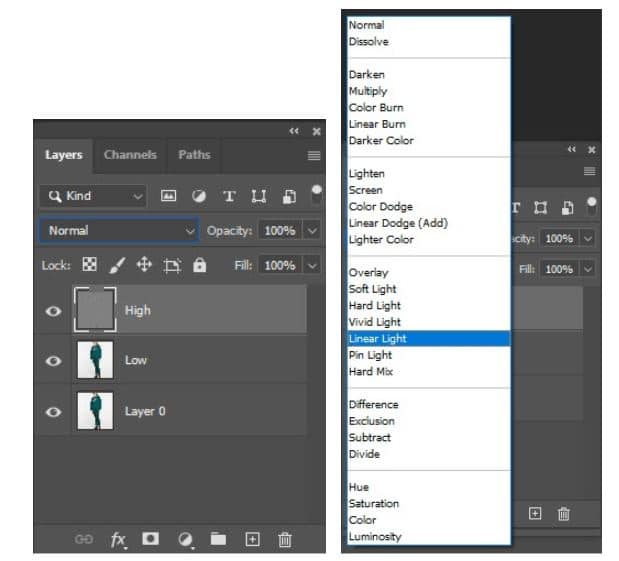
Press the Ctrl + ‘J’ Key at a time twice to create 2 more layers of the main Layer. You can also right-click on the main layer and then click on duplicate layer to create extra layers. Name the new layers as ‘Low’ and ‘High’ or ‘Middle’ and ‘Top’.
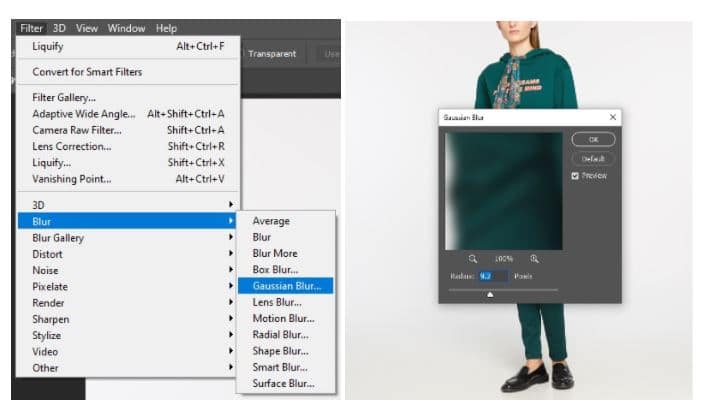
Step 4: Add Filter
Select the Low Layer and go to the top menu. Click on Filter > Blur > Gaussian Blur. A box will pop up. Set the Radius below 10, maybe around 4 to 9, and click on ‘Ok’.
Step 5: Apply Image
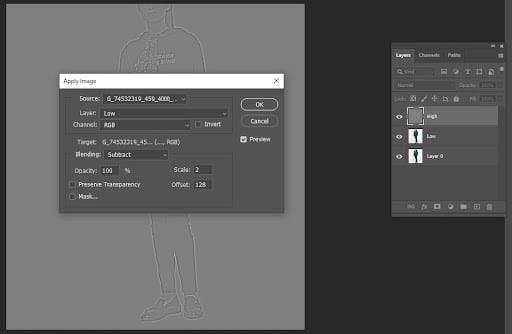
Click on the ‘High’ layer. Now go to Image > Apply Image.
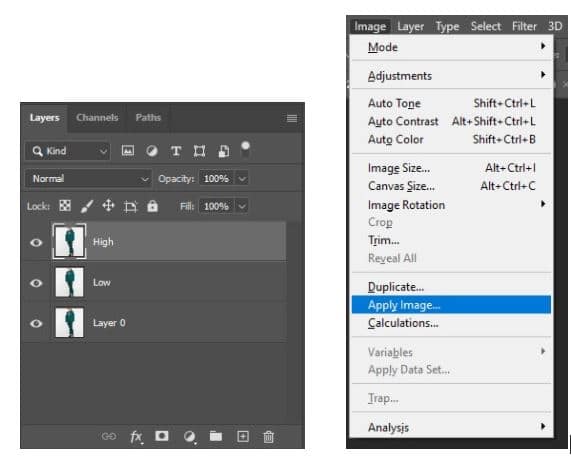
A box will pop up with several options. Choose the Layer as ‘Low’, Channel as ‘RGB’, Blending as ‘Substract’, Scale 2, and Offset 128.
Step 6: Linear Light
Now, click on the top layer and change the layer mode to Linear Light.
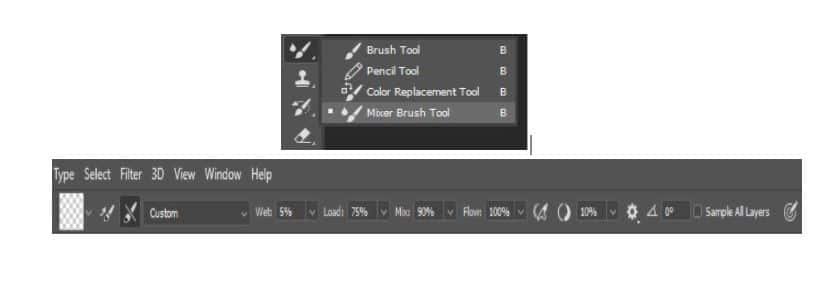
Step 7: Take the Mixer Brush tool
Finally, click on the ‘Mixer Brush Tool’ from the toolbar and adjust other options according to your needs.
Now, start brushing your image to remove wrinkles. You need to be very careful while brushing so that you do exactly the amount you need.
Step 8: Save the Photo
Lastly, save the file when you’re done.
You May Also Like: How to Feather Edges in Photoshop
What are the Common Mistakes When Removing Clothing Wrinkles in Photoshop?
The common mistakes when removing clothing wrinkles in Photoshop are as follows:
- Over-editing: Removing all wrinkles without preserving the fabric’s natural texture and detail makes apparel photography unnatural or artificial.
- Inconsistent Retouching: Harsh edges or noticeable transitions between the edited areas and the surrounding fabric can make the retouching obvious and unprofessional.
- Ignoring Texture and Flow: Failing to preserve the natural texture and drape of the fabric can make the clothing look fake.
- Creating Unnatural Patterns: When using tools like the Healing Brush or Clone Stamp, avoid repeating samples or patterns that are noticeable.
- Failing to use Layers: Working directly on the original image or not using duplicate layers for different adjustments limits flexibility and makes it difficult to revert to previous steps or refine edits.
- Overlooking Lighting and Shadows: Inconsistent lighting in edited areas can make the retouching obvious. Ensure you are sampling from areas with matching brightness or adjusting luminosity accordingly.
- Cloning from Unrelated Areas: Cloning from areas with vastly different textures or patterns will make the editing obvious.
Do You Need Professional Help to Remove Clothing Wrinkles in Photoshop?
Yes, businesses like yours benefit from professionals. Clothing photography with wrinkles gives a negative sense to online buyers, like low-quality products. Smoothing wrinkles in clothing or fabric is a creative art because it helps viewers visualize the fabric’s texture, details like stitching, and overall garment quality. So, to enhance clothing’s professional appearance, improve customer perception, and boost sales, you need post-processing experts.
Get Remove Wrinkles from Clothes Photos ...

Top-rated fashion, e-commerce, and product photographers outsource photo editing services from Clipping Path Studio for their high-quality image editing services, great communication, and fast turnaround deliveries. Here’s why you should rely on CPS experts:
- Specializing in Professional Photo Editing Services: Clipping Path Studio (CPS) has a team of expert retouchers experienced in fashion, apparel, and product image editing, ensuring natural and premium results.
- High-Volume Capability & Fast Turnaround: Whether you have hundreds or thousands of images, CPS delivers efficiently with strict quality control to maintain your brand’s reputation.
- Advanced Editing Techniques: Using Photoshop’s frequency separation, clone stamping, healing, and dodge & burn methods, CPS editors remove wrinkles while preserving fabric texture and realism.
- Cost-Effective Solutions for Businesses: CPS offers affordable outsourcing packages without compromising on professional standards, saving your business time and budget compared to in-house editing.
- Guaranteed Quality & Client Satisfaction: Clipping Path Studio prioritizes client satisfaction, offering revisions if needed and maintaining open communication for project clarity and success.
