
Image masking refers to the digital photo-editing technique that controls the pixel-level transparency of a raster image layer depending on the grayscale image or vector-defined region’s tonal value. Photo masks add creativity and artistic view and remove flaws in images.
There are 14 types of masking in Photoshop, categorized based on the desired effect, including layer masks, alpha channel masks, gradient masks, and clipping masks. Professional photo editors use the brush tool, gradient tool, selection tools, move tools, pen tools, and shape tools to create the masking effect.
The masking process streamlines image editing workflow for professional photographers, e-commerce store owners, online shop owners, advertising, and media companies. It has an impactful contribution to e-commerce product photography by highlighting its product’s features and benefits that drive customers’ attention to online stores.
What is Image Masking in Photo Editing?
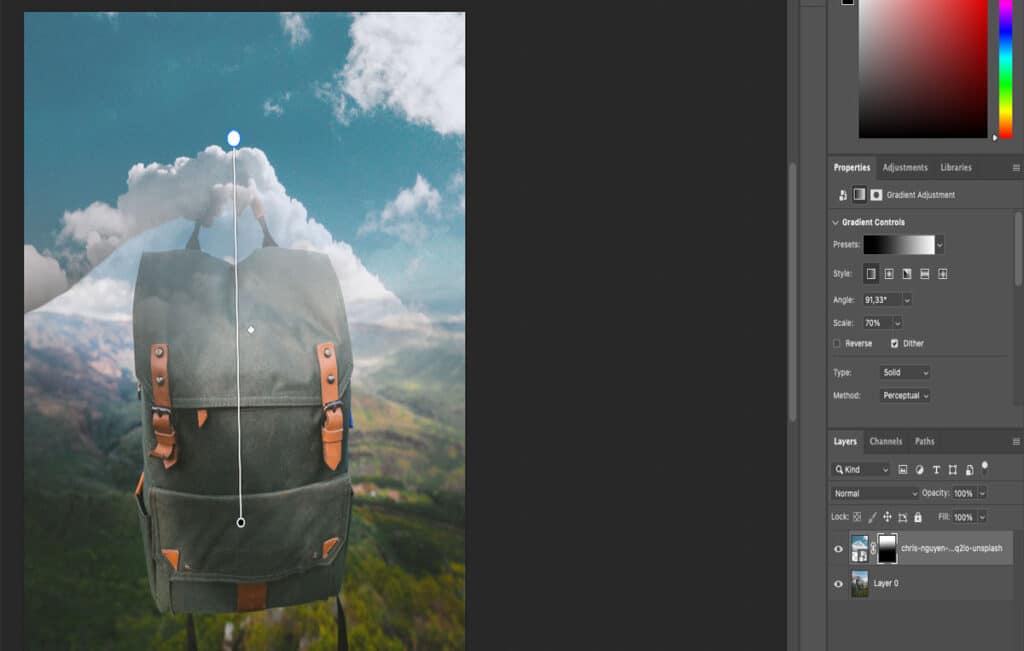
Image masking is a non-destructive image editing technique for selectively hiding and displaying specific parts of an image for precise editing. Professional photo editors apply different photo masking techniques, such as alpha masking, layer masking, clipping masks, gradient masks, etc.
As it is a raster-based process, masking takes grayscale images associated with a layer. Different shades of gray determine the level of transparency.
- Shades of gray show partially transparent parts in the image.
- White displays completely visible parts in the image.
- Black exhibits the hidden parts in the image.
Is Image Masking a Non-destructive Editing Method?
Yes, image masking is a non-destructive photo editing technique used in post-production. Instead of permanently altering the pixel data of the original image, a mask allows you to control the visibility of specific parts of a layer. This means you can hide or reveal portions of the image without deleting any actual pixels, preserving the original content.
What are the Different Types of Image Masking in Photoshop?
There are 14 types of image masking in Photoshop based on the effect you want to create as follows.
1. Layer Masks
A layer mask is a masking type that controls the transparency level’s visibility of a specific part in a layer. This masking technique is applied to specific areas in the image such as brightening the main subject in your image without affecting its surroundings or altering a certain color without affecting similar colors inside the photo composition.
Layer Masking Process:
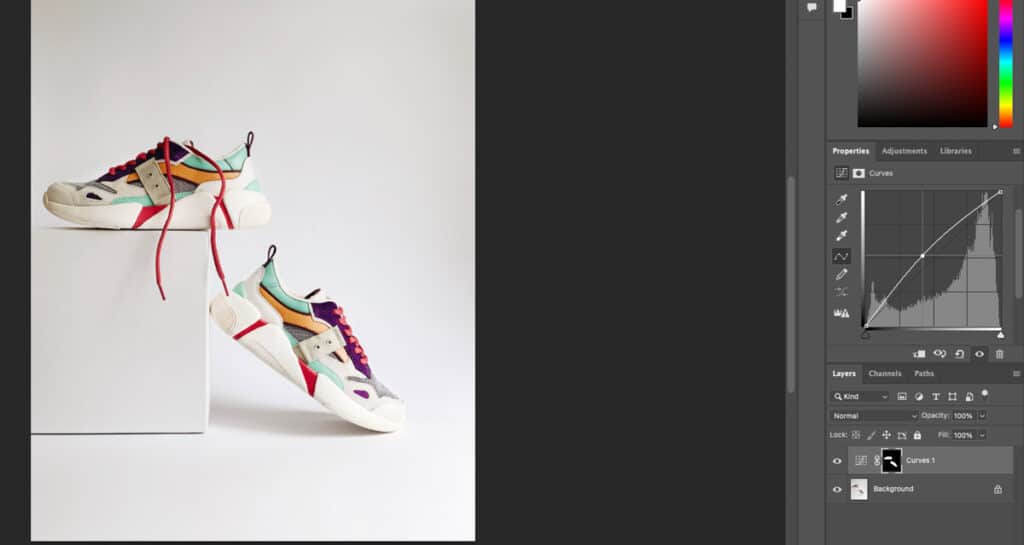
- Start by creating an adjustment layer. In this example, I’m selecting Curves to brighten the sneakers without affecting the background.
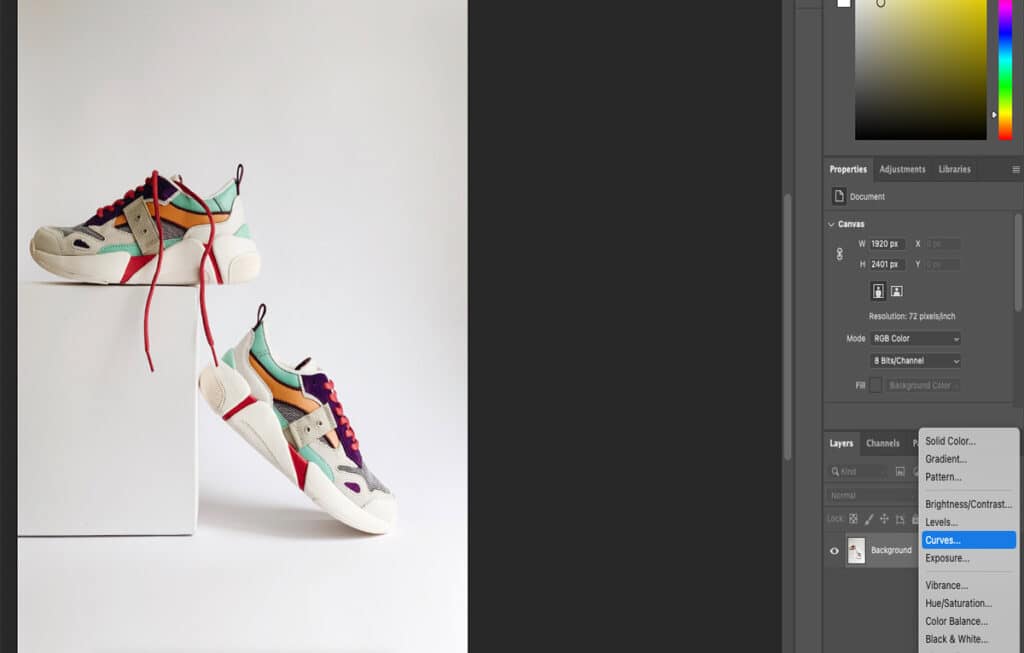
- Select the layer mask and press Control/Command + I on your keyboard to invert the mask.
- Set your foreground color to white and, using the brush tool, brush over the areas that you’d like to edit.
- In the second example, I used the black & white tool to desaturate all the colors in one sneaker.
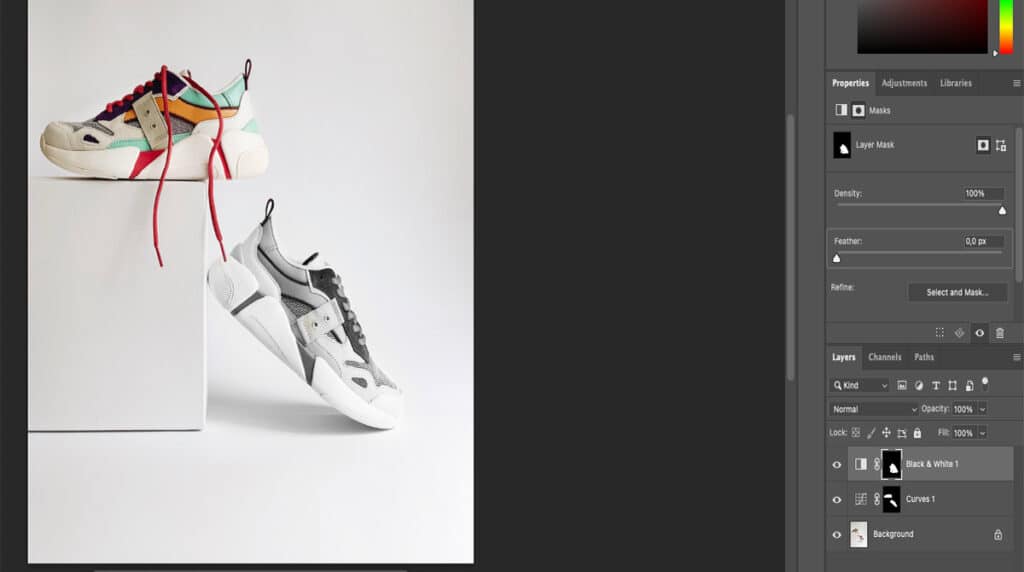
- There are many exciting ways to approach this technique. Use your imagination to make your photographs stand out!
2. Alpha Channel Masks
An alpha channel masking is a method controlling the transparency level within an image. Alpha channels are used to manually make difficult selections, such as subjects with detailed edges like fur, fabric, and hair or photos with busy backgrounds. This masking technique is found in the channels section of any editing software that has layers. There are three main channels: red, green, and blue that allow different grayscale versions of images.
Alpha Channel Masking Process:
- Duplicate the channel with the strongest contrast between your subject and its background. (If your background is white, the edges of your subject should be dark, and vice versa.)
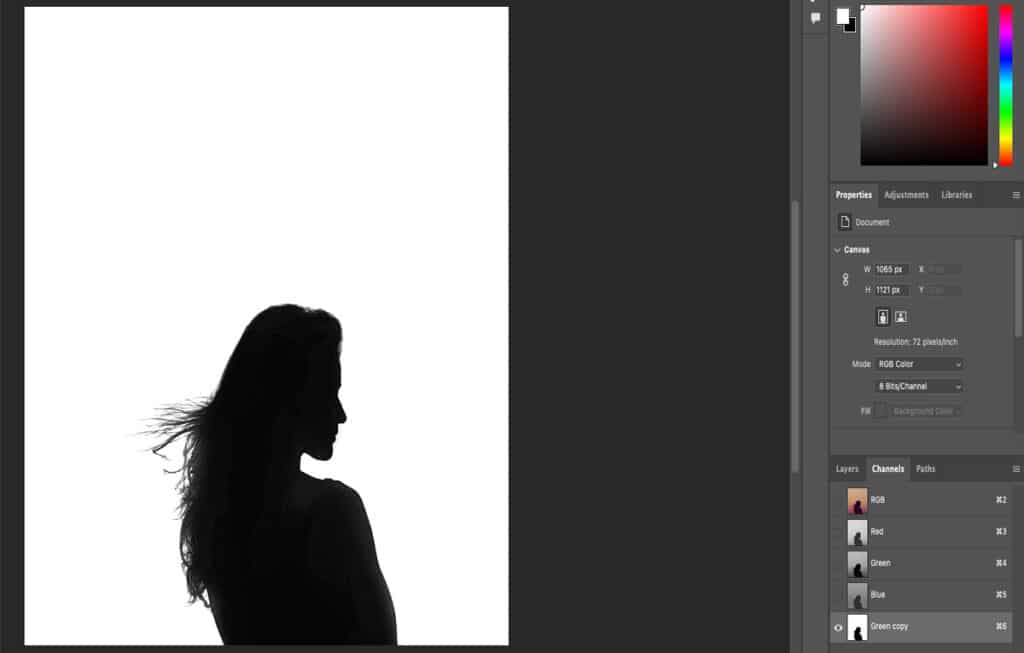
- After that, it’s a matter of using the Dodge and Burn tools to brighten the edges and darken the background of your photo. Once that is ready, you can create a mask that has very detailed edges.
3. Gradient Masks
Gradient masking is the type of masking that creates seamless transitions between visible and non-visible areas of a layer by applying smooth gradients. It is used for blending layers, applying selective adjustment in a non-destructive way, creating fading effects, and adding new objects to images without making them look unnatural. Gradient masks are mostly used in landscape photography, creative portraits, and wildlife photography for creative photo manipulation.
Gradient Masking Process:
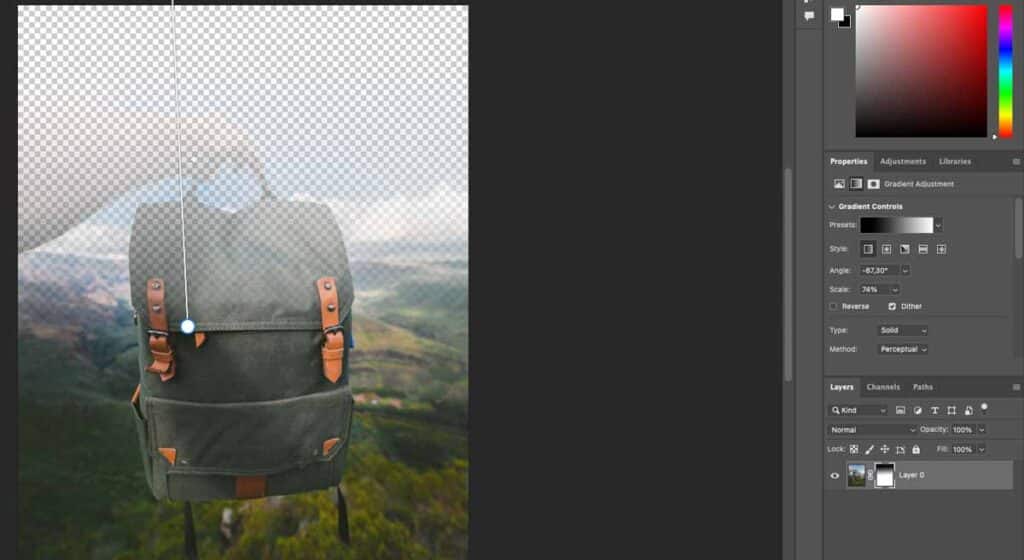
- Open your photos in the same document. Create a layer mask for the image that you’d like to blend with the second photo. Then, click on the Gradient tool, which is located under the Eraser tool and above the Blur tool.
- Click on the illustration of the gradient. This will open a menu with different gradient options. Go to the Basics folder and select the gradient that transitions from black to white. Make sure that Reverse is not selected, as illustrated in the example.

- Then, drag the gradient from any direction of your choice. This will seamlessly erase parts of the second photograph and create a natural-looking transition.
Note: Use the Brush tool to make some more adjustments, and make big changes with the Photoshop gradient tool.
4. Clipping Masks
A clipping masking is a type of masking that permits controlling the visibility of one layer based on the content of another layer. In the photo editing and graphic design industry, clipping masks are applied to combine photos with shapes or text.
Clipping Masking Process:
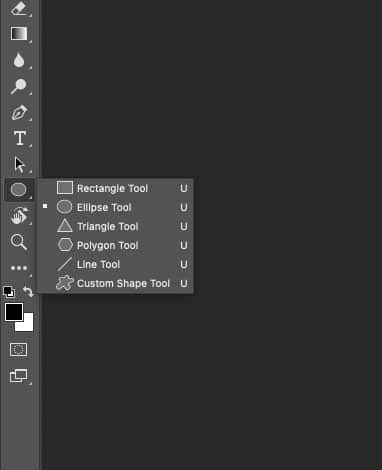
- Start by creating a blank new file with a black or white background. Right-click the Ellipse tool (alternatively, press U on your keyboard) and select a shape. Drag your cursor over the blank canvas to create a shape.
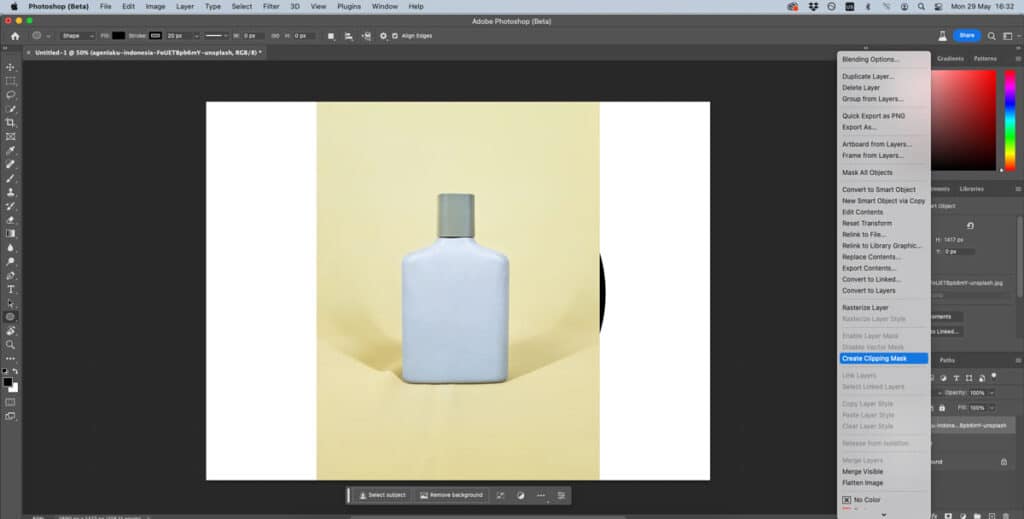
- Open your photo in the same file, making sure the new layer is directly above the shape you created. Right-click the layer and select create clipping mask. This will automatically link the photo to the shape, creating an eye-catching effect.
5. Quick Masks
A quick masking is a Photoshop feature that allows quick creating and editing selection for temporary masks. By using this tool, users paint selections directly on the images through grayscale values: black hides, white reveals, and shades of gray offer a partial selection. The quick mask brings effective results for refining selections with precise brush control. Then, it converts those into editable masks or selections.
Quick Masking Process:
- Enter Quick Mask mode by pressing Q.
- Paint with black or white to define the selection. Black allows adding mask or deflect and white removes the mask/select.
- Exit Quick Mask mode (‘Q‘) to convert to a selection.
6. Vector Masks
A vector mask is created using vector shapes or paths. It uses sharp and clean paths that define the visible areas of a layer. Vector mask is applied for creating logos, precise shaping, UX design, etc.
Vector Masking Process:
- Draw a path by using the Pen tool or the Shape tool.
- Add a Vector Mask to the layer.
- Adjust path points for refinement.
7. Color Masks
Color masking refers to those that are created from selected color ranges of an image. Using specific color values, color masks separate specific areas of an image. It is used for changing or enhancing certain, color-dominant regions or precise color targeting in skin tones.
Color Masking Process:
- Go to Select and choose Color Range.
- Click on the desired color and adjust fuzziness.
- Then, turn the selection into a mask.
8. Hair Masks
Hair masking is a specialized masking that is used for selecting and isolating soft edge objects such as hair, feathers, fur, etc. It is the process of precisely extracting the fine hair strand in detail with Refine Edge or Select and Mask tools. Hair masks preserve natural detail while separating objects from the background.
Hair Masking Process:
- Make a rough selection around the hair.
- Use Select and Mask, and click Refine Hair.
- Output to a layer mask.
9. Collage Masks
Collage masking refers to the strategic implementation of blending multiple images into a photo collage using masking techniques for selective hiding and revealing. The method involves using soft brushes on layer masks for smooth transitions and effects. The results bring naturally merged images without any abrupt changes.
Collage Masking Process:
- Put images in separate layers.
- Add a layer mask to each of them.
- Then, use a soft brush or gradient to blend the edges.
10. Translucent Image Masks
Translucent image masking is the masking that allows different degrees of transparency in a masked image. It uses grayscale levels to apply transparency in parts of an image. Translucent masking is used for ghosted visuals, soft fades, or subtle blending.
Translucent Masking Process:
- Add a layer mask to the image.
- Use gradient or paint with gray for translucency.
- Adjust brush opacity or mask levels.
11. Refine Edge Masks
Refine edge masking is a set of tools and a dedicated environment that is used for creating and refining masks. It is used for improving selections that have tricky borders, like hair, feathers, or fur. Adjusting feathering, smoothness, and contrast, you can refine the edge transition for a cleaner, more natural result to apply for a mask.
Refine Edge Masking Process:
- Make a selection.
- Go to Select and Mask.
- Adjust edge settings and output as a mask.
12. Clipping Paths
A Photoshop clipping path is a vector-based path made with Pen tool to define an outline around an object in an image. Clipping paths are used for isolating objects or elements to use for any background, especially effective for e-commerce product photography and offline publishing platforms.
Clipping Paths Process:
- Use the Pen tool to draw a path around the subject.
- Save and name the path.
- Set it as a clipping path under the Paths panel options.
13. Transparency Masks
Transparency masking, also called raster layer masking, refers to the mask that controls layer visibility. It works similarly to the layer mask, using the grayscale transparency. You can hide or show parts of a layer with black (invisible), white (visible), and grays (partial). A transparency mask creates fade effects, blending, and ghosted layers without altering the image pixels.
Transparency Masks Process:
- Add a layer mask.
- Paint black/white/gray to control visibility.
- Adjust with gradients or brush opacity.
14. Channel Masks
Channel masking is the masking method of utilizing individual color channels (red, blue, green) or alpha channels of the image as a grayscale mask. The process extracts selections based on tonal differences in a specific channel. Channel masks use contrast within the color channel to isolate an object that is difficult to select.
Channel Masking Process:
- Open the Channels panel.
- Duplicate a channel with good contrast.
- Enhance with Levels/Curves.
- Load as selection and apply to a mask.
How Does Image Masking Differ from a Clipping Path?
Image masking differs from a clipping path based on the application techniques in the editing process. A clipping path draws a vector path to isolate an object from the rest of the image whereas masking uses grayscale images of layers to separate parts from the rest of the image. Other differences between photo masking and clipping paths are as follows.
| Parameters | Image Masking | Clipping Path |
|---|---|---|
| Technical Method | A raster-based mask, (grayscale images) associated with a layer. | A vector path is created by the Photoshop Pen tool for a precise outline around an object. |
| Purpose | Used for the selective reveal and concealment of any parts of an image. | Use a drawing line to create a cutout. |
| Outcome of Edges | Creates refined edges for soft, delicate, and intricate objects. | Creates hard, straight, and clean edges for objects. |
| Transparency | Offers various transparency levels, creating fades and blends. | Creates solid transparency outside the path. |
| Way of Editing | Non-destructive process of editing. It stores the original image data. | A more permanent and less flexible way of editing as pixel information outside the path is removed or hidden. |
| Editing Process | Using a mask (a layer) to differentiate visible and invisible areas. Involves painting on the mask with black, white, or shades of gray, using selection tools, or applying filters. | Drawing a closed path around the object. Involves adjusting the vector path’s anchor points and curves. |
| Processing Time | Time-consuming, especially for intricate details. | Faster process for defined edged objects. |
| File Size | Can create larger file sizes. | Result in smaller file sizes. |
| Use cases | Images having hair, fur, smoke, transparent or semi-transparent objects, intricate jewelry, and during gradual transitions or blending. | Images of electronics, furniture, packaging, shapes, and text. |
When Should You Use Image Masking Instead of Clipping Path?
You should use image masking instead of a clipping path in the following situations:
- The object has soft or intricate edges, such as hair, feathers, or fur.
- The object is translucent, like fog, smoke, or glass.
- You need a fading or soft transition effect.
- You require a color-based selection, especially when the background and object have subtle contrast.
What’s the Difference Between Image Masking and Background Removal?
The main difference between image masking and background removal is the approach to handling the background, control, and reversibility. Image masking is a process that offers selective visibility. Users can choose to hide the background, gain control over the visible and hidden parts, and reverse the changes. Whereas, background removal is a task that uses many processes, and image masking is one of them. Depending on the process, control, and reversibility of the images are determined.
What are the Benefits of Photo Masking?
The benefits of photo masking in photo editing include adding artistic perspective, allowing creativity, controlling transparency, and removing flaws and boring looks to ensure professional quality and commercial look. Professional photographers, e-commerce sellers, online store owners, advertisers, and media companies look for industry-grade photo editing solutions to mask their images. Expert photo editors apply masking to improve image appearance to partially hide and show parts, allow image flexibility, and boost image appearance for presentation.
- Adding Artistic Perspective
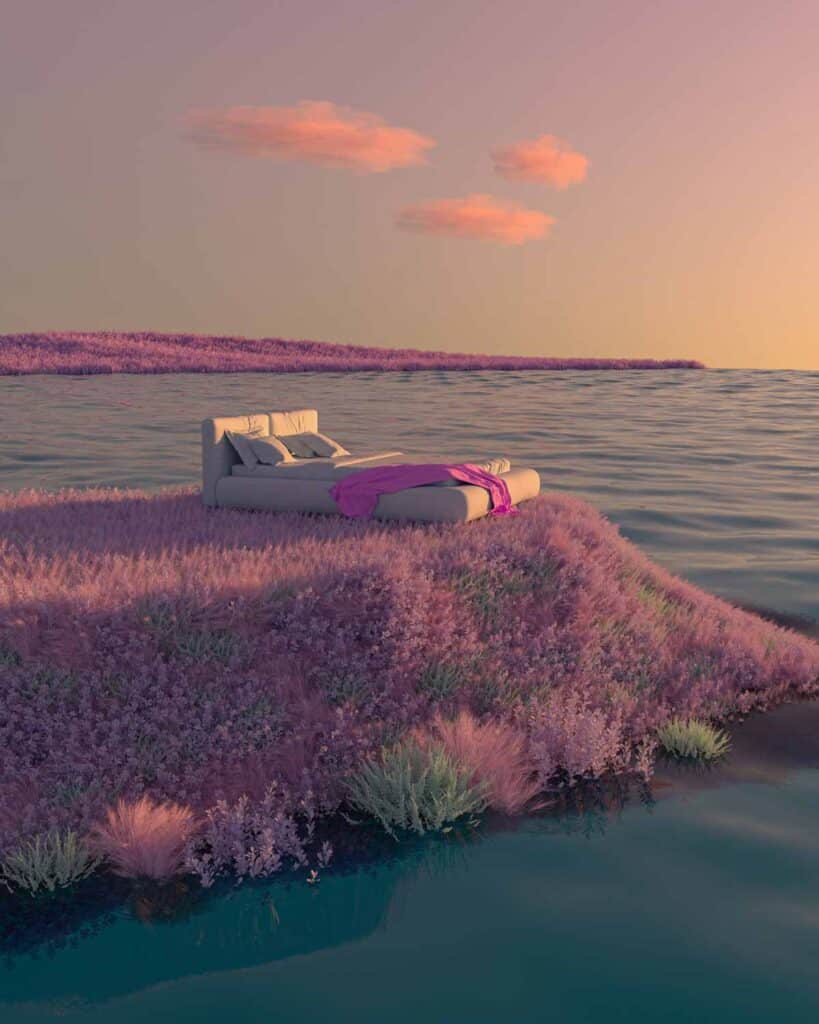
Image masking creates an artistic perception that sparks viewers’ interest. It opens vast editing possibilities for photographers. Create surreal images by blending multiple photos or adding new elements to a scene. For example, conceptual photographers often replace skies, objects, and even people in their images to make their photos look more artistic.
- Allowing Creativity in the Images
Image masking techniques allow applying creativity in images. Blend your photos with text, shapes, and other photos to create unmatched compositions. It allows users to design their websites or products for publishing and create their photography merchandise within minutes.
- Controlling Visual Transparency
Masking is important in controlling the transparency level and parts of photos. Photo editors show important parts of photos and leave the rest hidden. Masking plays an important role in transparent background photos that are usable on any background.
- Removes Flaws and Boring Look
Photo masking makes selective edits that enhance certain parts of your image without affecting any other areas. To brighten your subject’s face you need to protect the rest of the photo and masking allows you to achieve that. It eliminates the dullness of simple photos. Whether you’re a product photographer, landscape photographer, or a generalist, you’re bound to find photo masking useful.
Why is Image Masking Important for Hair and Transparent Objects?
Image masking is important for hair and transparent objects because it allows for precise, flexible, and non-destructive editing. This technique helps achieve a detailed and natural look, especially in complex areas like fine strands of hair or semi-transparent materials (e.g., veils, glass, smoke). Unlike other selection tools, image masking preserves the original image data, allowing for iterative refinements without permanent changes.
What Photoshop Tools are Used to Create Photo Masking?
Photoshop tools that are used to create photo masking are the brush tool, pen tool, gradient tool, selection tool, and AI-powered tools.
- Brush tool: Used for creating layer masks, by painting black and white to hide and reveal respective areas.
- Gradient tool: Used for creating layer masks. It creates a smooth transition between visible and non-visible parts.
- Selection tools (Lasso, Marquee, Magic Wand, Quick Selection): Used for creating layers masks to define initial boundaries.
- Move tool: Used for clipping masks, to adjust clipped layers’ alignment.
- Pen tool: Used for vector masking. Creates sharp paths for masks.
- Shape tools: Used for vector paths for generating geometric vector masks.
- AI-powered tools: Used for automatic detecting and masking, multi-object masking among others.
How to Mask an Image in Photoshop?
To mask an image in Adobe Photoshop follow these steps.
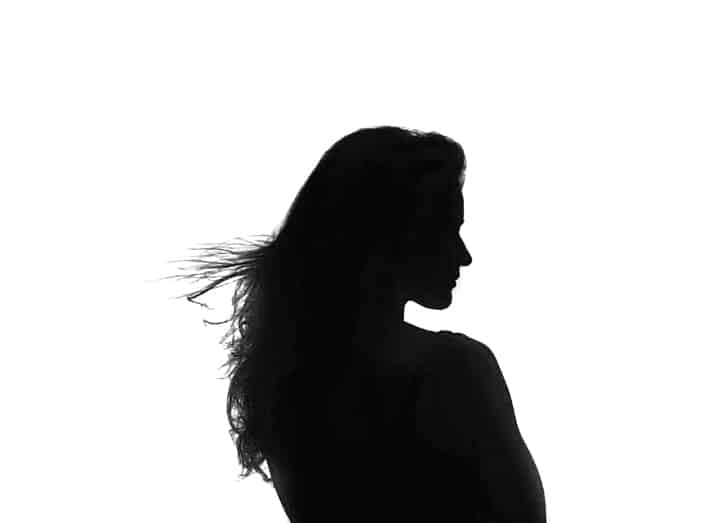
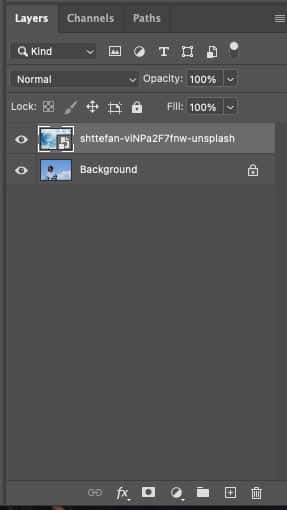
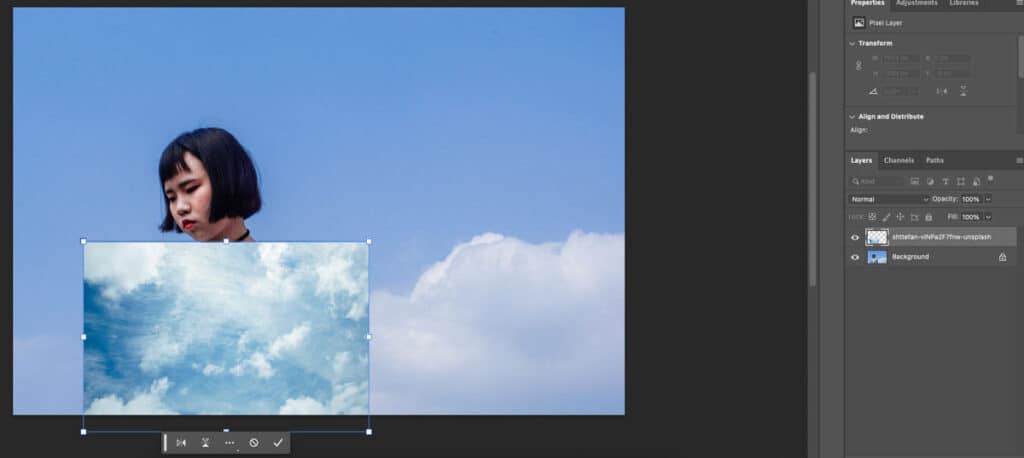
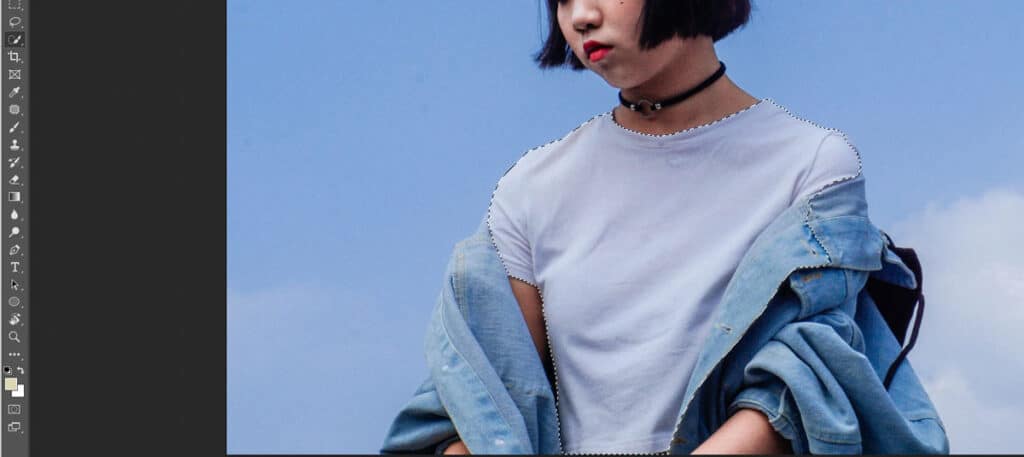
Step 1: Open Photos in Photoshop
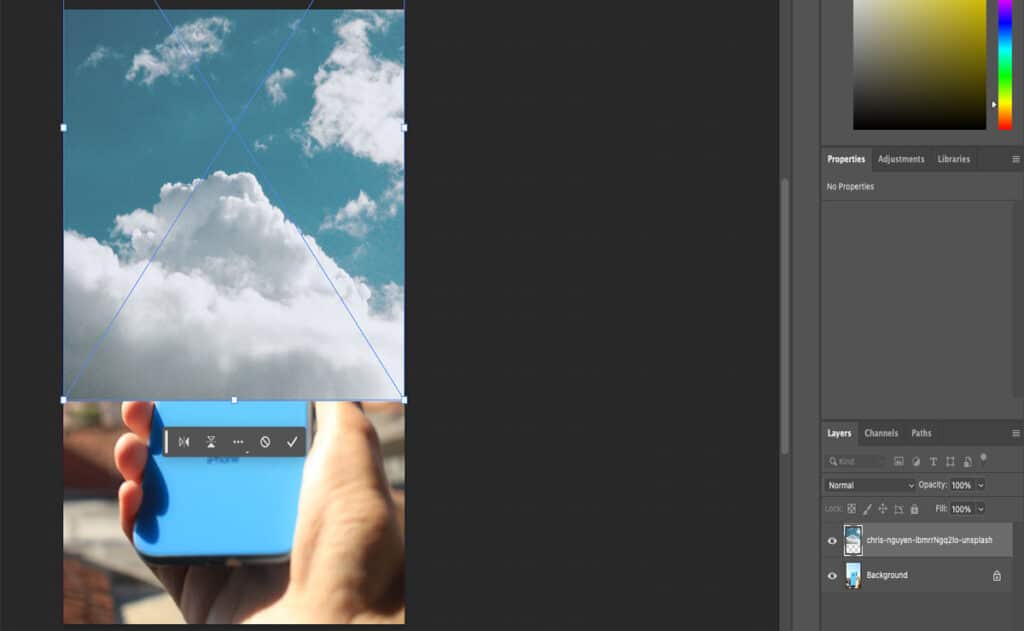
Open photos in the same document. I have taken 2 photos, one of a model and some clouds that I’d like to merge creatively. Move your photos around so that it’s easier to edit them later on. In this example, I moved the image containing the sky over the model’s shirt.
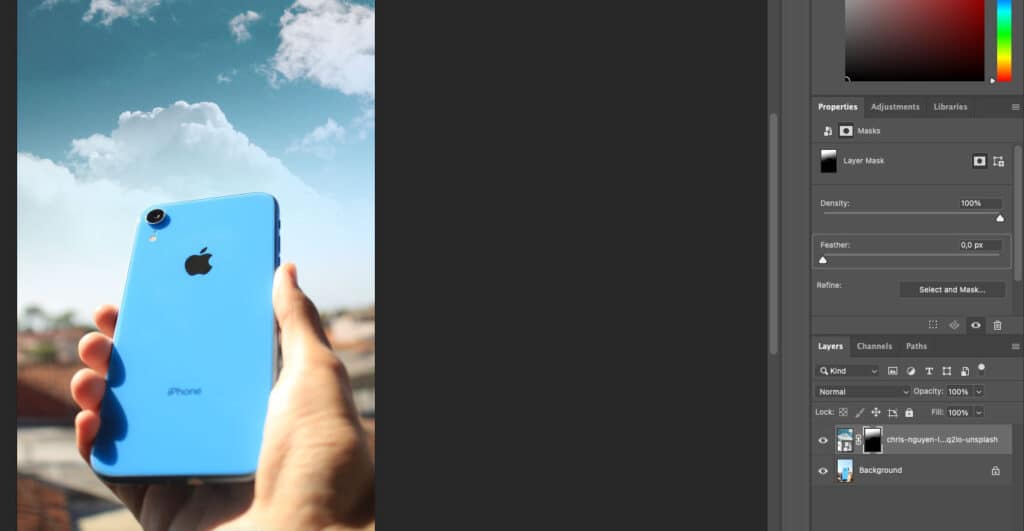
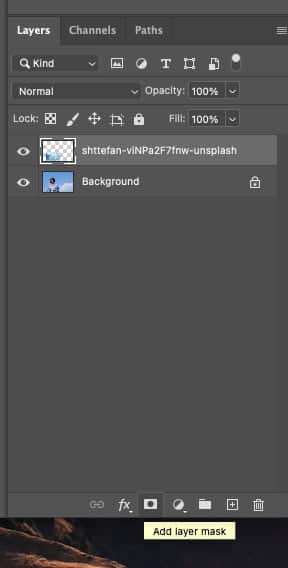
Step 2: Create a Layer Mask
Click on the Layer Mask icon at the bottom of the Layers screen to create a layer mask.
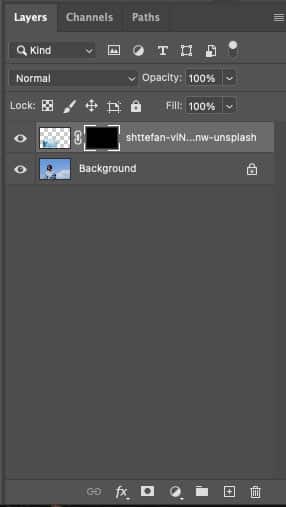
Step 3: Invert the Layer Mask
Press Control or Command + I on your keyboard to invert the layer mask. The layer mask will turn black.
Step 4: Define the Area Needs Editing
Go back to the first photograph (or the image without a layer mask) and select the area that you’d like to edit (i.e. fill with the second photograph). You can make a selection using any tool you like, but I recommend using the Quick Selection tool as it’s easy to use. Your selection doesn’t need to be perfect.
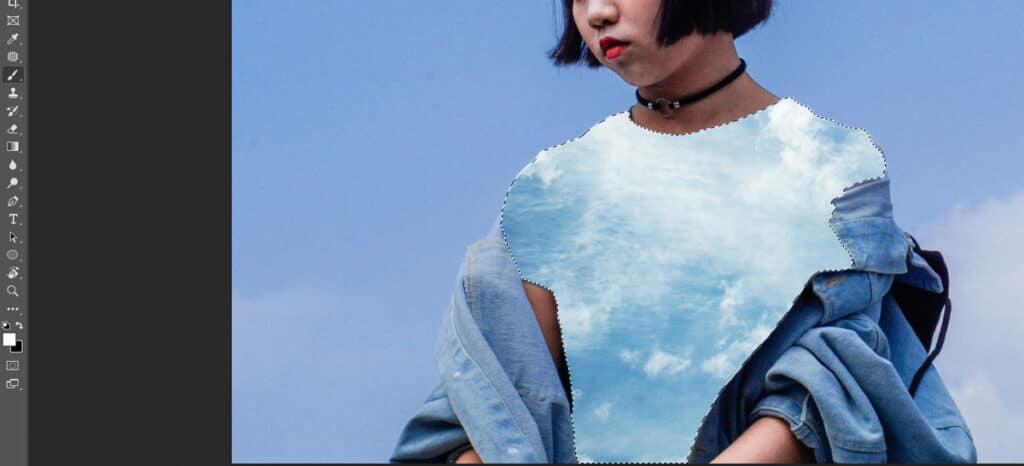
Step 5: Paint the White Color to Unmask
Go back to the layer with the mask. Click on the layer mask. Make sure your foreground color is set to white.
- Use the Brush tool to paint over the selected area.
- Toggle between black and white by pressing X on your keyboard.
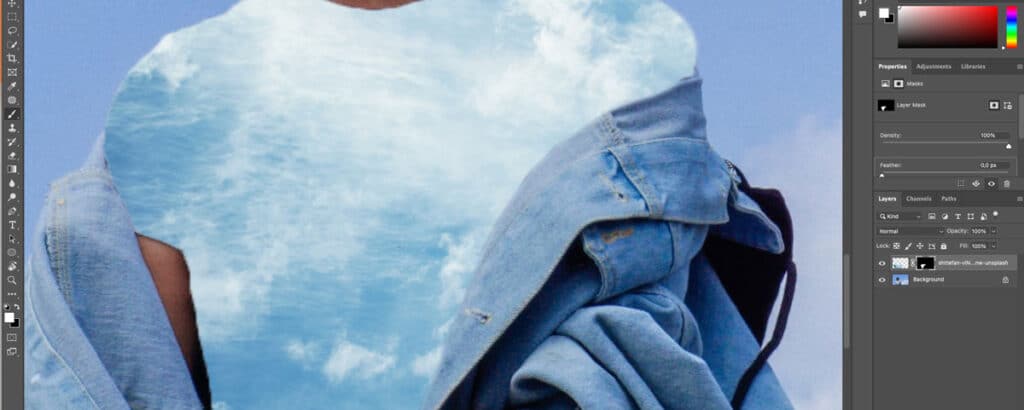
Step 6: Deselect and Refine the Mask
- Press Command or Control + D on your keyboard to remove the selection.
- Use a smaller brush to go over the areas that weren’t filled with masks.
If you want to remove the layer mask edits, brush over with black. If you want to add the layer mask edits back to the photo, brush over with white. Make sure that your brush opacity is at 100%.
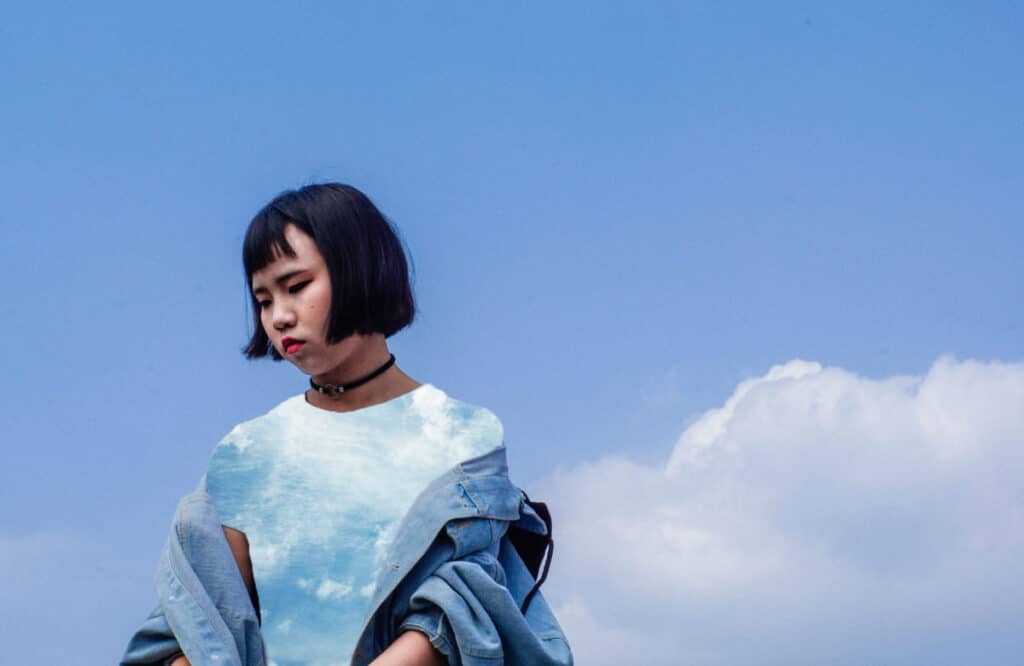
Step 7: Final Image
Here is the final result. You can use this technique to edit your photos in practical and creative ways.
How to Mask in Lightroom?
To mask in Adobe Lightroom, use the dedicated masking panel in the developer module as follows.
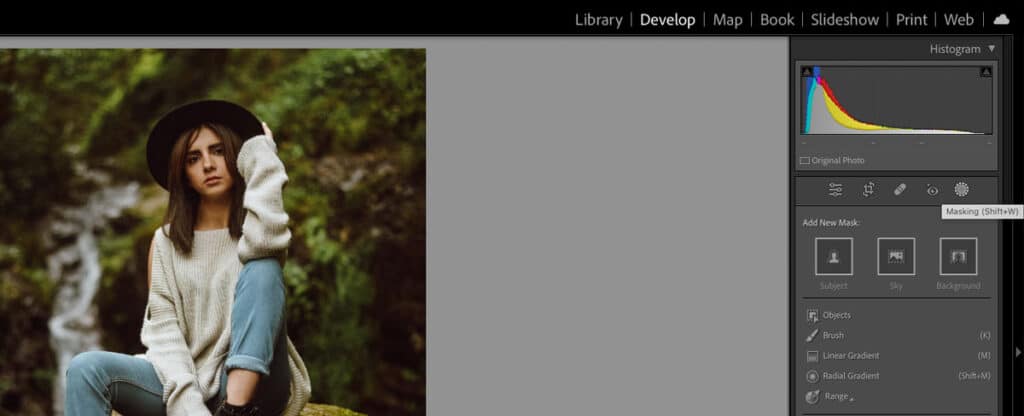
Step 1: Use the Masking Panel in the Developer Module
Use this tool to select a subject, sky, or background. Edit any subjects using the brush, linear gradient, radial gradient, or range tools. Also, manually select the area that you’d like to edit.
Step 2: Make a Selection
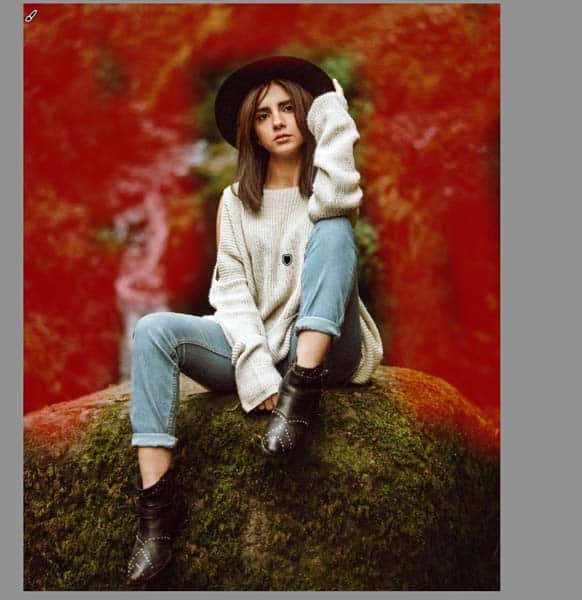
Click on Subject and Lightroom will automatically select the subject which will appear in red. This automatic selection feature facilitates editing bulk projects.

Or, manually brush over the photo to control the selection. The selection doesn’t need to be perfect unless you’re making very specific edits to your photo.
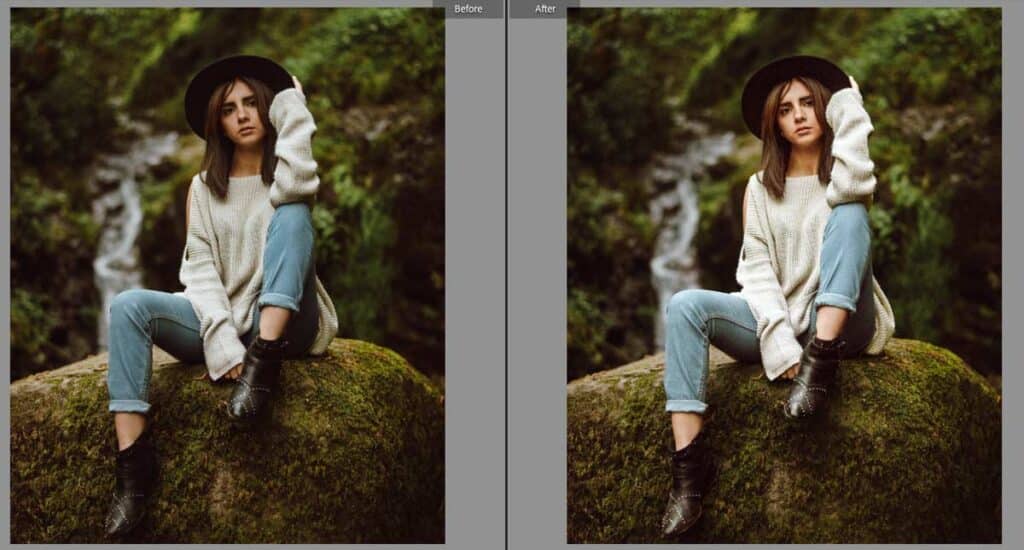
Step 3: Mask Adjusting for Targeted Brightening
The model in this photo doesn’t stand out much as the whole photograph is dark. Instead of brightening the entire photo, I wanted to keep the background dark while brightening the model. To do this, I made a few adjustments to the mask. There are many editing options to choose from in Lightroom, so feel free to get creative.

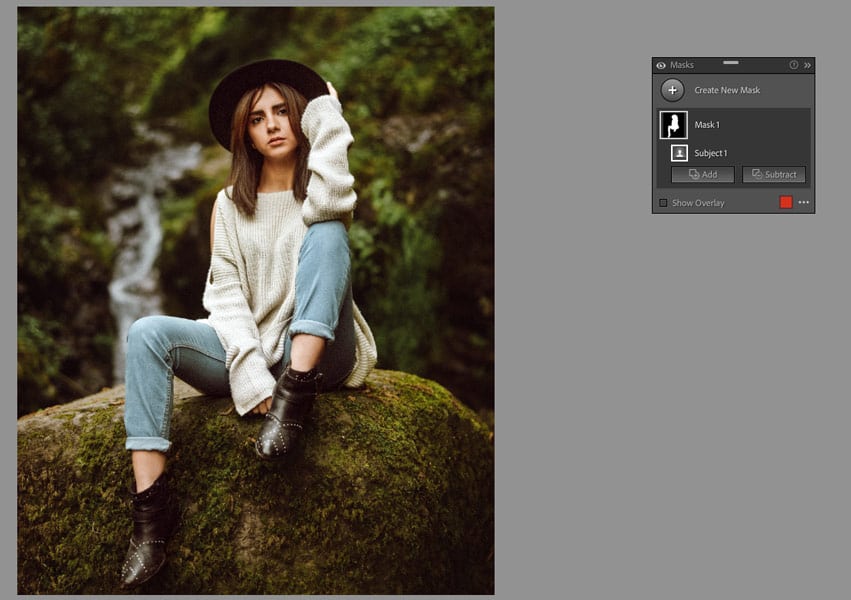
Step 4: Create a New Mask
If you want to edit another part of your photo, click on Create New Mask. Pay attention to each minor adjustment as it can make a big difference in your work.
Step 5: Find the Color and Luminance Range Masks
Lightroom offers special masking features for color adjustment and creative photo creation for photographers.
- Click on Range. You’ll be presented with three options: Colour Range, Luminance Range, and Depth Range.
- Go to the same Masking section
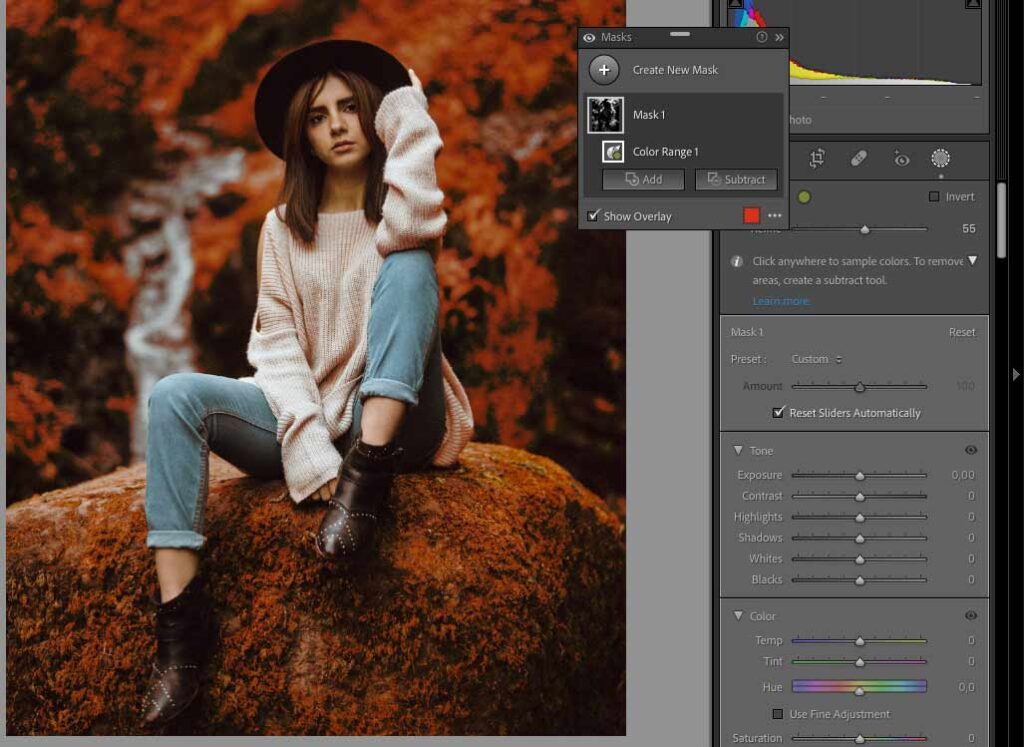
Step 6: Apply Color and Luminance Ranges to Improve Workflow

Color Range will make a selection based on the colors you select. When a selection is made, all the affected areas will turn red. Once this happens, you can start editing.
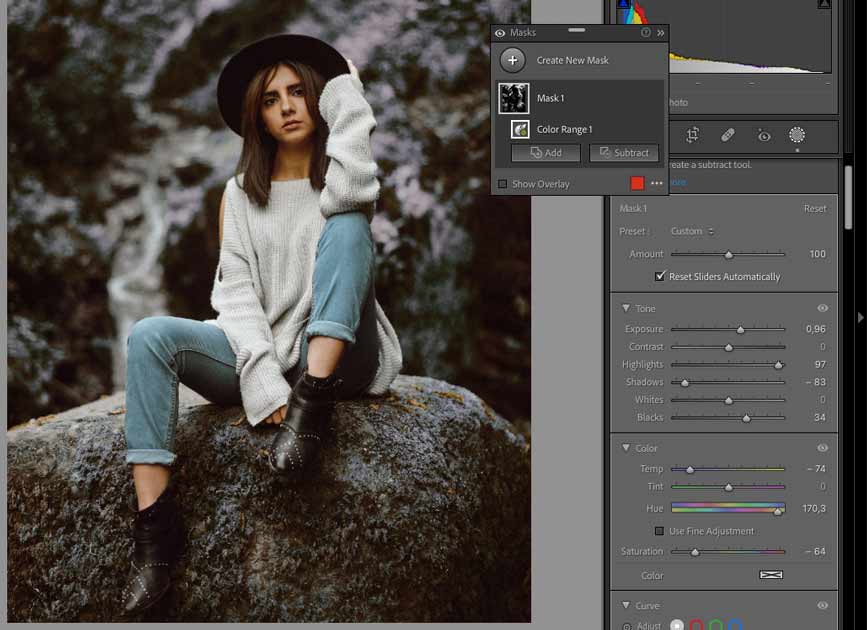
To give this photo a surreal look, I experimented with Hue, Saturation, and Temperature.
Luminance Range has similarities to Color Range but with different selections. It will select areas with a specific brightness level, depending on the area you pick.
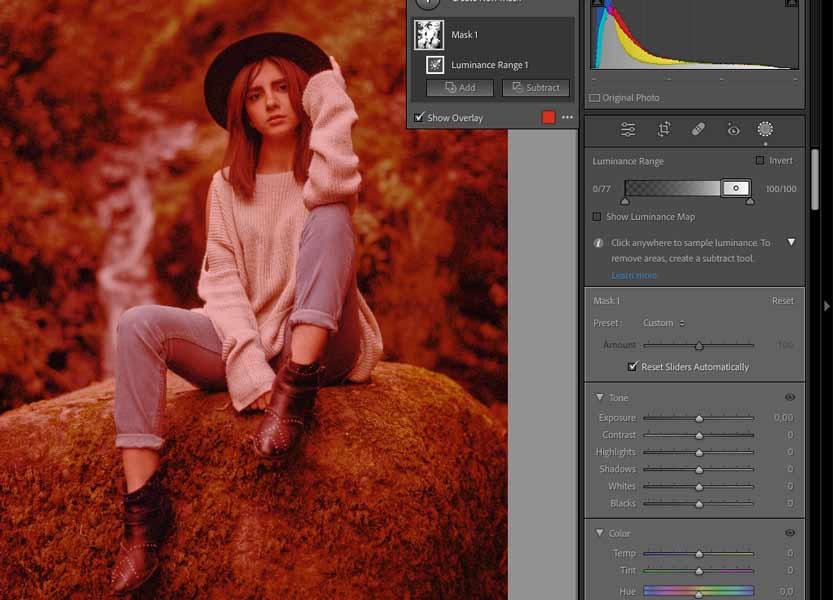
You can pick a specific brightness range. The wider it is, the more areas in your photo will be affected by your edits.
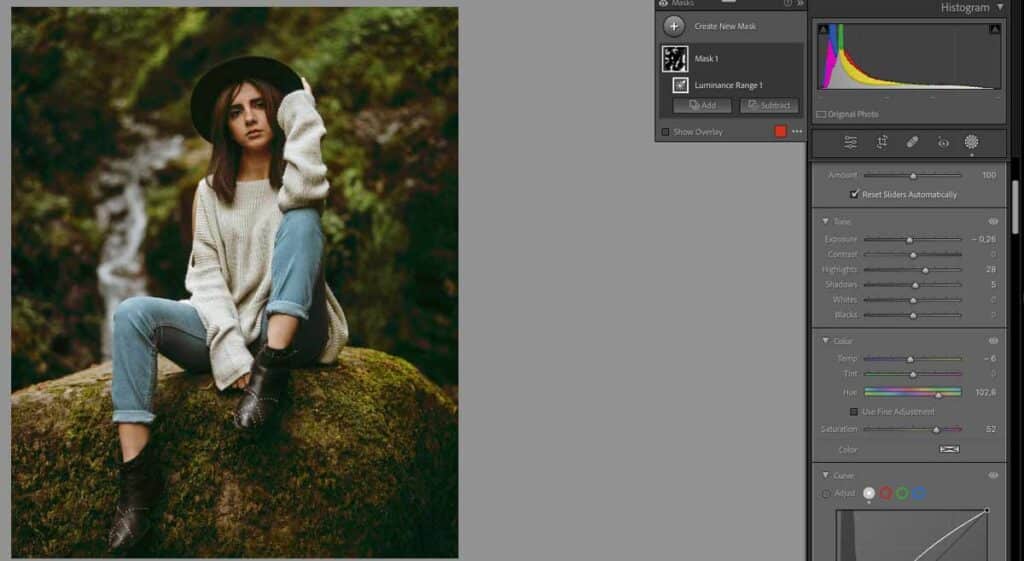
Step 7: Final Image
Both tools can be immensely helpful when making specific color edits in Adobe Lightroom.
What Technique is Used to Hide Part of an Image Without Removing it?
Masking techniques are used to hide part of an image without removing it as it offers control and flexibility. The image masking process makes selective control of the images. It contains photo pixels without deleting them, making it easy to recover the hidden data.
Different types of masks use different methods to hide any part of images as follows.
- Layer masks offer precise control of specific layers.
- Alpha channel masks offer built-in transparency channels.
- Vector masks provide clean edges.
- Clipping masks control the visibility of one layer with another.
The parts that are hidden and that are open are divided by color in the photo mask. White or opaque areas of the masks expose the underlying image whereas black or transparent areas conceal it. Grayscale parts create partial transparency.
Is Image Masking Service Suitable for E-commerce Product Photos?
Yes, an image masking service is suitable for e-commerce product photos to ensure pristine, high-quality, and professional looks that display product features. High-quality product photos attract customers, boost sales, and minimize product return rates. In a blog titled Why Product Photography Is Important, Etsy’s buyer survey data revealed that 90 percent of shoppers said the quality of the photos was “extremely important” or “very important” to a purchase decision.
Masking helps display product features and benefits easing up the viewer’s understanding. For this reason, e-commerce store owners, professional product photographers, and online sellers rely on Photoshop image masking services to ensure quality images that retain viewers’ attention and drive more traffic to the store.
Do Image Masking Services Work for Images with Shadows or Reflections?
Yes, professional image masking services are applicable for images having shadows and reflections. The skilled photo editors of service provider companies are equipped with an advanced and extensive level of tools and techniques to bring a professional look to the image.
