
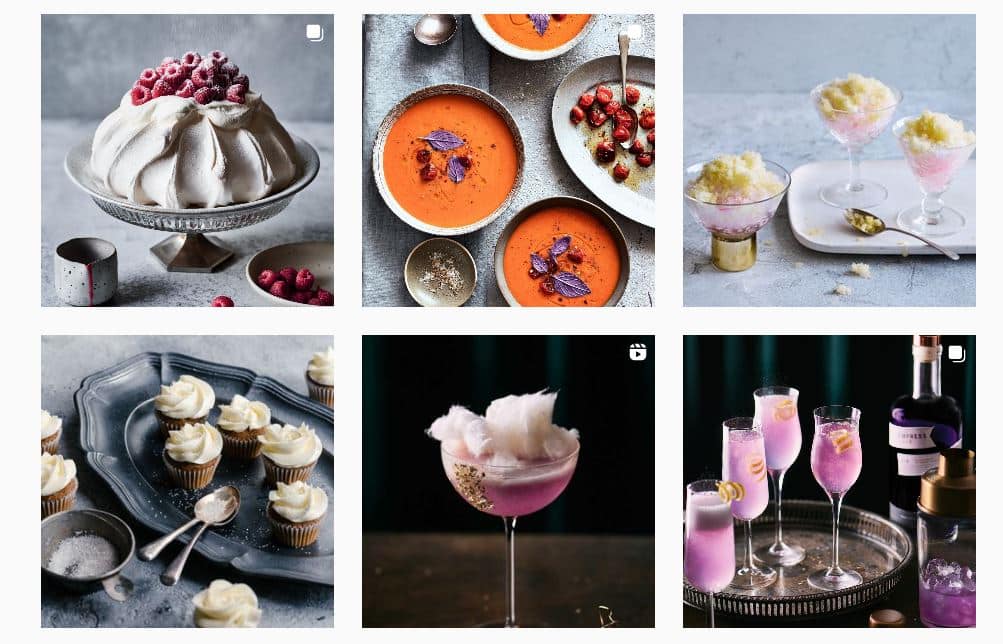
Don’t you feel hungry after seeing a mouthwatering food photograph?
I guess it’s a shared feeling.
Almost everyone loves to try out various delicious food items that are seen on social media and also share images on their social accounts, which makes food photography play an essential role, regardless of whether you are a professional food photographer, a restaurant owner, or a regular person.
This guide is designed to give you complete insight regarding photography and some creative ways to improve your photography skills to create finger-licking food photography.
So, without further ado, let’s get straight into the discussion.
Why Do You Need to Take Food Photography?
The need for food photographs varies depending on the people and the purpose for which they are using it. We, therefore, need to know who would require food photographs the most to comprehend the need for it.
Let’s look at the list of the main consumers of food images to find out why they might need them.
Restaurant Owners
The primary consumers of food images are restaurant owners. They need to promote their dishes to make them popular among the customers. To bring in more customers, they must use professional quality food shots that are appetizing enough to make the customers crave to taste the food items.
Some significant needs are-
- Build brand image
- Increase trust and credibility
- Create a visually appealing menu
- To promote on the restaurant websites
- Increase sales
Chef
Food photographs are also crucial for chefs. They must have a portfolio to get a job at a renowned restaurant or prove their skills as a professional culinary artist. Besides, through professional food images, they can portray their originality in creating various types of dishes.
Some significant needs are-
- Create their portfolio
- Increase their credibility
- Promote their culinary skills and creativity
Food Content Creators
Social media platforms like Facebook, Instagram, YouTube, and many others have numerous food content creators like food reviewers or influencers, food bloggers, and food vloggers who create cooking videos.
All of them are somewhat dependent on food photos, as the food bloggers who share their recipes on social sites need to use appealing food images to attract viewers to view their content. In the same way, food vloggers and influencers need to use tempting images on their pages and as thumbnails to promote their videos.
Some significant needs are-
- Share their content on social media
- Increase viewers’ interest in their content
- Build the trust of the viewers in their culinary skills
- Promote restaurants through their content
Food Photographers
Restaurant owners, chefs, or even general people rely on food photographers to capture appetizing food images for business, professional, and personal use. Besides, to work with restaurants and other clients, photographers need food images to build their portfolios and showcase their range of creativity and work experience.
Some significant needs are-
- Establish a successful career
- Increase the credibility of their proficiency
- Build their image
- Show their creativity
Food Lovers or Ordinary People
Last but not least, ordinary people visit different restaurants to taste food or celebrate their special moments. Some people may also feel the need to share their home-cooked meals or food items from restaurant visits on social media. So, they also require knowledge of taking good food shots to share their special moments with their friends and family.
Some significant needs are –
- To post on social media
- To inform others about the food quality and restaurant
- To capture memories of special ceremonies
What Makes a Great Food Photo?
Although a good camera and lens may seem necessary for photography, many other elements contribute to excellent food images. We have outlined those elements so that you can understand them quickly.
- One of the most important factors is the use of proper lighting. If your lighting is improper, your photographs will become dull or too bright.
- You have to look for ways to avoid shadows that may be created due to harsh light. So, you have to use soft light or make the light softer with diffusers.
- The style of composition and use of angles also make a difference in the appearance of your food. Some foods appear appetizing when viewed from the sides, some from above, some from a lower perspective, and some when viewed up close.
- The way the food is presented determines whether or not the image has visual noise. The style of presentation comprises both the plating and the background. The cutleries and backdrop should complement the main subject. Most importantly, the frame should have some breathing space.
- The most important element in food is its texture. Therefore, to make the image striking, care should be taken to ensure that the texture is as visible as possible.
- Food images are all about using colors. The more vibrant your image is, the more appealing it will look. So, colorful ingredients and optimum saturation can make viewers hungry just by seeing the photos.
- The image should have a good depth of field, as a lack of depth of field will make the image flat and unappealing. Depth of field can also be used to highlight particular aspects of the food to make it appear appetizing.
How to Shoot Food Photography – Easy Steps
There are various types of cameras, lenses, and other equipment widely available to capture high-quality photographs. But all these tools are not suitable for every kind of photography.
We have listed the following photographic equipment, which is extremely crucial to shooting good quality food photographs.
1. Choose the Right Camera
The type of camera you use to capture your food items makes a difference in the quality of the photographs. Many different types of cameras are available today, including DSLRs, smartphones, mirrorless, and many more.
Consider renowned brands like Nikon, Canon, Fujifilm, Sony, Panasonic, and many others when looking for the best camera for food photography. Although they have many different digital camera models, you can compare the features and customer testimonials to determine which camera best suits your needs and your budget.
However, if you want to shoot with your smartphone camera, you can consider using an iPhone, Google Pixel, or good quality Android phones like Samsung.
2. Camera Settings
Using the right camera settings is essential to balance the image brightness, color, and other features well. Digital cameras have built-in settings for certain lighting conditions, such as Auto, Macro, Landscape, Night mode, Shutter priority, Aperture mode, and so on. However, these auto modes sometimes create overexposed or underexposed images.
Therefore, it is better to manually adjust the camera settings to capture well-exposed images as per your lighting setup. Take into account the following to manually adjust the camera settings while shooting food products:
Aperture
The aperture is the hole at the center of the lens that allows light to enter the camera. This hole can be adjusted to control the flow of light as per the requirements of the lighting condition. The size of the aperture is expressed as f-stops. Usually, the aperture ranges from f/1.4 to f/32.
Remember, a wide aperture means a smaller f-stop (f/32), and a narrow aperture means a bigger f-stop (1.4). If you are photographing in a well-lit condition, then use a large f-stop to block excess light, and for a dark condition, use a smaller f-stop to make the image brighter.
Most importantly, the depth of field of an image can be controlled by adjusting the aperture. If you want to make your food item stand out from the background, you can use a wider or larger aperture, such as f/2.8, to draw the focus on the food item while blurring the background.
However, if you want to keep both the food item and the background in focus, use a smaller aperture. You can start with f/8 and gradually increase to f/11 if necessary. Usually, an aperture of around f/8-f/11 is ideal for creating a deep depth of field.
ISO
The light-sensitive sensor in a digital camera is referred to as the ISO. You should adjust the ISO depending on your lighting conditions. Use a higher ISO, for instance, around 400-800, in low-light conditions to get more exposed photos. But keep in mind that a higher ISO also means your image will have visible noise, also known as a grainy image.
For a well-lit setting, the best ISO for a food photoshoot is 100, as it will make the photographs less grainy and well-exposed. However, you can adjust it if it doesn’t suit your lighting setup.
Shutter Speed
The camera shutter speed of a camera refers to how quickly the shutter opens and closes. It determines how much a camera’s sensor will be exposed to light. It also affects the sharpness of the image.
If you want to add motion to your food, you can use both faster and slower shutter speeds in different ways. For instance, if you want a smooth motion blur effect, like pouring maple syrup on pancakes or adding frothy milk to your coffee, you can use a slower shutter speed.
On the other hand, you can use a faster shutter speed to freeze a moment, such as sprinkling salt on a steak or splashing beverage items like water, juice, wine, etc. But your image may have a darker exposure compared to the images taken with a slower shutter speed.
However, using a slower shutter speed can produce blurry images if the camera is used without a tripod. So, consider your lens’s focal length when adjusting the shutter speed to prevent camera shake. That is, for a 50mm lens, your minimum shutter speed should be 1/50s, but you should keep it at 1/100s for better quality.
White Balance
To ensure the accurate color of food, it is also important to adjust the white balance. Usually, restaurants use lights of different intensities, which makes it challenging for the camera’s auto-balance feature to accurately balance the color.
You can use a white or gray card or object to solve this issue. Simply take a photo of a white or gray object in your lighting setup, and then use that as a reference to tell your camera to adjust the white balance.
3. Photography Lens
Along with a good camera, you should also focus on the lens. As food requires shots from different perspectives, you may need to consider using different types of lenses. Some of the most commonly used lenses for food photography are prime lenses, zoom lenses, macro lenses, and Tilt-shift lenses.
4. Choose the Right Tripod
A common misconception is that tripods are not essential to capture still images of food. But the reality is that using a tripod is a must to make the food look crisp and clear, as controlling the camera with free hands causes shaking, which may make the images blurry.
On top of that, food products or items require shooting from different perspectives, especially overhead shots. Therefore, using sturdy and high-quality tripods for flat-lay photography is the only way to guarantee the camera’s stability, as, without a tripod, it becomes challenging to capture professional quality overhead or flat-lay shots.
5. Product Lighting setup
While designing food photography settings, you have to consider both natural and artificial lighting conditions. Even though natural light enhances the color of the food, working with it is a little more challenging than with artificial lighting. So, using artificial light is more convenient.
Also, the most significant advantage of artificial lighting is that you can control its position and intensity as per your needs to create creative and vibrant food images.
The following section will help you decide on the best lighting for food photography and design the lighting setup for your next shoot.
Natural Light
Natural light can be considered the best light for a food photoshoot if used properly. If you place your food product in direct sunlight, which is harsh, you’ll notice that the side that receives light has a washed-out effect while the other side is mostly in shadow.
Therefore, instead of placing the food product under direct sunlight on a bright sunny day, you can place it in a well-lit shady place. The benefit of a shady place is that your food product will look bright as well as its actual color, texture, shape, and small details will be prominent in the photographs.
Artificial Light
For your food photography setup, you can position the artificial light sources in the following ways:
- One Light: You can use only one light to shoot your food products. You must place the light source in front of the food at a 45-degree angle. Make sure to use a white umbrella as a diffuser to make the light soft and spread uniformly.
- Two Lights: Often, shadows are created if only one light is used. To solve this issue, you can use two lights. Place two lights on either side of the food product at a 45-degree angle with an umbrella diffuser.
Among them, one will be your main light and the other one will be a fill light. Place your main light facing the back of the table, and direct the fill light, which should have less intensity than the main light into the reflector.
- Three Lights: You can use three lights in two different setups.
- In the first setup, you can position one light behind the food item as backlighting and two lights with equal intensity at a 45-degree angle on either side of the food item. This will make the food illuminated from all directions.
- In the second setup, you can place one light in front of the food item and two more lights, facing opposite directions, on either side of the food item. The reflected light from the side lights will help create a muted natural shadow, enhancing the appearance of the food item.
Besides these setups, you can also use a food photography lightbox. Especially if you don’t want to add any distracting background, you should use a lightbox to make your composition look simple and elegant. Another advantage of using a lightbox is that the sheer sides serve as light modifiers on their own, eliminating the need for additional light diffusers or modifiers.
6. Accessories
The following accessories are necessary to control the light’s characteristics, distribute them evenly, and create an illuminated environment for the food photoshoot setup.
Modifiers
Light modifiers are highly crucial to improving the lighting of your food photos. Often, it is seen that the intensity of light doesn’t go with the mood of your composition. At that time, you need to use modifiers to adjust the intensity. Also, modifiers should be used while working with natural light to convert the hard light into soft light.
You can use modifiers like softboxes, umbrellas, scrims, and beauty dishes to soften the harshness of light and spread it evenly. However, if you only want to control the light rather than soften it, you can use other modifiers like snoots, barn doors, grids, and flags.
Reflectors
Another essential accessory to make the setting well-lit is a light reflector. If you set your light source on one side of your food product, then there are chances of having shadows on the other side of your product. So, to avoid such an issue, it is recommended to use light reflectors.
If you’re working in a small studio, you can use white foam boards. But for a larger setting or to give a professional vibe, you can buy some of the excellent quality reflectors like the Profoto collapsible reflector 120cm, the Manfrotto Triflip 8:1 kit 75cm, the Selens 5 in 1 60cm, and many others.
Flash
External flashes such as strobe lights and speedlights can be used to increase the brightness of the settings. However, using direct flash on the food product may make the texture of the food less prominent. Therefore, if using an external flash, be careful not to point it directly at the food.
7. Photography Backdrop
Backdrops are the most essential element for all types of photography, as in an image, viewers won’t see your camera or other equipment; instead, they will only see the product and the background. Additionally, no matter how delicious the food is, it won’t draw viewers if the background is unappealing.
For backdrops, you can use seamless white paper if you want to shoot in a studio with a white background. You can also use wooden or marble countertops. You can use faux wooden and faux marble backdrops as well to give your images a kitchen-like appearance.
8. Composition
Composition is the first and most crucial element of creating a good food photograph. Depending on how you structure the composition, your food item may be the main attraction or a supporting element. So, to make your composition striking, you can use the following rules:
Center framing
Every camera frame has two vertical and two horizontal lines intersecting each other to separate the frame into 9 equal grids. In central composition, your food item should be placed in the central column. This perfect symmetry is ideal for working with one food item, like pouring honey on a stack of pancakes.
Rule of Thirds
The rule of thirds is ideal for almost every type of food item. In this ruler, you should position your food item on one-third of the frame, keeping the rest of the two-thirds as negative space. Naturally, our eyes tend to focus on the intersecting parts of the grid lines. So, this position grabs viewers’ attention more easily.
Rule of Odds
Another useful composition style is using an odd number of food items. Usually, our attention gets diverted by seeing even numbers. So, to form a balance in the composition, you can place at least 3 items in a triangular shape or a row. However, using 5-7 items will also work, but the composition might become too crowded.
The Golden Triangle
One of the most effective approaches to making the eyes of the viewers move around the frame in a continuous loop is to use the golden triangle rule. You can provide a sense of movement by arranging the composition in triangular shapes.
For that, you can place your main food item with other props in a triangular shape. For instance, you may have one big plate with your main food item, one small bowl with a dip or side dish, and a glass of drink. You can position them to create a triangular pattern in the frame.
Another option is to divide your frame into two equal parts diagonally and then divide the diagonals from the other two sides at a right angle to form 4 triangles. You should place your main food items at the intersecting points, as they will serve as the image’s focal point.
12 Creative Food Photography Ideas & Tips to Get High-Quality Photos
The following creative ideas for food photography will help to enhance your vision to produce appealing food images.
1. Experiment with Different Angles and Vantage Points
To make food look tempting, it is vital to capture the image from a specific vantage point and angle that best describes the food at its best. Let’s explore a few of the advantageous vantage points and angles that can enhance the appearance of your meals.
Vantage Points
The position from which a photograph is taken is called the vantage point. The vantage points you should take into account to create creative food visuals are high angle, low angle, and straight angle.
You can raise the position of your food items, such as a cake stand for a cake, or stack items like pancakes to give them height. Try out these different positions to give your food items a different look that will strike the viewer’s mind.
Overhead or Flat-lay Shot
This is one of the most commonly used angles for photographing food, as almost every food item looks drooling in this view. All you need to do is arrange your food items on a flat surface or a table and take the shots from above.
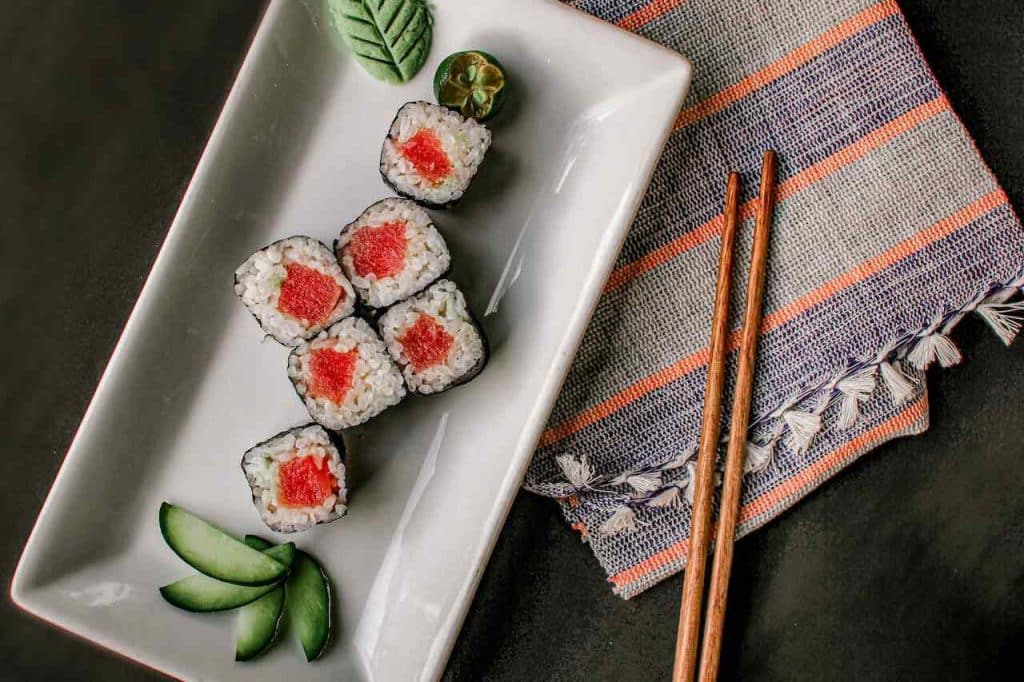
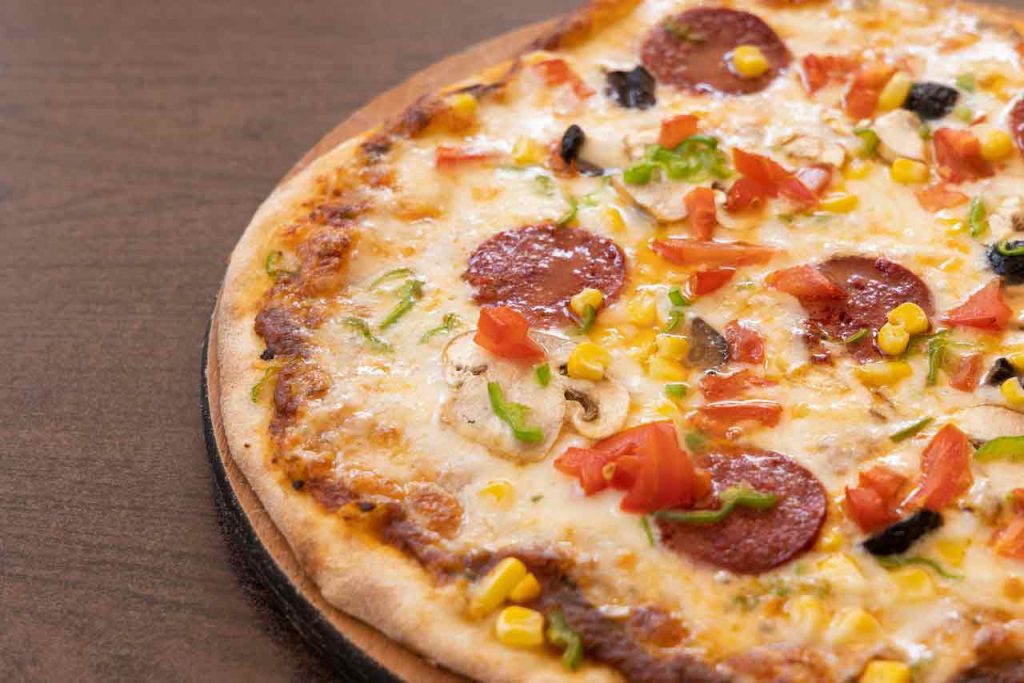
Food items, especially those with toppings like pizza or other food items like noodles, pasta, salad, and charcuterie boards, are ideal for this shot.
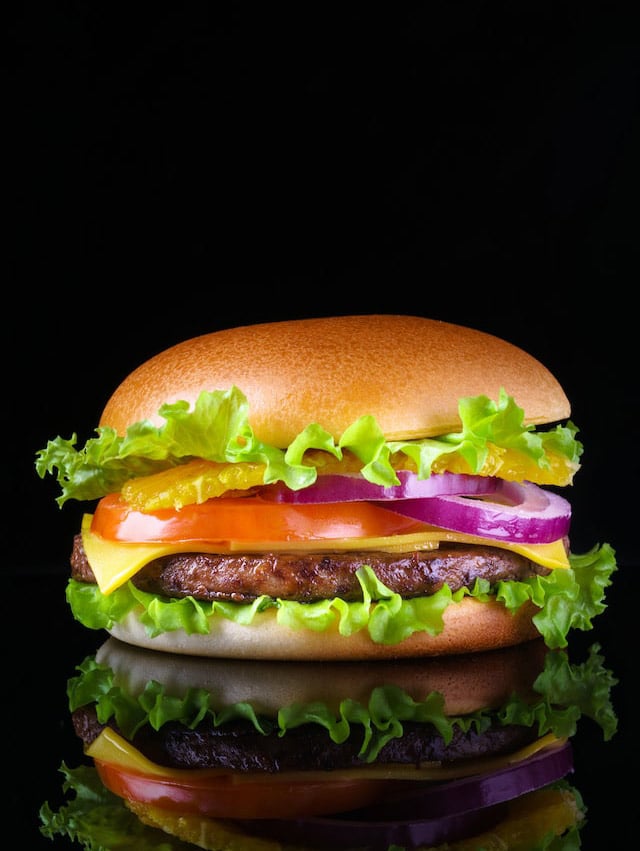
Side or Straight Shot
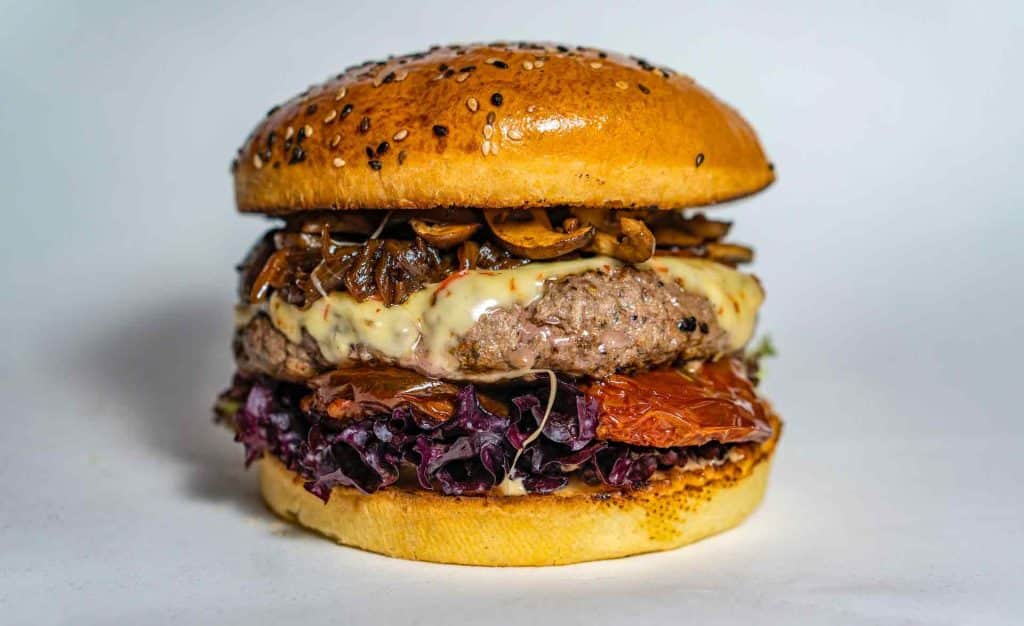
The side or straight angle is ideal for food items that have a height, such as birthday cakes, pancake stacks, etc. Besides, you can simulate the texture and juiciness of a hamburger patty. Also, you can use props in the background to enhance the composition in this type of shot. For this, take the shot from the table level.
45-degree Shots
45-degree shots are ideal for both flat and medium-height food items. At this angle, you will get a view that is between an overhead and a side view. For this, place your camera at a 45-degree angle from the food product to get a view of its front side and top surface, along with the details on its sides.
75-degree Shots
A 75-degree shot is mostly an overhead shot, but you can see a bit of the side view. This type of shot is ideal for jars and glasses to shoot different types of drinks. The main goal of this angle is to show the top decoration as well as the shape of the container to provide depth to the image.
2. Make Use of Vibrant Colors
A bland, monotonous food image can destroy a viewer’s appetite. That’s why no matter what you are photographing, fruits, vegetables, or other dishes, a splash of color will make the food images vibrant and more flavorful.
Usually, fruits, vegetables, and some sweet items like macarons have vibrant colors. So, color is not a concern when photographing those items. However, foods like pasta, bread, meat, etc. that don’t naturally have vibrant colors require some additional ingredients to add a pop of color.
For instance, to make a bowl of soup or pasta appetizing, you can add colorful ingredients like red, green, or yellow bell peppers, herbs, or vegetables like tomatoes, carrots, etc. beside the food item. However, in the case of dark items like chocolate or spinach curry, you can use bright-colored crockery.
To provide a vibe of freshness, you can use greens like salad, lettuce, and other veggies. But make sure they look fresh. Also, you can use colorful backgrounds to make the photographs eye-catching.
3. Add Some Motion or Action
The photographs become more dramatic and exciting when there is movement in the food images. You must capture images using a fast shutter speed or taking continuous pictures in burst mode. The following are some methods for including motion in your food photographs.
Food in the Air
Stretching a food item, pouring liquid-consistency ingredients, or suspending food in the air all add movement to the images and make the food product appear more enticing. You can try out this technique in cases like pulling cheese from a pizza, adding milk, egg, or sauce to the food, or tossing food in a skillet while cooking.
Sprinkling
Sprinkling is another method of creating delightful food images with motion. Usually, in the case of working with food items like pastry, cakes, and steak, this method is used. You can sprinkle salt on a steak, powdered sugar on pastries, and edible glitter, sprinkles, or beads for decorating cakes.
Splashing
The most common technique for adding life and movement to images is splashing. You can create a splashing image if you have a liquid ingredient in your main food item. For instance, you can use a spoon or bowl of milk and drop a fruit like a strawberry or raspberry from a height to create a splash effect.
Besides, creating a splashing effect is much easier when working with beverage items. For that, pouring your beverages into the glass from a height or swishing the glass will create dynamic splashing images.
However, if you are working with solid food items like fruits and vegetables, you can use a transparent jar filled with water to drop your food items into it. It is a lot of fun to create a splashing effect. All you need is a bit of creativity to create a disturbance on the surface of the liquid elements.
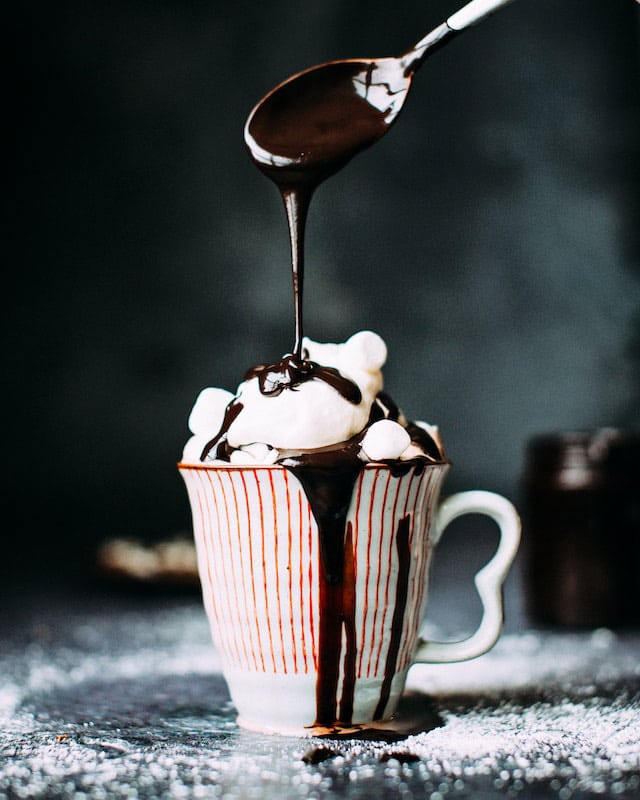
Melting or Dripping
Melting is another natural phenomenon that gives the feeling of motion to an image. It works well at getting viewers to drool over the picture. The most common melting shots are taken while shooting ice cream, chocolate, cheese, butter, and many others. Also, the dripping of water drops from a frozen beverage can or glass falls under this category.
4. Add Human Touch
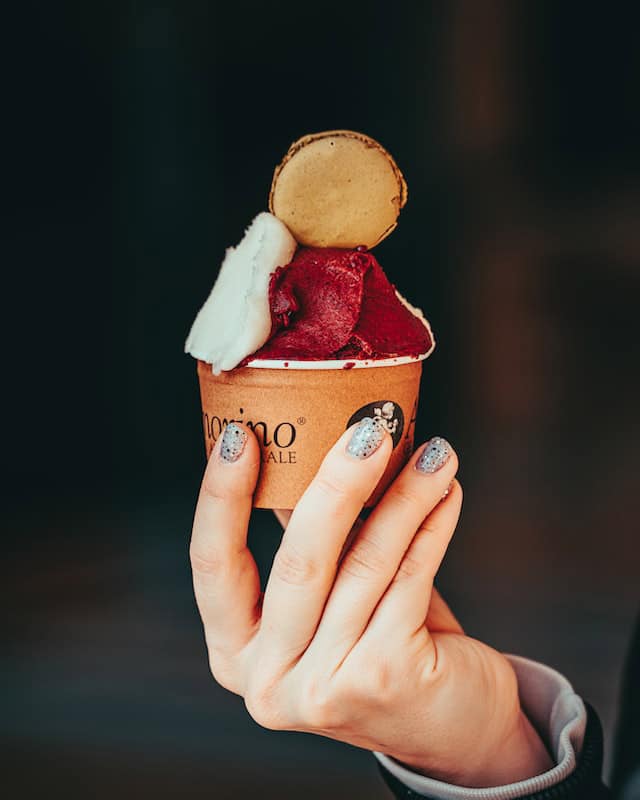
Adding humans to food is a great way to make your composition lively, visually appealing, and engaging. It is an effective way to make the viewer feel connected to your food images. For instance, a child holding an ice cream will make everyone remember their childhood or their children.
Moreover, this type of photography is quite popular on social media platforms. Besides, the models’ attire can make the food images more vibrant and refreshing. For that, you can make models wear clothes that complement the color of the food items, such as bright colors like yellow, blue, pink, red, orange, green, etc., for refreshing summer drinks.
However, adding a human element does not always require you to use the entire body of a model; you can use hands or lips instead. Using hand models will prevent attention from shifting away from the food to the models.
5. Use Props
Every type of photograph, including food photographs, can be visually enhanced by involving props in the composition. You should use props that make your main food item more scrumptious rather than clutter the frame. If your food item has a pale color, you can also use props to add color to the composition.
The ideal props for food imagery are the ingredients used to make the food item. For instance, you can use herbs, tomatoes, bell peppers, etc., along the side of your dish while photographing pasta. You can also use flowers, fruits, fabrics, candles, etc., to add contrasting colors to the composition.
6. Keep the Background Simple
The visual appeal of a photograph is significantly influenced by its background. The background’s simplicity holds the viewer’s focus on the subject of the image. That’s why keeping the background as simple as possible is recommended.
Food is usually photographed on white, black, or wooden backgrounds. However, you can also use a marble pattern background to add additional visual interest to the composition.
Nevertheless, no matter what background you choose, make sure it complements the color of your food. If you photograph dark-colored food items against a black background, your subject will blend in and look unappealing. So, use a dark background for light-colored food and a light background for dark-colored food. Choose the wooden background if you’re unsure which one to use.
7. Take Close-up or Macro Shots
Almost every food item looks fascinating when photographed from a short distance. Therefore, macro food photography can be used uniquely to show the texture and small details of a food item. For instance, the body of strawberries, the patterns of cabbage, onions, salmon, dripping cheese on a burger, etc., provide a different aesthetic to the images.
However, while taking macro shots, you should use pristine cutlery so that they don’t have any flaws in them. Also, make sure that everything is in perfect shape and the perfect position inside your frame. In zoom-in shots, as the imperfections in the frame become more visible, it can make the photographs unappealing instead of flavorsome.
8. Design a Theme or Tell a Story
Conceptual photography is the best way to encourage viewers to connect more deeply with your images. A theme makes a huge difference in how viewers perceive a photograph.
For instance, viewers will feel more connected to refreshing summer beverages if you show the drinks held by some people in the shade of palm trees by the beach or the pool in broad daylight rather than on a simple wooden table.
You can create festive, emotional, refreshing, and other moods by simply designing your composition based on a theme. So, think about your food items and research a bit about them to generate ideas regarding what type of theme or story you can convey through your photographs.
9. Keep the Composition Simple
A simple composition gives the feeling of a neat and organized frame. The simpler your composition is, the easier it will be for your subject to get highlighted in the frame. To give your food items a delicious appearance, decorate them well. If necessary, use minimalistic props or avoid them completely.
A simple composition helps to keep the subject the star of the frame. So, it is crucial to avoid any element that can steal the focus from the main food item and ruin the purpose of that photograph. Social media websites can also serve as a source of ideas for easy food combinations.
10. Use Negative Space
The space surrounding a composition’s subject is referred to as negative space. It’s important to leave some open space in the composition so that it doesn’t appear cluttered and has fewer distracting elements.
Negative space has more benefits than you can think of. Some of them are-
- It soothes the eyes and mind
- Enhances the focus on the subject
- Make the image look organized
- Provides the viewer with the space to breathe
- Gives space to insert a logo or any writing
11. Get Creative
A creative mind can make an ordinary-looking food item into something luscious that everyone would drool over to taste. You can use the following strategies to add more creativity to your food photos and make it stand out.
Reflection
It’s a great idea to include reflection when incorporating a different viewpoint. These photographs are typically taken in a dark setting so that the reflection can be properly captured and offer a distinctive contrast.
Most photographers use plexiglass and artificial lighting with diffusers to get the ideal reflection because they can adjust the position and angle of the light as per their preference.
Smoke
Utilizing smoke also adds a dynamic to your image and gives the impression of freshly cooked meals. For instance, the steam from a cup of coffee or a bowl of soup, smoke from a slice of barbeque meat or sauteed vegetables, etc. will make you feel the warmth of the image.
Remember, as the smoke is too light, you have to use a dark background so that the smoke doesn’t get blended with the background.
Garnishing
The way you design your plating or do the garnishing can make a difference in your composition. People first taste food with their eyes. That’s why it is important to make the meal look captivating enough to make the viewers hungry.
To add flavor, texture, and color to represent your food, you can add green herbs, red chilies, sesame seeds, carrots, cucumber, cherry tomatoes, etc.
Dark Theme
Most food photos that we see are bright, either because they were taken in natural light or because they were lit artificially to simulate natural light. Dark food photos, therefore, give the images a distinct perspective and contrast that we don’t often see.
Dark food photography camera settings are quite simple; you have to keep the ISO at the lowest and use a slow shutter speed. The primary focus should be on capturing underexposed images. Also, use a tripod to keep the camera steady and just one artificial light with a big softbox to cast gentle shadows.
The dark theme is ideal for creating a variety of artistic effects, such as smoke, reflection, dripping, melting, splashing, suspending, and many others.
12. Enhance Images with Some Basic Editing
Every raw image requires some retouching to make it flawless and look professional, as they may have issues with color, lighting, etc. despite maintaining all types of precautions. You can easily do some basic editing with software like Adobe Photoshop and Lightroom, even if you don’t have expertise in using them.
For instance, you can adjust the brightness if your image is under or overexposed. If the details are less prominent, you can increase the tonal contrast of the image. Moreover, if the meals look a bit faded, then you can increase the saturation to make the images look more vibrant.
However, over-editing will make the images look unrealistic and may also reduce their appeal. So, try to keep the editing minimal to make them look professional and delicious.
Your Options for Hiring a Professional Food Photographer
If you want food images for commercial purposes, then you should consider getting assistance from professional food photographers. Professional food photographers have years of experience in creating food photographs. They are aware of the best photographic techniques to use when taking food photos.
To hire a professional food photographer, you can consider the following sources.
- Thumbtack: Thumbtack is a reliable website and app-based service that works for both iOS and Android operators. Here, you will find numerous freelance food photographers working in your area. You can view their profile, pricing, payment methods, and work experience. Besides, you can make the hiring decision by seeing their reviews. In simple words, this service maintains transparency.
- Upwork: Another reliable source for hiring freelance food photographers is Upwork. You can search for skilled food photographers in your area through this website. You can view their portfolio, work experience, and reviews before hiring them. Moreover, you can see if they are free from work so that they can concentrate entirely on your project or are engaged in any project.
- Photography Studio: One of the major concerns about hiring a freelance photographer is that all of them may not have a studio. So, if you want to conduct commercial food photoshoots in a studio setup, then you should consult with a photography agency. Among all the benefits, the most significant one is that photography studios are well equipped and have almost all the types of technology you may need to shoot food, including 360-degree photography, 3D photography, white background photography, and many others.
You can pay them per image, per product, per hour, or even per day. However, the per day cost will be a bit expensive, around $1200-$3000. That’s why, for both small and large quantities of images, you can pay them per image to make the deal cost-effective.
Outsource Your Food Photo Editing and Retouching Services
Commercial food photography and photo retouching go hand in hand as it is necessary to edit photos to make them appear polished and flavorful. Since so many photos need to be edited for commercial product photography, it takes a lot of time for photographers to do it themselves.
Therefore, most photographers prefer to outsource the images for retouching services to save time. Besides, retouched images from photographers often add cost, which raises the overall cost for restaurant owners or other clients. So, to make the retouching process cost-effective, clients can take assistance from photo retouching services.
On that note, you can consider Clipping Path Studio to get quality edited images at an affordable price. We offer photo retouching and color correction services that you may need for your food photographs. Depending on the complexity of your product, the prices may range from $0.48-$3.19.
Our team of more than 150 professional editors is proficient enough to create professional-quality images and work on large orders. Besides, we are strict about our fast turnaround period. So, you will receive the delivery within the estimated time. We also accept urgent orders within the 12hrs-24hrs delivery time. But for that, you have a different price range.
FAQs
What is the best iso for food photography?
The ISO for food images depends on your lighting conditions. If you are shooting indoors in low light, then you can set the ISO at around 400. However, for outdoors photography and in well-lit conditions, keep the ISO around 100 to reduce visual noise.
What is the best shutter speed for food photography?
The shutter speed depends on the type of shot you want to take. Your best shutter speed for food photography should be at least 1/125 to capture a moving element precisely. However, motionless food images can be shot on 1/15.
What is the best lens to use for food photography?
The 24-70mm or 24-105mm zoom lens is the best lens for a food photoshoot, as the textures and details of the food item can be captured effortlessly through this lens by adjusting the focal length to take both macro shots and shots from a distance.
What is the best lighting for food photography?
Natural light is considered the best lighting for food photos. However, the intensity of natural light is too high, so the food should be placed in a shady place where the natural light doesn’t fall directly. This setup will help to capture the natural color of the food item as well as the textures will be prominent.
Is flash good for food photography?
The camera’s in-built flash should not be used to take snaps of food as it could make the textures of the food items disappear by giving a washed-out effect. However, you can use studio flashlights, such as strobes with a diffuser, to make the light softer and spread evenly.
Do I need a softbox for food photography?
Direct light can cast harsh shadows, ruining the aesthetic of your composition. So, if you are using artificial lighting, you should use a softbox to provide a soft and diffused light for your food photoshoot setup.
How can I practice food photography at home?
To practice food photography at home-
- Take a DSLR or use a phone camera.
- Use a lamp as an artificial light source or a window for natural light.
- Take a white cloth to place in front of the lamp, or a white curtain on the window to use as a modifier.
- Use white cardboard to use as a reflector.
- Keep the frame simple and set your food items.
- Take images from different angles.
How Much Does Food Photography Cost?
If you hire a professional photographer hourly, you may have to spend around $150-$500/hour. However, you can reduce the cost by paying per image, which may cost around $75- $250/image.
How Much Does Food Photo Editing Cost?
Depending on the various photo retouching services, the photo editing cost may start from below $1 to $6. Besides, the price also depends on the type of food item and the type of retouching you need.
Final Thoughts
All types of people, from beginners to professionals, can benefit from the ideas and tips mentioned above. As food photographs require creativity and extensive practice to achieve perfection, work on learning the traits of each food category daily so that you can get creative with their angles, lighting setup, and composition style.
We hope you have found our guide useful and will put it to use for your upcoming project to take stunning food images.
We hope you have found our food photography tips useful and will utilize them for your upcoming project.
